Let’s Create a Search Filter Using HTML, CSS, and JavaScript With Source Code
By applying some known values, filtering entails condensing and better tailoring a list of records to the user’s preferences.
In order to find records in the list or database, we conduct a search utilizing obscure search phrases. Because we search so frequently, many pages only provide a search option without any filtering or categories. Which method you choose to employ is up to you; we only demonstrate how to use both.
Introduction
As you know that JavaScript is a powerful programming language that allows you to create filtering options for your search engine. You must have basic knowledge fo JavaScipt
Below we’ve mentioned some methods of How can we filter and search in JavaScript using:
- Array.filter
- Array.find
- loops
- Array.includes
- Array.findIndex
| Code by | N/A |
| Project Download | Link Available Below |
| Language used | HTML, CSS, and JavaScript |
| External link / Dependencies | No |
| Responsive | Yes |
Hope You Enjoy Our Blog Let’s Start With A Basic HTML structure For the Search Filter.
50+ HTML, CSS & JavaScript Projects With Source Code
Html Code:
Below is HTML Code of HTML to perform the Search Filter using the JavaScript
 <!DOCTYPE html>
<html lang="en">
<head>
<meta charset="UTF-8" />
<meta name="viewport" content="width=device-width, initial-scale=1.0" />
<link rel="stylesheet" href="style.css" />
<title>Live User Filter</title>
</head>
<body>
<div class="container">
<header class="header">
<h4 class="title">Live User Filter</h4>
<small class="subtitle">Search by name and/or location</small>
<input type="text" id="filter" placeholder="Search">
</header>
<ul id="result" class="user-list">
<li>
<h3>Loading...</h3>
</li>
</ul>
</div>
<script src="script.js"></script>
</body>
</html>
Explanation of HTML code:
First of all, using the div tag with the class container we will create a container for our search filter javascript, and then using the <h4> tag selector we will add the heading to our live user filter and then using the small tag we will write a text inside to search by name and or location. Then using the input type text
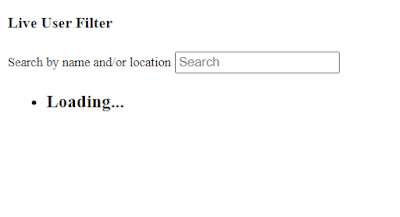
There is all the HTML Code for the Search Filter. Now, you can see output without Css and JavaScript. then we write Css and JavaScript for the Search filter.
Read also Portfolio Website using HTML and CSS (Source Code)
Only HTML code Output
CSS Code:
ADVERTISEMENT
@import url('https://fonts.googleapis.com/css2?family=Roboto:wght@400;700&display=swap');
* {
box-sizing: border-box;
}
body {
background-color: #f8f9fd;
font-family: 'Roboto', sans-serif;
display: flex;
align-items: center;
justify-content: center;
height: 100vh;
overflow: hidden;
margin: 0;
}
.container {
border-radius: 5px;
box-shadow: 3px 3px 10px rgba(0, 0, 0, 0.2);
overflow: hidden;
width: 300px;
}
.title {
margin: 0;
}
.subtitle {
display: inline-block;
margin: 5px 0 20px;
opacity: 0.8;
}
.header {
background-color: #3e57db;
color: #fff;
padding: 30px 20px;
}
.header input {
background-color: rgba(0, 0, 0, 0.3);
border: 0;
border-radius: 50px;
color: #fff;
font-size: 14px;
padding: 10px 15px;
width: 100%;
}
.header input:focus {
outline: none;
}
.user-list {
background-color: #fff;
list-style-type: none;
margin: 0;
padding: 0;
max-height: 400px;
overflow-y: auto;
}
.user-list li {
display: flex;
padding: 20px;
}
.user-list img {
border-radius: 50%;
object-fit: cover;
height: 50px;
width: 50px;
}
.user-list .user-info {
margin-left: 10px;
}
.user-list .user-info h4 {
margin: 0 0 10px;
}
.user-list .user-info p {
font-size: 12px;
}
.user-list li:not(:last-of-type) {
border-bottom: 1px solid #eee;
}
.user-list li.hide {
display: none;
}
ADVERTISEMENT
Step1:
ADVERTISEMENT
- We will update our project with a few fresh Google fonts by using the Google import link.
- We will set the background to white and the font face to “Roboto” using the background colour attribute to give the project new styling.
- With the help of the height and overflow properties, we will also set the height as “100 vh” and “hidden,” respectively.
@import url("https://fonts.googleapis.com/css2?family=Roboto:wght@400;700&display=swap");
* {
    box-sizing: border-box;
}
body {
    background-color: #f8f9fd;
    font-family: "Roboto", sans-serif;
    display: flex;
    align-items: center;
    justify-content: center;
    height: 100vh;
    overflow: hidden;
    margin: 0;
}
.container {
    border-radius: 5px;
    box-shadow: 3px 3px 10px rgba(0, 0, 0, 0.2);
    overflow: hidden;
    width: 300px;
}
Step2:
ADVERTISEMENT
- Now that the display is set to “inline-block,” the margin is set to 5 pixels and 20 pixels, respectively, using the class selector (.sub-title) and the class selector (.title), respectively.
- We will also add the styling to the input by setting the background color as “dark blue” and the width of our input as 100%.”
- Now that the display is set to “inline-block,” we will set the background to “white,” the maximum height to “400px,” the border-radius to “50%,” and the width and height of the image to “50px.” All of these settings will be made using the class selector (.user).
- Now we have completed our Css Code section. Here is our updated output With HTML and CSS.
100+ JavaScript Projects With Source Code ( Beginners to Advanced)
ADVERTISEMENT
HTML and CSS updated output
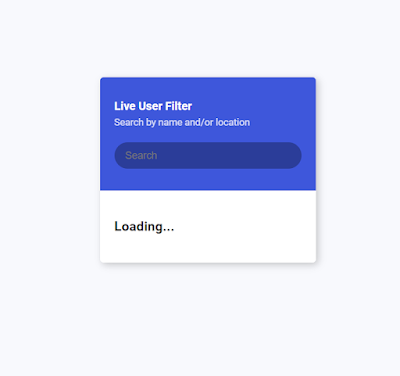
Now We add javascript Code to the get user profile and Details and implement a Search filter.
JavaScript Code:
const result = document.getElementById('result')
const filter = document.getElementById('filter')
const listItems = []
getData()
filter.addEventListener('input', (e) => filterData(e.target.value))
async function getData() {
const res = await fetch('https://randomuser.me/api?results=50')
const { results } = await res.json()
// Clear result
result.innerHTML = ''
results.forEach(user => {
const li = document.createElement('li')
listItems.push(li)
li.innerHTML = `
<img src="${user.picture.large}" alt="${user.name.first}">
<div class="user-info">
<h4>${user.name.first} ${user.name.last}</h4>
<p>${user.location.city}, ${user.location.country}</p>
</div>
`
result.appendChild(li)
})
}
function filterData(searchTerm) {
listItems.forEach(item => {
if(item.innerText.toLowerCase().includes(searchTerm.toLowerCase())) {
item.classList.remove('hide')
} else {
item.classList.add('hide')
}
})
}
Explanation of javascript code
First, we’ll create two variables, result and filter, and use the document by using the var keyword. The HTML elements are chosen using the getElementById property, and the event listener is added using the getData() function. The keyword is then located using the API. Each list item’s keyword will be checked, and if a match is found, the.innerHTML property will be used to push the term to the user’s display.
Restaurant Website Using HTML and CSS
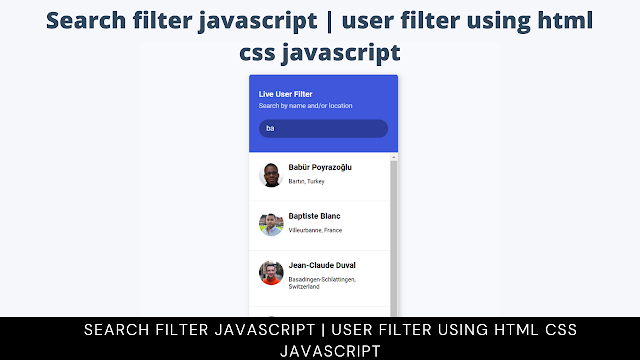
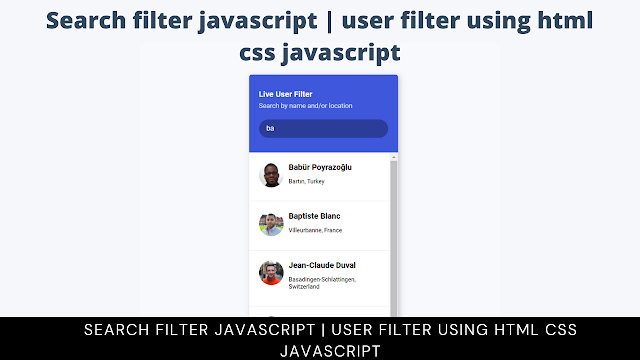
Final Output Search filter Using HTML, CSS, and javaScript
Below is Codepen Preview for the Search filter using JavaScript.

Now we have completed our Search filter Using HTML, CSS, and JavaScript. I hope you like the Search filter. you can see the output video and project screenshots. See our other blogs and gain knowledge in front-end development.
Video Output:
10+ Javascript Projects For Beginners With Source Code
Thank you
In this post, we learn how to create a Search filter using HTML CSS, and JavaScript. If we made a mistake or any confusion, please drop a comment to reply or help you in easy learning.
Written by – Code With Random/Anki
Which code editor do you use for this Search filter coding?
I personally recommend using VS Code Studio, it’s straightforward and easy to use.
What is the purpose of using filter?
A method for finding a particular user using filtering. You can apply a filter just by typing the keyword and the result similar to the keyword will be displayed to the user.
What are the types of search filter?
Text Input
Numeric Input
Checkbox
Radio button
Date picker
