How to Create Typing Effect Using JavaScript (Source Code)
Welcome to the Codewithrandom blog. In this blog, We learn how to create a Typing Effect Using JavaScript. We use HTML, CSS, and JavaScript for this Typing Effect Project.
I hope you enjoy our blog so let’s start with a basic html structure for a Typing Effect.
HTML Code For Typing Effect
<div class="container"> <p>CODEWITHRANDOM is for <span class="typed-text"></span><span class="cursor"> </span></p> </div>
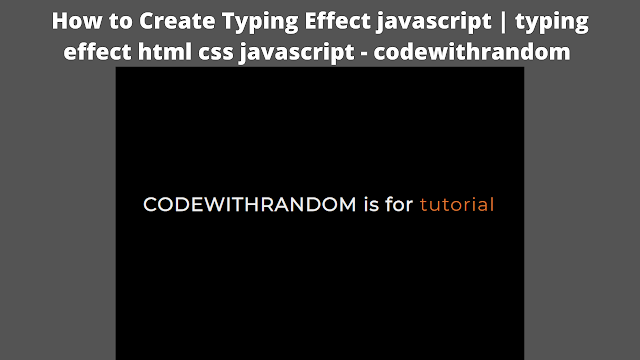
There is all the html code for the Typing Effect. Now, you can see output without Css and JavaScript. Then we write Css for styling typing effects and use javascript for Typing Effect Animation functionality.
Portfolio Website Using HTML CSS And JAVASCRIPT ( Source Code)
Output
CSS Code For Typing Effect
@import url('https://fonts.googleapis.com/css?family=Montserrat');
* {
margin: 0;
padding: 0;
box-sizing: border-box;
}
body {
font-family: 'Montserrat', sans-serif;
background-color: #000;
color: #eee;
}
.container {
height: 100vh;
display: flex;
justify-content: center;
align-items: center;
}
.container p {
font-size: 2rem;
padding: 0.5rem;
font-weight: bold;
letter-spacing: 0.1rem;
text-align: center;
overflow: hidden;
}
.container p span.typed-text {
font-weight: normal;
color: #dd7732;
}
.container p span.cursor {
display: inline-block;
background-color: #ccc;
margin-left: 0.1rem;
width: 3px;
animation: blink 1s infinite;
}
.container p span.cursor.typing {
animation: none;
}
@keyframes blink {
0% { background-color: #ccc; }
49% { background-color: #ccc; }
50% { background-color: transparent; }
99% { background-color: transparent; }
100% { background-color: #ccc; }
}
We have completed our styling of typing effect. Here is our updated output HTML + CSS.
Portfolio Website using HTML and CSS (Source Code)
Output
JavaScript Code For Typing Effect
const typedTextSpan = document.querySelector(".typed-text");
const cursorSpan = document.querySelector(".cursor");
const textArray = ["project", "fun", "free stuff", "tutorial"];
const typingDelay = 100;
const erasingDelay = 100;
const newTextDelay = 2000; // Delay between current and next text
let textArrayIndex = 0;
let charIndex = 0;
function type() {
if (charIndex < textArray[textArrayIndex].length) {
if(!cursorSpan.classList.contains("typing")) cursorSpan.classList.add("typing");
typedTextSpan.textContent += textArray[textArrayIndex].charAt(charIndex);
charIndex++;
setTimeout(type, typingDelay);
}
else {
cursorSpan.classList.remove("typing");
setTimeout(erase, newTextDelay);
}
}
function erase() {
if (charIndex > 0) {
if(!cursorSpan.classList.contains("typing")) cursorSpan.classList.add("typing");
typedTextSpan.textContent = textArray[textArrayIndex].substring(0, charIndex-1);
charIndex--;
setTimeout(erase, erasingDelay);
}
else {
cursorSpan.classList.remove("typing");
textArrayIndex++;
if(textArrayIndex>=textArray.length) textArrayIndex=0;
setTimeout(type, typingDelay + 1100);
}
}
document.addEventListener("DOMContentLoaded", function() { // On DOM Load initiate the effect
if(textArray.length) setTimeout(type, newTextDelay + 250);
});
Typing Effect Using JavaScript
100+ JavaScript Projects With Source Code ( Beginners to Advanced)
Now we have completed our Typing Effect. Here is our updated output with Html, Css, and JavaScript. I hope you like the Typing Effect Project. you can see the output video and project screenshots. See our other blogs and gain knowledge in front-end development.
Thank you!
In this post, We learn how to create a Typing Effect using HTML, CSS, and JavaScript. If we made a mistake or any confusion, please drop a comment to reply or help you learn easily.
Written by – Codewithrandom/ Anki


