How to Create 3D Image Gallery using HTML, CSS & JavaScript
.png)
Introduction:
Hello coders, welcome to the codewithrandom Blog. Today we’ll boost Your knowledge of Html, Css, and JavaScript by making this project called 3D Image Gallery. Image Gallery is present in very few websites mostly like MNCs have this section where they show the image of their moments.

But now we as a developer can also make creative by changing the way of presentation while showing the gallery. This project can help us to boost our knowledge as well as connect us with real-time examples. The word 3D means three-dimensional which means we can witness the image gallery in 3D format.
50+ HTML, CSS & JavaScript Projects With Source Code
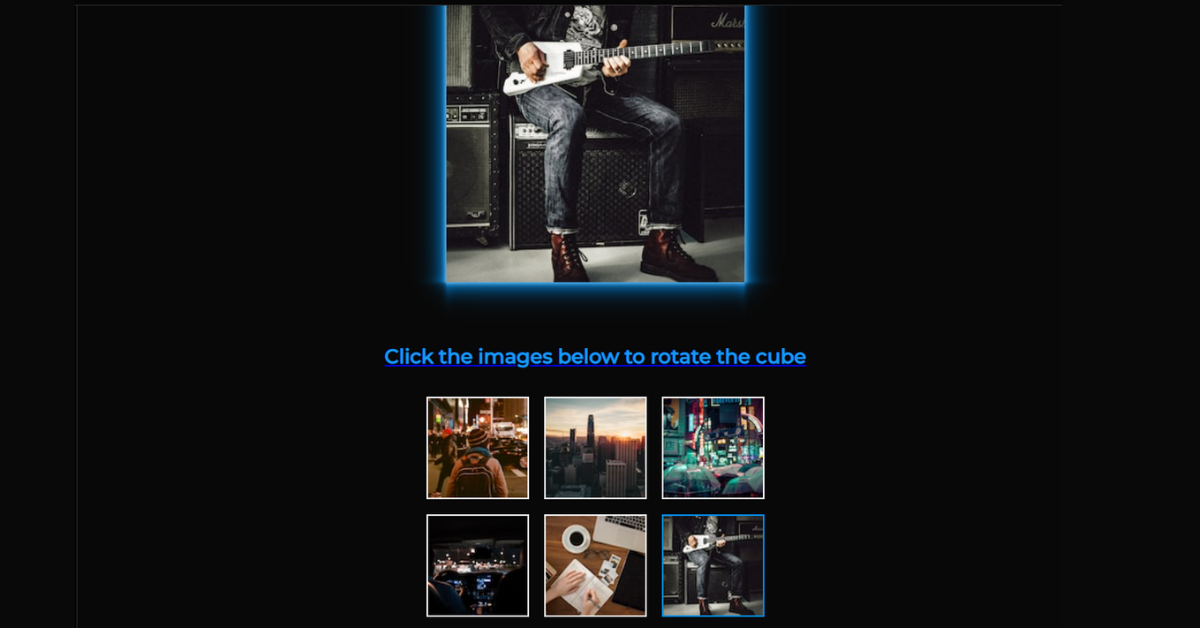
In Today’s blog, you learn How to Create a 3D Image Gallery using HTML, CSS, and JavaScript. We have a 3d Cube Image Gallery With a Section For Images and when click on any image its shows in Gallery Cube With Rotate Animation. This Is a Complete 3d Cube Image Gallery.
We Give you a complete source code of How to 3D Image Gallery.
| Code by | N/A |
| Project Download | Link Available Below |
| Language used | HTML, CSS and JavaScript |
| External link / Dependencies | No |
| Responsive | Yes |
Restaurant Website Using HTML and CSS
Let us see the coding of this project:
HTML Code For 3D Image Gallery:
<a href="https://www.youtube.com/embed/LOm7j3aameE"><h1>3D Cube Image Gallery</h1>
<div class="cube-container">
<div class="cube initial-position">
<img class="cube-face-image image-1" src="https://images.unsplash.com/photo-1445810694374-0a94739e4a03?w=300&h=300&fit=crop">
<img class="cube-face-image image-2" src="https://images.unsplash.com/photo-1515260268569-9271009adfdb?w=300&h=300&fit=crop">
<img class="cube-face-image image-3" src="https://images.unsplash.com/photo-1506045412240-22980140a405?w=300&h=300&fit=crop">
<img class="cube-face-image image-4" src="https://images.unsplash.com/photo-1514041181368-bca62cceffcd?w=300&h=300&fit=crop">
<img class="cube-face-image image-5" src="https://images.unsplash.com/photo-1488190211105-8b0e65b80b4e?w=300&h=300&fit=crop">
<img class="cube-face-image image-6" src="https://images.unsplash.com/photo-1486334803289-1623f249dd1e?w=300&h=300&fit=crop">
</div>
</div>
<h2>Click the images below to rotate the cube</h2></a>
<div class="image-buttons">
<input type="image" class="show-image-1" src="https://images.unsplash.com/photo-1445810694374-0a94739e4a03?w=100&h=100&fit=crop"></input>
<input type="image" class="show-image-2" src="https://images.unsplash.com/photo-1515260268569-9271009adfdb?w=100&h=100&fit=crop"></input>
<input type="image" class="show-image-3" src="https://images.unsplash.com/photo-1506045412240-22980140a405?w=100&h=100&fit=crop"></input>
<input type="image" class="show-image-4" src="https://images.unsplash.com/photo-1514041181368-bca62cceffcd?w=100&h=100&fit=crop"></input>
<input type="image" class="show-image-5" src="https://images.unsplash.com/photo-1488190211105-8b0e65b80b4e?w=100&h=100&fit=crop"></input>
<input type="image" class="show-image-6" src="https://images.unsplash.com/photo-1486334803289-1623f249dd1e?w=100&h=100&fit=crop"></input>
</div>
In this code, we have linked some images and set a label under the heading tag. Let us see the HTML Output before writing Css and JavaScript for the 3D Image Gallery.
Portfolio Website using HTML and CSS (Source Code)
Only Html Output:

CSS Code For 3D Image Gallery:
@import url(https://fonts.googleapis.com/css?family=Montserrat:500);
:root {
font-size: 10px;
--border-color: rgb(0, 143, 238);
}
* {
box-sizing: border-box;
}
body {
font-family: "Montserrat", Arial, sans-serif;
font-weight: 500;
line-height: 1.5;
text-align: center;
min-height: 100vh;
padding: 4rem 2rem;
color: #fafafa;
background-color: #080808;
}
h1 {
font-size: 4rem;
color: #0097fb;
}
h2 {
font-size: 2rem;
margin-bottom: 2.5rem;
color: #169af1;
}
.cube-container {
position: relative;
width: 30rem;
height: 30rem;
margin: 5rem auto 6rem;
perspective: 100rem;
}
.cube {
position: absolute;
width: 100%;
height: 100%;
transform-style: preserve-3d;
transition: transform 1s cubic-bezier(0.32, 0.05, 0.35, 1.6);
}
.cube-face-image {
display: block;
position: absolute;
box-shadow: 0 0 0.5rem #fff,
0 0 1.5rem var(--border-color),
0 0 3rem var(--border-color);
}
.image-buttons {
display: grid;
grid-template-columns: repeat(3, auto);
grid-gap: 1.5rem;
justify-content: center;
}
.image-buttons input {
border: 0.2rem solid #fafafa;
}
Create A Travel/Tourism Website Using HTML and CSS
In this snippet of CSS code we have first imported the fonts the styled the font for the whole page under the font family then set the presentation as cube given it as position then created a container and set the positioning for it so that it can’t get messy.
 .image-buttons input:focus {
outline: none;
border: 0.2rem solid var(--border-color);
}
/* Transform images to create cube */
.image-1 {
transform: translateZ(15rem);
}
.image-2 {
transform: rotateX(-180deg) translateZ(15rem);
}
.image-3 {
transform: rotateY(90deg) translateZ(15rem);
}
.image-4 {
transform: rotateY(-90deg) translateZ(15rem);
}
.image-5 {
transform: rotateX(90deg) translateZ(15rem);
}
.image-6 {
transform: rotateX(-90deg) translateZ(15rem);
}
/* Transform cube to show correct image */
.cube.initial-position {
transform: translateZ(-15rem) translateY(-2rem) rotateX(-15deg) rotateY(18deg) rotateZ(2deg);
}
.cube.show-image-1 {
transform: translateZ(-15rem);
}
.cube.show-image-2 {
transform: translateZ(-15rem) rotateX(180deg);
}
.cube.show-image-3 {
transform: translateZ(-15rem) rotateY(-90deg);
}
.cube.show-image-4 {
transform: translateZ(-15rem) rotateY(90deg);
}
.cube.show-image-5 {
transform: translateZ(-15rem) rotateX(-90deg);
}
.cube.show-image-6 {
transform: translateZ(-15rem) rotateX(90deg);
}
In this snippet of CSS we have set the presentation of images in the form of cube. We have given each rotation value for each image and specified the degree of the rotation. of the image. Let us see the CSS Output before writing the JavaScript for the 3D Image Gallery.
Ecommerce Website Using HTML, CSS, & JavaScript (Source Code)
HTML + CSS Output:

JavaScript Code For 3D Image Gallery:
window.addEventListener("DOMContentLoaded", () => {
const cube = document.querySelector(".cube"),
imageButtons = document.querySelector(".image-buttons");
let cubeImageClass = cube.classList[1];
imageButtons.addEventListener("click", e => {
const targetNode = e.target.nodeName,
targetClass = e.target.className;
if (targetNode === "INPUT" && targetClass !== cubeImageClass) {
console.log(`Show Image: ${targetClass.charAt(11)}`);
cube.classList.replace(cubeImageClass, targetClass);
cubeImageClass = targetClass;
}
});
});Final Output Of 3D Image Gallery using HTML, CSS & JavaScript:
Summary 3D Image Gallery:
We have created a 3D Image Gallery using our HTML, CSS & JavaScript. First, we have defined and linked all the images in the HTML File. Then in CSS we styled the page and set the form of presenting the images in the form of a Cube and setting the angle of rotation and in the JavaScript Code, we set the event listener for the whole window so that the user can go through the images which he clicks among the present one.
Responsive Resume/CV Website Using HTML & CSS
ADVERTISEMENT
If you loved it do comment as it boosts our motivation to bring new projects for you guys. If you face any difficulty while performing you can reach out to us with the help of the comment section.
ADVERTISEMENT
Happy Coding
ADVERTISEMENT
Written by @Harsh_9
ADVERTISEMENT
Which code editor do you use for this 3D Image Gallery coding?
I personally recommend using VS Code Studio, it’s straightforward and easy to use.
ADVERTISEMENT
is this project responsive or not?
Yes! this is a responsive project
Do you use any external links to create this project?
No!


