Email Subscription Form Using HTML and CSS
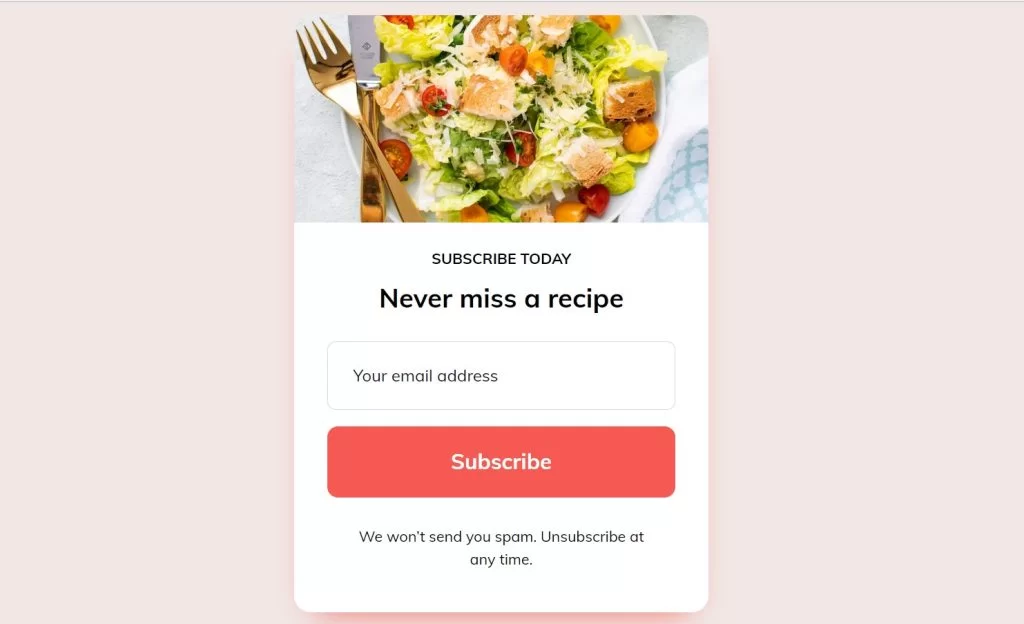
In this article will teach you how to create an email subscription form using HTML and CSS. The Email Subscription Form is an important and extensively used project. It enables the website user to connect with that website.When a user subscribes to any of the websites using their email addresses, he or she becomes a member of that website. They will be notified by email if the administrators publish something new.

We will build the same structure as seen above. Although this subscription form is not currently operational, I developed it using HTML and CSS. In our future article, we will create many more functional subscriber forms, since the user will subscribe via email and receive notifications whenever the admin adds something on their website.
50+ Html ,Css & Javascript Projects With Source Code
Prerequisites:
index.html – For adding structure to the project
styles.css: For adding styling to the project
I hope now you have a general idea of what the project entails. In our article, we will go over this project step by step.
Step1: Adding some basic HTML Code
HTML stands for HyperText Markup Language. This is a markup language. Its main job is to give our project structure. We will provide our project structure by utilising this markup language. So let’s look at our HTML code.
We start with the HTML file. First, copy the code below and paste it into your HTML file inside your IDE.
<head>
    <meta charset="UTF-8">
    <meta name="viewport" content="width=device-width, initial-scale=1.0">
    <title>Suscribe</title>
    <!-- Reset styles -->
    <link rel="stylesheet" href="https://unpkg.com/modern-css-reset/dist/reset.min.css" />
    <!-- Google Fonts Muli -->
    <link href="https://fonts.googleapis.com/css2?family=Muli:wght@300;400;700&display=swap" rel="stylesheet">
    <link rel="stylesheet" href="style.css">
</head>

<body>
    <section class="wrapper">
        <div class="container">
            <div class="img__container">
                <img src="https://images.unsplash.com/photo-1546793665-c74683f339c1?ixlib=rb-1.2.1&ixid=eyJhcHBfaWQiOjEyMDd9&auto=format&fit=crop&w=634&q=80"
                    alt="salad" class="img">
            </div>
            <div class="content">
                <h2 class="subtitle">Subscribe today</h2>
                <h1 class="title">Never miss a recipe</h1>
                <input type="text" class="mail" placeholder="Your email address" name="mail" required>
                <input type="submit" value="Subscribe" class="subscribe">
                <p class="text">We won’t send you spam. Unsubscribe at any time.</p>
            </div>
        </div>
    </section>
</body>
<!-- Reset styles --> <link rel="stylesheet" href="https://unpkg.com/modern-css-reset/dist/reset.min.css" /> <!-- Google Fonts Muli --> <link href="https://fonts.googleapis.com/css2?family=Muli:wght@300;400;700&display=swap" rel="stylesheet"> <link rel="stylesheet" href="style.css">
Before we start adding the stucture of our project we need to add some important links inside the head section .
- We will first add the reset style link
- CSS Reset: A CSS reset style sheet is a set of rules that “resets” all of the browser’s default styles.
- The browser styles were reset for two reasons:
- Not all browsers use the same set of default rules. They are similar but not identical. If the basic styles change, it can be challenging to present the identical designs in each browser.
- When you begin designing and coding all of your site’s fine features, you may discover that most of what you’re doing is essentially overriding default browser styles. This is done swiftly by the reset so that you do not have to.
- We will include a link to import new fonts from Google Fonts.
- The final link we’ll add connects our HTML to external CSS.
10+ Javascript Projects For Beginners With Source Code
Now let’s Add the structure for our Subscription form.
- Using the <section> element, we’ll first build a section for our subscription form.
- Using the div tag, we will now build a container for our subscription form within the section.
- We’ll make a container for our image and insert an image into it using the <img> tag.
- Now, we’ll use the div tag to construct a container for our content and a content section.
- Now, we’ll add a “Subscribe Today” heading using the <h2> tag.
- Similarly using the <h1> tag we will add an important heading our subscription form.
- We will now build a field for the email and a submit button for the subscribe using the input tag with types “email” and “submit.”
- We’ll insert a tiny paragraph within our subscription form using the <p> tag.
We don’t need anything else to develop the structure for our subscription form. We’ll style our picture editor now that we’ve learned how to use CSS. But first, let’s have a peek at our framework.
Output:

Step2: Adding CSS Code
Cascading Style Sheets (CSS) is a markup language for describing the presentation of a document written in HTML or XML. CSS, like HTML and JavaScript, is a key component of the World Wide Web.
Now we will look at our CSS code.
.wrapper {
  min-height: 100vh;
  color: #000;
  font-family: "Muli", sans-serif;
  font-size: 1rem;
  background-color: #f1e8e6;
  display: -ms-grid;
  display: grid;
  place-items: center;
}

.container {
  background-color: #fff;
  padding: 1em;
  border-radius: 1em;
  max-width: 768px;
  display: -ms-grid;
  display: grid;
  place-items: center;
  -webkit-box-shadow: 0px 17px 34px -20px #f55951;
  box-shadow: 0px 17px 34px -20px #f55951;
}

.title {
  font-size: 1.6rem;
  font-weight: 700;
}

.text {
  font-size: 1rem;
  margin-bottom: 0.8em;
}

.container {
  max-width: 400px;
  overflow: hidden;
  padding: 0;
}

.img {
  width: 100%;
  height: auto;
  border-radius: 1em 1em 0 0;
  -o-object-fit: cover;
  object-fit: cover;
  -webkit-transform: translateY(-50%);
  transform: translateY(-50%);
}

.img__container {
  height: 200px;
  overflow: hidden;
  margin-bottom: 1.5em;
}

.title {
  margin-bottom: 0.9em;
}

.subtitle {
  font-size: 0.9rem;
  text-transform: uppercase;
  margin-bottom: 0.5em;
  font-weight: 700;
}

.content {
  display: -ms-grid;
  display: grid;
  place-items: center;
  padding: 0 2em;
  margin-bottom: 1.8em;
}

.mail {
  padding: 0.5em 0 0.5em 1.5em;
  line-height: 3;
  width: 100%;
  border: 1px solid #d9d9d9;
  border-radius: 0.5em;
  margin-bottom: 1em;
}

::-webkit-input-placeholder {
  color: #111127;
}

:-ms-input-placeholder {
  color: #111127;
}

::-ms-input-placeholder {
  color: #111127;
}

::placeholder {
  color: #111127;
}

.subscribe {
  color: #fff;
  font-size: 1.3rem;
  font-weight: 700;
  background-color: #f55951;
  padding: 0.9em 0;
  display: inline-block;
  border: none;
  border-radius: 0.5em;
  width: 100%;
  margin-bottom: 1.3em;
}

.text {
  font-size: 0.9rem;
  width: 90%;
  text-align: center;
}
After we’ve added the CSS code, we’ll go over it step by step. To save time, you can simply copy this code and paste it into your IDE. Let us now examine our code step by step.
We will be adding some basic styling to our subscription form, but you guys can try new styling and share your code in the comments, which will help other people to think out of the box. you will be able to style the subscription form own your own.
Portfolio Website using HTML and CSS (Source Code)
Step1:Using the class selector, we will first define a minimum height of 100vh for the section. The font colour is jet black, the font family is “Muli,” the font size is “1 rem,” the backdrop colour is “white,” the display is “grid,” and we will centre the item using the place-item attribute.
.wrapper {
  min-height: 100vh;
  color: #000;
  font-family: "Muli", sans-serif;
  font-size: 1rem;
  background-color: #f1e8e6;
  display: -ms-grid;
  display: grid;
  place-items: center;
}
Step2: Using the background colour property, we will now style our container. We will add a white background to our container, and padding is set to “1 rem,” and we will add some curviness to the edges of “1 em” using the border-radius property, and we will set the maximum width as “768 px” using the maximum-width property, and we will add a red shadow to our box using the box-shadow property.
.container {
  background-color: #fff;
  padding: 1em;
  border-radius: 1em;
  max-width: 768px;
  display: -ms-grid;
  display: grid;
  place-items: center;
  -webkit-box-shadow: 0px 17px 34px -20px #f55951;
  box-shadow: 0px 17px 34px -20px #f55951;
}
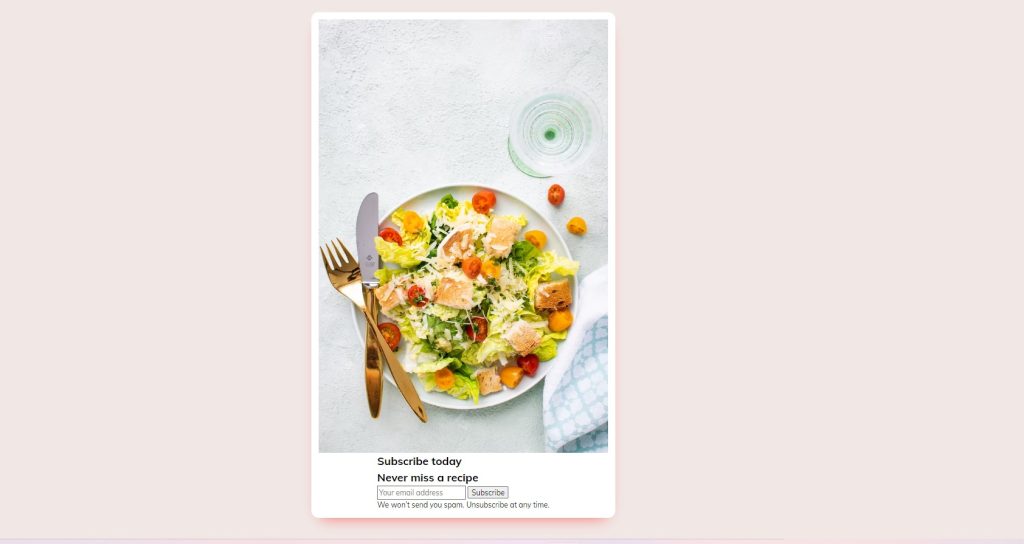
Step3: We will now style the element with the class selector (.title), with the font-size set to 1.6 rem and the font-weight set to 700.
Using the class selector (.text), we will set the font-size to 1 rem and the margin-bottom to 0.8 em.
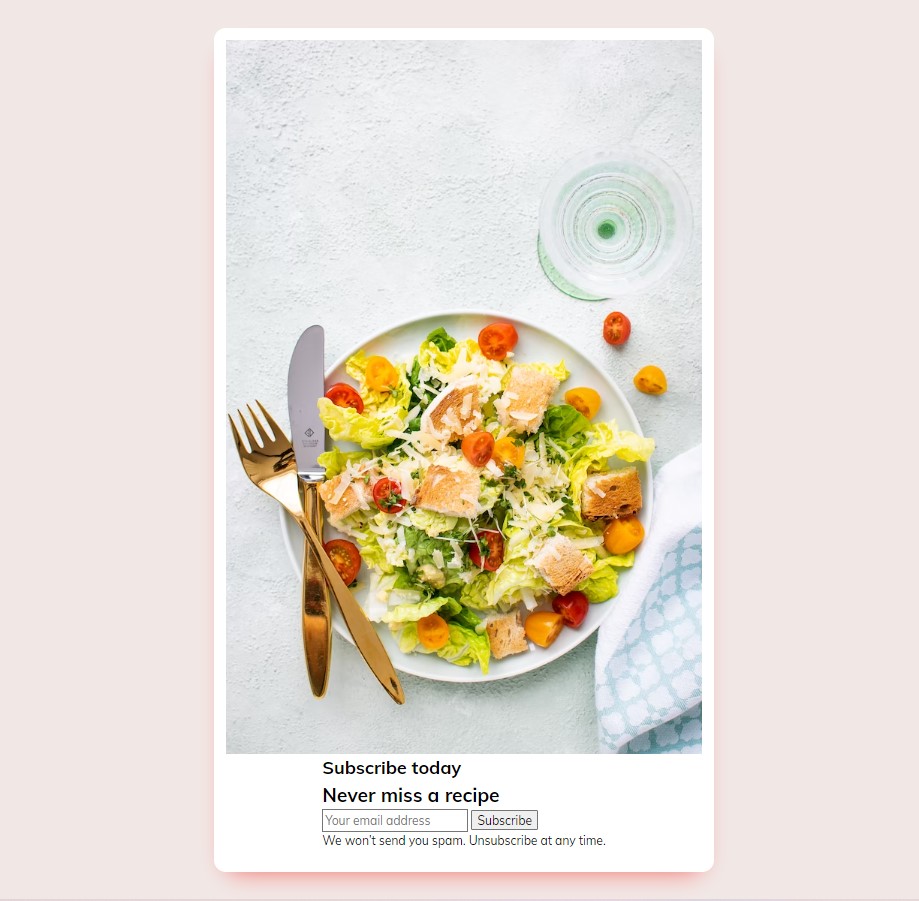
Step4: Using the class selector (.container), the maximum width is set to 400px, the unnecessary element is hidden, and padding is set to “zero.”
Weather App Using Html,Css And JavaScript
Using the class selector, we will now add styling to our image (.img). The width is set to “100%,” the height is set to “auto,” and we will add a border-radius of 1 em using the border-radius parameter. We will align the image to the y-axis using the transform attribute.
.container {
  max-width: 400px;
  overflow: hidden;
  padding: 0;
}

.img {
  width: 100%;
  height: auto;
  border-radius: 1em 1em 0 0;
  -o-object-fit: cover;
  object-fit: cover;
  -webkit-transform: translateY(-50%);
  transform: translateY(-50%);
}
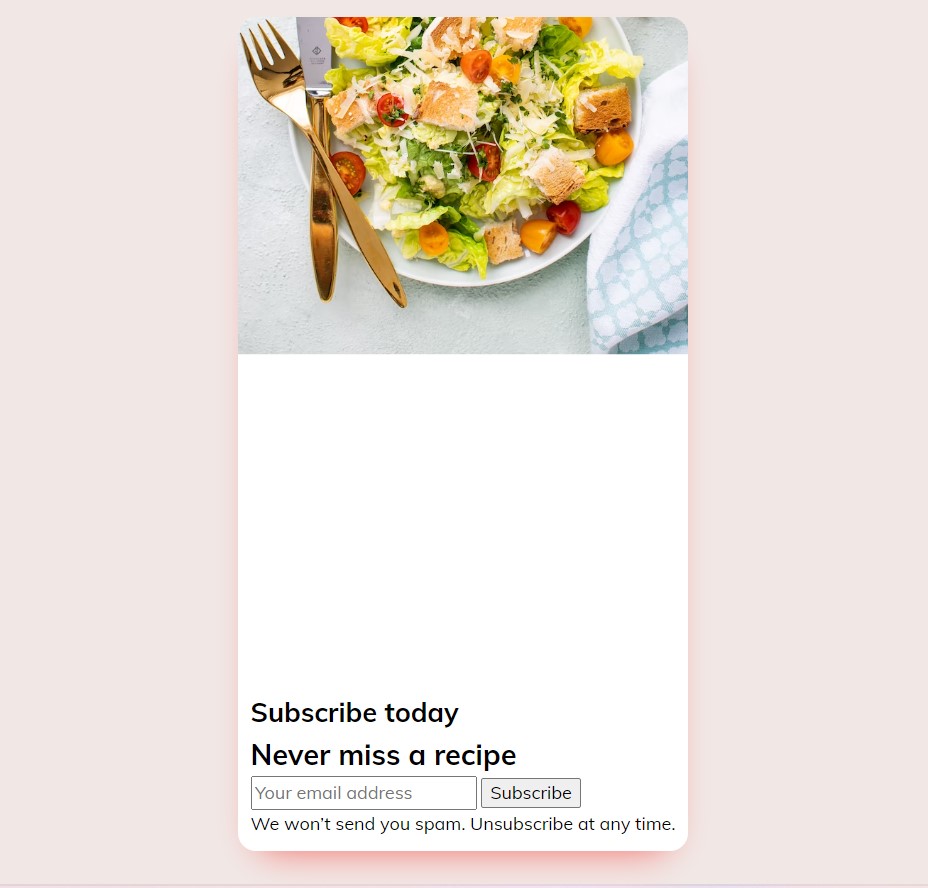
Step5: Now we’ll style our material by changing the sizes, orientation, and colour of our subscription form. We’ll centre the pieces and apply padding and margin to our content.
We will now style our email address, add a red background colour to our button, and raise the size of the button.
.mail {
  padding: 0.5em 0 0.5em 1.5em;
  line-height: 3;
  width: 100%;
  border: 1px solid #d9d9d9;
  border-radius: 0.5em;
  margin-bottom: 1em;
}

::-webkit-input-placeholder {
  color: #111127;
}

:-ms-input-placeholder {
  color: #111127;
}

::-ms-input-placeholder {
  color: #111127;
}

::placeholder {
  color: #111127;
}

.subscribe {
  color: #fff;
  font-size: 1.3rem;
  font-weight: 700;
  background-color: #f55951;
  padding: 0.9em 0;
  display: inline-block;
  border: none;
  border-radius: 0.5em;
  width: 100%;
  margin-bottom: 1.3em;
}

.text {
  font-size: 0.9rem;
  width: 90%;
  text-align: center;
}

The project is now finished, we have completed Subscription Form using HTML and CSS. Now look at the live preview.
ADVERTISEMENT
100+ JavaScript Projects With Source Code ( Beginners to Advanced)
ADVERTISEMENT
Output:
ADVERTISEMENT
Now We have Successfully created Email Subscription Form using HTML and CSS . You can use this project directly by copying into your IDE. WE hope you understood the project , If you any doubt feel free to comment!!
ADVERTISEMENT
If you find out this Blog helpful, then make sure to search code with random on google for Front End Projects with Source codes and make sure to Follow the Code with Random Instagram page.
ADVERTISEMENT
