How to Create Parallax Effect Website Using HTML & CSS ?
Welcome, programmers! In this article, we’ll learn how to create a website with a parallax effect using HTML and CSS.

Websites that use parallax effects have higher levels of interaction and better user experiences. We can change the speeds and directions at which the foreground and background images move. The parallax effect can be used in many different ways, such as to move text and images together or images with other images.
50+ HTML, CSS & JavaScript Projects With Source Code
I hope you have a general idea of what the project entails. In our article, we will go over this project step by step.
Step1: Adding HTML Markup
<!DOCTYPE html>
<html lang="en">

<head>
	<meta charset="UTF-8" />
	<meta http-equiv="X-UA-Compatible" content="IE=edge" />
	<meta name="viewport" content="width=device-width, initial-scale=1.0" />
	<link rel="stylesheet" href="style.css" />
	<title>parallax</title>
</head>

<body>
	<section class="1">
		<section class="parallax">
			<div class="parallax-inner">
				<br>
				<h1>Forests</h1>
				<br>
			</div>
		</section>
		<h3>Lorem ipsum dolor sit amet consectetur adipisicing elit. Veritatis minima fuga debitis quasi eius aliquid
			sapiente? Cumque blanditiis quibusdam, ex totam aliquam provident alias culpa, sit illo, eum doloribus
			doloremque. Lorem ipsum dolor sit amet consectetur adipisicing elit. Excepturi reprehenderit voluptatum
			aperiam pariatur numquam praesentium recusandae, ipsa at iusto eveniet, distinctio sunt dolore nemo veniam
			maiores vitae deserunt cum ducimus.</h3>
		<h3>Lorem ipsum dolor sit amet consectetur adipisicing elit. Veritatis minima fuga debitis quasi eius aliquid
			sapiente? Cumque blanditiis quibusdam, ex totam aliquam provident alias culpa, sit illo, eum doloribus
			doloremque. Lorem ipsum dolor sit amet consectetur adipisicing elit. Excepturi reprehenderit voluptatum
			aperiam pariatur numquam praesentium recusandae, ipsa at iusto eveniet, distinctio sunt dolore nemo veniam
			maiores vitae deserunt cum ducimus.</h3>
		<section class="parallax-1">
			<div class="parallax-inner">
				<br>
				<h1>Beaches</h1>
				<br>
			</div>
		</section>
	</section>

	<section class="2">
		<h3>Lorem ipsum dolor sit amet consectetur adipisicing elit. Veritatis minima fuga debitis quasi eius aliquid
			sapiente? Cumque blanditiis quibusdam, ex totam aliquam provident alias culpa, sit illo, eum doloribus
			doloremque. Lorem ipsum dolor sit amet consectetur adipisicing elit. Excepturi reprehenderit voluptatum
			aperiam pariatur numquam praesentium recusandae, ipsa at iusto eveniet, distinctio sunt dolore nemo veniam
			maiores vitae deserunt cum ducimus.</h3>
		<h3>Lorem ipsum dolor sit amet consectetur adipisicing elit. Veritatis minima fuga debitis quasi eius aliquid
			sapiente? Cumque blanditiis quibusdam, ex totam aliquam provident alias culpa, sit illo, eum doloribus
			doloremque. Lorem ipsum dolor sit amet consectetur adipisicing elit. Excepturi reprehenderit voluptatum
			aperiam pariatur numquam praesentium recusandae, ipsa at iusto eveniet, distinctio sunt dolore nemo veniam
			maiores vitae deserunt cum ducimus.</h3>
		<section class="parallax-2">
			<div class="parallax-inner">
				<br>
				<h1>Mountains</h1>
				<br>
			</div>
		</section>
		<h3>Lorem ipsum dolor sit amet consectetur adipisicing elit. Veritatis minima fuga debitis quasi eius aliquid
			sapiente? Cumque blanditiis quibusdam, ex totam aliquam provident alias culpa, sit illo, eum doloribus
			doloremque. Lorem ipsum dolor sit amet consectetur adipisicing elit. Excepturi reprehenderit voluptatum
			aperiam pariatur numquam praesentium recusandae, ipsa at iusto eveniet, distinctio sunt dolore nemo veniam
			maiores vitae deserunt cum ducimus.</h3>
		<h3>Lorem ipsum dolor sit amet consectetur adipisicing elit. Veritatis minima fuga debitis quasi eius aliquid
			sapiente? Cumque blanditiis quibusdam, ex totam aliquam provident alias culpa, sit illo, eum doloribus
			doloremque. Lorem ipsum dolor sit amet consectetur adipisicing elit. Excepturi reprehenderit voluptatum
			aperiam pariatur numquam praesentium recusandae, ipsa at iusto eveniet, distinctio sunt dolore nemo veniam
			maiores vitae deserunt cum ducimus.</h3>
	</section>
</body>

</html>
Since managing a codebase for a project is just as crucial as creating the project itself, any good programmer should be able to do this. In this example, we’ll create two different files, one for HTML and one for CSS, and link them together to achieve the desired outcome. Making separate files for each language is the optimum way to organise the code.
Ecommerce Website Using HTML, CSS, & JavaScript (Source Code)
<link rel="stylesheet" href="style.css" />
Adding the Structure:
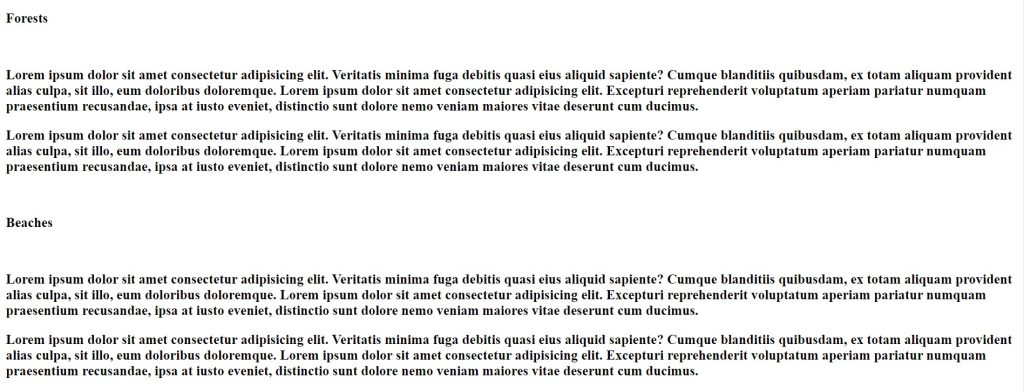
We must add the structure of our project in several sections in order to get the parallax effect. In our project, the three sections will be used to add the background image, and the final area will be used to add content for our website. Next, we’ll create a section with class “1” using the section tag, and inside of that section, we’ll use the <h1> tag to add a brief header that covers our backdrop. To add some lorem ipsum text to our project, we will once more use the section tag.
Simple Portfolio Website Using Html And Css With Source Code
As we introduced one part, we will add two more sections in a same manner, with the exception that we will use the section to add the parallax effect to our website.
Let’s have a look at the structure.
Output:

Step2: Adding CSS Code
In your stylesheet, copy and paste the CSS code provided below.
* {
  margin: 0;
  padding: 0;
  border: 0;
  font-weight: 100;
  font-family: "Open Sans", sans-serif;
}
.parallax {
  background: url("https://images.pexels.com/photos/192136/pexels-photo-192136.jpeg?auto=compress&cs=tinysrgb&dpr=2&h=650&w=940")
    repeat fixed 100%;
  background-size: cover;
  color: aliceblue;
}
.parallax-1 {
  background: url("https://images.pexels.com/photos/3369569/pexels-photo-3369569.jpeg?auto=compress&cs=tinysrgb&dpr=2&h=650&w=940")
    repeat fixed 100%;
  background-size: cover;
  color: aliceblue;
}
.parallax-2 {
  background: url("https://images.pexels.com/photos/417173/pexels-photo-417173.jpeg?auto=compress&cs=tinysrgb&dpr=2&h=650&w=940")
    repeat fixed 100%;
  background-size: cover;
  color: aliceblue;
}
.parallax-inner {
  padding-top: 20%;
  padding-bottom: 20%;
}
h3 {
  margin-left: 50px;
  margin-right: 50px;
  margin-top: 50px;
  margin-bottom: 50px;
}
h1 {
  font-size: 160px;
  text-align: center;
}
Basic Styling:
We’ll set the default margin and padding of the browser to zero by using the universal selector (*). Using the font-weight and font-family properties, we will set the font-weight to “100” and the font family to “opens-sans,” respectively.
* {
  margin: 0;
  padding: 0;
  border: 0;
  font-weight: 100;
  font-family: "Open Sans", sans-serif;
}
Adding Parallax Effect
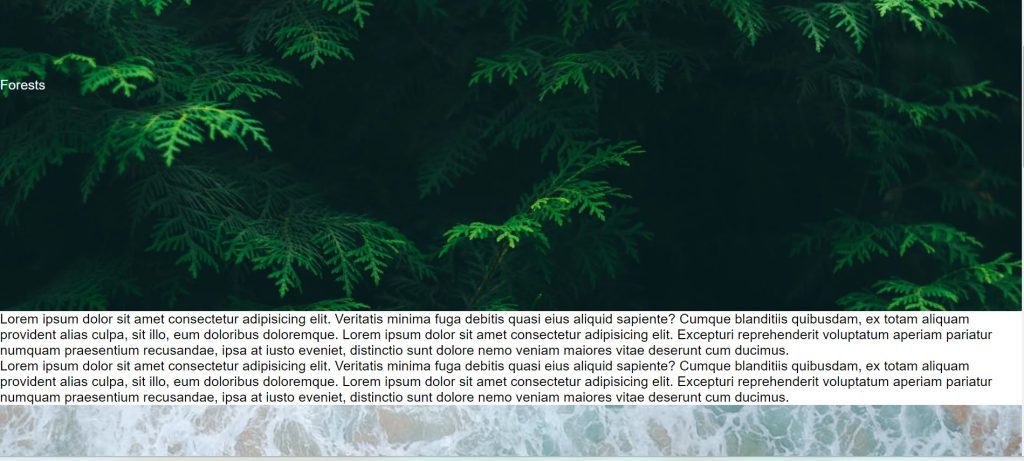
The class selector will be used to add the parallax effect. Our parallax will now have a forest background thanks to the background property and the url. We’ll repeat the background using the repeat property so that it fills the entire 100% width, and we’ll set the background size using the background size property to cover.
Gym Website Using HTML and CSS With Source Code
In a similar manner, we will add a background to the section using the background url property and the same background property that we used in the first parallax, using the class selector (.parallax-1,.parallax-2).
.parallax {
  background: url("https://images.pexels.com/photos/192136/pexels-photo-192136.jpeg?auto=compress&cs=tinysrgb&dpr=2&h=650&w=940")
    repeat fixed 100%;
  background-size: cover;
  color: aliceblue;
}
.parallax-1 {
  background: url("https://images.pexels.com/photos/3369569/pexels-photo-3369569.jpeg?auto=compress&cs=tinysrgb&dpr=2&h=650&w=940")
    repeat fixed 100%;
  background-size: cover;
  color: aliceblue;
}
.parallax-2 {
  background: url("https://images.pexels.com/photos/417173/pexels-photo-417173.jpeg?auto=compress&cs=tinysrgb&dpr=2&h=650&w=940")
    repeat fixed 100%;
  background-size: cover;
  color: aliceblue;
}
.parallax-inner {
  padding-top: 20%;
  padding-bottom: 20%;
}
Styling Heading and text:
As of right now, we will add margin to the left, right, bottom, and top using the HTML element selector (h3). Therefore, we’ll use the margins left, right, bottom, and top to add the margin from all sides, and we’ll give our h3 heading a 50px margin from all sides.
ADVERTISEMENT
The font size will now be set to 160px using the h1 tag selector, and the text will be centred using the text-align property.
ADVERTISEMENT
h3 {
  margin-left: 50px;
  margin-right: 50px;
  margin-top: 50px;
  margin-bottom: 50px;
}
h1 {
  font-size: 160px;
  text-align: center;
}
Now we’ve completed our parallax website using html & css. I hope you understood the whole project. Let’s take a look at our Live Preview.
ADVERTISEMENT
100+ JavaScript Projects With Source Code ( Beginners to Advanced)
ADVERTISEMENT
Output:
ADVERTISEMENT
Live Preview Of our parallax website using Html & Css
Now We have Successfully created our parallax website using html & css. You can use this project directly by copying into your IDE. WE hope you understood the project , If you any doubt feel free to comment!!
If you find out this Blog helpful, then make sure to search code with random on google for Front End Projects with Source codes and make sure to Follow the Code with Random Instagram page.


