What Is Css Grid? Learn Css Grid with Project
Hey friends, today I’ll explain all you need to know to start using a CSS Grid. and at the end of article, we create a project with Css Grid.
Basics
Before we see how to use CSS Grid, let’s learn what is a CSS Grid in simple terms. CSS Grid is basically a 2-D layout used in web development in making website interfaces. There are many alternatives such as float, tables, flexbox, and more but the grid has more benefits in using it. Now, let’s see the first property, the grid.
1. Grid
Generally, we split the grid into two. A grid container with items/cards inside it. First, we’ll code that in our HTML file.
<div class="grid-container">
<div class="grid-item">1</div>
<div class="grid-item">2</div>
<div class="grid-item">3</div>
<div class="grid-item">4</div>
<div class="grid-item">5</div>
<div class="grid-item">6</div>
<div class="grid-item">7</div>
<div class="grid-item">8</div>
<div class="grid-item">9</div>
</div>
Next, we will give the basic grid property in our CSS file. It will look like the below:
2. Grid-template-columns
One easy way to separate grid items into columns is by using the grid-template-columns property. Here’s how we use it:
grid-template-columns: auto auto auto;
The number of auto attributes you need to add depends on your needs. For example, if you want
2 columns: Add 1 auto attribute
3 columns: Add 2 auto attribute
4 columns: Add 3 auto attribute
This same ratio concept goes on for as many columns as you want.
3. Grid-gap
In this property, we can set a spacing/gap between all items in our grid container. Here’s the code you need.
grid-gap: 50px;
Here’s the output/visual on how this property works:
Great! Now, let’s move on with the next property.
4. Grid-area
This property will make your work easier in CSS Grid. Grid-area can give a name for your grid item to be used in styling the grid. To understand this property, I’ll share a CSS grid project example in number 5. For now, let’s see the grid-area property code.
.item1 { grid-area: header; }For now, there won’t really be any changes if you add this line of code. However, you need to know that there is a property called grid-area. Next, let’s see how to make a simple website layout with a grid.
5. Applying your skills in a simple layout
First, we will add the HTML code below:
<div class="grid-container">
<div class="item1">Header</div>
<div class="item2">Menu</div>
<div class="item3">Post</div>
<div class="item4">About</div>
<div class="item5">Footer</div>
</div>
Once done, let’s go to CSS. First, we will use the grid-area property as below to make our work easier later.
ADVERTISEMENT
.item1 { grid-area: header; }
.item2 { grid-area: menu; }
.item3 { grid-area: post; }
.item4 { grid-area: about; }
.item5 { grid-area: footer; }
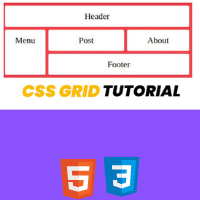
Now, we will move on to our grid container. Notice in lines 3-6, we will be combining grid-template and grid-area to work together. In line 7, we also implemented the grip-gap property.
ADVERTISEMENT
Ecommerce Website Using HTML, CSS, & JavaScript (Source Code)
ADVERTISEMENT
.grid-container {
display: grid;
grid-template-areas:
'header header header header header header'
'menu post post post about about'
'menu footer footer footer footer footer';
grid-gap: 10px;
background-color: #f5424b;
padding: 10px;
}
Lastly, we will style the grid items using the code below. You may customize this according to your needs.
ADVERTISEMENT
.grid-container > div {
background-color: white;
border-radius:5px;
text-align: center;
padding: 20px 0;
font-size: 30px;
}
And that’s all for the code. Now is the happy moment, we’re going to see our code output:
ADVERTISEMENT
100+ JavaScript Projects With Source Code ( Beginners to Advanced)
Before we end this article, let’s see the browser support for CSS Grid.
Browser Support
CSS Grid might be fun and nice to use for your projects. However, do consider that CSS Grid does not work on all browsers. For example, CSS Grid is supported on modern browsers such as Google Chrome, Microsoft Edge, Mozilla Firefox, Opera Browser, and more. CSS grid is not supported on Internet Explorer 10 or below.
Thank You!
comment down below any doubts or suggestions you have. I hope this post was useful and thanks to Code With Random for giving me the chance to write here. I hope to see you all in future posts. Goodbye!
Written by – CodingPorium


