Create Custom Checkbox Using HTML and CSS
Hello, guys welcome to the Codewithrandom blog, Today we learn How to Create a Custom Checkbox Using Html and Css Code. We learn topics like how to style a custom checkbox and types of checkboxes like toggle, disabled, read-only, and many more things about checkboxes.
Q. What is a Checkbox?
In our websites we use too many input elements for better enhancement of user experiences like text, date, radio, etc. and a checkbox is also an input tag we use for our websites.
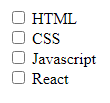
we use checkboxes when we want to provide users to verify their options and select multiple data objects and share their all information with us HTML provides so many simple input tags or if we want an extra tremendous website so we need to create custom checkboxes and provide the user a magnificent look of website/web apps so first have a simple HTML checkbox then we go to create our custom.
Basic HTML Checkbox Code:
HTML Structure of Custom Checkbox:-
<div class="new">
    <form>
        <div class="form-group">
            <input type="checkbox" id="html" /> <label for="html">HTML</label>
        </div>
        <div class="form-group">
            <input type="checkbox" id="css" /> <label for="css">CSS</label>
        </div>
        <div class="form-group">
            <input type="checkbox" id="javascript" />
            <label for="javascript">Javascript</label>
        </div>
        <div class="form-group">
            <input type="checkbox" id="react" />
            <label for="react">React</label>
        </div>
    </form>
</div>
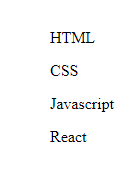
I think I did not need to provide HTML Boilerplate jokes apart let’s discuss our code so we just use the form, div, label, input: checkbox elements for our custom checkbox and class, id, type, for attributes, or we, use name tag also when we code for back-end functions and id element is if we want to write a clean code and its not sufficient for our custom checkbox so let’s focus on output then go to styling…
5+ HTML CSS Projects With Source Code
Output…
Styling of Our Custom Checkbox:-
*,
*:before,
*:after {
    -webkit-box-sizing: border-box;
    -moz-box-sizing: border-box;
    box-sizing: border-box;
    margin: 0;
    padding: 0;
}
.new {
    padding: 50px;
}
.form-group {
    display: block;
    margin-bottom: 15px;
}
.form-group input {
    padding: 0;
    height: initial;
    width: initial;
    margin-bottom: 0;
    display: none;
    cursor: pointer;
}
First we go to style our new div and form-group and input by giving margin, padding, cursor, height, width, display and more… now we go to do our main work lets styles labels… and our inputs are hidden now.
Portfolio Website using HTML and CSS (Source Code)
Output…
Final Styling of Our Custom Checkbox:-
.form-group label {
    position: relative;
    cursor: pointer;
}
.form-group label:before {
    content: "";
    -webkit-appearance: none;
    background-color: transparent;
    border: 2px solid #e94f4f;
    box-shadow: 0 1px 2px rgba(228, 8, 8, 0.05),
        inset 0px -15px 10px -12px rgba(0, 0, 0, 0.05);
    padding: 10px;
    display: inline-block;
    position: relative;
    vertical-align: middle;
    cursor: pointer;
    margin-right: 5px;
}
.form-group input:checked + label:after {
    content: "";
    display: block;
    position: absolute;
    top: 2px;
    left: 9px;
    width: 6px;
    height: 14px;
    border: solid #0079bf;
    border-width: 0 2px 2px 0;
    transform: rotate(45deg);
}
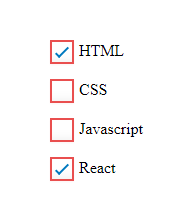
Here we use border, content, position, content, transform, vertical-align or etc. properties to give red Colour to the border of input and blue for checks, transform the element by rotating 45deg, and use box shadow for giving a shaded finish.
Restaurant Website Using HTML And CSS With Source Code
Final Output…
Type of Checkbox
- Standard Checkbox
- Slider
- Toggle
- Disabled
- Read Only
- Indeterminate
Hope you like this post and enjoy it. If we did any mistake please comment on it so this help full for also our users. Thank you for reading.
Written by Tushar Sharma
Team Code With Random





Helpful