Simple Dashboard Using HTML and CSS (Source Code)

Dashboard Code Using HTML and CSS
Hello Learners……. Welcome to the Codewithrandom blog… Today in this blog, we are going to learn how to build Dashboard Designs using HTML and CSS Code only. You learn Many Things in this Dashboard Design Project.
And I am damn sure that after reading this blog, you will be able to create your Dashboard using HTML and CSS.
| Code by | N/A |
| Project Download | Link Available Below |
| Language used | HTML and CSS |
| External link / Dependencies | Yes |
| Responsive | YES |
A dashboard is a visual display of all of your data. While it can be used in all kinds of different ways, its primary intention is to provide information at-a-glance, such as KPIs.
Portfolio Website using HTML and CSS (Source Code)
A dashboard usually sits on its page and receives information from a linked database. In many cases it’s configurable, allowing you the ability to choose which data you want to see and whether you want to include charts or graphs to visualize the numbers.
Dashboard Html Code:-
Semantic elements = elements with a meaning.
What are Semantic Elements?
A semantic element clearly describes its meaning to both the browser and the developer.
Examples of non-semantic elements: <div> and <span> – Tells nothing about its content.
Examples of semantic elements: <form>, <table>, and <article> – Clearly defines its content.
Semantic Elements in HTMLMany websites contain HTML code like: <div id=”nav”> <div class=”header”> <div id=”footer”> to indicate navigation, header, and footer.
In HTML some semantic elements can be used to define different parts of a web page:
- <article>
- <aside>
- <details>
- <figure>
- <footer>
- <header>
- <main>
- <mark>
- <nav>
- <section>
- <summary>
Hope you clearly understand the section tag. Before going through the content firstly go through the basic concepts of HTML like div tag, span tag, image tag, semantic tag, classes, and ids.
Create Portfolio Website Using HTML and CSS (Source Code)
<section id="sidebar">
<div class="white-label">
</div>
<div id="sidebar-nav">
<ul>
<li class="active"><a href="#"><i class="fa fa-dashboard"></i> Dashboard</a></li>
<li><a href="#"><i class="fa fa-desktop"></i> My Website</a></li>
<li><a href="#"><i class="fa fa-usd"></i> Ecommerce</a></li>
<li><a href="#"><i class="fa fa-pencil-square-o"></i> My Blog</a></li>
<li><a href="#"><i class="fa fa-sitemap"></i> SEO Tools</a></li>
<li><a href="#"><i class="fa fa-line-chart"></i> Reporting</a></li>
<li><a href="#"><i class="fa fa-comments-o"></i>Social Marketing</a></li>
<li><a href="#"><i class="fa fa-map-marker"></i> Get Traffic</a></li>
<li><a href="#"><i class="fa fa-users"></i> Employees</a></li>
<li><a href="#"><i class="fa fa-calendar-o"></i> Reservations</a></li>
<li><a href="#"><i class="fa fa-calendar"></i> Calendar</a></li>
</ul>
</div>
</section>
- first of all using the section tag we will create a section for our dashboard structure with id “sidebar”
- Now inside our section tag we will be creating different list items for the sidebar of our dashboard. Using the unordered list tag we will create a list of menu item we will be add icons class along with some items for creating the menu list item of our sidebar
- The menu items of our sidebar along placed inside the <a> tag to add the hyper link to the text of our dashboard.
More HTML Code For Dashboard Design
Math Game using HTML, CSS & JavaScript
<section id="content">
    <div id="header">
        <div class="header-nav">
            <div class="menu-button"><!--<i class="fa fa-navicon"></i>--></div>
            <div class="nav">
                <ul>
                    <li class="nav-settings">
                        <div class="font-icon"><i class="fa fa-tasks"></i></div>
                    </li>
                    <li class="nav-mail">
                        <div class="font-icon">
                            <i class="fa fa-envelope-o"></i>
                        </div>
                    </li>
                    <li class="nav-calendar">
                        <div class="font-icon">
                            <i class="fa fa-calendar"></i>
                        </div>
                    </li>
                    <li class="nav-chat">
                        <div class="font-icon">
                            <i class="fa fa-comments-o"></i>
                        </div>
                    </li>
                    <li class="nav-profile">
                        <div class="nav-profile-image">
                            <img
                                src="https://skynet.marketecture.com/user_avatars/258800/Hayley-Helsten.jpg"
                                alt="profile-img"
                                alt="profile image"
                            />
                            <div class="nav-profile-name">
                                Jane Smith<i class="fa fa-caret-down"></i>
                            </div>
                        </div>
                    </li>
                </ul>
            </div>
        </div>
    </div>
    <div class="content">
        <div class="content-header">
            <h1>Dashboard</h1>
            <p>Lorem ipsum dolor sit amet, consectetur adipiscing elit.</p>
        </div>
        <div class="widget-box sample-widget">
            <div class="widget-header">
                <h2>Widget Header</h2>
                <i class="fa fa-cog"></i>
            </div>
            <div class="widget-content">
                <img
                    src="https://s3-us-west-2.amazonaws.com/s.cdpn.io/87118/sample-data-1.png"
                />
            </div>
        </div>
        <div class="widget-box sample-widget">
            <div class="widget-header">
                <h2>Widget Header</h2>
                <i class="fa fa-cog"></i>
            </div>
            <div class="widget-content">
                <img
                    src="https://s3-us-west-2.amazonaws.com/s.cdpn.io/87118/sample-data-1.png"
                />
            </div>
        </div>
        <div class="widget-box sample-widget">
            <div class="widget-header">
                <h2>Widget Header</h2>
                <i class="fa fa-cog"></i>
            </div>
            <div class="widget-content">
                <img
                    src="https://s3-us-west-2.amazonaws.com/s.cdpn.io/87118/sample-data-1.png"
                />
            </div>
        </div>
        <div class="widget-box sample-widget">
            <div class="widget-header">
                <h2>Widget Header</h2>
                <i class="fa fa-cog"></i>
            </div>
            <div class="widget-content">
                <img
                    src="https://s3-us-west-2.amazonaws.com/s.cdpn.io/87118/sample-data-1.png"
                />
            </div>
        </div>
    </div>
</section>
- We will now start building the framework for our content area. We will do it by creating a new section with the id “content” using the section tag.
- We will use the navbar tag inside the section to first make a header for our dashboard. Next, we’ll design the dashboard’s navbar.
- We will add various icons to our navbar utilizing the font-awesome classes for icons inside the unordered list.
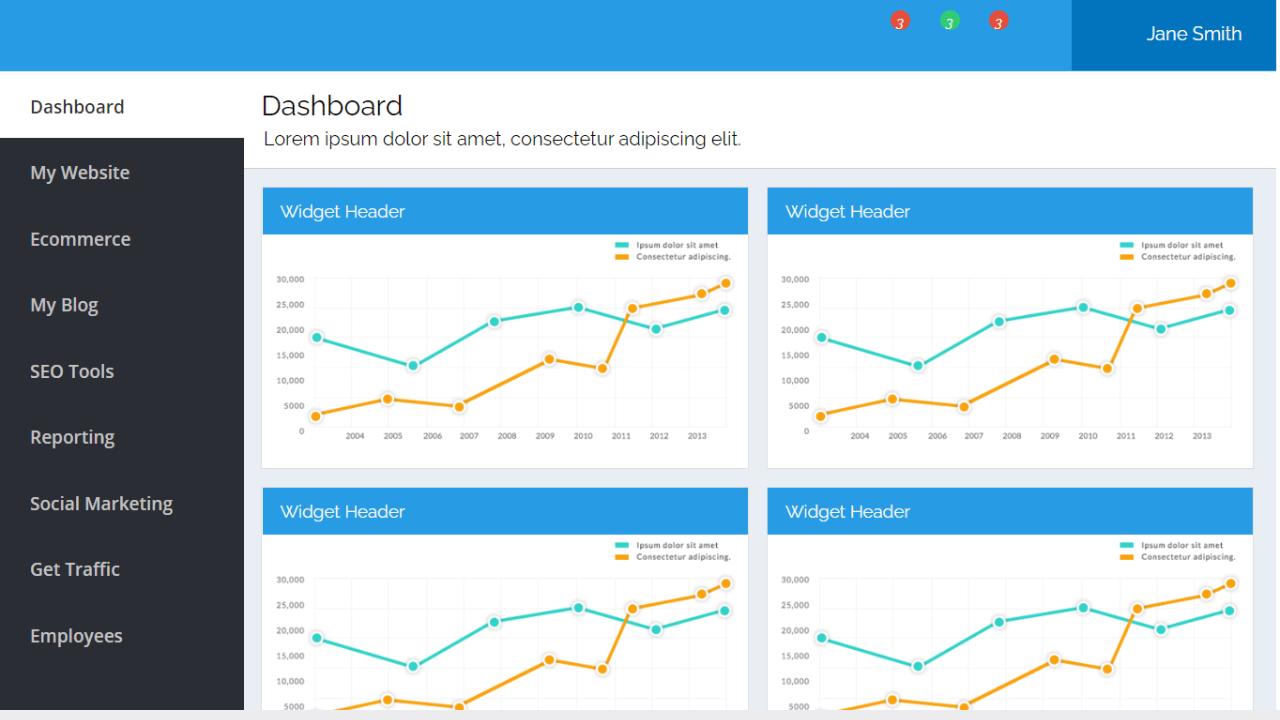
- We will now add various graphs for the content inside our dashboard using the div and image tags.
HTML Code Output:-

Dashboard Css Code:-
As our basic layout is done for the dashboard page but it still looks boring and disturbing. So what to do now?
I think what if we add some colors and alignment? Let’s see:-
Ecommerce Website Using HTML, CSS, and JavaScript (Source Code)
We will use basic CSS concepts for styling the HTML content. I hope you are properly concerned with the concepts of classes and ids and their selectors if you are then move forward to the CSS code. We are using the Border-Box model, Flex-box for styling, and more basic concepts like padding, margin, and float.
html,
body {
    font-family: "Open Sans", sans-serif;
    height: 100%;
}
body {
    background: #FFFFFF;
    height: 100%;
}
img {
    max-width: 100%;
}
ul {
    list-style: none;
    margin: 0;
    padding: 0;
}
a {
    text-decoration: none;
}
#header {
    float: left;
    width: 100%;
    background: #ffffff;
    position: relative;
}
.white-label {
    float: left;
    background: #33373B;
    max-width: 210px;
    padding: 10px;
    min-height: 44px;
    background: #279BE4;
    width: 100%;
    max-height: 44px;
}
.white-label img {
    max-height: 43px;
}
.header-nav {
    min-height: 64px;
    -webkit-box-sizing: border-box;
    -moz-box-sizing: border-box;
    box-sizing: border-box;
    background: #279BE4;
}
.menu-button {
    float: left;
    font-size: 29px;
    color: #fff;
    padding: 12px 19px;
}
.nav ul {
    height: 64px;
    float: right;
}
.nav ul li {
    float: left;
    position: relative;
    padding: 11px;
}
.nav > ul > li:first-child {
    border-left: none;
}
.nav ul li a {
    color: #fff;
    padding: 1px;
    float: left;
}
.nav ul li i {
    color: #fff;
}
.nav ul li:hover {
    background: #01A9F0;
    color: #fff;
}
.user-profile {
    float: right;
}
.user-profile > div {
    float: left;
    padding: 20px 8px;
    position: relative;
}
.user-profile i {
    font-size: 1.2em;
    color: #5F6F86;
}
.user-profile i:hover {
    color: #397AC5;
}
.font-icon i:after {
    position: absolute;
    content: "3";
    background: #E74C3C;
    color: #fff;
    font-size: 12px;
    border-radius: 50%;
    width: 10px;
    height: 10px;
    padding: 3px 4px 4px 3px;
    text-align: center;
    top: 12px;
    right: 11px;
}
.font-icon {
    padding: 8px 10px;
}
.font-icon i {
    font-size: 24px;
}
.nav-mail .font-icon i:after {
    background: #2ECC71;
}
div.user-image {
    padding: 9px 5px;
    margin: 0 5px;
    border-left: 1px solid #ccc;
    border-right: 1px solid #ccc;
}
.nav-profile {
    background: #0274BD;
}
.nav-profile-image img {
    width: 39px;
    height: 41px;
    border-radius: 50%;
    float: left;
}
.nav-profile-name {
    float: right;
    margin: 11px 7px 8px 14px;
    color: #fff;
}
.nav-profile-name i {
    padding: 0 0 0 11px;
}
.nav-chat i:after {
    display: none;
}
#sidebar {
    overflow: hidden;
    width: 210px;
    height: 100%;
    float: left;
    background: #2A2D33;
}
#sidebar-nav {
    width: 106%;
    height: calc(100% - 95px);
    padding: 0;
    background: #2A2D33;
    border-right: 1px solid #E0E0E0;
    overflow-y: scroll;
}
#sidebar-nav h2 {
    color: #60636B;
    float: left;
    width: 100%;
    font-size: 0.8em;
    font-family: "Open Sans", sans-serif;
    font-weight: 600;
    text-transform: uppercase;
    padding: 3px 0 2px 20px;
    border-top: 1px solid #4D4C4C;
    box-sizing: border-box;
    margin: 10px 0;
}
#sidebar-nav ul {
}
#sidebar-nav ul li {
}
#sidebar-nav ul li a {
    color: #C2C2C2;
    font-size: 0.95em;
    padding: 15px 20px;
    float: left;
    width: 100%;
    font-weight: 600;
    -webkit-box-sizing: border-box;
    -moz-box-sizing: border-box;
    box-sizing: border-box;
}
#sidebar-nav ul li:hover a,
#sidebar-nav ul li:hover a i,
#sidebar-nav li.active a,
#sidebar-nav li.active a i {
    color: #333;
}
#sidebar-nav ul li:hover a {
    background: #fff;
    color: #333;
}
#sidebar-nav ul li.active a {
    background: #fff;
    color: #333;
}
#sidebar-nav ul li.active a i {
    background: #fff;
}
#sidebar-nav i {
    padding-right: 8px;
    font-size: 1.3em;
    color: #60636B;
    width: 25px;
    text-align: center;
}
#content {
    float: left;
    width: calc(100% - 210px);
    height: 100%;
    word-wrap: break-word;
    background: #FFFFFF;
    font-family: Raleway, sans-serif;
}
::-webkit-scrollbar {
    width: 12px;
}
::-webkit-scrollbar-track {
    -webkit-box-shadow: inset 0 0 6px rgba(0, 0, 0, 0.3);
    border-radius: 10px;
}
::-webkit-scrollbar-thumb {
    border-radius: 10px;
    -webkit-box-shadow: inset 0 0 6px rgba(0, 0, 0, 0.5);
}
.content {
    float: left;
    background: #E9EEF4;
    width: 100%;
    height: calc(100% - 64px);
    -webkit-box-sizing: border-box;
    -moz-box-sizing: border-box;
    box-sizing: border-box;
}
.content-header {
    background: #fff;
    float: left;
    width: 100%;
    margin-bottom: 15px;
    padding: 15px;
    -webkit-box-sizing: border-box;
    -moz-box-sizing: border-box;
    box-sizing: border-box;
    border-bottom: 1px solid #ccc;
}
.content-header h1 {
    margin: 0;
    font-weight: normal;
    padding-bottom: 5px;
}
.content-header p {
    margin: 0;
    padding-left: 2px;
}
.widget-box {
    background: #fff;
    border: 1px solid #E0E0E0;
    float: left;
    width: 100%;
    margin: 0 0 15px 15px;
}
.widget-header {
    background: #279BE4;
}
.widget-header h2 {
    font-size: 15px;
    font-weight: normal;
    margin: 0;
    padding: 11px 15px;
    color: #F9F9F9;
    display: inline-block;
}
.sample-widget {
    max-width: 47%;
}
.widget-box .fa-cog {
    float: right;
    color: #fff;
    margin: 11px 11px 0 0;
    font-size: 20px;
}
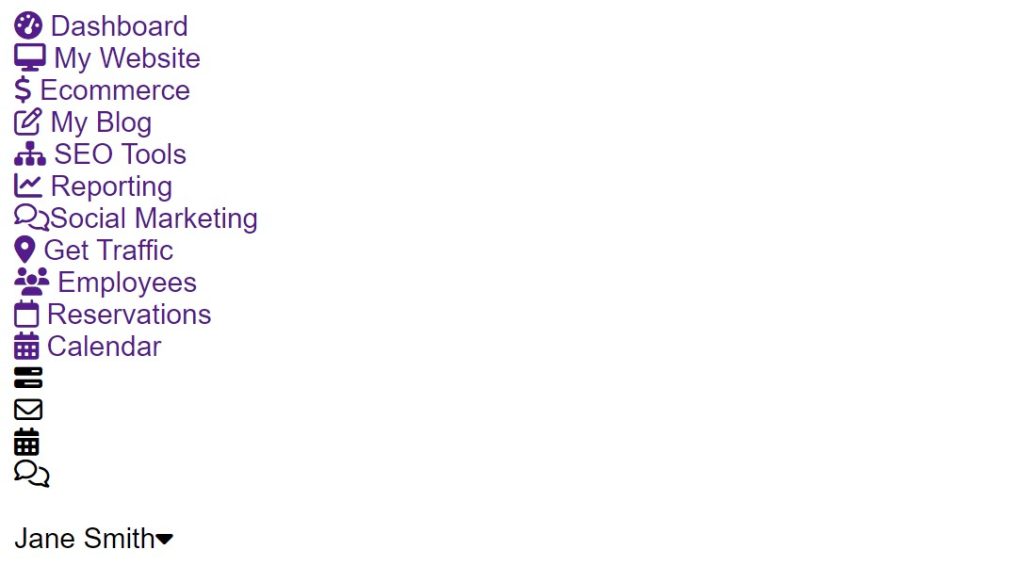
Step1:By using the tag selector (body) to set the dashboard’s font to “Open Sans,” the height property to set the body’s height to “100%,” and the background property to set the background color to “Light blue,” we can add some basic styling to our dashboard.
ADVERTISEMENT
The maximum width of our picture will be set to 100% using the (img) tag selector, and the list styling will be set to “none” using the (ul) tag selector.
ADVERTISEMENT
body {
    font-family: "Open Sans", sans-serif;
    height: 100%;
}
body {
    background: #FFFFFF;
    height: 100%;
}
img {
    max-width: 100%;
}
ul {
    list-style: none;
    margin: 0;
    padding: 0;
}
a {
    text-decoration: none;
}
ADVERTISEMENT
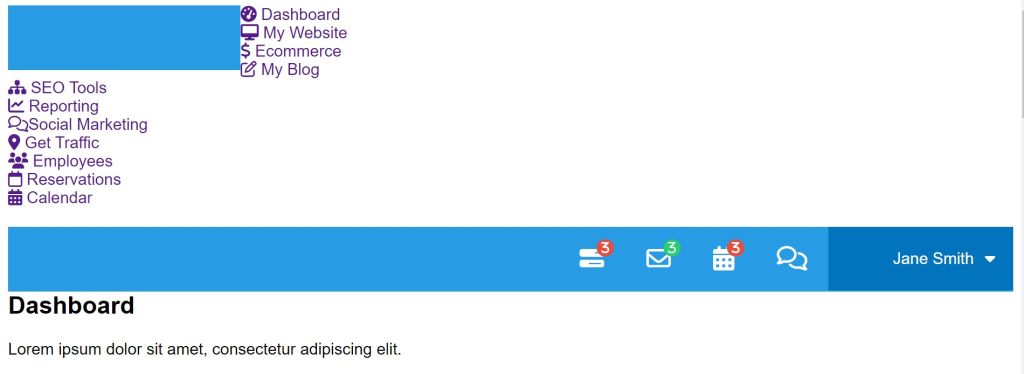
Step2:Now, using the (#header), we will style the header of our elements and dashboard. We will align the left and right of our header to the left and set the width to 100%. The child components and the menu list items will also receive styling from us.
ADVERTISEMENT
Quiz App With Timer using HTML, CSS & JavaScript
ADVERTISEMENT
#header {
    float: left;
    width: 100%;
    background: #ffffff;
    position: relative;
}
.white-label {
    float: left;
    background: #33373B;
    max-width: 210px;
    padding: 10px;
    min-height: 44px;
    background: #279BE4;
    width: 100%;
    max-height: 44px;
}
.white-label img {
    max-height: 43px;
}
.header-nav {
    min-height: 64px;
    -webkit-box-sizing: border-box;
    -moz-box-sizing: border-box;
    box-sizing: border-box;
    background: #279BE4;
}
.menu-button {
    float: left;
    font-size: 29px;
    color: #fff;
    padding: 12px 19px;
}
.nav ul {
    height: 64px;
    float: right;
}
.nav ul li {
    float: left;
    position: relative;
    padding: 11px;
}
.nav > ul > li:first-child {
    border-left: none;
}
.nav ul li a {
    color: #fff;
    padding: 1px;
    float: left;
}
.nav ul li i {
    color: #fff;
}
.nav ul li:hover {
    background: #01A9F0;
    color: #fff;
}
.user-profile {
    float: right;
}
.user-profile > div {
    float: left;
    padding: 20px 8px;
    position: relative;
}
.user-profile i {
    font-size: 1.2em;
    color: #5F6F86;
}
.user-profile i:hover {
    color: #397AC5;
}
.font-icon i:after {
    position: absolute;
    content: "3";
    background: #E74C3C;
    color: #fff;
    font-size: 12px;
    border-radius: 50%;
    width: 10px;
    height: 10px;
    padding: 3px 4px 4px 3px;
    text-align: center;
    top: 12px;
    right: 11px;
}
.font-icon {
    padding: 8px 10px;
}
.font-icon i {
    font-size: 24px;
}
.nav-mail .font-icon i:after {
    background: #2ECC71;
}
div.user-image {
    padding: 9px 5px;
    margin: 0 5px;
    border-left: 1px solid #ccc;
    border-right: 1px solid #ccc;
}
.nav-profile {
    background: #0274BD;
}
.nav-profile-image img {
    width: 39px;
    height: 41px;
    border-radius: 50%;
    float: left;
}
.nav-profile-name {
    float: right;
    margin: 11px 7px 8px 14px;
    color: #fff;
}
.nav-profile-name i {
    padding: 0 0 0 11px;
}
.nav-chat i:after {
    display: none;
}
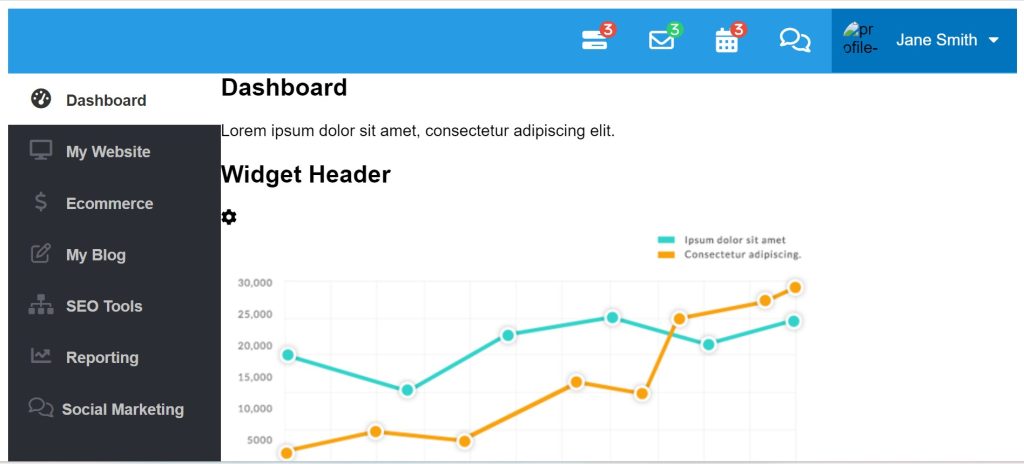
Step3:The sidebar will now get a style. We will set the overflow as “hidden” using the overflow attribute. The sidebar will float to the left using the float property with the following settings: width 210px, height 100%, and other. Our sidebar elements will now receive styling, and the font color will be changed to grey.
20+ JavaScript Game For Beginners (Demo + Free Code)
#sidebar {
    overflow: hidden;
    width: 210px;
    height: 100%;
    float: left;
    background: #2A2D33;
}
#sidebar-nav {
    width: 106%;
    height: calc(100% - 95px);
    padding: 0;
    background: #2A2D33;
    border-right: 1px solid #E0E0E0;
    overflow-y: scroll;
}
#sidebar-nav h2 {
    color: #60636B;
    float: left;
    width: 100%;
    font-size: 0.8em;
    font-family: "Open Sans", sans-serif;
    font-weight: 600;
    text-transform: uppercase;
    padding: 3px 0 2px 20px;
    border-top: 1px solid #4D4C4C;
    box-sizing: border-box;
    margin: 10px 0;
}
#sidebar-nav ul {
}
#sidebar-nav ul li {
}
#sidebar-nav ul li a {
    color: #C2C2C2;
    font-size: 0.95em;
    padding: 15px 20px;
    float: left;
    width: 100%;
    font-weight: 600;
    -webkit-box-sizing: border-box;
    -moz-box-sizing: border-box;
    box-sizing: border-box;
}
#sidebar-nav ul li:hover a,
#sidebar-nav ul li:hover a i,
#sidebar-nav li.active a,
#sidebar-nav li.active a i {
    color: #333;
}
#sidebar-nav ul li:hover a {
    background: #fff;
    color: #333;
}
#sidebar-nav ul li.active a {
    background: #fff;
    color: #333;
}
#sidebar-nav ul li.active a i {
    background: #fff;
}
#sidebar-nav i {
    padding-right: 8px;
    font-size: 1.3em;
    color: #60636B;
    width: 25px;
    text-align: center;
}
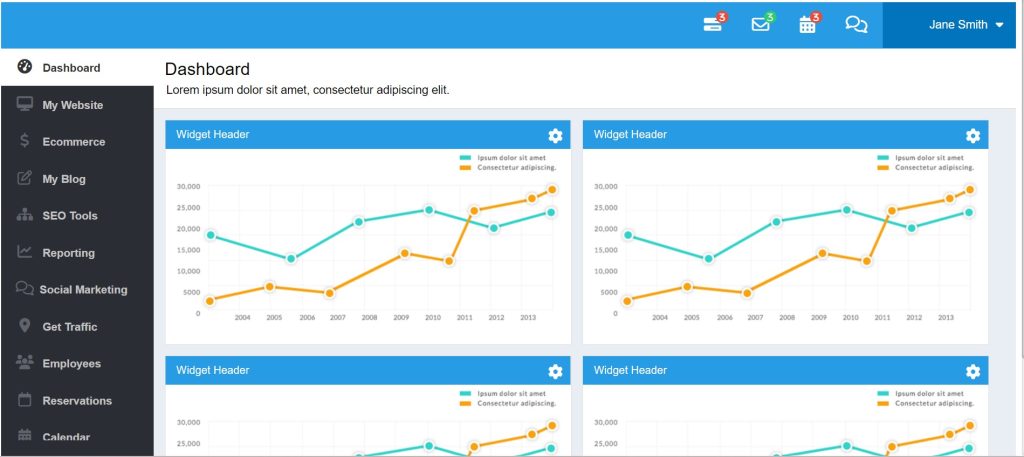
Step4:Now all that remains is to style our content and set the float attribute to the left. Our content has a 100% height setting. We will give the various elements of our website styling using the class selectors. The background color for the widget header that we selected is “blue.” As soon as you are familiar with the styling, I would advise simply reading the code.
.content {
    float: left;
    background: #E9EEF4;
    width: 100%;
    height: calc(100% - 64px);
    -webkit-box-sizing: border-box;
    -moz-box-sizing: border-box;
    box-sizing: border-box;
}
.content-header {
    background: #fff;
    float: left;
    width: 100%;
    margin-bottom: 15px;
    padding: 15px;
    -webkit-box-sizing: border-box;
    -moz-box-sizing: border-box;
    box-sizing: border-box;
    border-bottom: 1px solid #ccc;
}
.content-header h1 {
    margin: 0;
    font-weight: normal;
    padding-bottom: 5px;
}
.content-header p {
    margin: 0;
    padding-left: 2px;
}
.widget-box {
    background: #fff;
    border: 1px solid #E0E0E0;
    float: left;
    width: 100%;
    margin: 0 0 15px 15px;
}
.widget-header {
    background: #279BE4;
}
.widget-header h2 {
    font-size: 15px;
    font-weight: normal;
    margin: 0;
    padding: 11px 15px;
    color: #F9F9F9;
    display: inline-block;
}
.sample-widget {
    max-width: 47%;
}
.widget-box .fa-cog {
    float: right;
    color: #fff;
    margin: 11px 11px 0 0;
    font-size: 20px;
}
Final Output Of Dashboard Using Html And Css:-
Video Output of Dashboard:-
Which code editor do you use for this dashboard Design project coding?
I personally recommend using VS Code Studio, it’s straightforward and easy to use.
is this project responsive or not?
Yes! this project is a responsive project.
Do you use any external links to create this project?
Yes!
