Animated Eyes Follow Mouse Cursor Effect Using JavaScript
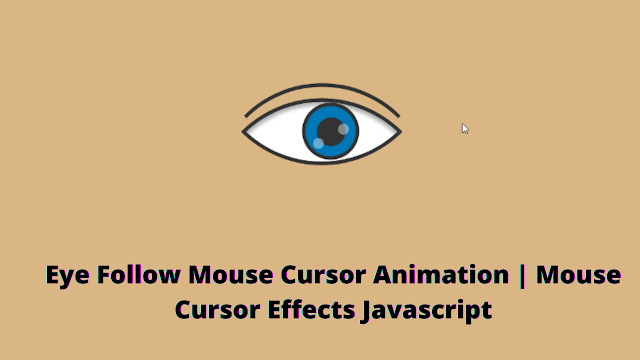
Hello Coders! Welcome to the Codewithrandom blog. In this blog, we learn how to create Animated Eyes Following Mouse Cursor Effect Using HTML, CSS, and JavaScript.
.png)
Project Description
Step 1
In order to make the Minion Eyes Follow Mouse Cursor Project, the HTML (Hypertext Markup Language) will assist us in creating the list’s structure and adding the required attributes and elements.
Step 2
In order to style or create the project with appropriate padding and alignment for the Eyes Follow Mouse Cursor Project, we will then use CSS (Cascading Style Sheets).
50+ HTML, CSS & JavaScript Projects With Source Code
Step 3
Finally, we’ll use JavaScript to add reasoning and make the Eyes Follow Mouse Cursor Project work from the user’s perspective.
I hope you enjoy our blog so let’s start with a basic HTML Structure for the Animated Eyes Follow Mouse Cursor Effect.
| Code by | N/A |
| Project Download | Link Available Below |
| Language used | HTML, CSS and JavaScript |
| External link / Dependencies | No |
| Responsive | Yes |
HTML Code For Animated Eyes Follow Mouse Cursor Effect
<div class="container">
<div class="eyeBall">
<div class="iris"></div>
</div>
<div class="eyeLid"></div>
<div class="lid"></div>
</div>
The container for our eye structure will be made using the div element and class container. The section for our eyes will be created using the div> element with the class “eyeball,” and the section for the eyelid and other structures will be created using the div tag.
There is all the HTML Code for the Animated Eyes Follow Mouse Cursor Effect. Now, you can see output without Css and JavaScript. then we write Css for styling and add the Eyes Follow Mouse Cursor Effect main functionality using javascript.
Portfolio Website using HTML and CSS (Source Code)
Only Html Code Output
 |
| Simple Blank Output with Blank Html Tag |
CSS Code For Animated Eyes Follow Mouse Cursor Effect
 body {
display: flex;
justify-content: center;
align-items: center;
height: 100vh;
background-color: #dab785;
}
.container {
position: relative;
cursor: pointer;
}
.iris {
position: absolute;
width: 70px;
height: 70px;
border: 5px solid #333;
background-color: #0077b6;
border-radius:50%;
left:40px;
top:30px;
}
.iris:before {
content:"";
position: absolute;
background-color: #333;
border-radius:50%;
width:40px;
height: 40px;
top:22%;
left:22%;
}
.iris:after {
content:"";
position: absolute;
background-color: rgba(255,255,255,0.4);
border-radius: 50%;
width:15px;
height:15px;
top:35%;
left:65%;
box-shadow: -35px 20px rgba(255,255,255,0.4);
}
.eyeBall {
position: relative;
width: 150px;
height: 150px;
background-color: white;
border: 5px solid #333;
border-radius:100% 0;
box-shadow: inset 5px 5px 5px rgba(0,0,0,0.3);
transform: rotate(45deg);
top:-10px;
z-index:1;
overflow: hidden;
}
.eyeLid {
position: absolute;
border-top: 5px solid #333;
border-left: 5px solid #333;
border-radius:100% 0;
width: 150px;
height: 150px;
top:-30px;
left:3px;
transform: rotate(45deg);
transition: .2s;
z-index:10;
}
.container:hover .eyeLid {
transform: rotate(-45deg) rotateX(160deg);
}
.container:hover .lid {
transform: translateY(90px);
}
.lid {
position: absolute;
z-index:9;
background-color: #dab785;
width: 295px;
height: 270px;
border-radius:50%;
top:-248px;
left:-68px;
transition: .2s;
}Step1:The display will first be set to “flex” using the body element selector, and the content will be justified to the center using the justify content property. The backdrop will finally be set to “brown” using the background color property.
Gym Website Using HTML and CSS With Source Code
body {
    display: flex;
    justify-content: center;
    align-items: center;
    height: 100vh;
    background-color: #dab785;
}
Step2:We’ll now style the container for our eye using the class option. (.container). Using the cursor property, we’ll assign the location to “relative” and the cursor to “pointer”.
We will now style the class selection. (.iris). Using the position property, we will set the position as “absolute”; using the width and height properties, we will set the width and height properties as “70 px”; using the border property, we will set the border as 5 px of solid black; and using the border radius property, we will set the border radius as “circle”.
ADVERTISEMENT
.container {
    position: relative;
    cursor: pointer;
}

.iris {
    position: absolute;
    width: 70px;
    height: 70px;
    border: 5px solid #333;
    background-color: #0077b6;
    border-radius: 50%;
    left: 40px;
    top: 30px;
}

.iris:before {
    content: "";
    position: absolute;
    background-color: #333;
    border-radius: 50%;
    width: 40px;
    height: 40px;
    top: 22%;
    left: 22%;
}

.iris:after {
    content: "";
    position: absolute;
    background-color: rgba(255, 255, 255, 0.4);
    border-radius: 50%;
    width: 15px;
    height: 15px;
    top: 35%;
    left: 65%;
    box-shadow: -35px 20px rgba(255, 255, 255, 0.4);
}
ADVERTISEMENT
Step3:Now, we will style the eyeball of our eyes using the position property and assign position to “relative” using the class selector. The width and height attributes are set to “150px,” the background property is set to “White,” and the border radius is set to “100%.”
ADVERTISEMENT
Responsive Resume/CV Website Using HTML & CSS
ADVERTISEMENT
.eyeBall {
    position: relative;
    width: 150px;
    height: 150px;
    background-color: white;
    border: 5px solid #333;
    border-radius: 100% 0;
    box-shadow: inset 5px 5px 5px rgba(0, 0, 0, 0.3);
    transform: rotate(45deg);
    top: -10px;
    z-index: 1;
    overflow: hidden;
}

.eyeLid {
    position: absolute;
    border-top: 5px solid #333;
    border-left: 5px solid #333;
    border-radius: 100% 0;
    width: 150px;
    height: 150px;
    top: -30px;
    left: 3px;
    transform: rotate(45deg);
    transition: 0.2s;
    z-index: 10;
}

.container:hover .eyeLid {
    transform: rotate(-45deg) rotateX(160deg);
}

.container:hover .lid {
    transform: translateY(90px);
}

.lid {
    position: absolute;
    z-index: 9;
    background-color: #dab785;
    width: 295px;
    height: 270px;
    border-radius: 50%;
    top: -248px;
    left: -68px;
    transition: 0.2s;
}
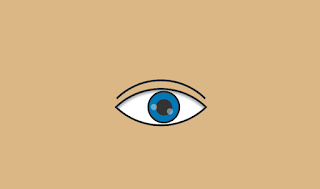
HTML + CSS Updated Output
ADVERTISEMENT
JavaScript Code For Animated Eyes Follow Mouse Cursor Effect
const eye = document.querySelector('.iris');
window.addEventListener('mousemove', (event) => {
const x = -(window.innerWidth / 2 - event.pageX) / 35;
const y = -(window.innerHeight / 2 - event.pageY) / 35;
eye.style.transform = `rotate(-45deg) translateY(${y}px) translateX(${x}px)`;
});
We will first make the constant variable “eye” in javascript, and then use that variable to access the document. We’ll use the window after setting the iris element in the queryselector attribute. AddEventListener: By adding the mouse event, we can make the iris track the user’s pointer as they move it around the screen.
10+ HTML CSS Projects For Beginners (Source Code)
Video Output Of Animated Eyes Follow Mouse Cursor Effect:
Final Output Animated Eyes Follow Mouse Cursor Effect
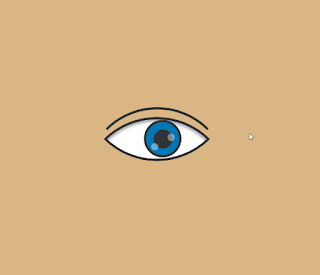
Now that we have completed our Animated Eyes Follow Mouse Cursor Effect. Hope you like the Animated Eyes Follow Mouse Cursor Effect. you can see the output video and project screenshots. See our other blogs and gain knowledge in front-end development.
Thank you!
In this post, we learn how to create Animated Eyes Follow Mouse Cursor Effect Using JavaScript. If we made a mistake or any confusion, please drop a comment to reply or help you learn easily.
Written by – Code With Random/Anki
Code by – Dm / Contact Us For Credit (Thanks)
Which code editor do you use for this Animated Eyes Follow Mouse Cursor coding?
I personally recommend using VS Code Studio, it’s straightforward and easy to use.
What is the purpose of custom cursor?
A customized cursor improves the document’s legibility and directs users’ attention to a particular section of the website.
