CSS Menu Hover Underline Effect
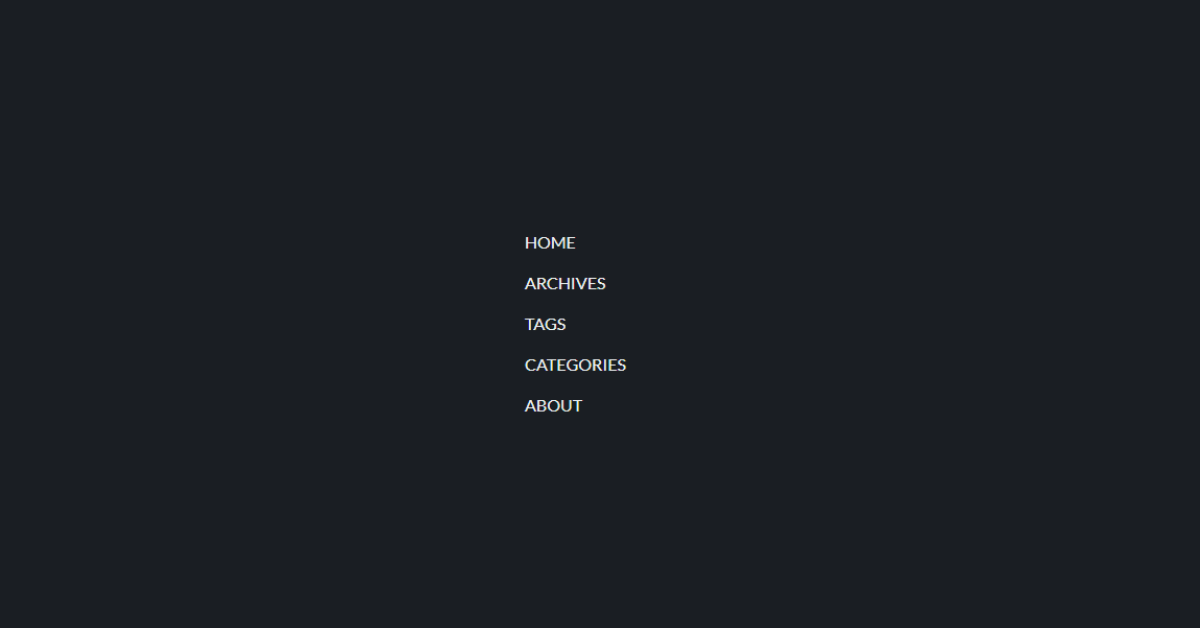
Hey Coders, In this tutorial, you will learn how to create an Underline Effect on Hover for Menu Items using CSS. This effect will display a Simple Line at the Bottom Of the Text. This project will purely use CSS to create the underline effect. No Javascript is used.
For this project we will have a list wherein there will be 5 items, when you will hover over any one of the items in the list, an underline will appear below the text. We will be creating 2 files – HTML and CSS files. CSS file will be linked in the head tag of the HTML file.
50+ HTML, CSS and JavaScript Projects With Source Code
Underline Hover Effect Css
Let us now start creating the effect.
Step 1: Adding basic HTML
Creating a basic structure to showcase the hover underline effect by creating a list using HTML – Hypertext Markup Language.
Here is the code for you to directly use it. The code will be explained below for you to understand how to create the Menu Hover Underline effect.
<!DOCTYPE html>
<html lang="en">
<head>
    <title>Document</title>
    <link rel="stylesheet" href="menuUnderline.css">
</head>
<body>
    <ul>
        <li><a href="#">home</a></li>
        <li><a href="#">archives</a></li>
        <li><a href="#">tags</a></li>
        <li><a href="#">categories</a></li>
        <li><a href="#">about</a></li>
      </ul>
</body>
</html>
Let us now understand the code:-
Ecommerce Website Using HTML, CSS, and JavaScript (Source Code)
- Inside the head tag we will link the CSS stylesheet to incorporate the styles into our basic structure.
- After linking the stylesheet we will now start creating the structure by creating a list inside the body of the html. The list will be made using a <ul> tag (unordered list). This will create bullets for the menu items as it will create an unordered list.
- To list the items inside the list we will use <li> tag (list items). To mention the list items we will use <a> tag (anchor tag), used to write links in html. As of now there is no reference link for the list items so we will put a # symbol.
Output:-
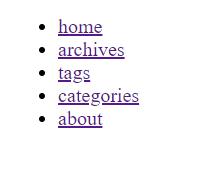
Step 2: Add CSS to create the Menu Hover Underline effect
Here is the code for you to directly use it.
@import url(https://fonts.googleapis.com/css?family=Lato);

body {
  display: flex;
  height: 100vh;
  justify-content: center;
  align-items: center;
  text-align: center;
  background: #1A1E23;
}

ul {
  display: flex;
  flex-direction: column;
  align-items: start;
  list-style-type: none;
}
li {
    padding: 6px 0;
}

a{
    position: relative;
    padding: 4px 0;
    font-family: Lato, sans-serif;
    color: #ecf0f1;
    text-decoration: none;
    text-transform: uppercase;
    transition: 0.5s;
    display: block;
}

a::after {
    position: absolute;
    content: "";
    top: 100%;
    left: 0;
    width: 100%;
    height: 3px;
    background: #3498db;
    transform: scaleX(0);
    transform-origin: right;
    transition: transform 0.5s;

}

a:hover {
    color: #95a5a6;
}

a:hover::after {
    transform: scaleX(1);
    transform-origin: left;
}
Let us now understand how we will style the CSS Menu hover underline effect:
- We will begin by importing stylesheet for font to be used in the webpage by using @import url(URL written here).
- Now start styling the body keeping the display flex and setting the following attributes with the values as follows to get the desire output : height: 100vh; justify-content: center; align-items: center; text-align: center; background: #1A1E23;
- The unordered list containing the menu items will be displayed with the following styles : display: flex; flex-direction: column; align-items: start; list-style-type: none;
- Now for the list items we will set the value for padding: 6px 0.
- The list items inside the list are written using the anchor tags and they will have these styles : position: relative; padding: 4px 0; font-family: Lato, sans-serif; color: #ecf0f1; text-decoration: none; text-transform: uppercase; transition: 0.5s; display: block;
- Now as we want the list items to show the underline effect when hovered upon them, we will give the after styling to the anchor tags : position: relative; padding: 4px 0; font-family: Lato, sans-serif; color: #ecf0f1; text-decoration: none; text-transform: uppercase; transition: 0.5s; display: block;
- When hovering over the menu items, we want this color to appear : color: #95a5a6; but you can select the color according to your choice as well.
- After hover we want to transform items and this will be done by using the selectors in CSS is used to add content after an element : a:hover::after . The transformation will be done by scale() – CSS function defines a transformation that resizes an element along the x-axis (horizontally). Now we want the transformation about origin which is the point around which a transformation is applied using transform-origin: left;
100+ HTML,CSS and JavaScript Projects With Source Code ( Beginners to Advanced)
Final Output Of CSS Menu Hover Underline Effect:-
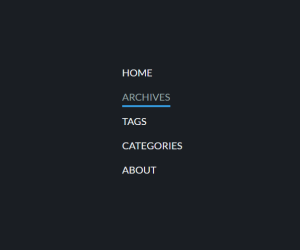
I Hope That This Article Was Helpful And You Understood The Whole Project. Now Let’s Take A Look At The Live Preview of Menu Hover Underline using CSS.
Now We Have Successfully Created a Menu Hover Underline effect using HTML and CSS. You Can Use This Project Directly By Copying It Into Your IDE. We Hope You Understood The Project, If You Have Any Doubts Feel Free To Comment!!
Happy Exploring And Learning !!
Follow: CodeWithRandom
Code By: alphardex
Written By: Cheshta Vohra
