How to Create a Calculator using HTML, CSS, and JavaScript?
Hey coders, Welcome to the Codewithrandom blog. In this tutorial, we will learn how to create a Calculator Using Html, Css, and JavaScript. Through this article, you will learn how to create a calculator with a step-by-step guide that will help us create a fully working calculator. We will be using CSS to style the elements in the calculator.
A calculator is used to perform basic mathematical operations like Addition, Subtraction, Multiplication, and Division.
There will be two sections in our Calculator –
- A screen to display the result.
- Keys to type in numbers and mathematical operators to calculate the result.
100+ HTML,CSS and JavaScript Projects With Source Code ( Beginners to Advanced)
Some features of the Calculator:
We will be developing a Calculator which will have the following features :
- The calculator will perform basic arithmetic operations like addition, subtraction, division, and multiplication.
- The calculator will display Infinity if we divide any number by zero.
- No result will be displayed in case of invalid expression. For example, 6-+7 will not display anything as a result.
Let Us Now Start Creating Our Simple Calculator Using HTML, CSS And Javascript. We Will Be Creating Three Files (HTML File, A CSS File, And JavaScript File).
Step 1: Adding basic HTML
Creating A Basic Structure Of Calculator Using HTML – Hypertext Markup Language.
Here Is The Code For You To Directly Use It. The Code Will Be Explained Below For You To Understand How To Create The Calculator :
<html>
<head>
    <link rel="stylesheet" href="calc.css">
</head>

<body>

    <div class="container">
        <form name="form">
        <div class="display">
            <input type="text" placeholder="0" name="displayResult" />
        </div>
            <div class="buttons">
              <div class="row">
                <input type="button" name="b7" value="7" onClick="calcNumbers(b7.value)">
                  <input type="button" name="b8" value="8" onClick="calcNumbers(b8.value)">
                  <input type="button" name="b9" value="9" onClick="calcNumbers(b9.value)">
                  <input type="button" name="addb" value="+" onClick="calcNumbers(addb.value)">
                </div>

                <div class="row">
                <input type="button" name="b4" value="4" onClick="calcNumbers(b4.value)">
                  <input type="button" name="b5" value="5" onClick="calcNumbers(b5.value)">
                  <input type="button" name="b6" value="6" onClick="calcNumbers(b6.value)">
                  <input type="button" name="subb" value="-" onClick="calcNumbers(subb.value)">
                </div>

                <div class="row">
                <input type="button" name="b1" value="1" onClick="calcNumbers(b1.value)">
                  <input type="button" name="b2" value="2" onClick="calcNumbers(b2.value)">
                  <input type="button" name="b3" value="3" onClick="calcNumbers(b3.value)">
                  <input type="button" name="mulb" value="*" onClick="calcNumbers(mulb.value)">
                </div>

                <div class="row">
                <input type="button" name="b0" value="0" onClick="calcNumbers(b0.value)">
                  <input type="button" name="potb" value="." onClick="calcNumbers(potb.value)">
                  <input type="button" name="divb" value="/" onClick="calcNumbers(divb.value)">
                  <input type="button" class="red" value="=" onClick="displayResult.value=eval(displayResult.value)">
                </div>
            </div>

        </form>
    </div>
    <script src="calc.js"></script>
</body>

</html>
Let us now understand the code:
- Starting with Inside of the Head Section, we have linked our CSS stylesheet. You can name the stylesheet according to you.
- Now let’s start creating the basic structure of calculator inside the <Body>. Starting off by creating a division using the div tag with class=”container”.
- A form will now be created for the so that we can use the input type property of the form to display the result of our calculation. Inside it create a div with class=”display” and then using the input type as text we will create the space to display the calculation and the result.
- Now we will create another div with class=”buttons” which will contain the buttons with numbers and mathematical operators.
- 4 separate div will be created to display buttons in the calculator in 4 rows. Using input type as button the numbers and operators buttons will be created.
- At the end of the body we will link our JavaScript file using the script tag as follows: <script src=”calc.js”></script>
Create Portfolio Website Using HTML and CSS (Source Code)
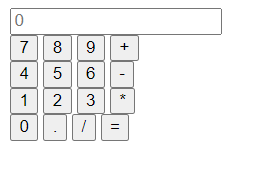
Let us now take a look at the html output of our Simple Calculator:

Step 2: Add CSS to style the basic structure of Calculator
Here is the code for you to directly use it in your IDE.
body, html {
    background: #ECEDEF;
    margin: 0;
    padding: 0;
}

.container {
    position: fixed;
    top: 50%;
    left: 50%;
    transform: translate(-50%, -50%);
    background: #fff;
    box-shadow: 0 4px 8px 0 rgba(0,0,0,0.2), 0 6px 20px 0 rgba(0,0,0,0.2);
    border-radius: 14px;
    padding-bottom: 20px;
    width: 320px;

}
.display {
    width: 100%;
    height: 60px;
    padding: 40px 0;
    background: #FF0509;
    border-top-left-radius: 14px;
    border-top-right-radius: 14px;
}
.buttons {
    padding: 20px 20px 0 20px;
}
.row {
    width: 280px;
    float: left;
}
input[type=button] {
    width: 60px;
    height: 60px;
    float: left;
    padding: 0;
    margin: 5px;
    box-sizing: border-box;
    background: #ecedef;
    border: none;
    font-size: 30px;
    line-height: 30px;
    border-radius: 50%;
    font-weight: 700;
    color: #5E5858;
    cursor: pointer;

}
input[type=text] {
    width: 270px;
    height: 60px;
    float: left;
    padding: 0;
    box-sizing: border-box;
    border: none;
    background: none;
    color: #ffffff;
    text-align: right;
    font-weight: 700;
    font-size: 60px;
    line-height: 60px;
    margin: 0 25px;

}
.red {
    background: #FF0509 !important;
    color: #ffffff !important;

}
Let Us Now Understand How We Will Style our Simple Calculator:
- We will Start By Styling The Basic structure of Calculator By targeting the body of the calculator and assign the attributes with these values : background: #ECEDEF; margin: 0; padding: 0;
- For styling the html element with class container, targeting it by CSS dot selector position: fixed; top: 50%; left: 50%; transform: translate(-50%, -50%); background: #fff; box-shadow: 0 4px 8px 0 rgba(0,0,0,0.2), 0 6px 20px 0 rgba(0,0,0,0.2); border-radius: 14px; padding-bottom: 20px; width: 320px;
- To style the html elements which have the display class, targeting the class using the dot selector, we will use the following attributes with the corresponding values – width: 100%; height: 60px; padding: 40px 0; background: #FF0509; border-top-left-radius: 14px; border-top-right-radius: 14px;
- Now for the buttons, targeting them by button class, giving padding css property – padding: 20px 20px 0 20px;
- For html element with the class row – width: 280px; float: left;
- The input type for the button element we will style it to get the desired output, we will use these CSS properties and values -width: 60px; height: 60px; float: left; padding: 0; margin: 5px; box-sizing: border-box; background: #ecedef; border: none; font-size: 30px; line-height: 30px; border-radius: 50%; font-weight: 700; color: #5E5858; cursor: pointer;
- The input type for the text value, we will style it to get the desired output, therefore we will use these CSS properties and values –width: 270px; height: 60px; float: left; padding: 0; box-sizing: border-box; border: none; background: none; color: #ffffff; text-align: right; font-weight: 700; font-size: 60px; line-height: 60px; margin: 0 25px;
- Finally, the html element with the class red will havebackground: #FF0509 !important; and color: #ffffff !important;
Step 3: Add Javascript to give logic the basic structure of Calculator to display the result
function calcNumbers(result){
    form.displayResult.value=form.displayResult.value+result;

}
- We will create a function calcNumbers() using the function keyword and giving result as a parameter.
- The function definition will display the result og the operation performed in the calculator at the desired place.
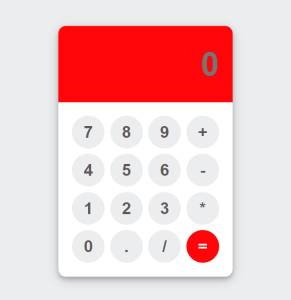
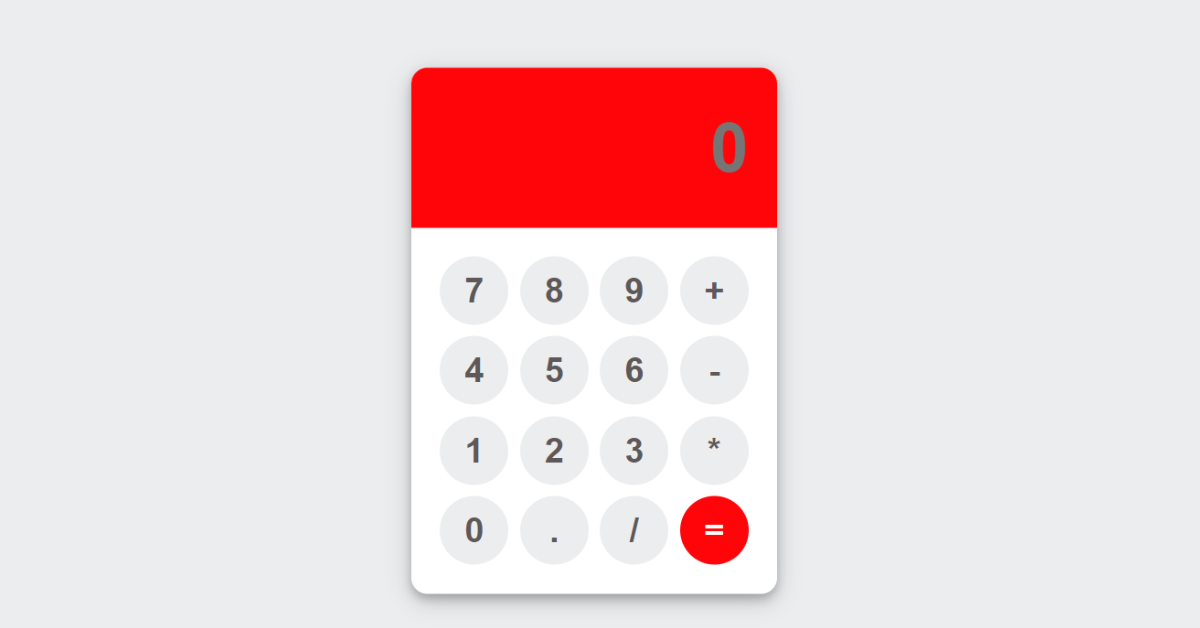
Final Output Of Calculator Using Html,Css and JavaScript

I hope that this article was helpful and you understood the whole project. Now let’s take a look at the Live Preview of the simple Calculator created using mostly HTML, CSS, and Javascript-
100+ HTML,CSS and JavaScript Projects With Source Code ( Beginners to Advanced)
Now we have successfully created our Simple Calculator using HTML, CSS & JavaScript. You can use this project directly by copying it into your IDE. We hope you understood the project, If you have any doubts feel free to comment!!
Happy exploring and learning !!
Follow: codeWithRandom
Code by: Web Dev Trick
Written by: Cheshta Vohra


