Create Copy Text to the Clipboard Using JavaScript
Hello everyone. Welcome to today’s tutorial at Codewithrandom. In this article, We’ll Learn How To Create Copy text From An Input Field To a Clipboard Using Javascript.
Sometimes you want to include the copy feature while creating advanced web pages and applications. Instead of selecting the text and pressing a few keys on the keyboard, this enables your users to copy text by clicking a button or icon.
50+ HTML, CSS and JavaScript Projects With Source Code
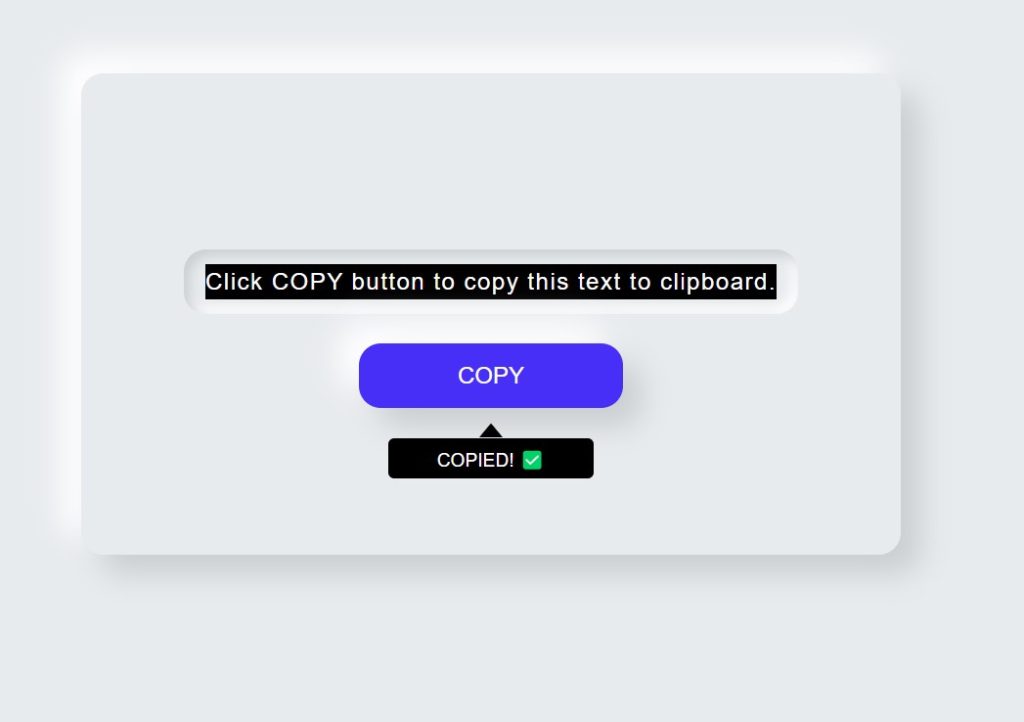
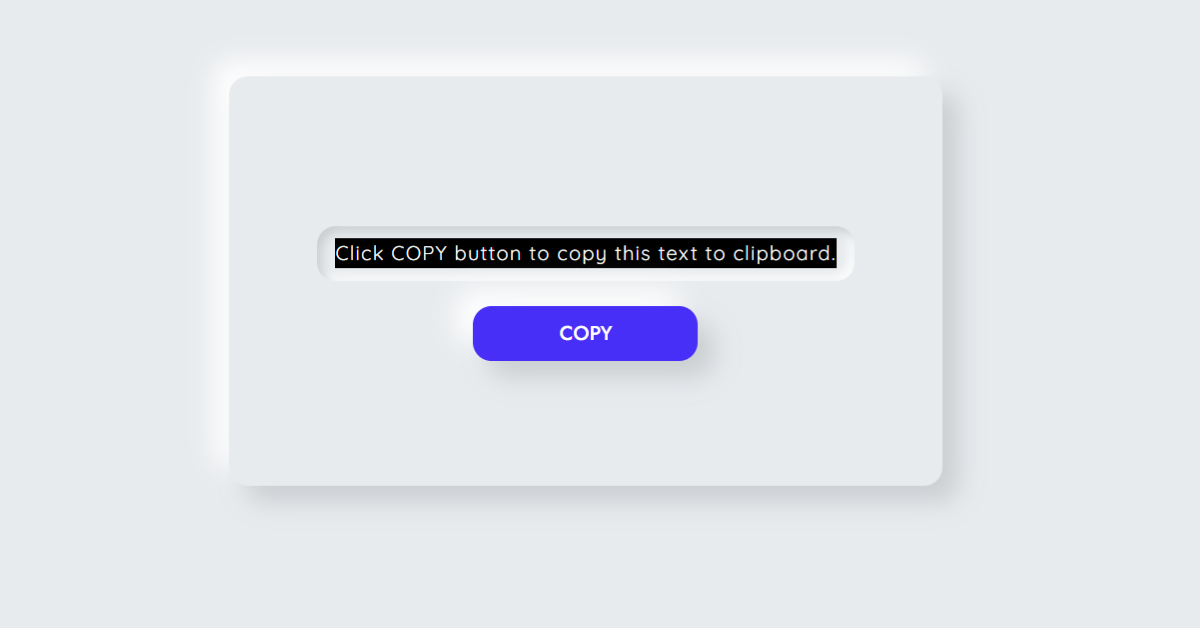
I hope you have a general idea of what the project entails. In our article, we will go over this project step by step.
Step1: Adding some basic HTML Code
HTML stands for HyperText Markup Language. This is a markup language. Its main job is to give our project structure. We will provide our project structure by utilising this markup language. So let’s look at our HTML code.
<html>
<head>
    <title>Copy to clipboard</title>
    <link rel="stylesheet" type="text/css" href="style.css">
</head>
<body>
    <div id="container">
        <span id="text">
          Click COPY button to copy this text to clipboard.
        </span>
        <button id="copy" tooltip="Copy to clipboard">Copy</button>
      </div>
    <script src="index.js"></script>
</body>
</html>
Before beginning to add structure to our copy to clipboard, We need to update some links. Because we used two separate files for our HTML and CSS in this project, we need to connect them all.To do this, please include the links to our CSS.
How To Create OTP Input Field Using HTML , CSS & Javascript
<link rel="stylesheet" href="style.css">
Now let’s Add the structure for our Copy button.
In this project we have used 3 most basic element of HTML to add structure for our Copy to clipboard button .
- The div tag will be used to create a container for our copy button.
- We’re going to add some text inside of our container right now using the span tag, which we’ll copy afterwards with javascript.
- We will now create a copy button by using the <button> tag.
27+ Free Resume Templates Using HTML And CSS
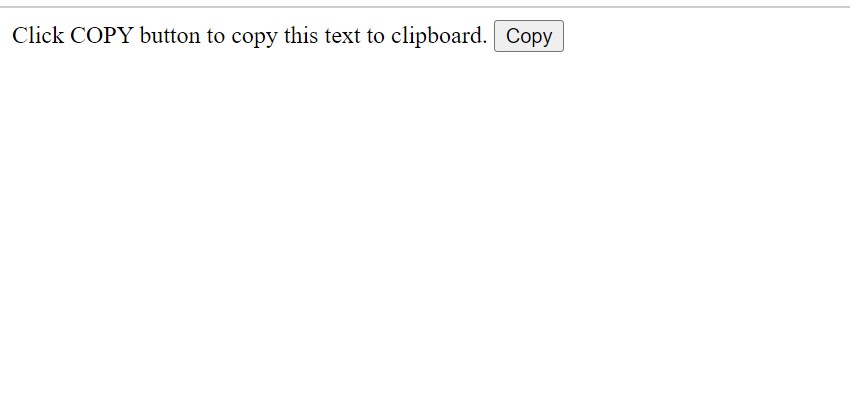
We don’t require anything else to build the structure for our copy button. Now that we are using CSS, we will style our copy to clipboard button. But let’s look at our structure first.
Output:
Step2: Adding CSS Code
Cascading Style Sheets (CSS) is a markup language for describing the presentation of a document written in HTML or XML. CSS, like HTML and JavaScript, is a key component of the World Wide Web.
Now we will look at our CSS code.
html,
body {
  width: 100%;
  height: 100%;
  font-size: 16px;
  font-family: "Quicksand", sans-serif;
  font-weight: 400;
  margin: 0;
  padding: 0;
  display: flex;
  flex-direction: column;
  justify-content: center;
  align-items: center;
  color: #fff;
  background-color: #e8ebee;
}
::selection {
  background-color: #000;
  color: white;
}
#container {
  display: flex;
  box-sizing: border-box;
  flex-direction: column;
  justify-content: center;
  align-items: center;
  padding: 100px 50px;
  margin: 30px;
  box-shadow: 13px 13px 20px #caced1, -13px -13px 20px #fff;
  border-radius: 15px;
}
#text {
  box-sizing: border-box;
  background-color: #e8ebee;
  color: #000;
  border-radius: 15px;
  padding: 10px 15px;
  margin: 20px;
  display: flex;
  justify-content: center;
  align-items: center;
  text-align: center;
  font-family: "Quicksand", sans-serif;
  font-size: 1rem;
  font-weight: 300;
  letter-spacing: 1px;
  line-height: 1.5;
  box-shadow: inset 4px 4px 8px #caced1, inset -4px -4px 8px #fff;
}
#copy {
  position: relative;
  box-sizing: border-box;
  background-color: #482ff7;
  color: #fff;
  width: 180px;
  min-height: 44px;
  font-size: 1rem;
  font-family: "Jost", sans-serif;
  font-weight: 500;
  text-transform: uppercase;
  padding: 5px;
  border: 0;
  border-radius: 15px;
  outline: none;
  cursor: pointer;
  user-select: none;
  box-shadow: 13px 13px 20px #caced1, -13px -13px 20px #fff;
}
#copy:before {
  content: "";
  width: 16px;
  height: 16px;
  bottom: -20px;
  left: 82px;
  clip-path: polygon(50% 40%, 0% 100%, 100% 100%);
}
#copy:after {
  content: attr(tooltip);
  width: 140px;
  bottom: -48px;
  left: 20px;
  padding: 5px;
  border-radius: 4px;
  font-size: 0.8rem;
}
#copy:before,
#copy:after {
  opacity: 0;
  pointer-events: none;
  position: absolute;
  box-sizing: border-box;
  background-color: #000;
  color: #fff;
  transform: translateY(-10px);
  transition: all 300ms ease;
}
#copy:hover:before,
#copy:hover:after {
  opacity: 1;
  transform: translateY(0);
}
After we’ve added the CSS code, we’ll go over it step by step. To save time, you can simply copy this code and paste it into your IDE. Let us now examine our code step by step.
We will be adding some basic styling to our copy to clipboard, but you guys can try new styling and share your code in the comments, which will help other people to think out of the box. We will add their own styling.
Portfolio Website using HTML and CSS (Source Code)
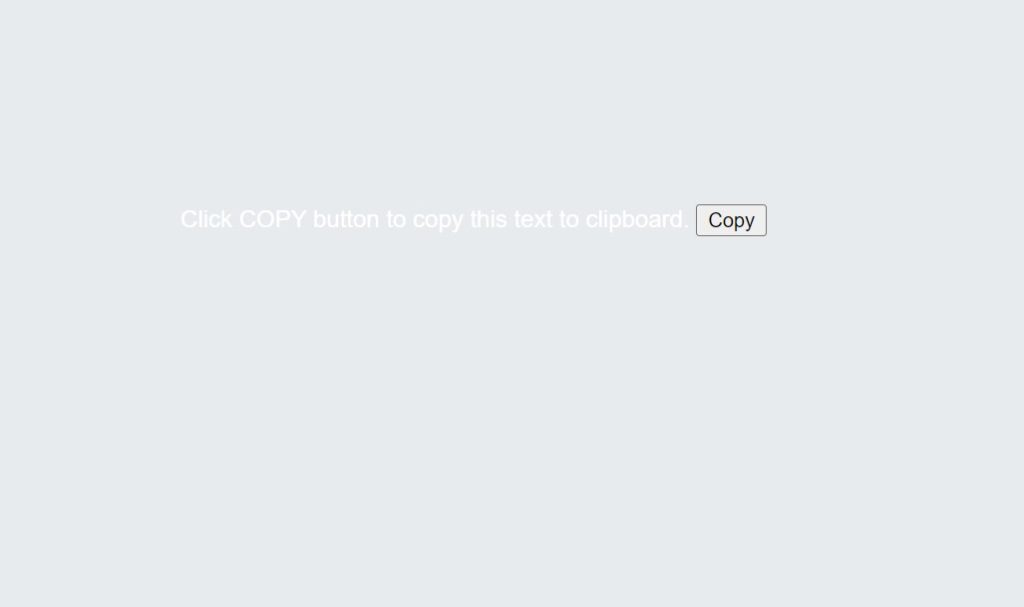
Step1: We will style our body by applying some styling using the body tag selector. Both the height and width are set to 100%. We will use the font-family property to set the font family to “Quicksand” with the font-size attribute set to 16px. The display is set to “flex,” the content will be justified to the centre using the justify-content property, and the background colour will be set to “light grey” using the background-color property.
html,
body {
  width: 100%;
  height: 100%;
  font-size: 16px;
  font-family: "Quicksand", sans-serif;
  font-weight: 400;
  margin: 0;
  padding: 0;
  display: flex;
  flex-direction: column;
  justify-content: center;
  align-items: center;
  color: #fff;
  background-color: #e8ebee;
}
::selection {
  background-color: #000;
  color: white;
}
Ecommerce Website Using HTML, CSS, and JavaScript (Source Code)
Step2: Using the id selector (#container), we will now add styling to our container. We’ll use the box-sizing property to set the box’s size to the border box and the display property to set the display to flex. Using the align-item property, we will centre the object. For a nuemorphism effect, we also applied some box shadow to our container.
#container {
  display: flex;
  box-sizing: border-box;
  flex-direction: column;
  justify-content: center;
  align-items: center;
  padding: 100px 50px;
  margin: 30px;
  box-shadow: 13px 13px 20px #caced1, -13px -13px 20px #fff;
  border-radius: 15px;
}
Step3: The text and button will now get style. Our text will be styled using the id selector (#text). We will use the box-sizing property to set the font colour to black, the font size to 1 rem, and the space between letters to 1.5 while using the border-box as the box size.
The button’s position is now set to “relative” and the background and font colours are now set to “blue” and “white,” respectively, using the id selector (#copy). The minimum-height property will be used to add a minimum height of 44px to the button’s 180px width.
ADVERTISEMENT
Weather App Using Html,Css And JavaScript
ADVERTISEMENT
#text {
  box-sizing: border-box;
  background-color: #e8ebee;
  color: #000;
  border-radius: 15px;
  padding: 10px 15px;
  margin: 20px;
  display: flex;
  justify-content: center;
  align-items: center;
  text-align: center;
  font-family: "Quicksand", sans-serif;
  font-size: 1rem;
  font-weight: 300;
  letter-spacing: 1px;
  line-height: 1.5;
  box-shadow: inset 4px 4px 8px #caced1, inset -4px -4px 8px #fff;
}
#copy {
  position: relative;
  box-sizing: border-box;
  background-color: #482ff7;
  color: #fff;
  width: 180px;
  min-height: 44px;
  font-size: 1rem;
  font-family: "Jost", sans-serif;
  font-weight: 500;
  text-transform: uppercase;
  padding: 5px;
  border: 0;
  border-radius: 15px;
  outline: none;
  cursor: pointer;
  user-select: none;
  box-shadow: 13px 13px 20px #caced1, -13px -13px 20px #fff;
}
#copy:before {
  content: "";
  width: 16px;
  height: 16px;
  bottom: -20px;
  left: 82px;
  clip-path: polygon(50% 40%, 0% 100%, 100% 100%);
}
#copy:after {
  content: attr(tooltip);
  width: 140px;
  bottom: -48px;
  left: 20px;
  padding: 5px;
  border-radius: 4px;
  font-size: 0.8rem;
}
#copy:before,
#copy:after {
  opacity: 0;
  pointer-events: none;
  position: absolute;
  box-sizing: border-box;
  background-color: #000;
  color: #fff;
  transform: translateY(-10px);
  transition: all 300ms ease;
}
#copy:hover:before,
#copy:hover:after {
  opacity: 1;
  transform: translateY(0);
}
Step3: JavaScript Code
const textElement = document.getElementById("text");
const copyButton = document.getElementById("copy");

const copyText = (e) => {
  window.getSelection().selectAllChildren(textElement);
  document.execCommand("copy");
  e.target.setAttribute("tooltip", "Copied! ✅");
};

const resetTooltip = (e) => {
  e.target.setAttribute("tooltip", "Copy to clipboard");
};

copyButton.addEventListener("click", (e) => copyText(e));
copyButton.addEventListener("mouseover", (e) => resetTooltip(e));
- The document.getElementById() method will be used to first choose our HTML elements, and we’ll then store their information in various variables.
- Now we will create a constant variable and using the object event handler inside it we will select all the text element using the .selectAllChildren() method.
- Now using the document.execCommand we will copy the text.
- And using the e.target we will set the attribute to the copied.
100+ JavaScript Projects With Source Code ( Beginners to Advanced)
ADVERTISEMENT
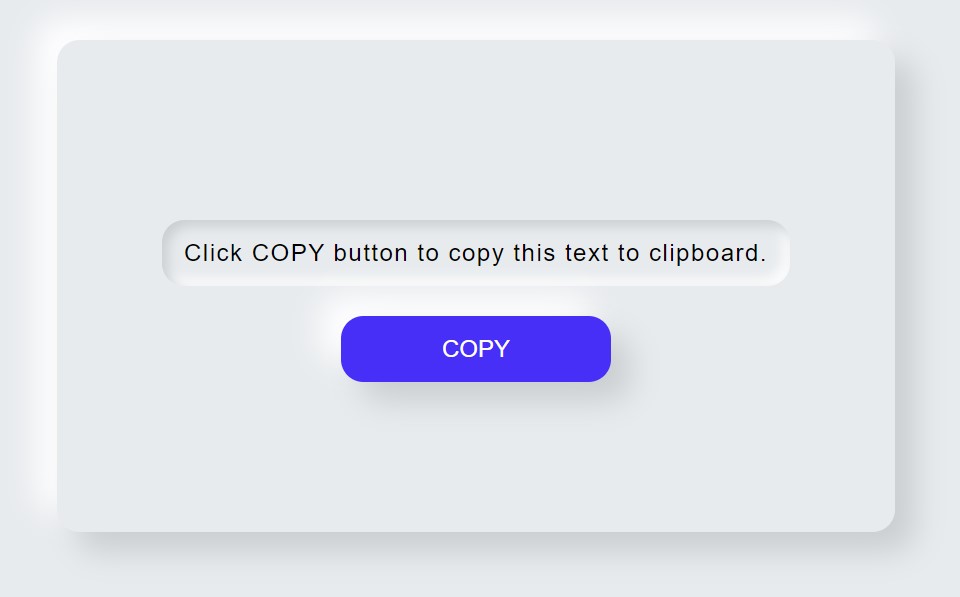
Now we’ve completed our copy to clipboard button using JavaScript. I hope you understood the whole project. Let’s take a look at our Live Preview.
ADVERTISEMENT
Final Output Of Copy Text to the Clipboard Using JavaScript:
Codepen Preview Of Copy to Clipboard Button:
Now We have Successfully created our Copy to Clipboard button HTML, CSS & JavaScript You can use this project directly by copying into your IDE. WE hope you understood the project , If you any doubt feel free to comment!!
ADVERTISEMENT
We have also created an article where you can find 10+ front-end project . if you intreseted you can checkout the below link.
Front-End Projcets
If you find out this Blog helpful, then make sure to search code with random on google for Front End Projects with Source codes and make sure to Follow the Code with Random Instagram page.
What is Clipboard?
The clipboard, also referred to as the pasteboard, is a memory location on a computer, smartphone, or tablet where text or other data that has been briefly cut or copied is kept. Once something has been copied to the clipboard, it can be pasted wherever it is required as often as necessary. Until you cut or duplicate something else, or until you log out of the computer, the clipboard retains its contents.
What is the purpose of copy to clip board button?
Any text on a website can be copied using a button clip and then pasted numerous times with the aid of a copy to clipboard button, which makes it easier for users to use.
