Create a Stopwatch In JavaScript
Hello Coder! Welcome to the Codewithrandom Blog. In this article, we create Stopwatch In JavaScript, Html, and Css.
Stopwatch is a good standalone project as well. A stopwatch is basically used on many websites to track the time of a user who’s surfing on the site. It’s a JavaScript Intermediate project for the Front-End Developer.
100+ HTML,CSS and JavaScript Projects With Source Code ( Beginners to Advanced)
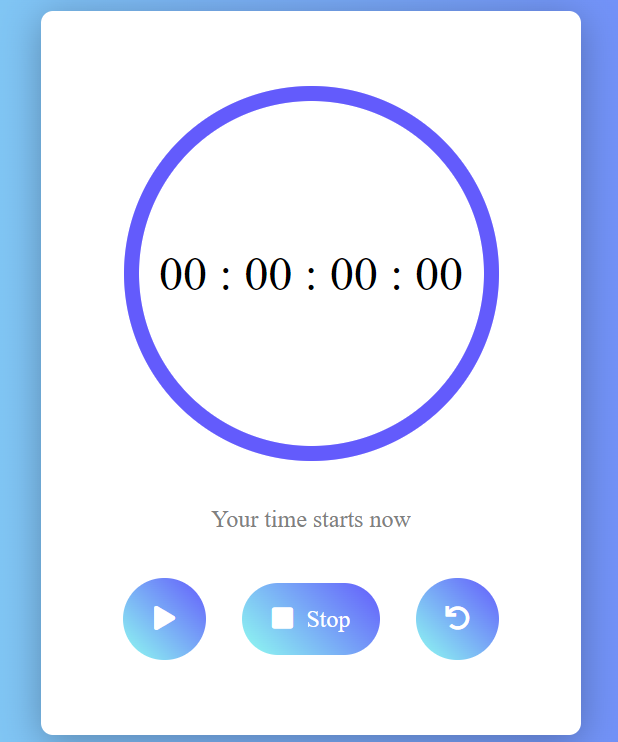
A stopwatch watch is similar to a watch that starts at zero and tells us the time. Most people use a stopwatch during competitions or for personal use to keep track of how long certain tasks take.
As you can see on the sample graphic for your project [Stopwatch in HTML, CSS, and JavaScript], Stopwatch typically has three buttons. The timer is set off by pressing one button, stopped by another, and then restarted by the third. We can see the time to the hour with the aid of our stopwatch.
The stopwatch we are creating is similar to a regular stopwatch that is used to keep track of time. Albeit, it is unique in its ability to track hours, minutes, seconds, and milliseconds.
Ecommerce Website Using HTML, CSS, and JavaScript (Source Code)
Prerequisites for this project:
Before we start the coding you must have basic knowledge of HTML5, CSS3 & little bit of JS. I’ll explain the project in a manner that makes it easy to follow even for complete beginners with a basic understanding of the listed technologies.
HTML Code for Stopwatch:-
<head>
    <meta charset="UTF-8">
    <title>Stopwatch by imrohitsoni</title>
    <link rel="stylesheet" href="https://pro.fontawesome.com/releases/v5.10.0/css/all.css" integrity="sha384-AYmEC3Yw5cVb3ZcuHtOA93w35dYTsvhLPVnYs9eStHfGJvOvKxVfELGroGkvsg+p" crossorigin="anonymous"/>
    <script src="https://cdnjs.cloudflare.com/ajax/libs/jquery/3.5.1/jquery.min.js" ></script>

</head>
<body>
    <div class = "wrap">
        <div id="timer">

            <svg width="260" height="260">
                <circle class="defaultCircle" cx="125" cy="125" r="120" stroke="#635bfc" stroke-width="10" fill="none" stroke-linecap="round" />
                <circle class="animateCircle" cx="125" cy="125" r="120" stroke="#635bfc" stroke-width="10" fill="none" stroke-linecap="round" />

            </svg>

            <span id="hours">00</span> :
            <span id="minutes">00</span> :
            <span id="seconds">00</span> :
            <span id="milliseconds">00</span>
        </div>
        <p>Your time starts now</p>
            <div class="option">
                <a id="play" onclick="playFunc();" href="javascript:void(0)"><i class="fa fa-play"></i></a>
                <a id="stop" onclick="stopFunc();" href="javascript:void(0)"><i class="fa fa-stop"></i> Stop</a>
                <a id="reset" onclick="resetFunc();" href="javascript:void(0)"><i class="fa fa-undo"></i></a>
            </div>
        </div>
</body>
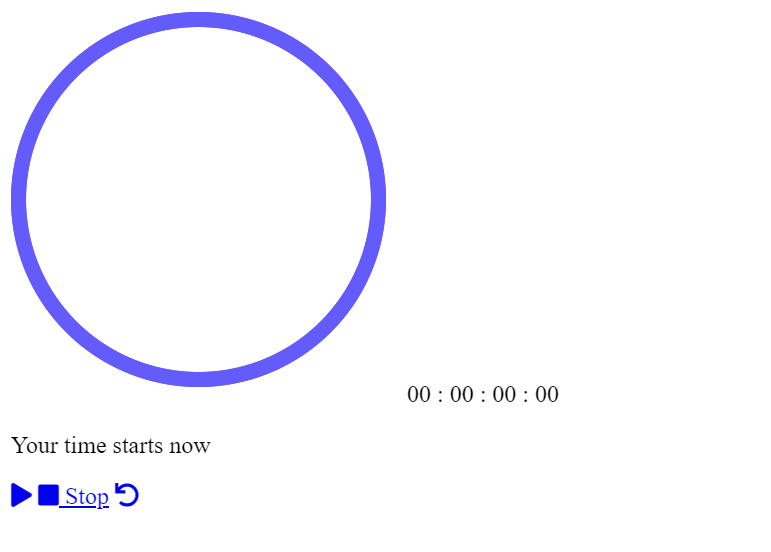
In this code, we divided the class into its own wrap and gave it the id “timer” before creating a stopwatch-like design using circles in the svg tag. Currently employing the span tag with the id hours, minutes, seconds, and milliseconds We will display a text paragraph to start the time using the p> tag, then we will design the controls for our stopwatch using the div tag with the class option. The play, pause, and reset icons will be added.
Restaurant Website Using HTML And CSS With Source Code
Then we created a span id in which we mentioned hours, minutes, seconds & milliseconds. Now let’s design the page using CSS.
HTML Code Output:
CSS Code for Stopwatch:-
* {
    margin: 0;
    padding: 0;
    box-sizing: border-box;
}

body {
    font-family: Roboto;
    font-weight: 300;
    background: linear-gradient(to left, #635bfc, #8ffcf0);
    display: flex;
    justify-content: center;
    align-items: center;
    height: 100vh;
}

.container {
    width: 800px;
    margin: 150px auto;
    color: #ffffff;
    text-align: centre;
}

.wrap {
    display: inline-block;
    min-width: 360px;
    min-height: 400px;
    padding: 50px 15px;
    background-color: #fff;
    box-shadow: 0 5px 25px #0000004a;
    border-radius: 8px;
    text-align: center;
}

#timer {
    position: relative;
    width: 250px;
    height: 250px;
    line-height: 250px;
    border-radius: 50%;
    font-size: 32px;
    margin: 0 auto;
    background-color: #fff;
}

p {
    font-weight: 400;
    color: gray;
    padding: 30px 0;
}

.option a {
    display: inline-block;
    margin: 0 10px;
    text-decoration: none;
}

#play, #reset {
    width: 55px;
    height: 55px;
    line-height: 55px;
    border-radius: 50px;
    color: #fff;
    background: linear-gradient(45deg, #8ffcf0, #635bfc);
    box-shadow: 0 8px 25px #bf5fc045, 0 8px 25px, #ff00ec50;
    transition: all ease 0.1s;
}

#stop {
    padding: 15px 20px;
    border-radius: 50px;
    color: #fff;
    font-weight: 400;
    background: linear-gradient(45deg, #8ffcf0, #635bfc);
    box-shadow: all ease 0.1s;
}

#play:active, #reset:active, #stop:active {
    transform: scale(0.95);
}

#stop .fa {
    margin-right: 5px;
}

#fa-play {
    padding-left: 5px;
}

.pause .fa-play,
.fa-pause {
    display: none;
}

.pause .fa-pause {
    display: inline-block;
}

/* Circle Animation */
#timer svg {
    position:absolute;
    left: 0;
}

.defaultCircle {
    opacity: 0.3;
}

#animateCircle.addAnimation {
    stroke-dasharray: 770;
    stroke-dashoffset: -770;
    animation: animateCircle 60s linear infinite;
    animation-play-state: paused;
}

@keyframes animateCircle {
    from {
        stroke-dashoffset: 0;
    }
}Step1:We will set the padding and margin to zero using the universal selector, then we will use the box-sizing property to set the box-sizing to border-box.
The font family will now be set to Roboto using the body tag selector, along with the font-weight being set to 300. The display property will also be set to Flex, and the content will be justified to the center using the Justify Content property. It is set to “100 vh” for the body’s height.
Create A Travel/Tourism Website Using HTML and CSS
* {
    margin: 0;
    padding: 0;
    box-sizing: border-box;
}

body {
    font-family: Roboto;
    font-weight: 300;
    background: linear-gradient(to left, #635bfc, #8ffcf0);
    display: flex;
    justify-content: center;
    align-items: center;
    height: 100vh;
}
Step2:Now using the class selector (.container) we will set the width as “800px” and using the margin property we will set the margin as 150px and using the color property we will set the font color as “white” and using the text align property we will align the container to the center.
Now using the id selector timer we will add the styling to our timer using the position property we will set the position as “relative” and using the width and height property we will set the width and height of our timer as 250px respectively.Now using the font size property we will set the font size as “32px”.
.container {
    width: 800px;
    margin: 150px auto;
    color: #ffffff;
    text-align: centre;
}

.wrap {
    display: inline-block;
    min-width: 360px;
    min-height: 400px;
    padding: 50px 15px;
    background-color: #fff;
    box-shadow: 0 5px 25px #0000004a;
    border-radius: 8px;
    text-align: center;
}

#timer {
    position: relative;
    width: 250px;
    height: 250px;
    line-height: 250px;
    border-radius: 50%;
    font-size: 32px;
    margin: 0 auto;
    background-color: #fff;
}Step3:The font weight will now be set to “400px using the paragraph tag, and the font colour will be set to grey using the colour property. The display will then be set to “inline-block” using the class selector (.option) class selector, and the text decoration will be set to “none” using the text decoration property.
Create Resume/CV Website Using HTML and CSS (Source Code)
We will now finish adding our stopwatch control’s fundamental style and animation. To give our icon an interactive appearance, we will add some padding, a border radius, and additional font size.
#stop {
    padding: 15px 20px;
    border-radius: 50px;
    color: #fff;
    font-weight: 400;
    background: linear-gradient(45deg, #8ffcf0, #635bfc);
    box-shadow: all ease 0.1s;
}

#play:active, #reset:active, #stop:active {
    transform: scale(0.95);
}

#stop .fa {
    margin-right: 5px;
}

#fa-play {
    padding-left: 5px;
}

.pause .fa-play,
.fa-pause {
    display: none;
}

.pause .fa-pause {
    display: inline-block;
}

/* Circle Animation */
#timer svg {
    position:absolute;
    left: 0;
}

.defaultCircle {
    opacity: 0.3;
}

#animateCircle.addAnimation {
    stroke-dasharray: 770;
    stroke-dashoffset: -770;
    animation: animateCircle 60s linear infinite;
    animation-play-state: paused;
}

@keyframes animateCircle {
    from {
        stroke-dashoffset: 0;
    }
}
In the styling part, we designed the body to make it creative & attractive as we have styled the circles which will be the shape of our stopwatch as well as the buttons now we have created the structure we styled the pre-defined tags now we have to make it responsive to do it we have to code in Javascript.
50+ HTML, CSS and JavaScript Projects With Source Code
HTML + CSS Code Output:-

Stopwatch in JavaScript Code:-
window.onload = function() {

    var milliseconds = 00;
    var seconds = 00;
    var minutes = 00;
    var hours = 00;

    var appendMilliseconds = document.getElementById("milliseconds");
    var appendSeconds = document.getElementById("seconds");
    var appendMinutes = document.getElementById("minutes");
    var appendHours = document.getElementById("hours");

    var buttonStart = this.document.getElementById("play");
    var buttonStop = this.document.getElementById("stop");
    var buttonReset = this.document.getElementById("reset");

    var Interval;

    // Function for starting timer

    function startTimer() {
        milliseconds++;

        // Milliseconds Counter

        if (milliseconds < 9) {
            appendMilliseconds.innerHTML = "0" + milliseconds;


        }
        if (milliseconds > 9) {
            appendMilliseconds.innerHTML = milliseconds;
        }
        if (milliseconds > 99) {
            seconds++;
            appendSeconds.innerHTML = "0" + seconds;
            milliseconds = 0;
            appendMilliseconds.innerHTML = "0" + milliseconds;
        }
        if (seconds > 9) {
            appendSeconds.innerHTML = seconds;
        }

        //Second Counter

        if (seconds > 59) {
            minutes++;
            appendMinutes.innerHTML = "0" + minutes;
            seconds = 0;
            appendSeconds.innerHTML = "0" + seconds;
        }
        if (minutes > 9) {
            appendMinutes.innerHTML = minutes;
        }

        //Minutes Counter
        if (minutes > 59) {
            hours++;
            appendHours.innerHTML = "0" + hours;
            minutes = 0;
            appendminutes.innerHTML = "0" + minutes;
        }
        if (hours > 9) {
            appendHours.innerHTML = hours;
        }
    }

    // Button to start timer
    buttonStart.onclick = function() {
        clearInterval(Interval);
        Interval = setInterval(startTimer, 10);
        $("#animateCircle").addClass("addAnimation");
        $("#animateCircle.addAnimation").css("animation-play-state", "running")
    }

    // Button to stop timer
    buttonStop.onclick = function() {
        clearInterval(Interval);
        $("#animateCircle").css("animation-play-state", "paused")

    }

    // Button to reset timer
    buttonReset.onclick = function() {
        clearInterval(Interval);
        milliseconds = "00";
        seconds = "00";
        minutes = "00";
        hours = "00";
        appendMilliseconds.innerHTML = milliseconds;
        appendSeconds.innerHTML = seconds;
        appendMinutes.innerHTML = minutes;
        appendHours.innerHTML = hours;
    }


}
The code is the last and most crucial component of the project. As you can see, we established numerous if-statements in the onload function() that we developed. Additionally, we defined the onclick function for the start, stop, and pause buttons. The variables for hours, minutes, seconds, and milliseconds will be created.
Now we will choose every HTML element using document.getElementById. After that, we’ll use the timer function to add a click event listener to our button, which will cause the set timer method to begin counting from milliseconds and grow every second as soon as the user presses the button. We will show the timer inside our stopwatch using the inside text.
Gym Website Using HTML and CSS (Source Code)
Let’s see the output of this project.
Final Output Of Stopwatch In JavaScript :-
Live Output Of Stopwatch:
We have Successfully created our Stopwatch using HTML5, CSS3 & JS (Source Code) | How to Create a Stopwatch in JavaScript You can use this project for your personal needs and the respective lines of code are given with the code pen link mentioned below.
If you find out this Blog helpful, then make sure to search code with random on google for Front End Projects with Source codes and make sure to Follow the Code with Random Instagram page.
WRITTEN BY – Harsh Sawant
Code BY – Rohit Kumar Soni(@imrohitsoni)
What is a Stopwatch?
A web-based program called a stopwatch is used to keep track of the duration. The total time is calculated using a stopwatch, which typically measures time in hours, minutes, seconds, and microseconds.
ADVERTISEMENT
What is the purpose of stopwatch?
To determine how long an event will last, you can hit the buttons on a stopwatch at its beginning and end.
ADVERTISEMENT
