CSS Range Slider | Html range slider with labels
Welcome🎉 to Code With Random blog. In this blog, we learn how we create a CSS Range Slider. We use HTML, Css, and javascript for this CSS Range Slider. Hope you enjoy our blog so let’s start with a basic HTML structure for a CSS Range Slider.
HTML code
 <!-- currently works properly in Chrome only, JS fallback required for IE/FF -->
 <h1>CSS Range Slider</h1>
 <h3>JS used for color-change and % label</h3>
 <input type="range" value="0">
 <div id="h4-container"><div id="h4-subcontainer"><h4>0<span></span></h4></div></div>
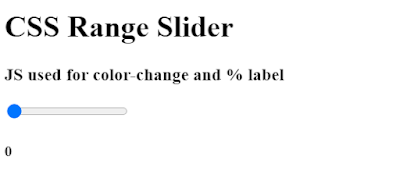
There is all HTML code for the CSS Range Slider. Now, you can see output without
 html {
       height: 100%;
       display: flex;
       align-items: center;
       justify-content: center;
       font-family: 'Work Sans', sans-serif;
       text-align: center;
 }
  html h1, html h2, html h3, html h4, html h5, html h6 {
       margin: 0;
 }
  html h1 {
       color: #333;
       font-weight: 500;
 }
  html h3 {
       color: #aaa;
       font-weight: 500;
 }
  html h4 {
       color: #999;
       font-weight: 500;
 }
  html h4:after {
       content: "%";
       padding-left: 1px;
 }
  html input[type="range"] {
       outline: 0;
       border: 0;
       border-radius: 500px;
       width: 400px;
       max-width: 100%;
       margin: 24px 0 16px;
       transition: box-shadow 0.2s ease-in-out;
 }
  @media screen and (-webkit-min-device-pixel-ratio: 0) {
       html input[type="range"] {
            overflow: hidden;
            height: 40px;
            -webkit-appearance: none;
            background-color: #ddd;
      }
       html input[type="range"]::-webkit-slider-runnable-track {
            height: 40px;
            -webkit-appearance: none;
            color: #444;
            transition: box-shadow 0.2s ease-in-out;
      }
       html input[type="range"]::-webkit-slider-thumb {
            width: 40px;
            -webkit-appearance: none;
            height: 40px;
            cursor: ew-resize;
            background: #fff;
            box-shadow: -340px 0 0 320px #1597ff, inset 0 0 0 40px #1597ff;
            border-radius: 50%;
            transition: box-shadow 0.2s ease-in-out;
            position: relative;
      }
       html input[type="range"]:active::-webkit-slider-thumb {
            background: #fff;
            box-shadow: -340px 0 0 320px #1597ff, inset 0 0 0 3px #1597ff;
      }
 }
  html input[type="range"]::-moz-range-progress {
       background-color: #43e5f7;
 }
  html input[type="range"]::-moz-range-track {
       background-color: #9a905d;
 }
  html input[type="range"]::-ms-fill-lower {
       background-color: #43e5f7;
 }
  html input[type="range"]::-ms-fill-upper {
       background-color: #9a905d;
 }
  #h4-container {
       width: 400px;
       max-width: 100%;
       padding: 0 20px;
       box-sizing: border-box;
       position: relative;
 }
  #h4-container #h4-subcontainer {
       width: 100%;
       position: relative;
 }
  #h4-container #h4-subcontainer h4 {
       display: flex;
       align-items: center;
       justify-content: center;
       position: absolute;
       top: 0;
       width: 40px;
       height: 40px;
       color: #fff !important;
       font-size: 12px;
       transform-origin: center -10px;
       transform: translateX(-50%);
       transition: margin-top 0.15s ease-in-out, opacity 0.15s ease-in-out;
 }
  #h4-container #h4-subcontainer h4 span {
       position: absolute;
       width: 100%;
       height: 100%;
       top: 0;
       left: 0;
       background-color: #1597ff;
       border-radius: 0 50% 50% 50%;
       transform: rotate(45deg);
       z-index: -1;
 }
  input:not(:active) + #h4-container h4 {
       opacity: 0;
       margin-top: -50px;
       pointer-events: none;
 }
Here is our updated output CSS.
https://cdnjs.cloudflare.com/ajax/libs/jquery/3.3.1/jquery.min.js$(function() {
var rangePercent = $('[type="range"]').val();
$('[type="range"]').on('change input', function() {
rangePercent = $('[type="range"]').val();
$('h4').html(rangePercent+'<span></span>');
$('[type="range"], h4>span').css('filter', 'hue-rotate(-' + rangePercent + 'deg)');
// $('h4').css({'transform': 'translateX(calc(-50% - 20px)) scale(' + (1+(rangePercent/100)) + ')', 'left': rangePercent+'%'});
$('h4').css({'transform': 'translateX(-50%) scale(' + (1+(rangePercent/100)) + ')', 'left': rangePercent+'%'});
});
});
Final output
Now we have completed our javascript section, Here is our updated output with javascript. Hope you like the CSS Range Slider. you can see output video and project screenshots. See our other blogs and gain knowledge in front-end development. Thank you 🙏💕!
In this post, we learn how to create a CSS Range Slider using simple HTML & CSS, and javascript. If we made a mistake or any confusion, please drop a comment to reply or help you in easy learning.


