How to Create a Responsive Hamburger Menu Using HTML &CSS
Welcome to Code With Random blog. In this blog, we learn how to create a Responsive Hamburger Menu. We use HTML & CSS for the Responsive Hamburger Menu. Hope you enjoy our blog so let’s start with a basic HTML structure for the Responsive Hamburger Menu.
In this article, we present a How to Create Responsive Hamburger Menu Using HTML &CSS with complete source code for you so you can copy and paste it into your project.
HTML code for the hamburger menu
<header class="header">
<a href="" class="logo">CSS Nav</a>
<input class="menu-btn" type="checkbox" id="menu-btn" />
<label class="menu-icon" for="menu-btn"><span class="navicon"></span></label>
<ul class="menu">
<li><a href="#work">Our Work</a></li>
<li><a href="#about">About</a></li>
<li><a href="#careers">Careers</a></li>
<li><a href="#contact">Contact</a></li>
</ul>
</header>
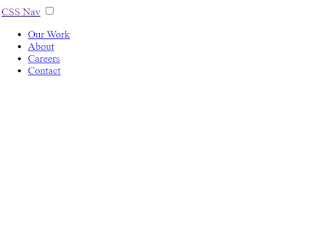
There is all the Html code for the Responsive Hamburger Menu. Now, you can see output without CSS, then we write CSS for the Responsive Hamburger Menu.
Output
Create Delete Button Animation Using HTML &CSS
CSS code for the hamburger menu
body {
margin: 0;
font-family: Helvetica, sans-serif;
background-color: #f4f4f4;
}
a {
color: #000;
}
/* header */
.header {
background-color: #fff;
box-shadow: 1px 1px 4px 0 rgba(0,0,0,.1);
position: fixed;
width: 100%;
z-index: 3;
}
.header ul {
margin: 0;
padding: 0;
list-style: none;
overflow: hidden;
background-color: #fff;
}
.header li a {
display: block;
padding: 20px 20px;
border-right: 1px solid #f4f4f4;
text-decoration: none;
}
.header li a:hover,
.header .menu-btn:hover {
background-color: #f4f4f4;
}
.header .logo {
display: block;
float: left;
font-size: 2em;
padding: 10px 20px;
text-decoration: none;
}
/* menu */
.header .menu {
clear: both;
max-height: 0;
transition: max-height .2s ease-out;
}
/* menu icon */
.header .menu-icon {
cursor: pointer;
display: inline-block;
float: right;
padding: 28px 20px;
position: relative;
user-select: none;
}
.header .menu-icon .navicon {
background: #333;
display: block;
height: 2px;
position: relative;
transition: background .2s ease-out;
width: 18px;
}
.header .menu-icon .navicon:before,
.header .menu-icon .navicon:after {
background: #333;
content: '';
display: block;
height: 100%;
position: absolute;
transition: all .2s ease-out;
width: 100%;
}
.header .menu-icon .navicon:before {
top: 5px;
}
.header .menu-icon .navicon:after {
top: -5px;
}
/* menu btn */
.header .menu-btn {
display: none;
}
.header .menu-btn:checked ~ .menu {
max-height: 240px;
}
.header .menu-btn:checked ~ .menu-icon .navicon {
background: transparent;
}
.header .menu-btn:checked ~ .menu-icon .navicon:before {
transform: rotate(-45deg);
}
.header .menu-btn:checked ~ .menu-icon .navicon:after {
transform: rotate(45deg);
}
.header .menu-btn:checked ~ .menu-icon:not(.steps) .navicon:before,
.header .menu-btn:checked ~ .menu-icon:not(.steps) .navicon:after {
top: 0;
}
/* 48em = 768px */
@media (min-width: 48em) {
.header li {
float: left;
}
.header li a {
padding: 20px 30px;
}
.header .menu {
clear: none;
float: right;
max-height: none;
}
.header .menu-icon {
display: none;
}
}
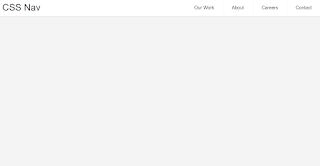
We have completed our CSS section, Here is our final updated output CSS.
Final Output
Create Moving Car Animation Using HTML &Css
We have completed our CSS section, Here is our updated output with CSS. Hope you like the Responsive Hamburger Menu, you can see output project screenshots. See our other blogs and gain knowledge in front-end development.
This post teaches us to create a Responsive Hamburger Menu using simple HTML & CSS. If we made a mistake or any confusion, please drop a comment to reply or help you in easy learning.
Thank You And Happy Learning
Written by – Code With Random/Anki
code by – mutedblues


