3D Interactive Card Hover Using HTML, CSS, And JavaScript
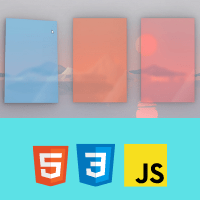
Welcome to Code With Random blog. This blog teaches us how we create a 3D Interactive Card. We use HTML, CSS, and JavaScript for the 3D Interactive Card. In this article, I will show you how to create a 3D card-flipping effect with vanilla HTML and CSS.
These also work great for lots of different things – for example, a bank card UI, a playing card UI, or just a teams page. The demo can be seen below! We provide you with 3D Interactive Card Hover Using HTML, CSS, And JavaScript code so you can easily it’s copy and paste the code into your project.
I hope you enjoy our blog so let’s start with a basic HTML structure for the 3D Interactive Card.
HTML Code 3D Interactive Card Hover
<html lang="en">

<head>
    <meta charset="UTF-8">
    <meta http-equiv="X-UA-Compatible" content="IE=edge">
    <meta name="viewport" content="width=device-width, initial-scale=1.0">
    <title>3D Interactive Card </title>
    <link rel="stylesheet" href="style.css">
</head>

<body>
    <div class="overlay">
    </div>

    <div class="wrapper">
        <div class="card card-0">
            <div class="glare-container">
                <div class="glare">
                </div>
            </div>
        </div>

        <div class="card card-1">
            <div class="glare-container">
                <div class="glare">
                </div>
            </div>
        </div>

        <div class="card card-2">
            <div class="glare-container">
                <div class="glare">
                </div>
            </div>
        </div>
    </div>
    <!-- Javascript Here -->
    <script src="https://cdnjs.cloudflare.com/ajax/libs/jquery/3.6.0/jquery.min.js"></script>
    <script src="app.js"></script>
</body>

</html>
There is all the HTML code for the 3D Interactive Card. Now, you can see an output with a 3D Interactive Card then we write CSS & javascript for the 3D Interactive Card.
CSS Code for 3D Interactive Card Hover
body {
  margin: 0;
  background-color: #eee;
  background-image: url("https://images7.alphacoders.com/938/thumb-1920-938300.jpg");
  background-repeat: no-repeat;
  background-position: center;
  background-size: cover;
  height: 100vh;
  overflow: hidden;
}

.overlay {
  background-color: rgba(255, 255, 255, 0.4);
  width: 100vw;
  height: 100vh;
  position: absolute;
}

.card {
  backdrop-filter: blur(5px);
  min-width: 35vh;
  height: 55vh;
  box-shadow: 0px 0px 3px rgba(0, 0, 0, 0.051),
    0px 0px 7.2px rgba(0, 0, 0, 0.073), 0px 0px 13.6px rgba(0, 0, 0, 0.09),
    0px 0px 24.3px rgba(0, 0, 0, 0.107), 0px 0px 45.5px rgba(0, 0, 0, 0.129),
    0px 0px 109px rgba(0, 0, 0, 0.18);
}

.glare-container {
  width: 100%;
  height: 100%;
  overflow: hidden;
  position: relative;
}

.glare {
  position: absolute;
  left: 100%;
  bottom: -50%;
  width: 150%;
  height: 150%;
  background: rgb(255, 255, 255);
  background: linear-gradient(
    90deg,
    rgba(255, 255, 255, 0.1) 0%,
    rgba(255, 255, 255, 0) 20%
  );
  transform: rotateZ(35deg);
  pointer-events: none;
  filter: blur(4px);
}

.card-0{
  background-color: rgba(0, 166, 255, 0.3);
}

.card-1 {
  background-color: rgba(255, 59, 0, 0.37);
}

.card-2 {
  background-color: rgba(255, 0, 0, 0.23);
}

.wrapper{
  display: grid;
  grid-template-columns: 1fr 1fr 1fr;
  justify-items: center;
  align-items: center;
  height: 100vh;
}
CSS Updated output

Javascript(Jquery) Code
var limits = 15.0;

$(".card").mousemove(function (e) {
    var rect = e.target.getBoundingClientRect();
    var x = e.clientX - rect.left; //x position within the element.
    var y = e.clientY - rect.top; //y position within the element.
    var offsetX = x / rect.width;
    var offsetY = y / rect.height;

    var rotateY = (offsetX) * (limits * 2) - limits;
    var rotateX = (offsetY) * (limits * 2) - limits;

    var shadowOffsetX = (offsetX) * 32 - 16;
    var shadowOffsetY = (offsetY) * 32 - 16;

    $(this).css({
        "box-shadow": (1 / 6) * -shadowOffsetX + "px " + (1 / 6) * -shadowOffsetY + "px 3px rgba(0, 0, 0, 0.051), " +
            (2 / 6) * -shadowOffsetX + "px " + (2 / 6) * -shadowOffsetY + "px 7.2px rgba(0, 0, 0, 0.073), " +
            (3 / 6) * -shadowOffsetX + "px " + (3 / 6) * -shadowOffsetY + "px 13.6px rgba(0, 0, 0, 0.09), " +
            (4 / 6) * -shadowOffsetX + "px " + (4 / 6) * -shadowOffsetY + "px 24.3px rgba(0, 0, 0, 0.107), " +
            (5 / 6) * -shadowOffsetX + "px " + (5 / 6) * -shadowOffsetY + "px 45.5px rgba(0, 0, 0, 0.129), " +
            -shadowOffsetX + "px " + -shadowOffsetY + "px 109px rgba(0, 0, 0, 0.18)",
        transform: "perspective(1000px) rotateX(" + -rotateX + "deg) rotateY(" + rotateY + "deg)"
    });

    var glarePos = rotateX + rotateY + 90;
    $(this)
        .children()
        .children()
        .css("left", glarePos + "%");
});

$(".card").mouseleave(function (e) {
    $(".card").css({ "box-shadow": "0px 0px 3px rgba(0, 0, 0, 0.051), 0px 0px 7.2px rgba(0, 0, 0, 0.073), 0px 0px 13.6px rgba(0, 0, 0, 0.09), 0px 0px 24.3px rgba(0, 0, 0, 0.107), 0px 0px 45.5px rgba(0, 0, 0, 0.129), 0px 0px 109px rgba(0, 0, 0, 0.18)", "transform": "scale(1.0)" });
    $(".glare").css("left", "100%");
});
Final output

50+ Html, Css & Javascript Projects With Source Code
Now that we have completed our javascript section, our updated output with javascript. I hope you like the 3D Interactive Card. you can see the output video and project screenshots. See our other blogs and gain knowledge in front-end development.
This post teaches us how to create a 3D Interactive Card using simple HTML & CSS and javascript. If we made a mistake or any confusion, please drop a comment to reply or help you in easy learning.
Thank you And Keep Learning!!
Written by – Code With Random/Anki
Code By – Josh Allen


