Create Custom Side Scrollbar Using HTML And CSS Source Code
Hello coders🧑💻!! In this blog we will create an responsive custom Scrollbar using html and css . This project is basically about how we use css to customize our Scrollbar .This project is completely beginnner friendly .
By the end of this article you will able to make your own Custom Scrollbar using html and css.
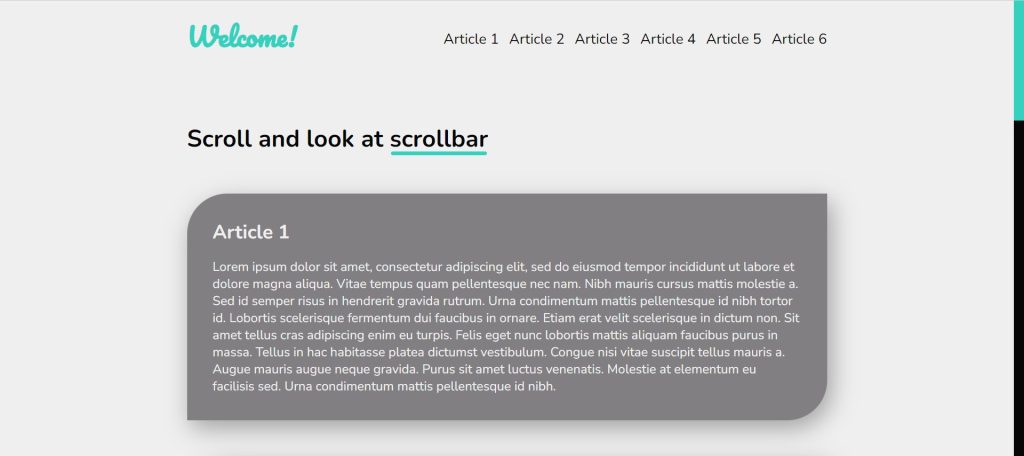
I hope you must have got an idea about the project.
So, Let’s start our side Scrollbar Project By Adding The Source Codes. For That, First, We Are Using The Html Code.
Step1: Adding HTML code For Side Scrollbar
HTML stands for Hyper Text Markup Language, and it provides structure to our website.
ALL HTML documents begin with <!doctype HTML>, which informs the browser that our code adheres to the most recent HTML version.
The HTML document starts with <html> and ends with </html>.
The main tag is <body>, where we will write all of our content that will be displayed on the browser later.
Now we’ll look at our HTML code.
<!DOCTYPE html>
<html>
  <head>
    <meta http-equiv="content-type" content="text/html; charset=utf-8" />
    <meta name="" content="" />
    <title>Heart</title>
    <link rel="stylesheet" href="style.css" />
  </head>
  <body>
    <header>
        <h1 class="logo">Welcome!</h1>
        <nav>
          <ul class="nav-list">
            <li>
              <a href="#art-1">Article 1</a>
            </li>
            <li>
              <a href="#art-2">Article 2</a>
            </li>
            <li>
              <a href="#art-3">Article 3</a>
            </li>
            <li>
              <a href="#art-4">Article 4</a>
            </li>
            <li>
              <a href="#art-5">Article 5</a>
            </li>
            <li>
              <a href="#art-6">Article 6</a>
            </li>
          </ul>
        </nav>
      </header>

      <section class="main">
        <h1>Scroll and look at scrollbar</h1>
        <article id="art-1" class="first-article article">
          <h2>Article 1</h2>
          <p>Lorem ipsum dolor sit amet, consectetur adipiscing elit, sed do eiusmod tempor incididunt ut labore et dolore magna aliqua. Vitae tempus quam pellentesque nec nam. Nibh mauris cursus mattis molestie a. Sed id semper risus in hendrerit gravida rutrum. Urna condimentum mattis pellentesque id nibh tortor id. Lobortis scelerisque fermentum dui faucibus in ornare. Etiam erat velit scelerisque in dictum non. Sit amet tellus cras adipiscing enim eu turpis. Felis eget nunc lobortis mattis aliquam faucibus purus in massa. Tellus in hac habitasse platea dictumst vestibulum. Congue nisi vitae suscipit tellus mauris a. Augue mauris augue neque gravida. Purus sit amet luctus venenatis. Molestie at elementum eu facilisis sed. Urna condimentum mattis pellentesque id nibh.</p>
        </article>
        <article id="art-2" class="second-article article">
          <h2>Article 2</h2>
          <p>Ornare massa eget egestas purus viverra accumsan in nisl nisi. Tristique sollicitudin nibh sit amet commodo nulla. Tellus id interdum velit laoreet id donec. Sagittis nisl rhoncus mattis rhoncus urna neque viverra justo. Massa tempor nec feugiat nisl pretium fusce id. Augue lacus viverra vitae congue eu consequat ac felis donec. Bibendum est ultricies integer quis auctor elit sed. Faucibus purus in massa tempor nec. Integer malesuada nunc vel risus commodo viverra maecenas accumsan. Sem integer vitae justo eget magna fermentum iaculis eu non. Diam sit amet nisl suscipit. Eget nullam non nisi est sit amet. Sed adipiscing diam donec adipiscing tristique risus. Nec feugiat in fermentum posuere urna nec tincidunt.</p>
        </article>
        <article id="art-3" class="third-article article">
          <h2>Article 3</h2>
          <p>Vel quam elementum pulvinar etiam non quam lacus suspendisse. Nisl nisi scelerisque eu ultrices vitae auctor eu. Nisi lacus sed viverra tellus in hac. Placerat in egestas erat imperdiet sed euismod nisi. Orci a scelerisque purus semper eget duis at tellus at. Neque vitae tempus quam pellentesque nec nam. Orci nulla pellentesque dignissim enim sit. Leo a diam sollicitudin tempor. Facilisis magna etiam tempor orci eu. Libero justo laoreet sit amet cursus sit amet. Ultricies integer quis auctor elit sed vulputate mi sit amet. Purus gravida quis blandit turpis cursus in hac habitasse. A diam sollicitudin tempor id eu. Non nisi est sit amet facilisis magna etiam tempor.</p>
        </article>
        <article id="art-4" class="fourth-article article">
          <h2>Article 4</h2>
          <p>Vestibulum lectus mauris ultrices eros in cursus turpis. Habitant morbi tristique senectus et netus. Amet volutpat consequat mauris nunc congue nisi vitae suscipit tellus. Vel turpis nunc eget lorem dolor sed viverra ipsum nunc. Iaculis urna id volutpat lacus laoreet non curabitur gravida arcu. Viverra maecenas accumsan lacus vel. Turpis egestas integer eget aliquet nibh praesent. Ut porttitor leo a diam. Placerat orci nulla pellentesque dignissim enim. In massa tempor nec feugiat nisl pretium fusce id velit. Felis imperdiet proin fermentum leo vel orci. Quam id leo in vitae turpis massa. Convallis convallis tellus id interdum velit laoreet id donec. Id neque aliquam vestibulum morbi. Gravida dictum fusce ut placerat. Maecenas ultricies mi eget mauris pharetra et. Massa placerat duis ultricies lacus sed turpis tincidunt id aliquet. Praesent tristique magna sit amet purus gravida quis blandit. Eget velit aliquet sagittis id consectetur purus ut faucibus pulvinar. Sagittis purus sit amet volutpat consequat mauris nunc congue.</p>
        </article>
        <article id="art-5" class="fifth-article article">
          <h2>Article 5</h2>
          <p>Vestibulum lectus mauris ultrices eros in cursus turpis. Habitant morbi tristique senectus et netus. Amet volutpat consequat mauris nunc congue nisi vitae suscipit tellus. Vel turpis nunc eget lorem dolor sed viverra ipsum nunc. Iaculis urna id volutpat lacus laoreet non curabitur gravida arcu. Viverra maecenas accumsan lacus vel. Turpis egestas integer eget aliquet nibh praesent. Ut porttitor leo a diam. Placerat orci nulla pellentesque dignissim enim. In massa tempor nec feugiat nisl pretium fusce id velit. Felis imperdiet proin fermentum leo vel orci. Quam id leo in vitae turpis massa. Convallis convallis tellus id interdum velit laoreet id donec. Id neque aliquam vestibulum morbi. Gravida dictum fusce ut placerat. Maecenas ultricies mi eget mauris pharetra et. Massa placerat duis ultricies lacus sed turpis tincidunt id aliquet. Praesent tristique magna sit amet purus gravida quis blandit. Eget velit aliquet sagittis id consectetur purus ut faucibus pulvinar. Sagittis purus sit amet volutpat consequat mauris nunc congue.</p>
        </article>
        <article id="art-6" class="sixth-article article">
          <h2>Article 6</h2>
          <p>Vestibulum lectus mauris ultrices eros in cursus turpis. Habitant morbi tristique senectus et netus. Amet volutpat consequat mauris nunc congue nisi vitae suscipit tellus. Vel turpis nunc eget lorem dolor sed viverra ipsum nunc. Iaculis urna id volutpat lacus laoreet non curabitur gravida arcu. Viverra maecenas accumsan lacus vel. Turpis egestas integer eget aliquet nibh praesent. Ut porttitor leo a diam. Placerat orci nulla pellentesque dignissim enim. In massa tempor nec feugiat nisl pretium fusce id velit. Felis imperdiet proin fermentum leo vel orci. Quam id leo in vitae turpis massa. Convallis convallis tellus id interdum velit laoreet id donec. Id neque aliquam vestibulum morbi. Gravida dictum fusce ut placerat. Maecenas ultricies mi eget mauris pharetra et. Massa placerat duis ultricies lacus sed turpis tincidunt id aliquet. Praesent tristique magna sit amet purus gravida quis blandit. Eget velit aliquet sagittis id consectetur purus ut faucibus pulvinar. Sagittis purus sit amet volutpat consequat mauris nunc congue.</p>
        </article>
      </section>
  </body>
</html>
Starting with HTML, we first created a header section that contains our website’s logo and navigation bar. We create our navbar using an unordered list, and then we create another section that contains the content of our webpage, beginning with the main headline of our webpage.
100+ Front-end Projects for Web developers (Source Code)
Then, using a “h2” heading and paragraph, we created the random content for our webpage. Similarly, you can try to add your own content to a webpage of your choice.
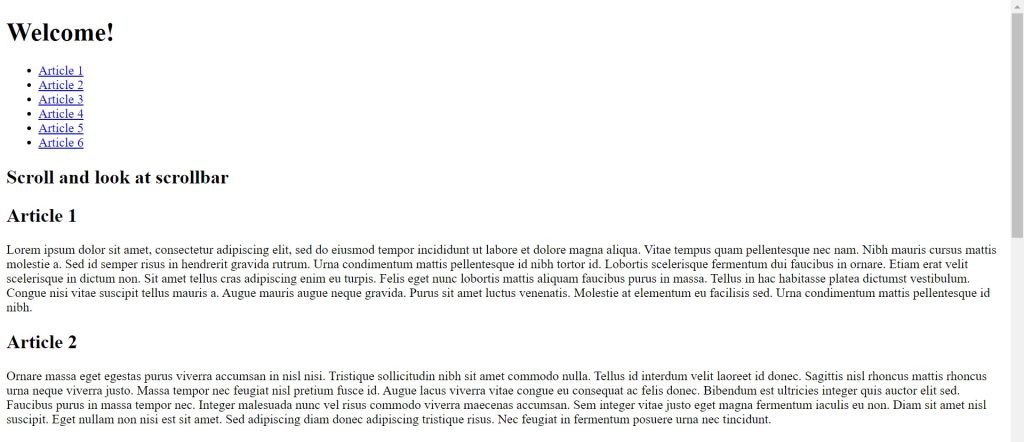
Let’s take a look at our HTML structure without any styling.
Preview:
Step2: Adding CSS code For Side Scrollbar
CSS is an abbreviation for Cascading Style Sheet. CSS will be used to style our webpage so that it looks appealing, and CSS is used to improve the user experience.
Now let’s take a look at our CSS code.
@import url('https://fonts.googleapis.com/css2?family=Nunito:wght@400;700&display=swap');
@import url('https://fonts.googleapis.com/css2?family=Pacifico&display=swap');
html {
  scrollbar-width: thin;
  scrollbar-color: #34d1bf #070707;
}
html::-webkit-scrollbar {
  width: 1vw;
}
html::-webkit-scrollbar-thumb {
  background-color: #34d1bf;
}
html::-webkit-scrollbar-track {
  background-color: #070707;
}
* {
  margin: 0;
  padding: 0;
  box-sizing: border-box;

}

html {
  font-size: 100%;
  scroll-behavior: smooth;
}
ul {
  list-style-type: none;
}
ul li {
  margin-top: 0.5em;
}
ul li + li {
  margin-left: 0.8em;
}
a {
  color: #070707;
  text-decoration: none;
  font-size: 18px;
  display: inline-block;
  transition: all 500ms ease-in-out;
}
a:hover {
  transform: translateY(-5px);
  color: #34d1bf;
}
header {
  max-width: 800px;
  margin: 0 auto;
  padding: 1em 0;
  display: flex;
  align-items: center;
  justify-content: space-between;
}
header .nav-list {
  display: flex;
  margin-left: auto;
}
header .logo {
  font-family: "Pacifico", cursive;
  color: #34d1bf;
}
body {
  background: #efefef;
  font-family: 'Nunito', sans-serif;
  color: #070707;

}
body .main {
  max-width: 800px;
  margin: 4rem auto;
}
body .main h1 {
  font-size: 30px;
  position: relative;
}
body .main h1::after {
  position: absolute;
  content: '';
  background: #34d1bf;
  width: 120px;
  height: 5px;
  border-radius: 200px;
  bottom: 0px;
  left: 255px;
}
body .main .article {
  margin-top: 3em;
  background: #817f82;
  padding: 2em;
  color: #efefef;
  border-radius: 50px 0px;
  box-shadow: 5px 10px 30px rgba(0, 0, 0, 0.33);
}
body .main .article p {
  margin-top: 1em;
}
@media (max-width: 600px) {
  header, .main {
    width: 95%;
    margin: 0 auto;
  }
  h1 {
    font-size: 22px;
  }
  .article h2 {
    font-size: 18px;
  }
  .article p {
    font-size: 14px;
  }
  a {
    font-size: 12px;
  }
}
Now that we’ve included our CSS code in our article, let’s go over it step by step.
Step1: First, we have imported our Google Fonts into the document so that we can use them later on to change the font style of our content . Then we selected the html and set the srollbar width and color with smooth scrollbar property .
5+ HTML CSS project With Source Code
Then using our universal selector (*), we just selected all our elements and defined margin and padding as zero and box-size as a border box.
@import url('https://fonts.googleapis.com/css2?family=Nunito:wght@400;700&display=swap');
@import url('https://fonts.googleapis.com/css2?family=Pacifico&display=swap');
html {
  scrollbar-width: thin;
  scrollbar-color: #34d1bf #070707;
}
html::-webkit-scrollbar {
  width: 1vw;
}
html::-webkit-scrollbar-thumb {
  background-color: #34d1bf;
}
html::-webkit-scrollbar-track {
  background-color: #070707;
}
* {
  margin: 0;
  padding: 0;
  box-sizing: border-box;

}

html {
  font-size: 100%;
  scroll-behavior: smooth;
}
Step2: We chose our ul tag and set the list style type to “none” so that there is no style, then we chose our anchor tag and provided the colour, font size, and transition to our anchor tag. We also added the hover selector to add more styling to our anchor tag. When we hover our cursor over the list items, the colour of the list items changes with the transform property.
ul {
  list-style-type: none;
}
ul li {
  margin-top: 0.5em;
}
ul li + li {
  margin-left: 0.8em;
}
a {
  color: #070707;
  text-decoration: none;
  font-size: 18px;
  display: inline-block;
  transition: all 500ms ease-in-out;
}
a:hover {
  transform: translateY(-5px);
  color: #34d1bf;
}Step3:Now we’ve selected our body tag, changed the background colour to light gray, and added the colour and font family to the body. We’ve now selected the class (“.main”) within the body and assigned the margin and maximum width to the given class element.Then we selected the article class and provided the backgorund color,padding ,border-radius to our random content in the html.
header .nav-list {
  display: flex;
  margin-left: auto;
}
header .logo {
  font-family: "Pacifico", cursive;
  color: #34d1bf;
}
body {
  background: #efefef;
  font-family: 'Nunito', sans-serif;
  color: #070707;

}
body .main {
  max-width: 800px;
  margin: 4rem auto;
}
body .main h1 {
  font-size: 30px;
  position: relative;
}
body .main h1::after {
  position: absolute;
  content: '';
  background: #34d1bf;
  width: 120px;
  height: 5px;
  border-radius: 200px;
  bottom: 0px;
  left: 255px;
}
body .main .article {
  margin-top: 3em;
  background: #817f82;
  padding: 2em;
  color: #efefef;
  border-radius: 50px 0px;
  box-shadow: 5px 10px 30px rgba(0, 0, 0, 0.33);
}
body .main .article p {
  margin-top: 1em;
}
Step4: Now we’ll add the main styling to our webpage, which will make it responsive; we’ll add the media query and set the maximum width. If the content width is greater than the defined width, the font sizes of the h1, h2, p and a tag will change depending on the window size.
ADVERTISEMENT
@media (max-width: 600px) {
  header, .main {
    width: 95%;
    margin: 0 auto;
  }
  h1 {
    font-size: 22px;
  }
  .article h2 {
    font-size: 18px;
  }
  .article p {
    font-size: 14px;
  }
  a {
    font-size: 12px;
  }
}
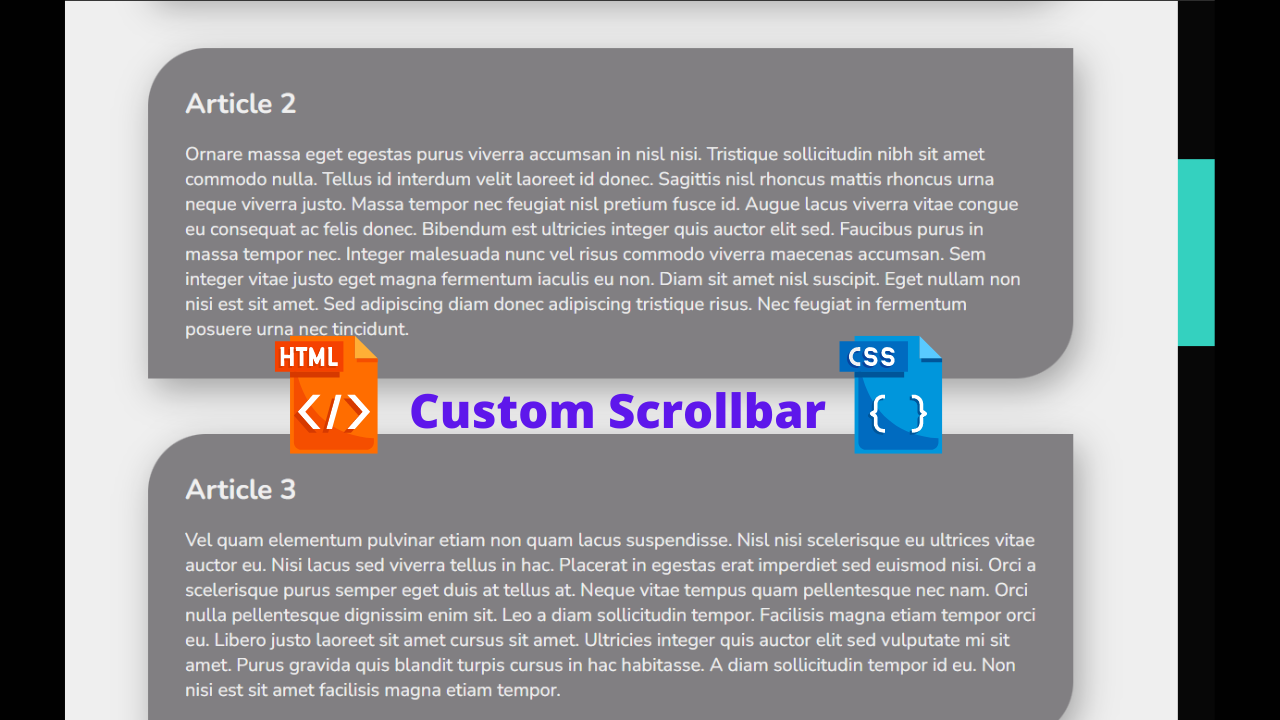
Now we have completed our css code and below👇here is the output after styling our webpage.
ADVERTISEMENT
Final Output Of Side Scrollbar

ADVERTISEMENT
The project is now finished, and as you can see, we customised our scrollbar with HTML and CSS. Now look at the live preview.
ADVERTISEMENT
Portfolio Website Using HTML CSS And JAVASCRIPT ( Source Code)
ADVERTISEMENT
Output:
See the Pen
Custom Scrollbar and Smooth Scrolling by Dusan Lukic (@dusanlukic)
on CodePen.
Now We have Successfully created our responsive cutom scrollbar poject. You can use this project directly by copying into your IDE. WE hope you understood the project , If you any doubt feel free to comment!!
If you find out this Blog helpful, then make sure to search code with random on google for Front End Projects with Source codes and make sure to Follow the Code with Random Instagram page.
