Hey Guys , In Today’s Blog We are going to see How to create Animated Tabs Using HTML, CSS, and JavaScript. For that, the respective source codes were given below along with the respective preview of output section. So you can make use of that.
Animated Tabs Using HTML , CSS and JavaScript
Now The Project is going to create and for that we are first adding an HTML Code.
HTML CODE:
ul class="tabs">
  <li data-tab-target="#home" class="active tab">Home</li>
  <li data-tab-target="#pricing" class="tab">Pricing</li>
  <li data-tab-target="#about" class="tab">About</li>
  <li data-tab-target="#news" class="tab">News</li>
</ul>

<div class="tab-content">
  <div id="home" data-tab-content class="active">
    <h1>Home</h1>
    <p>This is the home</p>
  </div>
  <div id="pricing" data-tab-content>
    <h1>Pricing</h1>
    <p>Some information on pricing</p>
  </div>
  <div id="about" data-tab-content>
    <h1>About</h1>
    <p>Let me tell you about me</p>
  </div>
  <div id="news" data-tab-content>
    <h1>News</h1>
    <p>News is great.</p>
  </div>

</div>
First We are creating an Unordered list with class tabs for adding navbars such as home , Pricing , About etc… Now We adding those navbar content into an list tags with an active class for home section. The navbar is now completed.
Now We opening an header div class and inside of it we adding an header with sub heading for each navbars. and those content were separately added by div class with respective names of navigations.
Age Calculator Using Javascript
So that’s of for HTML , Now We go for CSS to make some stylings on it.
CSS CODE:
[data-tab-content] {
  display: none;
}

.active[data-tab-content] {
  display: block;
}

body {
  padding: 0;
  margin: 0;
}

.tabs {
  display: flex;
  justify-content: space-around;
  list-style-type: none;
  margin: 0;
  padding: 0;
  border-bottom: 1px solid black;
}

.tab {
  cursor: pointer;
  padding: 10px;
}

.tab.active {
  background-color: #CCC;
}

.tab:hover {
  background-color: #AAA;
}

.tab-content {
  margin-left: 20px;
  margin-right: 20px;
}
First we setting the display to none for nav bars by calling div class name that contains these nav bars. Then we set the margin and padding values to zero.
Now We are adding properties to nav bars by calling out the first div class and adding the flex box properties and border-bottom.
After that we adding an hover class and active class by background colors. Lastly the contents in the website were moved from left and top 20 px using margin properties.
Portfolio Website using HTML and CSS (Source Code)
So that’s of for CSS , Now The last part here is Java Script which given below.
JavaScript CODE:
const tabs = document.querySelectorAll('[data-tab-target]')
const tabContents = document.querySelectorAll('[data-tab-content]')

tabs.forEach(tab => {
  tab.addEventListener('click', () => {
    const target = document.querySelector(tab.dataset.tabTarget)
    tabContents.forEach(tabContent => {
      tabContent.classList.remove('active')
    })
    tabs.forEach(tab => {
      tab.classList.remove('active')
    })
    tab.classList.add('active')
    target.classList.add('active')
  })
})
Here We are creating an variable tabs and calling out the navbars using JS query Selector Property and also we calling out the contents that needs to be displayed in a web using the same JS property.
Then We assigning for every tab when we click the contents will be displayed according to the navbar heading. and we adding the class list to remove when the current tab is moved by clicking on some other tab. simply the background of navbar is removed when moving to other.
Lastly again we adding for each tab when we click the nav bar the background color will be added to represent it has active class. Simply a classList.add.
So that’s of for Java Script and now we came to end of project as we added the source codes successfully. We now move for project preview in the below output section.
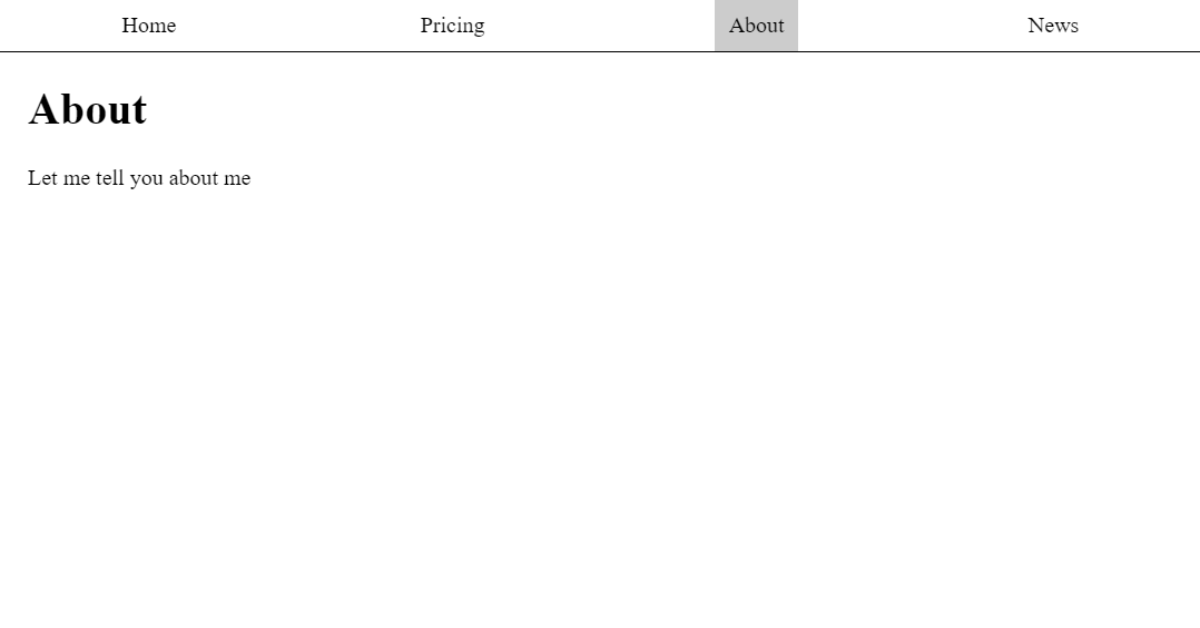
Final Output Of Tabs-
Now We have Successfully created our Tabs Using HTML , CSS and JAVA SCRIPT. You can use this project for your personnel needs and the respective lines of code are given with the code pen link mentioned below.
If you find out this Blog helpful, then make sure to search code with random on google for Front End Projects with Source codes and make sure to Follow the Code with Random Instagram page.
REFER CODE – Wandering Wind
WRITTEN BY- Ragunathan


