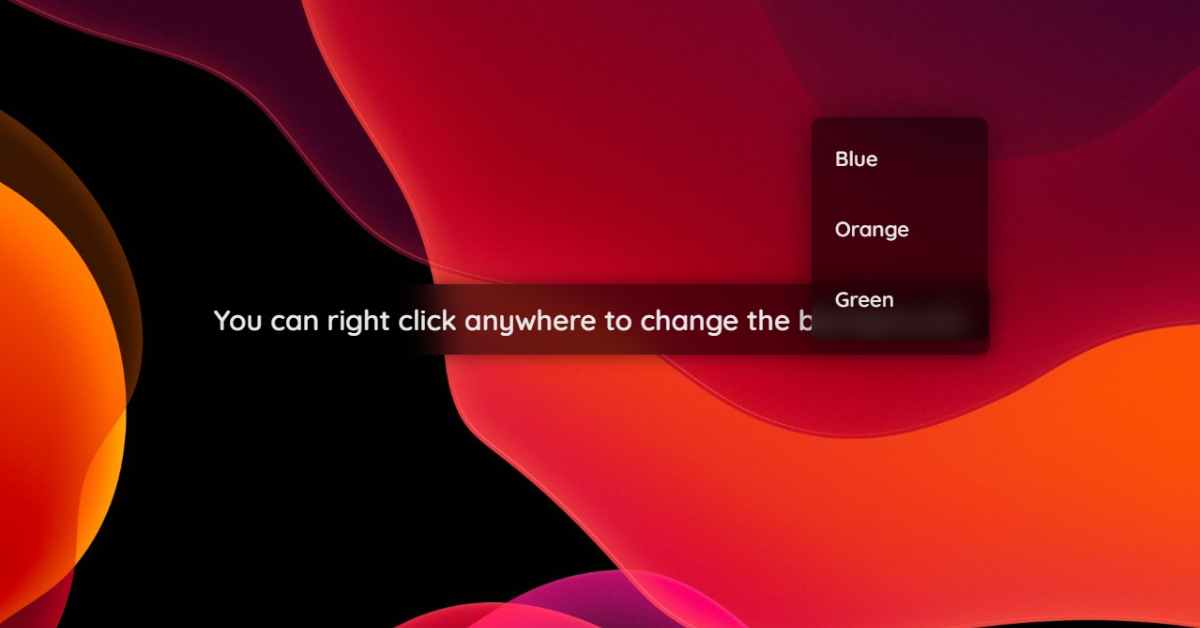
How to Create a Custom Right-Click Menu Using JavaScript
Hello, guys! In this article, we will use HTML, CSS, and JavaScript to construct an outstanding Custom Right-Click Menu (a “context menu” ). Before we begin this project, which is an intermediate-level project, programmers should be familiar with some CSS and JavaScript ideas, and we will try to describe the project step-by-step so that you guys can comprehend it more simply.
First and foremost, we must define a context menu.
What exactly is a context menu?
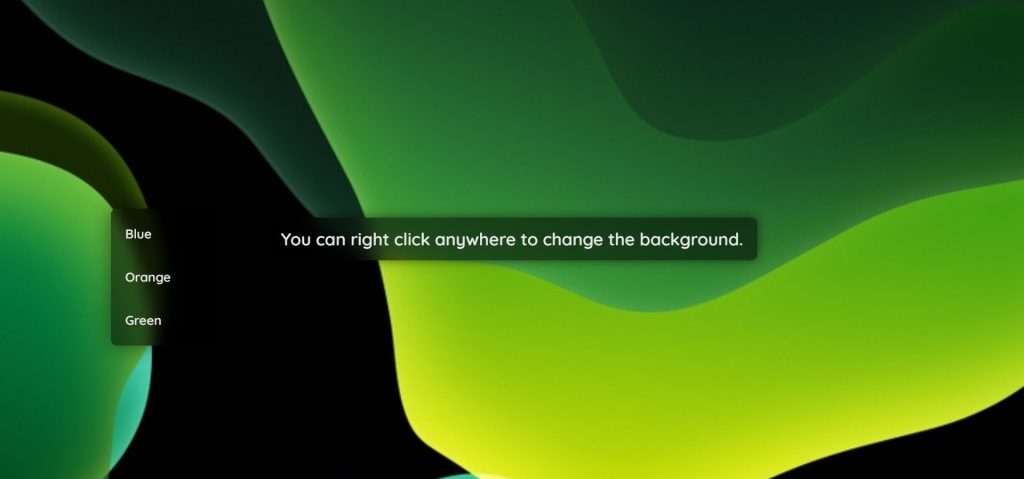
A context menu is a menu that opens when you right-click, and whatever is available for it or available in its context provides a range of options. The accessible options you choose are usually actions connected to the selected object.
Prerequisites:
index.html – For adding structure to the project
styles.css: For adding styling to the project
script.js – For adding drag and drop or browse featurest
I hope now you have a general idea of what the project entails. In our article, we will go over this project step by step.
Step1: Adding some basic HTML Code
HTML stands for HyperText Markup Language. This is a markup language. Its main job is to give our project structure. We will provide our project structure by utilising this markup language. So let’s look at our HTML code.
<html lang="en">

<head>
    <link rel="preconnect" href="https://fonts.gstatic.com">
    <link href="https://fonts.googleapis.com/css2?family=Quicksand:wght@400;600&display=swap" rel="stylesheet">
    <link rel="stylesheet" href="style.css">
    <meta http-equiv="X-UA-Compatible" content="IE=edge">
</head>

<body>
    <div class="cadre">
        <p class="title">You can right click anywhere to change the background.</p>
    </div>

    <div class="context-menu">
        <button class="btn" id="blue" onClick="changeBackground(id)">
            <div>Blue</div>
        </button>
        <button class="btn" id="orange" onClick="changeBackground(id)">
            <div>Orange</div>
        </button>
        <button class="btn" id="green" onClick="changeBackground(id)">
            <div>Green</div>
        </button>
    </div>

    <div class="browser-info" id="firefox">
        <h1>This website is going to look better if you turn on the <span class="nowrap">backdrop-filter</span> property
            :</h1>
        <p>
            -In the address bar, type "about:config".<br>
            -Click on "Accept the risk and continue".<br>
            -Type <span class="nowrap">"backdrop-filter"</span> in the search bar.<br>
            -If it's written "false", double click on it to turn it on.
        </p>
    </div>
    <div class="browser-info" id="IE">
        <h1>This website is going to look better on Google Chrome, Firefox or Edge. Open this page on one of them if you
            can.</h1>
    </div>
    <div class="browser-info" id="mobile">
        <h1>This website is going to look better on Google Chrome.</h1>
    </div>
    <script src="script.js"></script>
</body>

</html>
We’ll start by adding the project’s structure, but first we’ll need to include certain items inside the link, such as the fact that we’ve used various files for CSS and javascript, so we’ll need to link them up, and we’ve also used some Google fonts inside our project.
//Head Section
<link rel="preconnect" href="https://fonts.gstatic.com">
<link href="https://fonts.googleapis.com/css2?family=Quicksand:wght@400;600&display=swap" rel="stylesheet">
<link rel="stylesheet" href="style.css">
//Body Section
<script src="script.js"></script>
First, we’ll create a div with the class “cadre,” and then, inside the div, we’ll use the paragraph tag to construct a title informing the user that they can right-click anywhere on the screen.
<div class="cadre">
    <p class="title">You can right click anywhere to change the background.</p>
</div>
Now we’ll have a div with the class “context menu” to add the structure for the context menu. Using the button tag with class “btn” and the button onclick() event inside the button, we will make three buttons for blue, orange, and green colours to change the background colour dependent on the buttons.
<div class="context-menu">
    <button class="btn" id="blue" onClick="changeBackground(id)">
        <div>Blue</div>
    </button>
    <button class="btn" id="orange" onClick="changeBackground(id)">
        <div>Orange</div>
    </button>
    <button class="btn" id="green" onClick="changeBackground(id)">
        <div>Green</div>
    </button>
</div>
The browser information will now be included using the div tag with the class “browser-info.” We will add information for several browsers such as Firefox, Chrome, and Internet Explorer, among others. Using the fundamental <h1> and <p> tags, we will add content for all of these browsers to demonstrate how our project will deliver the optimal user experience on different browsers.
<div class="browser-info" id="firefox">
        <h1>This website is going to look better if you turn on the <span class="nowrap">backdrop-filter</span> property
            :</h1>
        <p>
            -In the address bar, type "about:config".<br>
            -Click on "Accept the risk and continue".<br>
            -Type <span class="nowrap">"backdrop-filter"</span> in the search bar.<br>
            -If it's written "false", double click on it to turn it on.
        </p>
    </div>
    <div class="browser-info" id="IE">
        <h1>This website is going to look better on Google Chrome, Firefox or Edge. Open this page on one of them if you
            can.</h1>
    </div>
    <div class="browser-info" id="mobile">
        <h1>This website is going to look better on Google Chrome.</h1>
    </div>
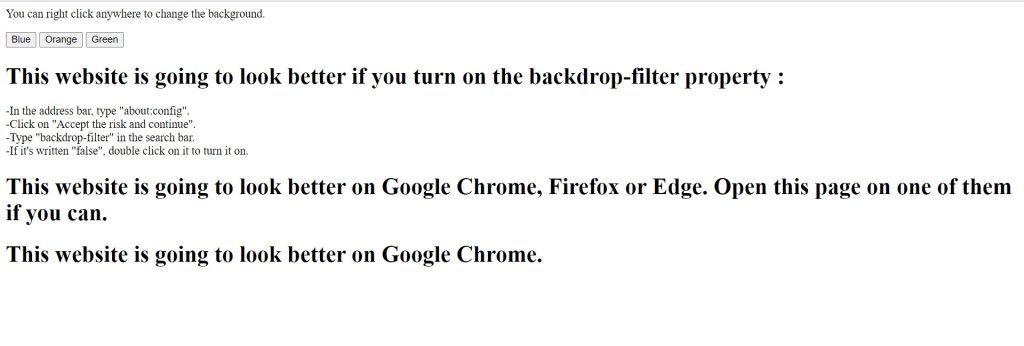
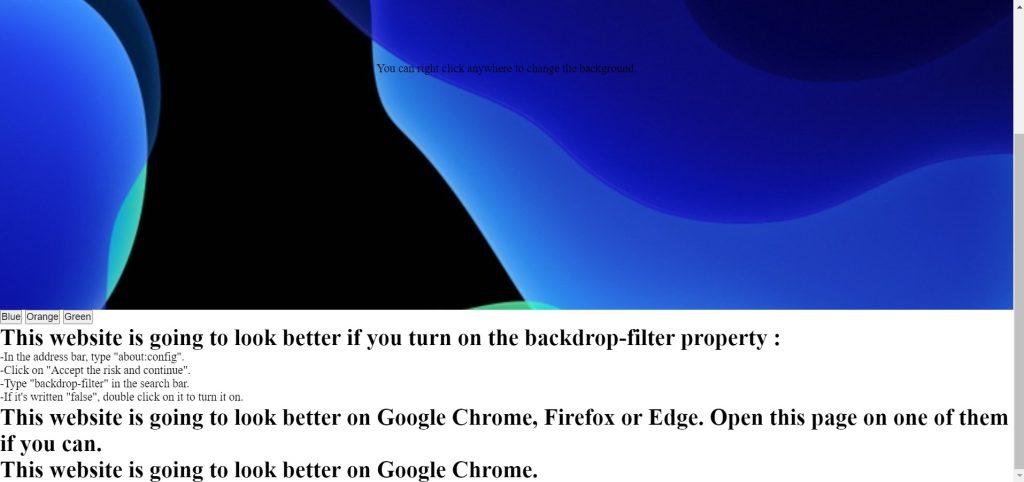
We don’t need anything else to develop the structure for our context menu. We’ll style our picture editor now that we’ve learned how to use CSS. But first, let’s have a peek at our framework.
Output:
Step2: Adding CSS Code
Cascading Style Sheets (CSS) is a markup language for describing the presentation of a document written in HTML or XML. CSS, like HTML and JavaScript, is a key component of the World Wide Web.
Portfolio Website using HTML and CSS (Source Code)
Now we will look at our CSS code.
* {
  margin: 0;
  padding: 0;
  box-sizing: border-box;
  -webkit-tap-highlight-color: transparent;
}
html,
body,
.cadre {
  width: 100%;
  height: 100%;
  overflow: auto;
}
.cadre {
  background-image: url("https://www.vocowallpaper.com/wallpapers/26/Dark%2C+blue%2C+background%2C+iOS+13--w26532--preview.jpg");
  background-repeat: no-repeat;
  background-size: cover;
  background-position-x: center;
  display: flex;
  justify-content: center;
  align-items: center;
  transition: background-image 0.6s;

  -moz-user-select: none;
  -webkit-user-select: none;
  -ms-user-select: none;
  user-select: none;
}
.title {
  font-family: "Quicksand", sans-serif;
  font-size: 1.5em;
  font-weight: 600;
  padding: 15px 20px;
  background-color: rgba(0, 0, 0, 0.54);
  border-radius: 8px;
  color: #e8e8e8;
  backdrop-filter: blur(15px);
  -webkit-backdrop-filter: blur(15px);
  box-shadow: 0 0 15px rgba(0, 0, 0, 0.54);
  max-width: 90%;
}
.context-menu {
  border-radius: 8px;
  width: 150px;
  box-shadow: 0 0 30px rgba(0, 0, 0, 0.54);
  position: absolute;
  background-color: rgba(0, 0, 0, 0.54);
  backdrop-filter: blur(10px);
  -webkit-backdrop-filter: blur(10px);

  /* that's for the pen : */
  display: block;
  top: 50%;
  left: 50%;
  transform: translate(-50%, -50%);

  /*
  but normally it's just :
  display: none;
  */
}
.btn {
  border: none;
  background-color: transparent;
  width: 100%;
  height: 50px;
  font-size: 1.1em;
  font-family: "Quicksand", sans-serif;
  font-weight: 800;
  letter-spacing: 0.004em;
  color: #e8e8e8;
  cursor: pointer;
  transition: background-color 0.2s;
  padding: 0 10px;
}
.btn div {
  width: 100%;
  height: 100%;
  text-align: left;
  transition: background-color 0.15s;
  border-radius: 3px;
  display: flex;
  align-items: center;
  padding: 0 10px;
}
.btn:hover div {
  background-color: rgba(147, 147, 147, 0.31);
}
#blue {
  margin: 10px 0;
}
#green {
  margin: 10px 0;
}
.browser-info {
  font-family: "Quicksand", sans-serif;
  background-color: rgba(0, 0, 0, 0.54);
  border-radius: 8px;
  color: #e8e8e8;
  box-shadow: 0 0 15px rgba(0, 0, 0, 0.54);
  position: absolute;
  top: 50%;
  left: 50%;
  transform: translate(-50%, -50%);
  width: 850px;
  max-width: 90%;
  display: none;
  backdrop-filter: blur(25px);
  -webkit-backdrop-filter: blur(25px);
}
.browser-info h1 {
  font-size: 1.3em;
  padding: 20px;
  font-weight: 600;
}
.browser-info p {
  font-size: 1.1em;
  padding: 0 35px 20px 35px;
  font-weight: 400;
}

/* I want these words to stay on the same line. */
.nowrap {
  white-space: nowrap;
}
Step1: We’ll use the universal tag selector to set the padding and margin to “zero,” and we’ll use the box-sizing attribute to set the box-sizing to “Border-box.”
We will set the width and height to 100% of our body using the body selector and class selector (.cadere), and the overflow property will be set to auto.
* {
  margin: 0;
  padding: 0;
  box-sizing: border-box;
  -webkit-tap-highlight-color: transparent;
}
html,
body,
.cadre {
  width: 100%;
  height: 100%;
  overflow: auto;
}
Step2: Now using th class selector (.cadre) , using the background-image property with url we will add the background for our project and using the background-repeat property the background is set to “no-repeat” and size of the backgorund will cover the whole body and display is set to flex with a transition delay of 0.6s
50+ Html ,Css & Javascript Projects With Source Code
.cadre {
  background-image: url("https://www.vocowallpaper.com/wallpapers/26/Dark%2C+blue%2C+background%2C+iOS+13--w26532--preview.jpg");
  background-repeat: no-repeat;
  background-size: cover;
  background-position-x: center;
  display: flex;
  justify-content: center;
  align-items: center;
  transition: background-image 0.6s;

  -moz-user-select: none;
  -webkit-user-select: none;
  -ms-user-select: none;
  user-select: none;
}
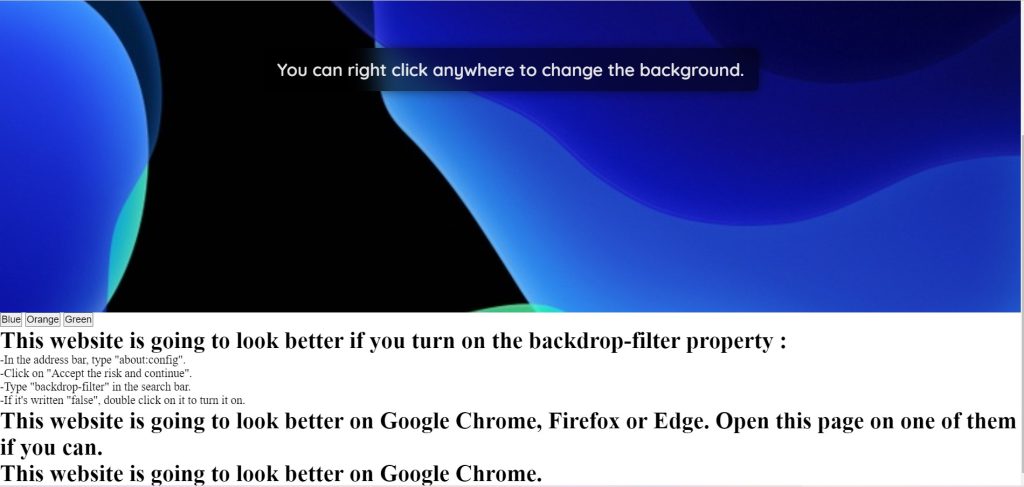
Step3: Using the font-family attribute, we will now style our title. The font-family will be “Quicksand,” the font-size will be 1.5 rem, and the font-boldness will be around 600. We also added 15px top and bottom padding, as well as left and right padding, because our title’s 20px background colour is set to black, and we will add a 15px blur to the background using the background filter.
.title {
  font-family: "Quicksand", sans-serif;
  font-size: 1.5em;
  font-weight: 600;
  padding: 15px 20px;
  background-color: rgba(0, 0, 0, 0.54);
  border-radius: 8px;
  color: #e8e8e8;
  backdrop-filter: blur(15px);
  -webkit-backdrop-filter: blur(15px);
  box-shadow: 0 0 15px rgba(0, 0, 0, 0.54);
  max-width: 90%;
}
Step4: Now we’ll style our context menu. First, we will add some border-radius to our context menu, with a width of 150px. Using the box-shadow property, we will add a box shadow to our context menu, with the position set to absolute.
ADVERTISEMENT
Using the class selector, we will now style the blue, orange, and green buttons (.btn). Using the border property, we will set the border to “none,” the background colour to “transparent,” the width to 100%, the height to 50 px, and the font size to 1 em.
ADVERTISEMENT
100+ JavaScript Projects With Source Code ( Beginners to Advanced)
ADVERTISEMENT
.btn {
  border: none;
  background-color: transparent;
  width: 100%;
  height: 50px;
  font-size: 1.1em;
  font-family: "Quicksand", sans-serif;
  font-weight: 800;
  letter-spacing: 0.004em;
  color: #e8e8e8;
  cursor: pointer;
  transition: background-color 0.2s;
  padding: 0 10px;
}
.btn div {
  width: 100%;
  height: 100%;
  text-align: left;
  transition: background-color 0.15s;
  border-radius: 3px;
  display: flex;
  align-items: center;
  padding: 0 10px;
}
.btn:hover div {
  background-color: rgba(147, 147, 147, 0.31);
}
#blue {
  margin: 10px 0;
}
#green {
  margin: 10px 0;
}
Step5: We’ll just add some styling to our browser data now. We’ll add some font families, change their background colours, and adjust the font size and padding.
ADVERTISEMENT
browser-info {
  font-family: "Quicksand", sans-serif;
  background-color: rgba(0, 0, 0, 0.54);
  border-radius: 8px;
  color: #e8e8e8;
  box-shadow: 0 0 15px rgba(0, 0, 0, 0.54);
  position: absolute;
  top: 50%;
  left: 50%;
  transform: translate(-50%, -50%);
  width: 850px;
  max-width: 90%;
  display: none;
  backdrop-filter: blur(25px);
  -webkit-backdrop-filter: blur(25px);
}
.browser-info h1 {
  font-size: 1.3em;
  padding: 20px;
  font-weight: 600;
}
.browser-info p {
  font-size: 1.1em;
  padding: 0 35px 20px 35px;
  font-weight: 400;
}

/* I want these words to stay on the same line. */
.nowrap {
  white-space: nowrap;
}
Step3: JavaScript Code
const menu = document.querySelector(".context-menu");
const red = document.querySelector("#red");
const blue = document.querySelector("#blue");
const black = document.querySelector("#black");
const cadre = document.querySelector(".cadre");
const firefox = document.querySelector("#firefox");
const IE = document.querySelector("#IE");
const mobile = document.querySelector("#mobile");

// Browsers detection :
var isFirefox = typeof InstallTrigger !== "undefined";
var isIE = /*@cc_on!@*/ false || !!document.documentMode;
var isChrome =
  /Chrome/.test(navigator.userAgent) && /Google Inc/.test(navigator.vendor);

function mobileCheck() {
  return (
    typeof window.orientation !== "undefined" ||
    navigator.userAgent.indexOf("IEMobile") !== -1
  );
}

if (mobileCheck() && !isChrome) {
  mobile.style.display = "block";
  mobile.style.backgroundColor = "#0b0b0b";
  cadre.style.cursor = "pointer";
} else if (isFirefox && !CSS.supports("backdrop-filter: blur(25px)")) {
  firefox.style.display = "block";
  firefox.style.backgroundColor = "#0b0b0b";
  cadre.style.cursor = "pointer";
} else if (isIE) {
  IE.style.display = "block";
  IE.style.backgroundColor = "#0b0b0b";
  cadre.style.cursor = "pointer";
}

// Context menu
cadre.addEventListener("contextmenu", function (e) {
  e.preventDefault();

  // Show the context menu
  menu.style.display = "block";

  // just for the pen :
  menu.style.transform = "translate(0)";

  // set position X of the menu
  if (window.innerWidth - e.clientX > menu.offsetWidth + 10) {
    menu.style.left = e.clientX + "px";
  } else {
    menu.style.left = e.clientX - menu.offsetWidth + "px";
  }
  // set position Y of the menu
  if (window.innerHeight - e.clientY > menu.offsetHeight + 10) {
    menu.style.top = e.clientY + "px";
  } else {
    menu.style.top = e.clientY - menu.offsetHeight + "px";
  }
});

// change the background
function changeBackground(color) {
  var url;

  switch (color) {
    case "blue":
      url =
        "https://www.vocowallpaper.com/wallpapers/26/Dark%2C+blue%2C+background%2C+iOS+13--w26532--preview.jpg";
      break;
    case "orange":
      url = "https://wallpapershome.com/images/pages/pic_h/21581.jpg";
      break;
    case "green":
      url =
        "https://www.vocowallpaper.com/wallpapers/27/Green%2C+dark%2C+background%2C+iOS+13--w27008--preview.jpg";
      break;
    default:
      url =
        "https://www.vocowallpaper.com/wallpapers/26/Dark%2C+blue%2C+background%2C+iOS+13--w26532--preview.jpg";
  }

  cadre.style.backgroundImage = "url(" + url + ")";
}

//exit the context menu
window.addEventListener("click", function () {
  menu.style.display = "none";
});

cadre.addEventListener("click", function () {
  IE.style.display = "none";
  firefox.style.display = "none";
  mobile.style.display = "none";
  cadre.style.cursor = "default";
});
- we will first select all the HTML elements using the document.queryselector() method and storing their value inside some constant variable.
10+ Javascript Projects For Beginners With Source Code
ADVERTISEMENT
- We will create the function for the size of mobile screen and we will check if the browser is chrome then using the css property in javascript we will set their backdrop and display will as “block”.
- We will now add an eventlistener to our context menu as the user will click on any of the button the using color function we will change the color of our background.
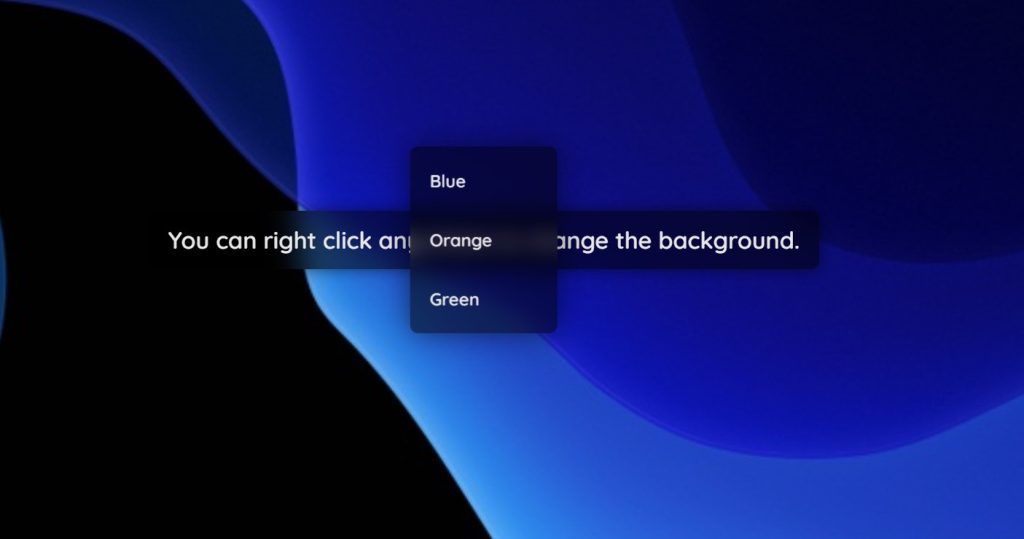
Now we’ve completed our Custom Context menu using HTML , CSS & javascript. I hope you understood the whole project. Let’s take a look at our Live Preview.
Output:
Live Preview Of Custom Context menu using HTML , CSS & Javascript
Now We have Successfully created our Custom context menu using HTML , CSS & javascript. You can use this project directly by copying into your IDE. WE hope you understood the project , If you any doubt feel free to comment!!
How to make Heartbeat Animation using HTML and CSS Code?
If you find out this Blog helpful, then make sure to search code with random on google for Front End Projects with Source codes and make sure to Follow the Code with Random Instagram page.
