Create a Chatbot using HTML , CSS and JavaScript
.png)
Hello Coder, Welcome to the Codewithrandom blog. In this blog, we learn how to create a chatbot using HTML, CSS, and JavaScript. So if users type a specific word, they get a specific answer in the chatbot that we write in JavaScript code.
What is a Chatbot?
A chatbot is a collection of different tools and technologies that helps developers provide 24*7 support to their customers. A chatbot is used to provide help and support to the user according to their needs. Chatbots help enhance user design and provide more accurate output.
What are the benefits of using Chatbots?
1. Provides 24/7 support.
2. Easily Accessible.
3. User friendly.
4. Support Multiple Languages.
How to Add Chatbot to a Website Using HTML?
You have to create three files in a folder called index.html, style.css, and app.js. You must remember that you can change the file name or folder name, but in that extension, like for HTML files, we use.html, so it’s the same. It may be like cwr.html or xyz.html.
After creating files and adding this code to the files, your chatbot is ready, so where you need it, add it to your website.
Live Preview Of Chatbot:-
I hope you enjoy our blog so let’s start with a basic HTML structure for the Chatbot Javascript.
| Code by | Codewithrandom |
| Project Download | Link Available Below |
| Language used | HTML, CSS, and JavaScript |
| External link / Dependencies | No |
| Responsive | YES |
Chatbot Html Code:-
<!DOCTYPE html>
<html lang="en">
<head>
<meta charset="UTF-8" />
<meta http-equiv="X-UA-Compatible" content="IE=edge" />
<meta name="viewport" content="width=device-width, initial-scale=1.0" />
<title>Chatbot Javascript </title>
<link rel="stylesheet" href="style.css" />
</head>
<body>
<div class="glass">
<h1>Ask Your Question??</h1>
<h2>Yeah,ask Some Question</h2>
<div class="input">
<input
type="text"
id="userBox"
onkeydown="if(event.keyCode == 13){ talk()}"
placeholder="Type your Question"
/>
</div>
<p id="chatLog">Answer Appering Hear</p>
</div>
<script src="app.js"></script>
</body>
</html>
We will construct the fundamental framework for our chatbot using HTML ideas, but first, we must add some file links to our html file.
Project management is essential while creating a project, and the simplest approach to manage is to make separate files for each language and then link them together inside our website.
Weather App Using Html,Css And JavaScript
For the links for our external CSS file, we will add the external file link inside the head section, and the javascript file is added inside the body section.
<!-- CSS -->
<link rel="stylesheet" href="style.css" />
 //Body Section
<script src="script.js"></script>
Adding the structure for Chatbot Html Code
- Using the div tag, we will create a container for our chatbot.
- Inside the div tag, using the h1> tag, we will add the heading of our chatbot, and then using the input tag with type text, we will create an input column for the user so that they can ask questions to the chatbot.
- Then we will create a section using the div tag in which the answer will be displayed.
- There is all the HTML code for the Chatbot. Now, you can see output without CSS and JavaScript. then we write Css and JavaScript for the Chatbot.
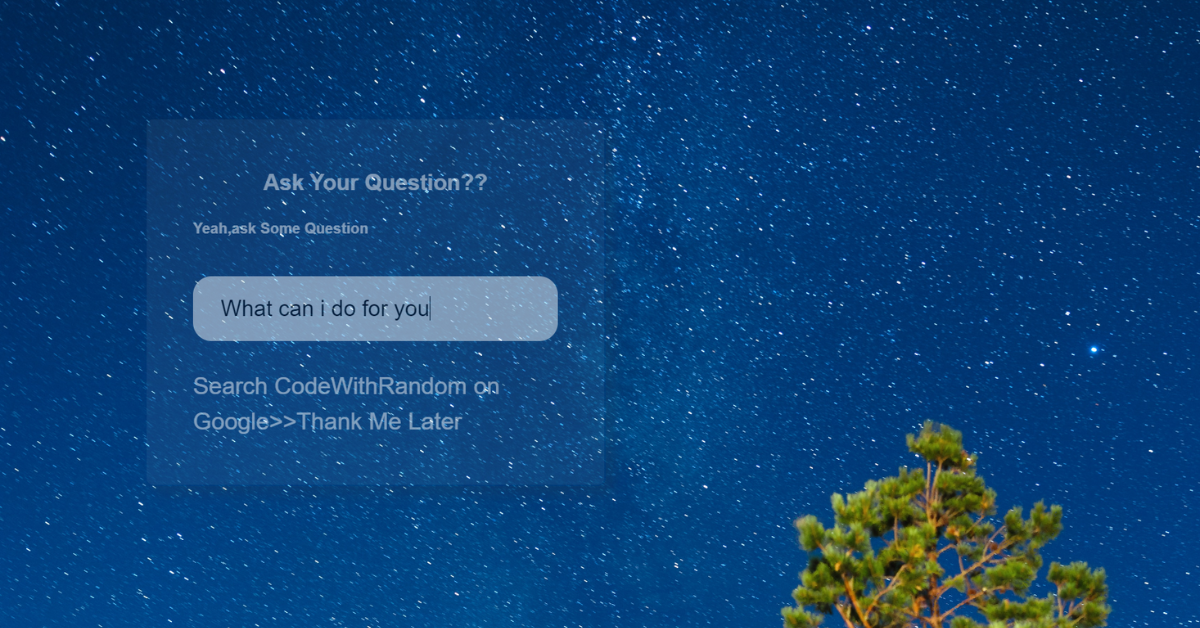
Let’s have a look at our chatbot webpage now that we’ve added structure.
100+ JavaScript Projects With Source Code ( Beginners to Advanced)
Only Html Code output:-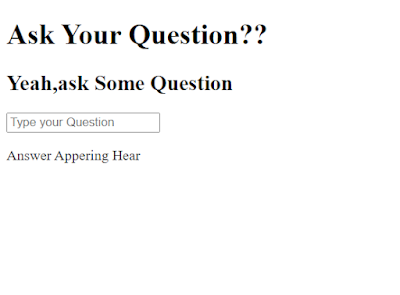
Chatbot CSS Code:-
 * {
margin: 0;
padding: 0;
box-sizing: border-box;
}
body {
width: 100vw;
height: 100vh;
font-family: sans-serif;
padding: 10em 10em;
background: url(./bg.jpg);
opacity: 0.5;
background-position: center;
background-repeat: no-repeat;
background-position: 100% 20%;
background-size: cover;
display: flex;
align-items: center;
justify-content: space-between;
}
.glass {
width: 500px;
height: 400px;
background-color: rgba(255, 255, 255, 0.1);
padding: 50px;
color: #000;
border-radius: 9px;
backdrop-filter: blur(50px);
border: 2px solid transparent;
background-clip: padding-box;
box-shadow: 10px 10px 10px rgba(45, 55, 68, 0.3);
line-height: 1.5;
transform: translatey(-5%);
transition: transform 0.5s;
}
.glass-1 {
width: 500px;
height: 400px;
background-color: rgba(255, 255, 255, 0.1);
padding: 50px;
color: rgb(122, 82, 82);
border-radius: 9px;
backdrop-filter: blur(50px);
border: 2px solid transparent;
background-clip: padding-box;
box-shadow: 10px 10px 10px rgba(45, 55, 68, 0.3);
line-height: 1.5;
transform: translatey(-5%);
transition: transform 0.5s;
font-size: 1.7rem;
}
.glass h1 {
font-size: 1.5rem;
text-align: center;
}
.glass h2 {
font-size: 1rem;
margin-top: 20px;
}
.input {
width: 100%;
height: 70px;
overflow: hidden;
margin-top: 40px;
}
.input input {
width: 100%;
height: 70px;
border: none;
padding-left: 30px;
padding-top: 0;
outline: none;
font-size: 1.5rem;
border-radius: 20px;
}
.glass p {
font-size: 1.6rem;
margin-top: 30px;
}Step1:The margin and padding will be set to “zero” using the universal tag selector (*), and the box-sizing attribute will be used to set the box-sizing to “border-box.”
Restaurant Website Using HTML and CSS
ADVERTISEMENT
We’ll set the width and height to 100vw and 100vh, respectively, using the body tag selector. The body’s typeface is specified to be “sans-serif.” We have added an image to our chatbot using the URL and the background parameter. The display was set to “flex.”
ADVERTISEMENT
* {
  margin: 0;
  padding: 0;
  box-sizing: border-box;
}
body {
  width: 100vw;
  height: 100vh;
  font-family: sans-serif;
  padding: 10em 10em;
  background: url(./bg.jpg);
  opacity: 0.5;
  background-position: center;
  background-repeat: no-repeat;
  background-position: 100% 20%;
  background-size: cover;
  display: flex;
  align-items: center;
  justify-content: space-between;
}Step2:We will now adjust the width and height to 500 pixels and 400 pixels, respectively, using the class selector (.glass). We will specify a border-radius of 9 pixels using the border-radius attribute. Using the backdrop filter, we will add a filter to the background and give our glass container a blurred backdrop.
ADVERTISEMENT
Car Racing Game Using HTML,CSS and JavaScript Code
ADVERTISEMENT
We’ll now style the components inside of our glass container. Our h1 heading will have a font size of 1.5 rem, and the content will be centred by utilising the text-align attribute. The remaining elements will also get style in a similar manner.
ADVERTISEMENT
.glass {
  width: 500px;
  height: 400px;
  background-color: rgba(255, 255, 255, 0.1);
  padding: 50px;
  color: #000;
  border-radius: 9px;
  backdrop-filter: blur(50px);
  border: 2px solid transparent;
  background-clip: padding-box;
  box-shadow: 10px 10px 10px rgba(45, 55, 68, 0.3);
  line-height: 1.5;
  transform: translatey(-5%);
  transition: transform 0.5s;
}
.glass-1 {
  width: 500px;
  height: 400px;
  background-color: rgba(255, 255, 255, 0.1);
  padding: 50px;
  color: rgb(122, 82, 82);
  border-radius: 9px;
  backdrop-filter: blur(50px);
  border: 2px solid transparent;
  background-clip: padding-box;
  box-shadow: 10px 10px 10px rgba(45, 55, 68, 0.3);
  line-height: 1.5;
  transform: translatey(-5%);
  transition: transform 0.5s;
  font-size: 1.7rem;
}
.glass h1 {
  font-size: 1.5rem;
  text-align: center;
}
.glass h2 {
  font-size: 1rem;
  margin-top: 20px;
}
.input {
  width: 100%;
  height: 70px;
  overflow: hidden;
  margin-top: 40px;
}
.input input {
  width: 100%;
  height: 70px;
  border: none;
  padding-left: 30px;
  padding-top: 0;
  outline: none;
  font-size: 1.5rem;
  border-radius: 20px;
}
.glass p {
  font-size: 1.6rem;
  margin-top: 30px;
}
Chat Bot Html Css Output Update:-
Ecommerce Website Using HTML, CSS, & JavaScript (Source Code)
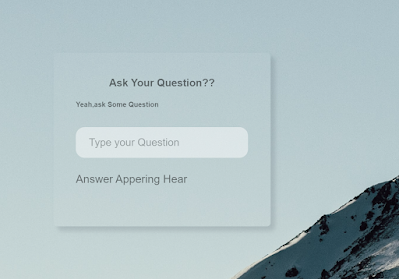
Javascript Chatbot Code:-
function talk(){
var know = {
"Who are you" : "Hello, Codewith_random here ",
"How are you" : "Good :)",
"What can i do for you" : "Please Give us A Follow & Like.",
"Your followers" : "I have my family of 5000 members, i don't have follower ,have supportive Famiy ",
"ok" : "Thank You So Much ",
"Bye" : "Okay! Will meet soon.."
};
var user = document.getElementById('userBox').value;
document.getElementById('chatLog').innerHTML = user + "<br>";
if (user in know) {
document.getElementById('chatLog').innerHTML = know[user] + "<br>";
}else{
document.getElementById('chatLog').innerHTML = "Sorry,I didn't understand <br>";
}
}
We’ll build a function called talk() in our javascript, and inside of it, we’ll establish an object variable in which we’ll store the number of strings before using the document.
10+ JavaScript Projects For Beginners In 2023 (Source Code)
We will choose the HTML element using the getelementbyId () method, and we will use the if statement to determine whether or not the asked question is stored in the function. If so, the solution will be displayed. Otherwise, “Sorry, I didn’t understand” will appear.
Final Output Of Chatbot Using Html,Css, and JavaScript:-
[su_button id=”download” url=”https://drive.google.com/drive/folders/1Gyz2eubAwC8fw6RA-POzE2Dm8xbSIIY4?usp=sharing” target=”blank” style=”3d” size=”11″ wide=”yes” center=”yes” icon=”icon: download”]DOWNLOAD CODE NOW[/su_button]


Gym Website Using HTML and CSS With Source Code
Here is our updated output with javascript. Hope you like the Chatbot. you can see the output video and project screenshots. See our other blogs and gain knowledge in front-end development. Thank you!
10+ HTML CSS Projects For Beginners with Source Code
Written by – Code With Random/Anki
Which code editor do you use for this Chatbot project coding?
I personally recommend using VS Code Studio, it’s straightforward and easy to use.
How to Make Chatbot in Html?
we need Css and Javascript code in an Html file for creating Chatbot in Html. we Create a div, some heading and paragraph, and input where the user can ask a question to the chatbot, and the chatbot show the answer in the heading or paragraph where we want through javascript code.
How To Add Chatbot In Website Using Html?
You have to create 3 Files in a folder called index.html, style.css, and app.js. You must remember that you can change the file name or folder name but in that extension like for HTML files we use .html so it’s the same is it. it may be like cwr.html, xyz.html.
after creating files and adding this code in files your chatbot is ready so where you need you add this to your website.
What is a Chatbot?
A chatbot is a collection of different tools and technologies that helps developers provide 24*7 support to their customers. A chatbot is used to provide help and support to the user according to their needs. Chatbots help enhance user design and provide more accurate output.
![15+ CSS Text Hover Effects [Demo + Code] Read more about the article 15+ CSS Text Hover Effects [Demo + Code]](https://www.codewithrandom.com/wp-content/uploads/2022/11/codewithrandom47-300x157.png)
