How to Create To Do list Using JavaScript
Hello Coder! Welcome To the Codewithrandom Blog. In This Blog, We Learn How To Create To Do List Using Javascript. In this to-do list you can add todos, and delete also show many todos left and completed and active todos.
The HTML (Hypertext Markup Language) will help us to create the structure for the list with some necessary attributes and elements.
Then we will use CSS (Cascading Stylesheet) which will help us to style or design the project with suitable padding and alignment.
At last, we will use JS (JavaScript) which will add logic to make the project responsive from the user end. I hope you have got an idea about the project.
100+ HTML,CSS and JavaScript Projects With Source Code ( Beginners to Advanced)
HTML Code For To-Do List:-
<div id="hero" class="hero">
<h1 class="title">To Do List</h1>
<div id="todoApp" class="todo-app">
<div id="todoMenu1" class="todo-menu-1">
<button
id="toggleAll"
class="toggle-all"
aria-label="Toggle all to do tasks"
>
<span class="rotate">❯</span>
</button>
<input
id="addTodoTextInput"
class="add-todo-text-input"
type="text"
placeholder="What do you need to do?"
aria-label="Enter to do text"
autofocus
/>
</div>
<ul id="todos" class="todos" aria-label="List of to do tasks"></ul>
<div id="todoMenu2" class="todo-menu-2">
<label
id="todosLeft"
class="todos-left"
aria-label="Number of to do tasks left to complete"
></label>
<div id="todoMenu2Buttons" class="todo-menu-2-buttons">
<button
id="showAllTodos"
class="menu-2-button active"
aria-label="Show all to do tasks"
>
All
</button>
<button
id="showUncompletedTodos"
class="menu-2-button"
aria-label="Show active to do tasks"
>
Active
</button>
<button
id="showCompletedTodos"
class="menu-2-button"
aria-label="Show completed to do tasks"
>
Completed
</button>
</div>
<button
id="deleteCompletedButton"
class="delete-completed-button"
aria-label="Clear completed to do tasks"
>
Clear completed
</button>
</div>
</div>
</div>
Inside our to-do list app, we will be creating two sections. The first section is the hero section, inside of which we will create an input section for the user. First of all, using the h1> tag, we will add the heading for our to-do list app, and then, using the input type text, we will create a section where the user wishes to enter what he or she wants to do, and then, using the toggle button, we will switch between the to-do list and the task list. Using the toggle button, we will create a section in which we will create a list of tasks that the user has to perform.
Restaurant Website Using HTML And CSS With Source Code
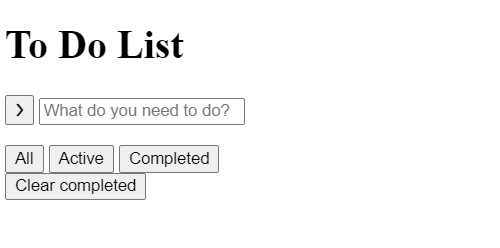
Then, using the button tag, we will create the button for the active, completed, and cleared buttons inside our to-do list app for making a complete to-do notes app that will help in entering the important tasks of the day and completing them accordingly. There is all the HTML Code for To do list Now you can see output without Css and JavaScript. then we write Css and JavaScript for our To do list Project.
Html Code Output:-
CSS Code For To-Do List:-
:root {
    --mobile-hero-app-row: 9fr;
}
html {
    box-sizing: border-box;
}
*,
*:before,
*:after {
    -webkit-box-sizing: border-box;
    box-sizing: border-box;
    margin: 0;
    padding: 0;
}
body {
    font-family: "Roboto", sans-serif;
}
.hero {
    display: -ms-grid;
    display: grid;
    -ms-grid-columns: 1fr 550px 1fr;
    grid-template-columns: 1fr 550px 1fr;
    -ms-grid-rows: 110px 9fr 1fr;
    grid-template-rows: 110px 9fr 1fr;
    background: #8967d0;
    height: 100vh;
    width: 100vw;
}
.title {
    -ms-grid-column: 2;
    grid-column: 2;
    -ms-flex-item-align: center;
    -ms-grid-row-align: center;
    align-self: center;
    -ms-grid-column-align: center;
    justify-self: center;
    color: #574285;
    font-size: 50px;
}
.todo-app {
    display: -ms-grid;
    display: grid;
    -ms-grid-rows: 60px 1fr 45px;
    grid-template-rows: 60px 1fr 45px;
    -ms-grid-column: 2;
    grid-column: 2;
    -ms-grid-row: 2;
    grid-row: 2;
    background: white;
    overflow: auto;
    border-radius: 7px;
    -webkit-box-shadow: 0 10px 20px rgba(0, 0, 0, 0.19),
        0 6px 6px rgba(0, 0, 0, 0.23);
    box-shadow: 0 10px 20px rgba(0, 0, 0, 0.19), 0 6px 6px rgba(0, 0, 0, 0.23); /* Because scrollbar is usually between 14-18px. */
    margin-right: -18px;
    margin-left: -18px;
}
.todo-menu-1 {
    display: -ms-grid;
    display: grid;
    -ms-grid-columns: 50px 1fr;
    grid-template-columns: 50px 1fr;
    -ms-grid-rows: 60px;
    grid-template-rows: 60px;
    -webkit-box-align: stretch;
    -ms-flex-align: stretch;
    align-items: stretch;
    -webkit-box-shadow: 0 -1px 6px rgba(0, 0, 0, 0.19);
    box-shadow: 0 -1px 6px rgba(0, 0, 0, 0.19);
    border-bottom: 1px solid #e6e6e6;
}
.add-todo-text-input {
    outline: none;
    border: none;
    border-bottom: 1px solid #e6e6e6;
}
::-webkit-input-placeholder {
    color: #e6e6e6;
    font-style: italic;
}
:-ms-input-placeholder {
    color: #e6e6e6;
    font-style: italic;
}
::-ms-input-placeholder {
    color: #e6e6e6;
    font-style: italic;
}
::placeholder {
    color: #e6e6e6;
    font-style: italic;
}
:-moz-placeholder,
::-moz-placeholder {
    opacity: 1;
}
.toggle-all,
.delete-button,
.delete-completed-button,
.menu-2-button {
    background: none;
    border: none;
    outline: none;
}
.toggle-all {
    color: #e6e6e6;
    -ms-grid-column-align: stretch;
    justify-self: stretch;
    text-align: center;
}
.toggle-all-checked {
    color: #4d4d4d;
}
.rotate {
    display: inline-block;
    font-size: 20px;
    -webkit-transform: rotate(90deg);
    -ms-transform: rotate(90deg);
    transform: rotate(
        90deg
    ); /* Prevent rotate class from being clicked so that toggle-all button can be clicked instead. */
    pointer-events: none;
}
.todo-menu-2 {
    display: -ms-grid;
    display: grid;
    -ms-grid-columns: 2fr 3fr 2fr;
    grid-template-columns: 2fr 3fr 2fr;
    -webkit-box-align: center;
    -ms-flex-align: center;
    align-items: center;
    color: #777;
    background: #f4f5f6;
    font-size: 14px;
    font-weight: 300;
}
.todo-menu-2 .todos-left {
    -ms-grid-column-align: start;
    justify-self: start;
    padding-left: 20px;
}
.todo-menu-2 .todo-menu-2-buttons {
    -ms-grid-column-align: center;
    justify-self: center;
    display: -ms-grid;
    display: grid;
    -ms-grid-columns: auto auto auto;
    grid-template-columns: auto auto auto;
    grid-gap: 3px;
}
.todo-menu-2 .delete-completed-button,
.todo-menu-2 .menu-2-button,
.todo-menu-2 .todos-left {
    font-family: inherit;
    color: inherit;
    font-size: inherit;
    font-weight: inherit;
}
.todo-menu-2 .menu-2-button {
    padding: 2px 8px;
    border: 1px solid rgba(137, 103, 208, 0);
    border-radius: 3px;
}
.todo-menu-2 .menu-2-button:hover {
    border: 1px solid rgba(137, 103, 208, 0.5);
}
.active {
    border: 1px solid rgba(137, 103, 208, 1) !important;
}
.todo-menu-2 .delete-completed-button {
    -ms-grid-column-align: end;
    justify-self: end;
    padding-right: 20px;
}
.todo-menu-2 .delete-completed-button:hover {
    text-decoration: underline;
}
.todos {
    display: -ms-grid;
    display: grid;
    grid-auto-columns: 1fr;
    grid-auto-rows: -webkit-max-content;
    grid-auto-rows: max-content;
    list-style-type: none;
    overflow: auto;
}
.todos .todo {
    display: -ms-grid;
    display: grid;
    -ms-grid-columns: 50px 450px 50px;
    grid-template-columns: 50px 450px 50px;
    border-bottom: 1px solid #ededed;
    -webkit-box-align: center;
    -ms-flex-align: center;
    align-items: center;
    overflow-wrap: break-word; /* word-wrap is renamed to overflow-wrap but Edge still uses word-wrap */
    word-wrap: break-word;
} /* checkbox centering */
.todos .todo .pretty {
    -ms-grid-column-align: center;
    justify-self: center;
    -webkit-transform: scale(1.4);
    -ms-transform: scale(1.4);
    transform: scale(1.4);
    margin: 0;
}
.pretty .state label {
    text-indent: 0;
}
.pretty .state i {
    -webkit-transform: rotate(-5deg);
    -ms-transform: rotate(-5deg);
    transform: rotate(-5deg);
    color: #5dc2af;
}
.add-todo-text-input,
.todo-text {
    font-size: 24px;
    color: #4d4d4d;
}
.todo-text {
    padding-top: 13px;
    padding-bottom: 13px;
}
.todo-text:focus {
    outline: none;
}
.todo-checked-text {
    color: #d9d9dd;
    text-decoration: line-through;
}
.todo-checked-text:focus {
    color: #4d4d4d;
    text-decoration: none;
}
.delete-button {
    font-size: 28px;
    color: #df8383;
    -ms-grid-column-align: end;
    justify-self: end;
    visibility: hidden;
}
.todos .todo:hover .delete-button {
    visibility: visible;
}
.delete-button:hover {
    color: #f14a5d;
    cursor: pointer;
}
@media (max-width: 1024px) {
    .hero {
        height: var(--mobile-hero-height);
    }
    .delete-button {
        color: #f14a5d;
        -ms-grid-column-align: center;
        justify-self: center;
        visibility: visible;
    }
}
@media (max-width: 680px) {
    .hero {
        -ms-grid-columns: 1fr 8fr 1fr;
        grid-template-columns: 1fr 8fr 1fr;
        -ms-grid-rows: 73px 9fr 1fr;
        grid-template-rows: 73px 9fr 1fr;
    }
    .title {
        font-size: 33px;
    }
    .todo-app {
        -ms-grid-rows: 40px 1fr auto;
        grid-template-rows: 40px 1fr auto;
    }
    .todo-menu-1 {
        -ms-grid-rows: 40px;
        grid-template-rows: 40px;
    }
    .add-todo-text-input,
    .todo-text {
        font-size: 16px;
    }
    .todo-menu-2 {
        -ms-grid-columns: 1fr 1fr;
        grid-template-columns: 1fr 1fr;
        grid-row-gap: 8px;
        font-size: 12px;
        padding: 8px 0px;
    }
    .todo-menu-2 .todos-left {
        -ms-grid-column-align: center;
        justify-self: center;
    }
    .todo-menu-2 .todo-menu-2-buttons {
        grid-column: 1 / -1;
        -ms-grid-row: 1;
        grid-row: 1;
    }
    .todo-menu-2 .delete-completed-button {
        -ms-grid-column-align: center;
        justify-self: center;
    }
    .todo-menu-2 .delete-completed-button:hover {
        text-decoration: none;
    }
    .todos {
    }
    .todos .todo {
        -ms-grid-columns: 50px var(--mobile-todo-text-width) 50px;
        grid-template-columns: 50px var(--mobile-todo-text-width) 50px;
    }
    ::-webkit-input-placeholder {
        font-size: 16px;
    }
    :-ms-input-placeholder {
        font-size: 16px;
    }
    ::-ms-input-placeholder {
        font-size: 16px;
    }
    ::placeholder {
        font-size: 16px;
    }
    .rotate {
        font-size: 14px;
    }
}
Inside our CSS for adding the styling inside our to-do list, we will first set the background color to orange. The font family is set as Roboto in our to-do list app, and then using the basic class selector, we will add the styling to each of the elements of our to-do list.
Create A Travel/Tourism Website Using HTML and CSS
We will add the styling to the hero section, inside which we will add the styling to the heading and the input box of our to-do list. Using the h1 tag selector, we will set the font size to 50px. Inside our input box, we will add a bottom border to our input box. Along with this, we will add the styling to the button and the placeholder inside our input box. Similarly, we will add styling to menu 2, where we will display all the to-do list items. We will add the padding and margin in between, and using the media query property, we will set the maximum width of our container.
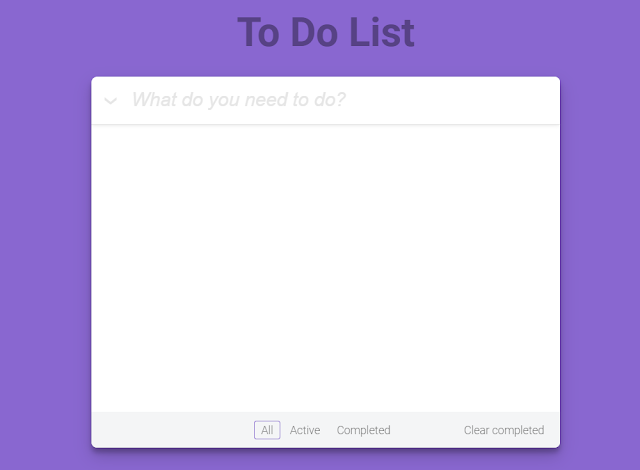
We will add responsiveness to our project according to the screen size. We will add responsiveness to our to-do list. Now we complete our CSS Code section.
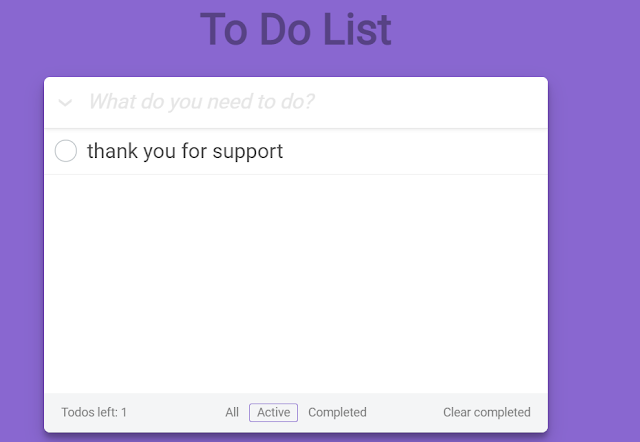
Here is our updated output Wih HTML + CSS of Todo List.
Portfolio Website using HTML and CSS (Source Code)
To-Do List JavaScript Code:-
var todoList = {
    todos: [],
    addTodo: function(todoText) {
     this.todos.push({
      todoText: todoText,
      completed: false
     });
    },
    deleteTodo: function(position) {
     this.todos.splice(position, 1);
    },
    deleteCompletedTodos: function() {
     // Count backwards to avoid index problem when deleting todos.
     for (var i = this.todos.length - 1; i >= 0; i--) {
      if (this.todos[i].completed === true) {
       this.deleteTodo(i);
      }
     }
    },
    updateTodo: function(newTodoText, position) {
     this.todos[position].todoText = newTodoText;
    },
    toggleCompleted: function(todo) {
     todo.completed = !todo.completed;
    },
    toggleAll: function() {
     var totalTodos = this.todos.length;
     var completedTodos = 0;
     // Count number of completed todos.
     this.todos.forEach(function(todo) {
      if (todo.completed === true) {
       completedTodos++;
      }
     });
     if (completedTodos === totalTodos) {
      todoList.todos.forEach(function(todo) {
       todo.completed = false;
      });
     }
     else {
      todoList.todos.forEach(function(todo) {
       todo.completed = true;
      });
     }
    },
    updateLocalStorage: function() {
     localStorage.setItem('todos', JSON.stringify(todoList.todos));
    },
    getLocalStorage: function() {
     if (localStorage.getItem('todos') !== null) {
      todoList.todos = JSON.parse(localStorage.getItem('todos'));
     }
    }
   };
   var handlers = {
    addTodo: function() {
     var addTodoTextInput = document.getElementById('addTodoTextInput');
     // Test if addTodoTextInput.value is not empty and not just whitespace before adding it as a todo.
     if (/S/.test(addTodoTextInput.value)) {
      todoList.addTodo(addTodoTextInput.value);
      addTodoTextInput.value = '';
      view.displayTodos();
     }
    },
    deleteTodo: function(position) {
     todoList.deleteTodo(position);
     view.displayTodos();
    },
    deleteCompletedTodos: function() {
     todoList.deleteCompletedTodos();
     view.displayTodos();
    },
    updateTodo: function(newTodoText, position) {
     todoList.updateTodo(newTodoText, position);
     todoList.updateLocalStorage();
    },
    toggleCompleted: function(todo) {
     todoList.toggleCompleted(todo);
     view.displayTodos();
    },
    toggleAll: function() {
     todoList.toggleAll();
     view.displayTodos();
    }
   };
   var view = {
    selectedFilter: 'showAllTodos',
    filteredTodos: [],
    displayTodos: function() {
     var todosUl = document.getElementById('todos');
     // Filter todos based on selectedFilter.
     view.filterTodos();
     // Empty the list before updating it.
     todosUl.innerHTML = '';
     // Create todo elements from todoList.todos and display them.
     view.filteredTodos.forEach(function(todo, position) {
      var todoLi = document.createElement('li');
      var checkbox = this.createCheckbox(todo);
      var todoLabel = this.createTodoLabel(todo);
      var deleteButton = this.createDeleteButton();
      todoLi.className = 'todo';
      todoLi.appendChild(checkbox);
      todoLi.appendChild(todoLabel);
      todoLi.appendChild(deleteButton);
      todosUl.appendChild(todoLi);
      // If todo is completed, set checkbox to true and give the li its 'checked' class.
      if (todo.completed === true) {
       checkbox.querySelector('input').checked = true;
       todoLabel.classList.add('todo-checked-text');
      }
      todo.elementReference = todoLi;
     }, this);
     this.checkTodosCompletion();
     todoList.updateLocalStorage();
    },
    filterTodos: function() {
     switch(view.selectedFilter) {
      case 'showAllTodos':
       view.filteredTodos = todoList.todos;
       break;
      case 'showUncompletedTodos':
       view.filteredTodos = todoList.todos.filter(function(todo) {
        return todo.completed == false;
       });
       break;
      case 'showCompletedTodos':
       view.filteredTodos = todoList.todos.filter(function(todo) {
        return todo.completed == true;
       });
       break;
     }
    },
    createCheckbox: function() {
     // for pretty-checkbox.css
     var checkboxMain = document.createElement('div');
     var checkbox = document.createElement('input');
     var checkboxState = document.createElement('div');
     var checkboxIcon = document.createElement('i');
     var checkboxLabel = document.createElement('label');
     checkboxMain.className = 'pretty p-icon p-round';
     checkboxState.className = 'state';
     checkboxIcon.className = 'icon mdi mdi-check mdi-18px';
     checkbox.type = 'checkbox';
     checkbox.className = 'checkbox';
     checkboxState.appendChild(checkboxIcon);
     checkboxState.appendChild(checkboxLabel);
     checkboxMain.appendChild(checkbox);
     checkboxMain.appendChild(checkboxState);
     return checkboxMain;
    },
    createTodoLabel: function(todo) {
     var todoLabel = document.createElement('label');
     todoLabel.textContent = todo.todoText;
     todoLabel.className = 'todo-text';
     todoLabel.contentEditable = true;
     return todoLabel;
    },
    createDeleteButton: function() {
     var deleteButton = document.createElement('button');
     deleteButton.textContent = '×';
     deleteButton.className = 'delete-button';
     return deleteButton;
    },
    checkTodosCompletion: function() {
     var totalTodos = todoList.todos.length;
     var completedTodos = 0;
     var toggleAllButton = document.getElementById('toggleAll');
     var deleteCompletedButton = document.getElementById('deleteCompletedButton');
     var todosLeftLabel = document.getElementById('todosLeft');
     todoList.todos.forEach(function(todo) {
      if (todo.completed === true) {
       completedTodos++;
      }
     });
     var uncompletedTodos = totalTodos - completedTodos;
     // If all todos are completed, add 'toggle-all-checked' class to toggleAll button.
     if (completedTodos === totalTodos && totalTodos > 0) {
      toggleAllButton.classList.add('toggle-all-checked');
     }
     else {
      toggleAllButton.classList.remove('toggle-all-checked');
     }
     // If at least one todo is completed, show Clear completed button, otherwise don't display it.
     switch(completedTodos) {
      case 0:
       deleteCompletedButton.style.display = 'none';
       break;
      default:
       deleteCompletedButton.style.display = 'initial';
       break;
     }
     // Update todosLeft label with the number of uncompleted todos.
     switch(uncompletedTodos) {
      case 0:
       todosLeftLabel.textContent = '';
       break;
      default:
       todosLeftLabel.textContent = "Todos left: " + uncompletedTodos;
     }
    },
    // Find the todo's element reference inside the todos array which matches argument element and then return it's index.
    getTodoElementIndex: function(todoElement) {
     var todo = todoList.todos.find(function(todo) {
      return todo.elementReference == todoElement;
     });
     return todoList.todos.indexOf(todo);
    },
    // If device width is 680px or smaller, make todo text field equal to app width - 100px (for checkbox and delete button) so that extra text goes in a new line instead of increasing the todo's width and making it overflow horizontally.
    resizeTodos: function() {
     if (window.matchMedia('(max-device-width: 680px)').matches) {
      var hero = document.getElementById('hero');
      var todoAppWidth = document.getElementById('todoApp').offsetWidth;
      var todoTextWidth = todoAppWidth - 100 + 'px';
      hero.style.setProperty('--mobile-todo-text-width', todoTextWidth);
     }
    },
    // For mobile devices, set hero height to mobile viewport height instead of using 100vh for height (because when using mobile keyboard, it's not included in the 100vh).
    setMobileHeroRows: function() {
     var hero = document.getElementById('hero');
     var windowHeight = window.innerHeight + 'px';
     hero.style.setProperty('--mobile-hero-height', windowHeight);
    },
    setUpEventListeners: function() {
     var addTodoTextInput = document.getElementById('addTodoTextInput');
     var todoMenu1 = document.getElementById('todoMenu1');
     var todosUl = document.getElementById('todos');
     var todoMenu2 = document.getElementById('todoMenu2');
     window.addEventListener('resize', function() {
      // If screen width is 680px or less, run resizeTodos function.
      // The problem with this if statement is that Apple devices report screen width in dips while Android devices report it in physical pixels (which are being used here).
      // Correct if statement to cover both Apple and Android devices:
      if (window.matchMedia('(max-device-width: 680px)').matches) {
       view.resizeTodos();
      }
     });
     todoMenu1.addEventListener('click', function(event) {
      var elementClicked = event.target;
      if (elementClicked.id === 'toggleAll') {
       handlers.toggleAll();
      }
     });
     // Run addTodo function when 'Enter' is pressed inside addTodoTextInput
     addTodoTextInput.addEventListener('keyup', function(event) {
      if (event.key === 'Enter') {
       handlers.addTodo();
      }
     });
     todosUl.addEventListener('click', function(event) {
      // Get the element that was clicked.
      var elementClicked = event.target;
      // Check if elementClicked is a delete button.
      if (elementClicked.classList.contains('delete-button')) {
       // Get index using getTodoElementIndex function.
       var indexOfTodoElement = view.getTodoElementIndex(elementClicked.parentNode);
       handlers.deleteTodo(indexOfTodoElement);
      }
      // Check if elementClicked is a checkbox.
      else if (elementClicked.classList.contains('checkbox')) {
       // Get index using getTodoElementIndex function.
       var indexOfTodoElement = view.getTodoElementIndex(elementClicked.parentNode.parentNode);
       handlers.toggleCompleted(todoList.todos[indexOfTodoElement]);
      }
     });
     // Make todos lose focus on Enter.
     todosUl.addEventListener('keypress', function(event) {
      var elementClicked = event.target;
      if (event.key === 'Enter') {
       elementClicked.blur();
      }
     });
     // When todo li loses focus, make todoList.todos.todo.todoText equal to the value of todo li.
     todosUl.addEventListener('focusout', function(event) {
      var elementClicked = event.target;
      if (elementClicked.classList.contains('todo-text')) {
       var indexOfTodoElement = view.getTodoElementIndex(elementClicked.parentNode);
       handlers.updateTodo(elementClicked.textContent, indexOfTodoElement);
      }
     });
     todosUl.addEventListener('paste', function(event) {
      // Prevent paste.
      event.preventDefault();
      // Get text from clipboard.
      var text = event.clipboardData.getData('text/plain');
      // Insert text.
      document.execCommand('insertHTML', false, text);
     });
     todoMenu2.addEventListener('click', function(event) {
      var elementClicked = event.target;
      if (elementClicked.id === 'deleteCompletedButton') {
       handlers.deleteCompletedTodos();
      }
      // If the clicked element is a menu 2 button, add 'active' class to it and remove it from any other active button.
      else if (elementClicked.classList.contains('menu-2-button')) {
       var menu2ButtonElements = document.querySelectorAll('.menu-2-button');
       menu2ButtonElements.forEach(function(button) {
        button.classList.remove('active');
       });
       elementClicked.classList.add('active');
       view.selectedFilter = elementClicked.id;
       view.displayTodos();
      }
     });
    }
   };
   view.setUpEventListeners();
   todoList.getLocalStorage();
   view.setMobileHeroRows();
   view.displayTodos();
   view.resizeTodos();
First, let’s save the HTML elements that we’ll be using in various functionalities using constant variable.
Using the document.getelementby() method, we store HTML elements in constants along with their tag names and IDs. The elements with id are new-task, incomplete task, and completed task, and the element with tag name is button. CreateNewTaskElement will be a new variable that will now have the function added. (taskString). Using documents, we will utilise this function to add a new list item to our to-do list. CreateElement using this record.
We’ll add an input box, label, and button to our to-do list app using the createElement command. To attach each item in this list, we will utilise the append() method. This technique is used to add a group of items or a string of objects after the last child of the element.
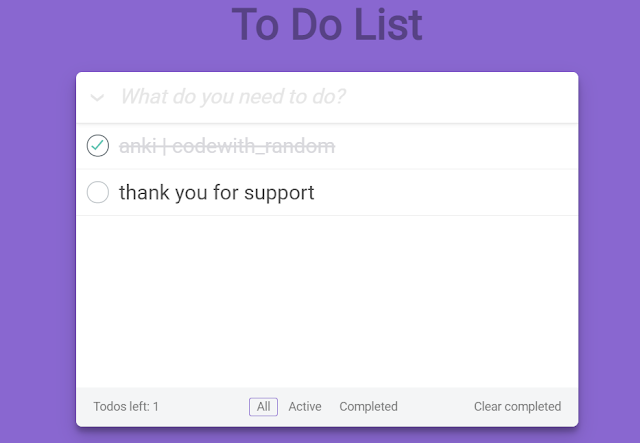
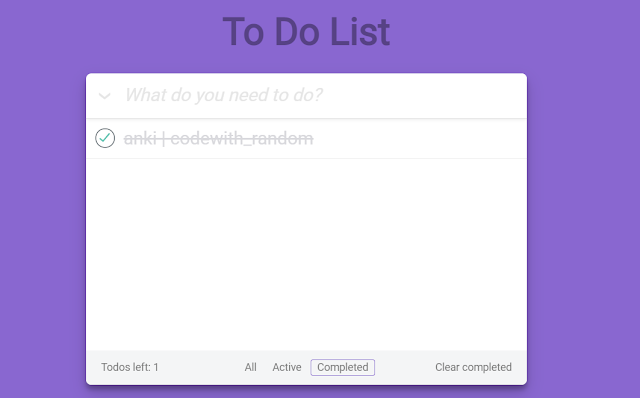
Now we complete our To do List Using JavaScript. Here is our updated output with HTML,CSS and JavaScript.
100+ JavaScript Projects With Source Code ( Beginners to Advanced)
Final Output Of To do List Using JavaScript:-
Video Output:
Create a Music Player using HTML,CSS & JavaScript
In this post, we learn how to Create To do list Using JavaScript. If we did a mistake or if there is any confusion please drop a comment to give a reply or help you in easy learning. Written by – Code With Random/Anki
What is a to do list?
What is the benefit of To-Do list?
Provides motivation
Improves memory
Reduces stress
