
How to Host a Website on MilesWeb: A Complete Step-by-Step Guide

Getting a website online for the first time can feel a little confusing.
You have your website files ready, you may already have a domain name, but then come questions like: Where do I upload the files? How do I connect the domain? What are nameservers? And how do I get that little HTTPS lock working?
I had the same questions when I first started working with hosting.
In this guide, I’ll walk you through the complete process of hosting a website on MilesWeb, starting from choosing a hosting plan and creating an account to connecting your domain, uploading your website files, enabling SSL, and finally checking whether everything is working properly.
I’ll also cover some of the extra features MilesWeb provides, which can be useful if you plan to host more than one website.
What Is Web Hosting?
Let’s start with the basics.
Your website is made up of files. A simple website might contain an index.html file, CSS, JavaScript, images and a few other folders.
But having those files on your laptop doesn’t make the website available on the internet.
You need a server that stores those files and makes them available whenever someone visits your domain. That’s basically what web hosting does.
For example, if your website is:
the domain tells the visitor’s browser where to go, while the hosting server stores the actual website files.
So, you can think of it this way:
Domain = your website’s address
Hosting = the server where your website lives
Once both are connected, people can access your website through the domain.
A Quick Introduction to MilesWeb
MilesWeb is a web hosting provider offering different types of hosting, including shared hosting, WordPress hosting, VPS, cloud and dedicated hosting.
For someone starting with a normal website, shared hosting is usually the simplest option. You don’t have to worry about managing an entire server, and most of the basic things you need are already available through the hosting panel.
What You Need Before Starting
Before we start, there are just a few things you should have ready.
Step-by-Step: How to Host Your Website on MilesWeb
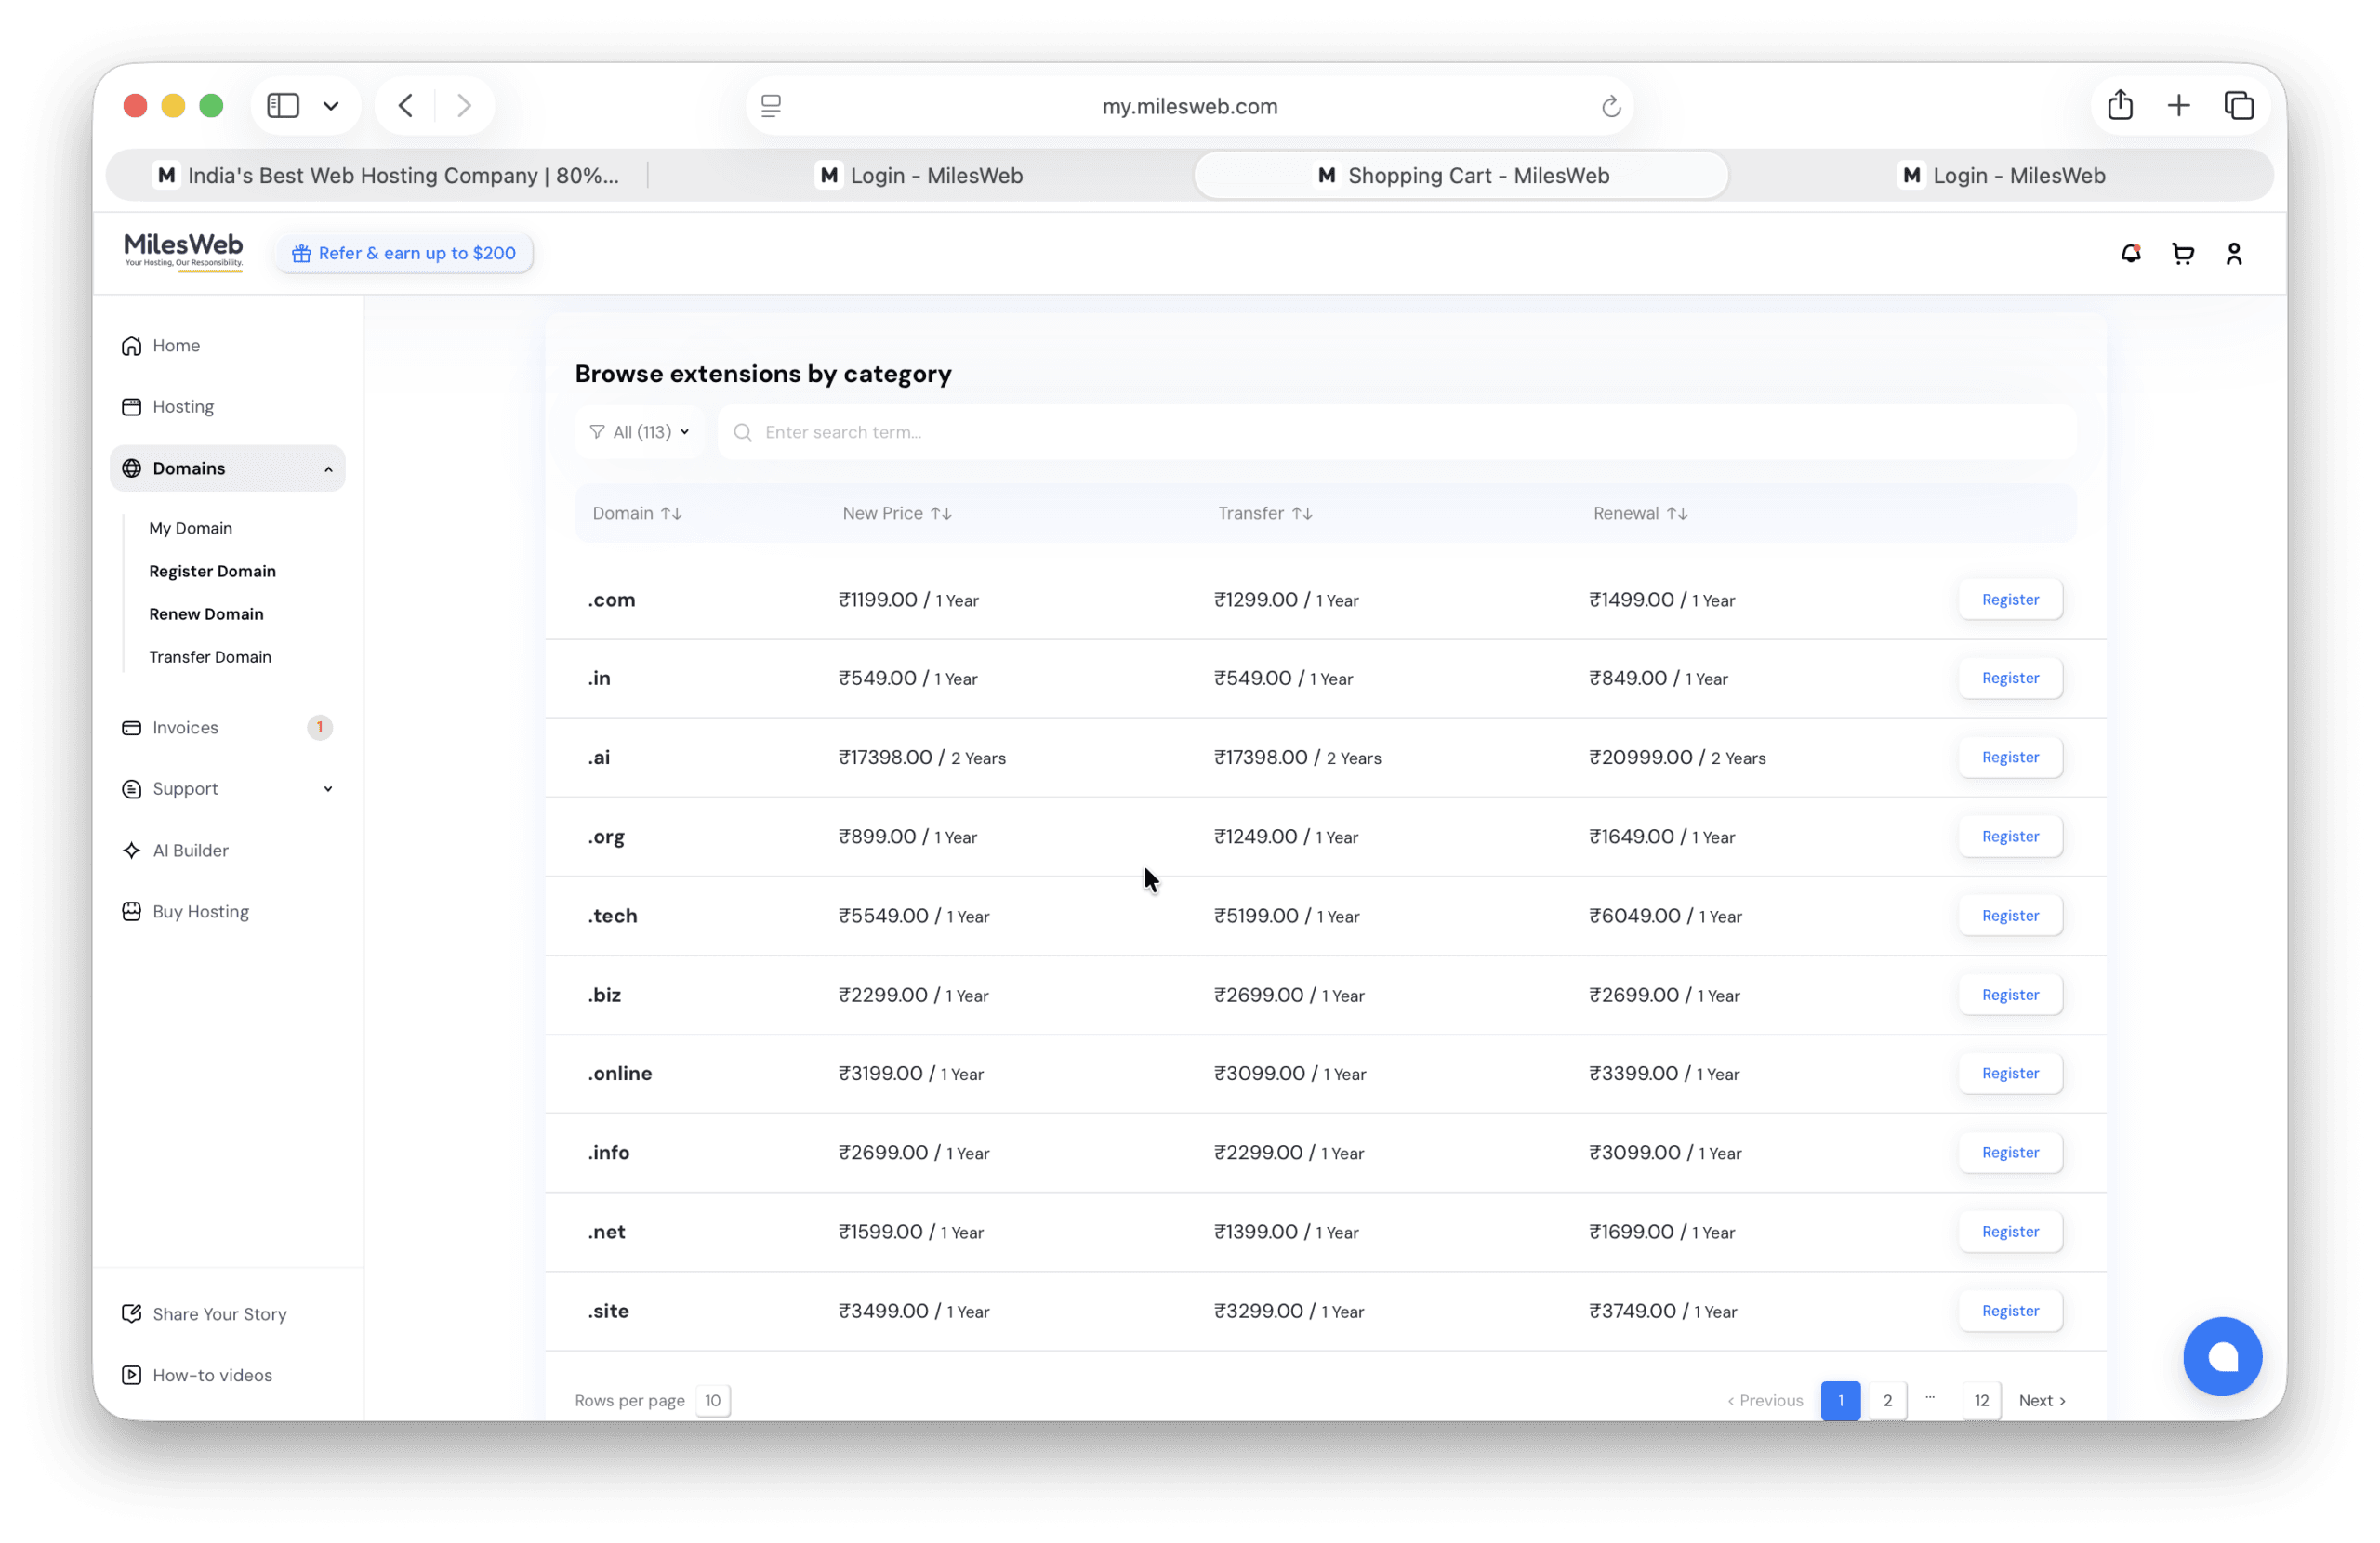
The first thing you need is a hosting plan that fits your website. MilesWeb offers different hosting options, but if you’re hosting a portfolio, blog, landing page, or small business website, shared hosting is usually enough.
If you’re planning to host multiple websites, look at the plans that support multiple domains. For example, the current Premium plan supports up to 25 websites.
Step 2: Create Your Account
Once you’ve selected your plan, create your MilesWeb account.
You’ll need to:
- Select your hosting plan.
- Choose the billing period.
- Enter your account details.
- Add or register your domain.
- Complete the payment.
- Finish the initial hosting setup.
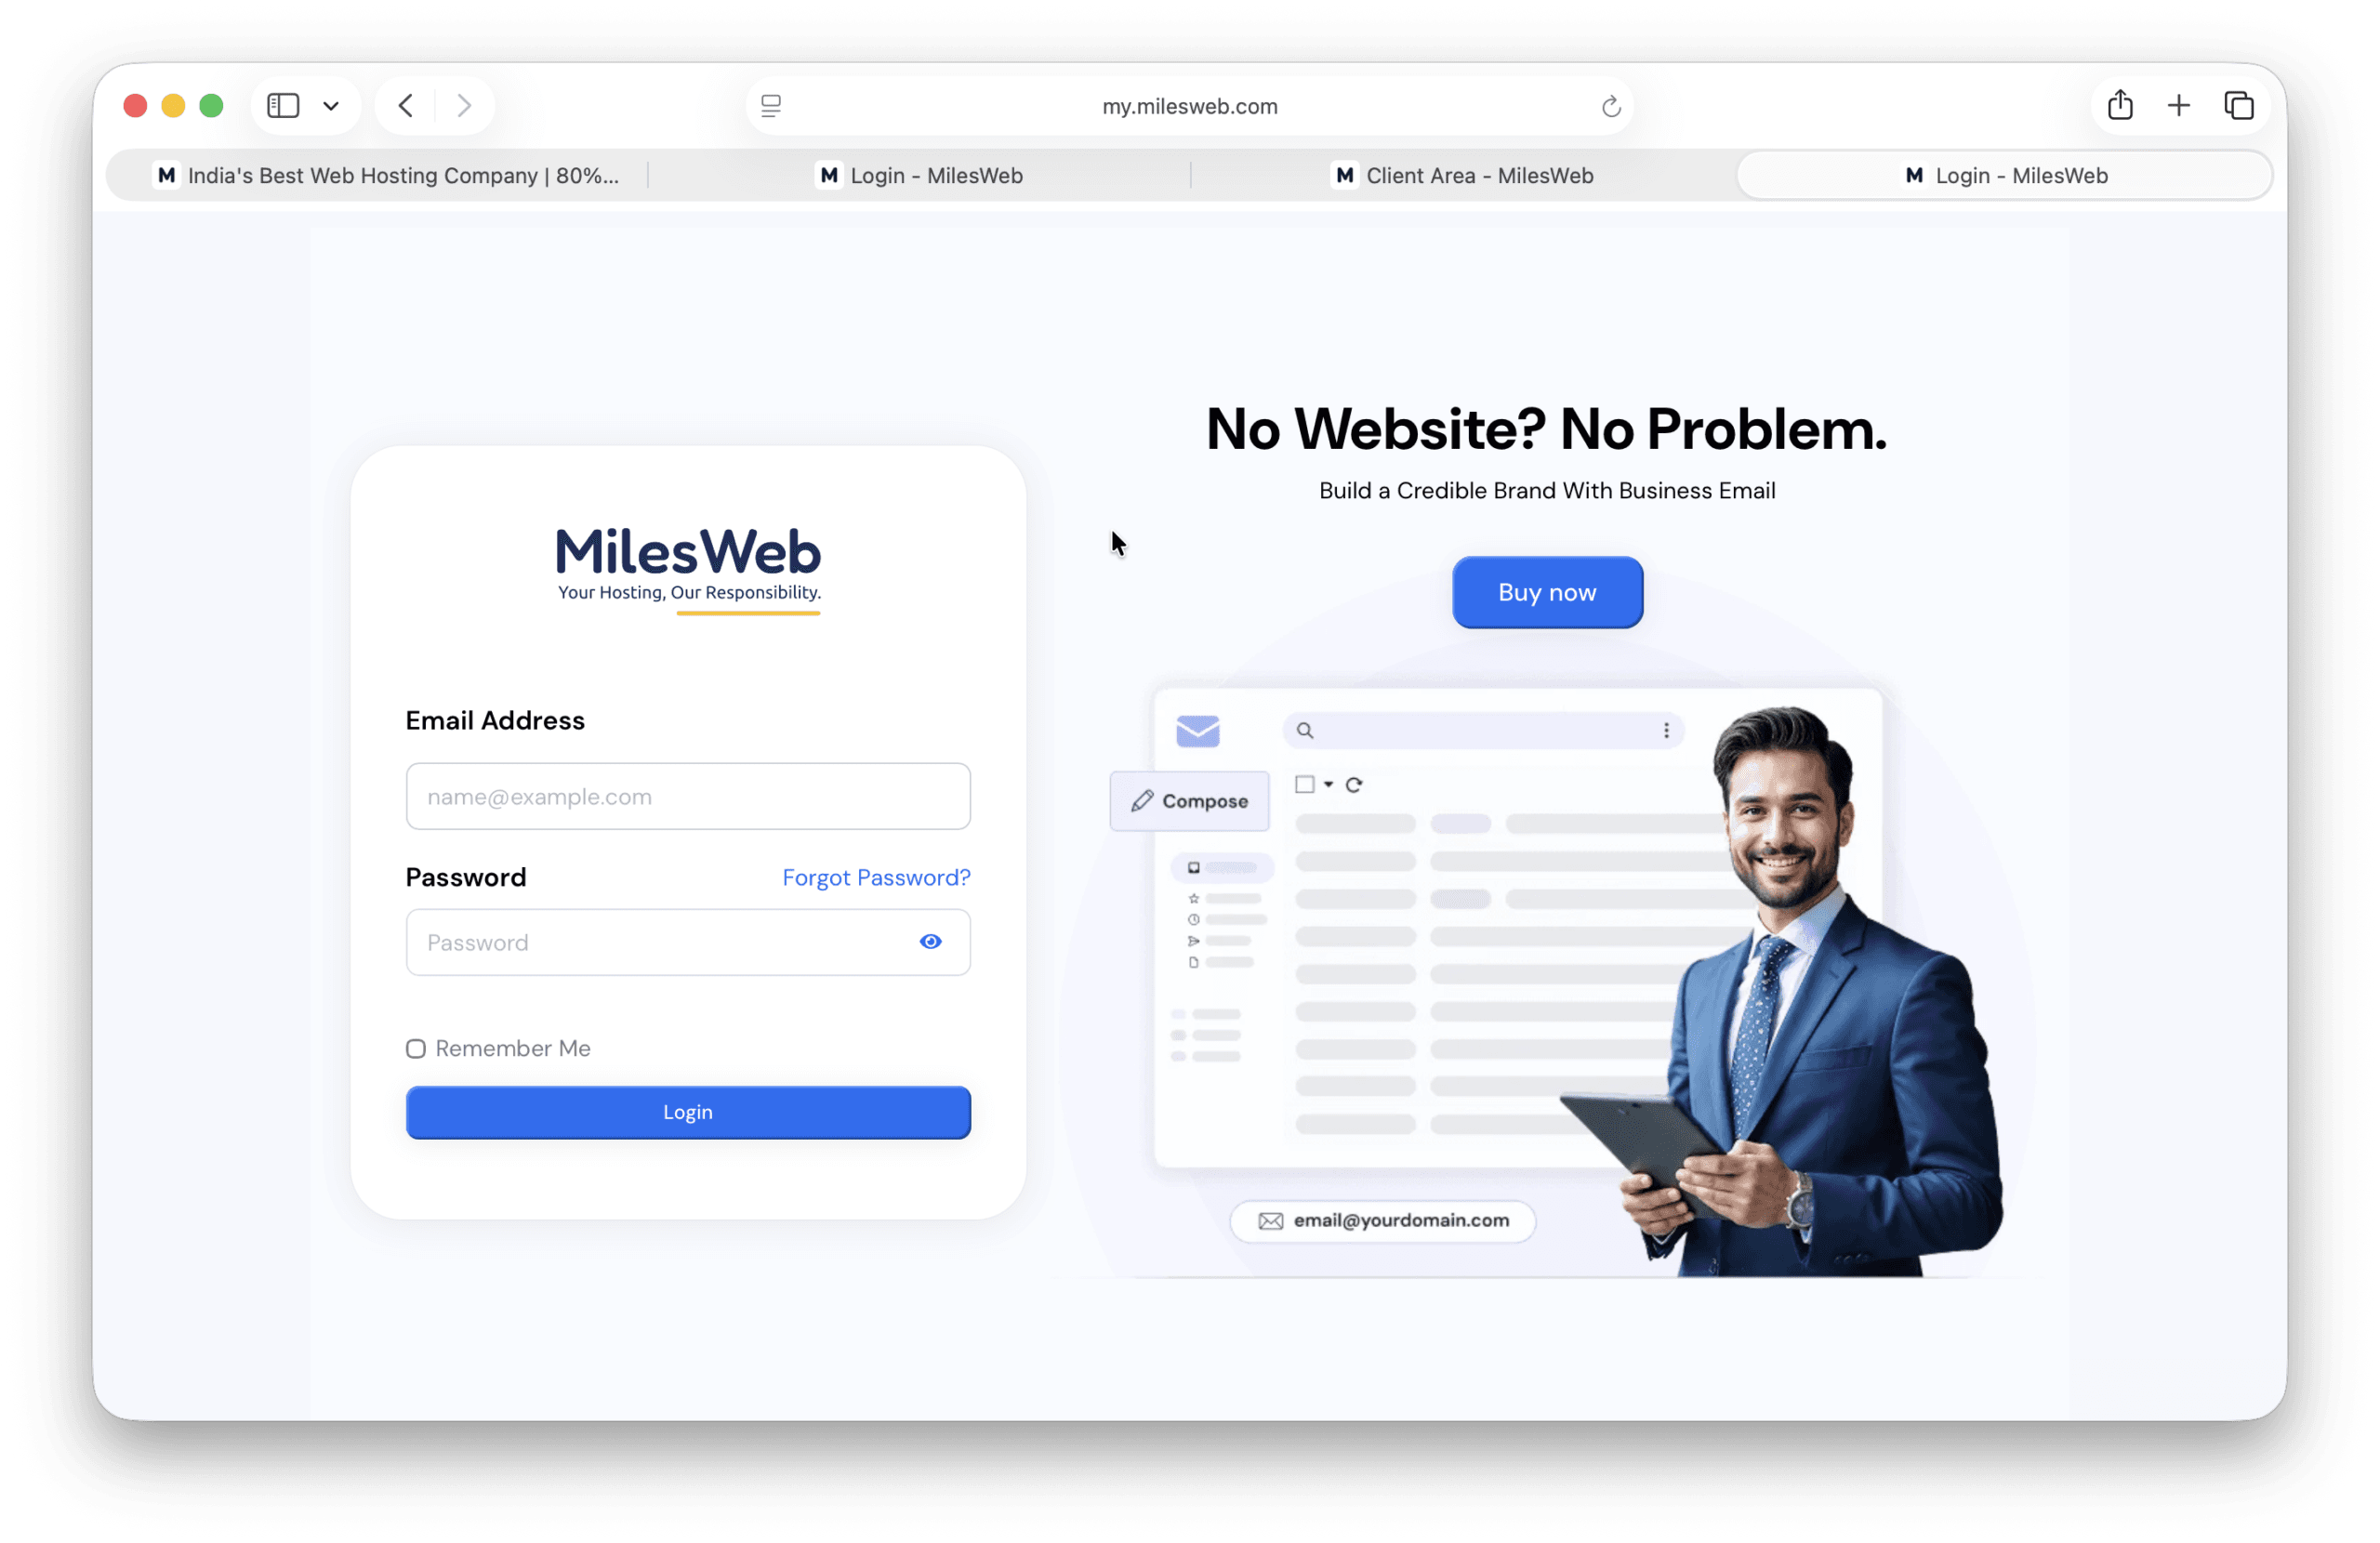
Once the setup is complete, you’ll have access to your hosting dashboard.
Step 3: Connect Your Domain
If your domain and hosting are purchased separately, you’ll need to connect the domain to MilesWeb.
The easiest way is usually to update your domain’s nameservers with the nameservers provided by MilesWeb.
Go to your domain registrar, open the DNS or Nameserver settings, enter the MilesWeb nameservers, and save the changes.
DNS Propagation
Don’t worry if the website doesn’t start working immediately.
After changing nameservers, the DNS changes need some time to propagate. Depending on the situation, this can take several hours and sometimes up to 24–48 hours.
1. Your Website Files
If you’re hosting a normal HTML/CSS/JavaScript website, keep all your files together.
For example:
index.html
style.css
script.js
images/
If you’re using WordPress or another platform, the process can be slightly different, but the basic hosting setup remains similar.
2. A Domain Name
You’ll also need a domain such as:
yourwebsite.com
If you don’t have one yet, eligible MilesWeb hosting plans include a free domain for the first year.
3. A MilesWeb Hosting Account
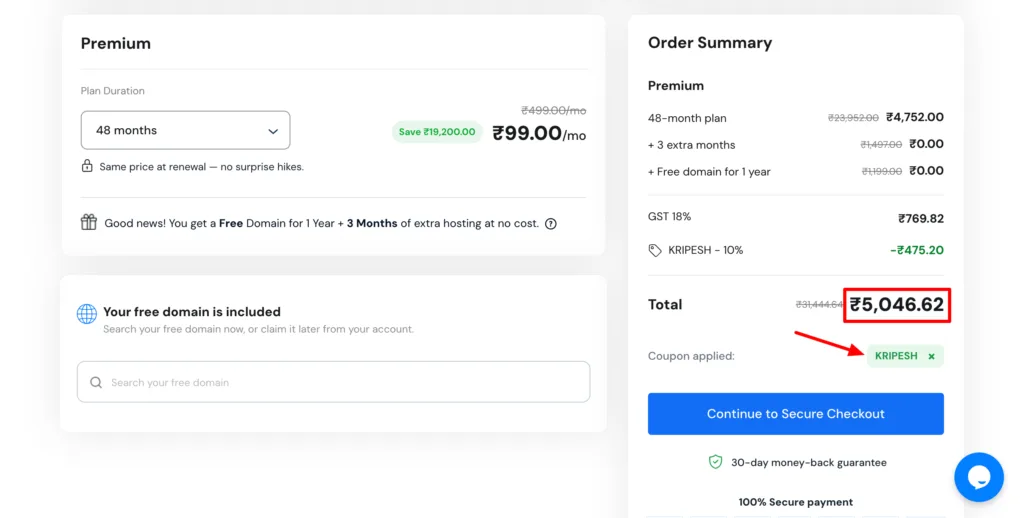
Finally, you’ll need an active hosting plan.
Once you have these three things, you’re ready to start.
Choose a MilesWeb Hosting Plan
The first thing you’ll see when purchasing hosting is the list of available plans.
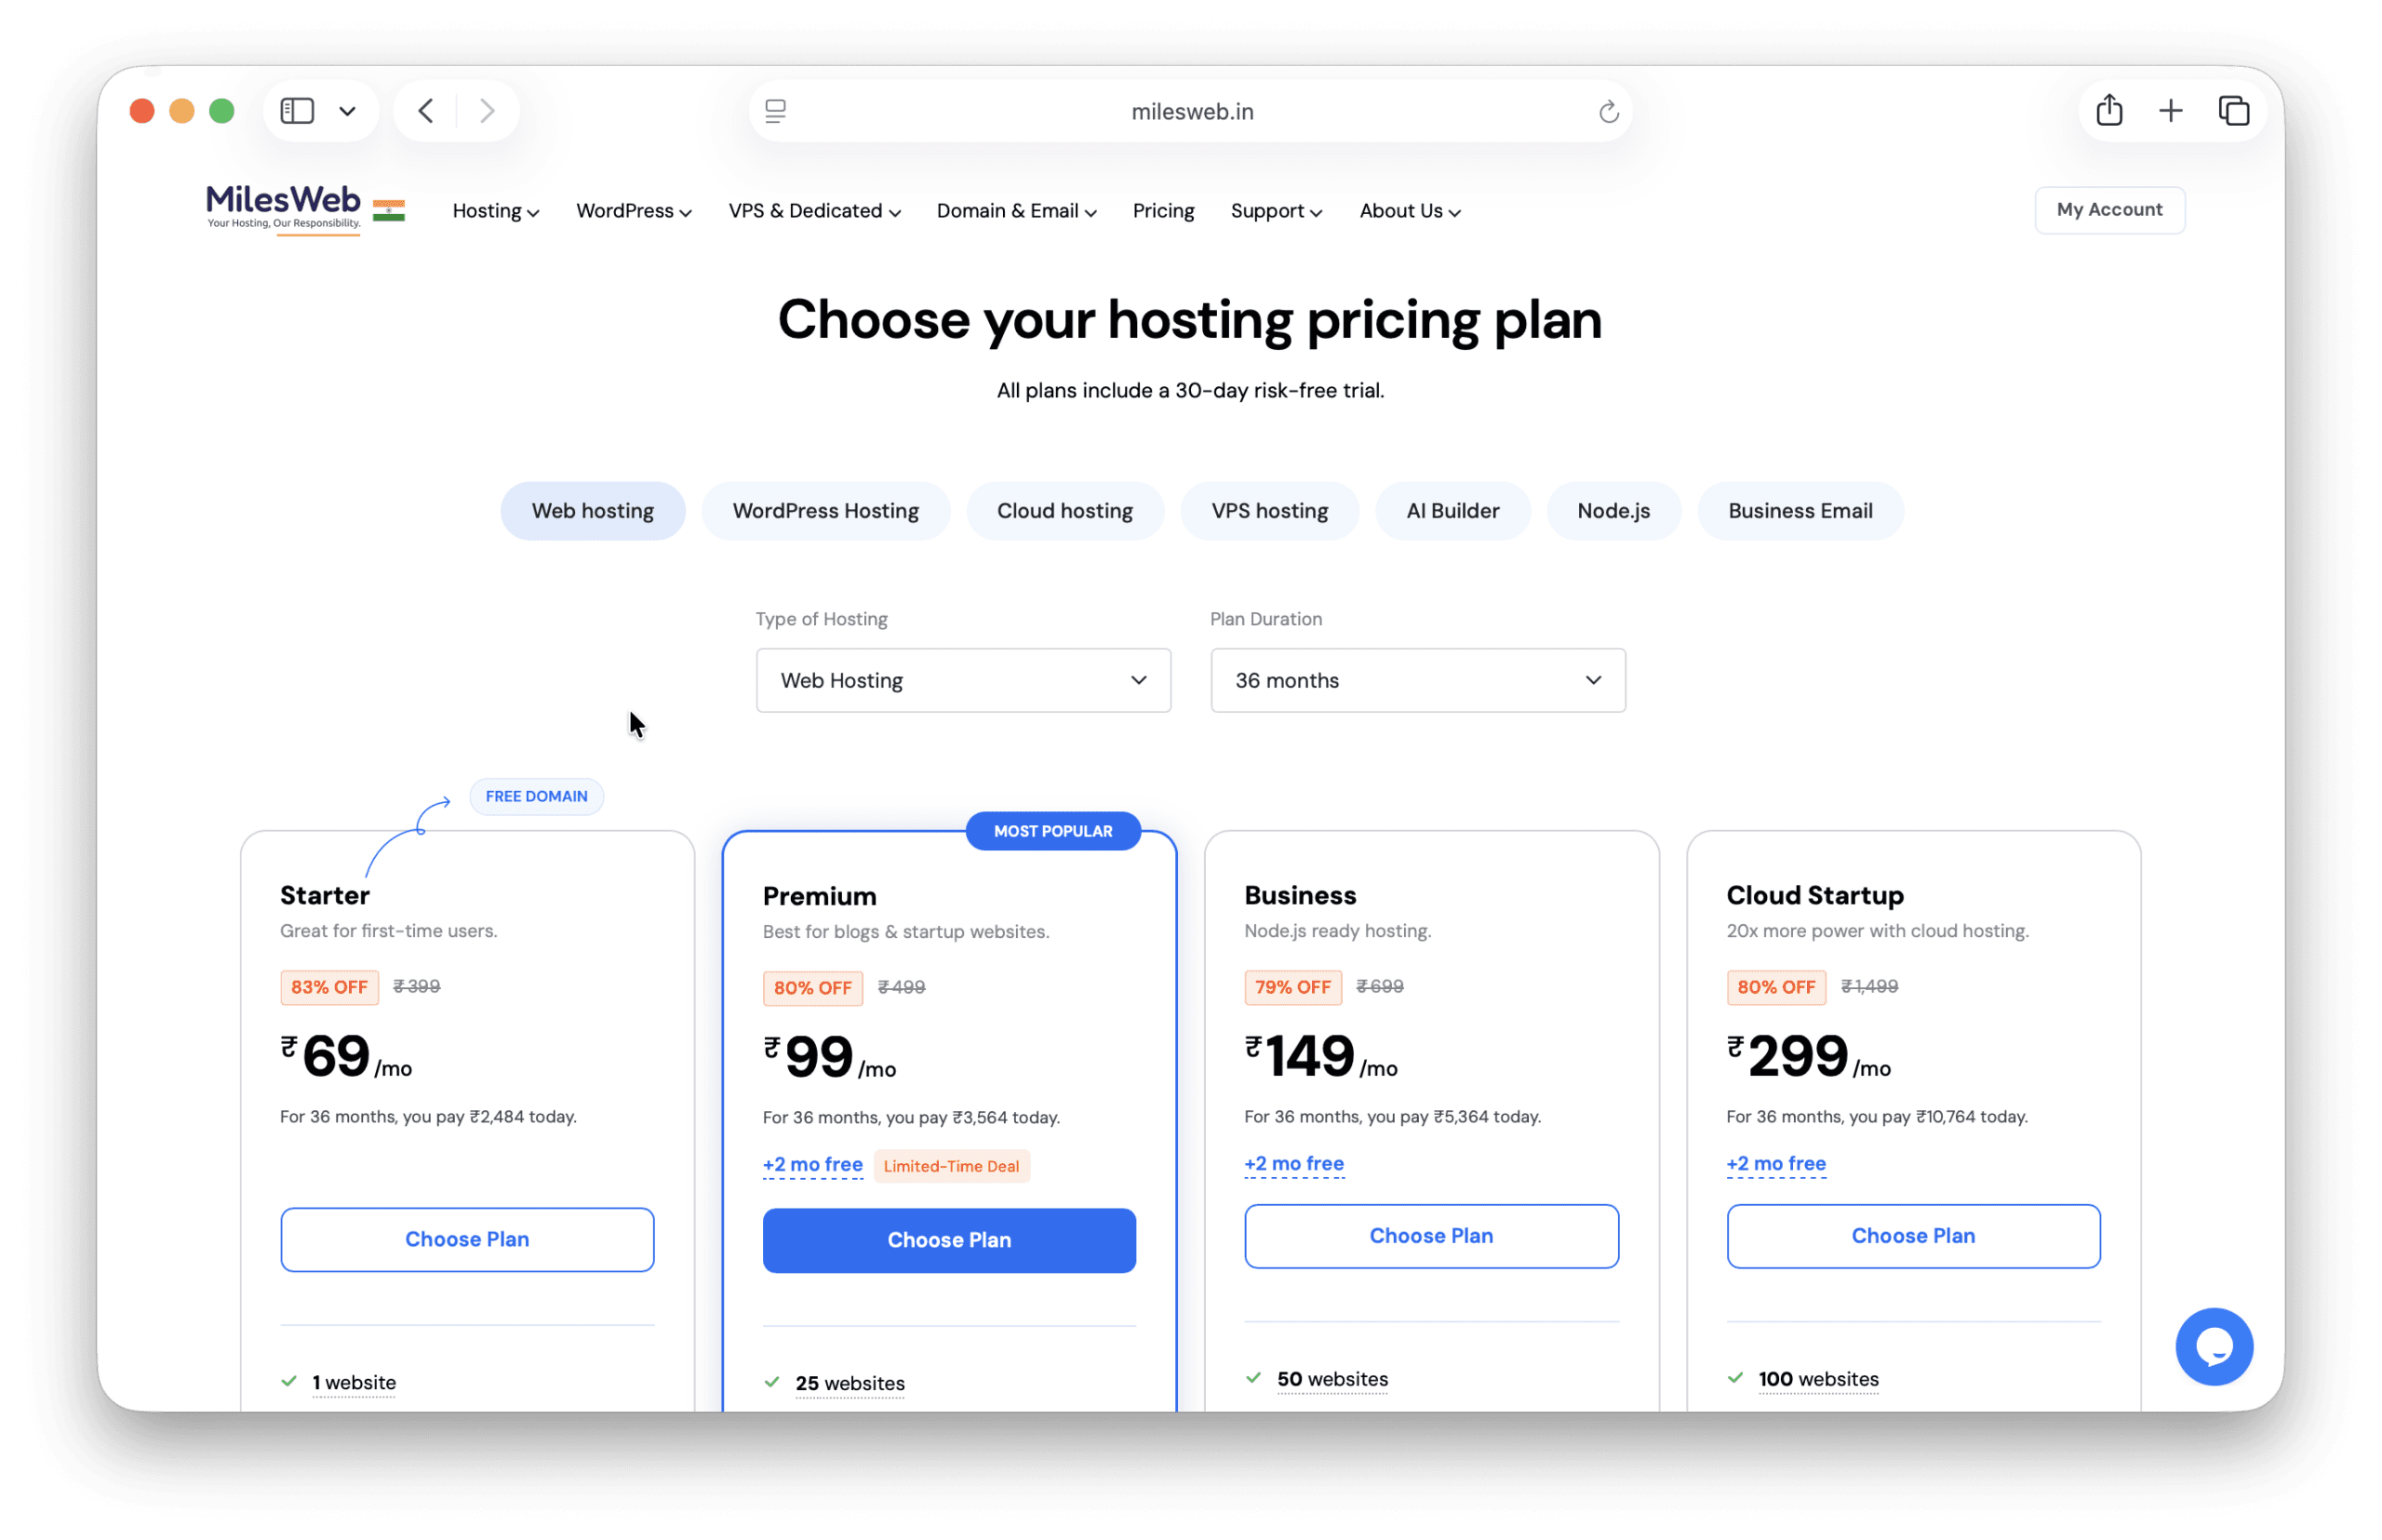
MilesWeb currently has multiple shared hosting options, so don’t feel like you need to pick the most expensive plan immediately.
For a small portfolio, blog, landing page or basic business website, shared hosting is generally enough.
Shared Hosting vs VPS
This is something beginners often get confused about.
With shared hosting, your website runs on a server environment that is shared with other websites. The hosting company takes care of most of the server management for you.
A VPS, on the other hand, gives you more resources and control. It’s useful when your website or application needs more flexibility or server-level configuration.
For a first website, you probably don’t need a VPS.
If you’re just putting a portfolio, blog, small business website or similar project online, shared hosting is a much simpler starting point.
If your requirements increase later, you can always move to a more powerful plan.
Which Plan Makes Sense for Beginners?
One thing I personally find useful about the higher shared hosting plans is the ability to host multiple websites from the same account.
For example, MilesWeb’s current Premium plan supports up to 25 websites. It also includes 50 GB NVMe storage and up to 50 professional email accounts.
That’s useful if you’re a developer, freelancer or someone who works on multiple projects because you don’t necessarily need a separate basic hosting account for every small website.
Connect Your Domain to MilesWeb
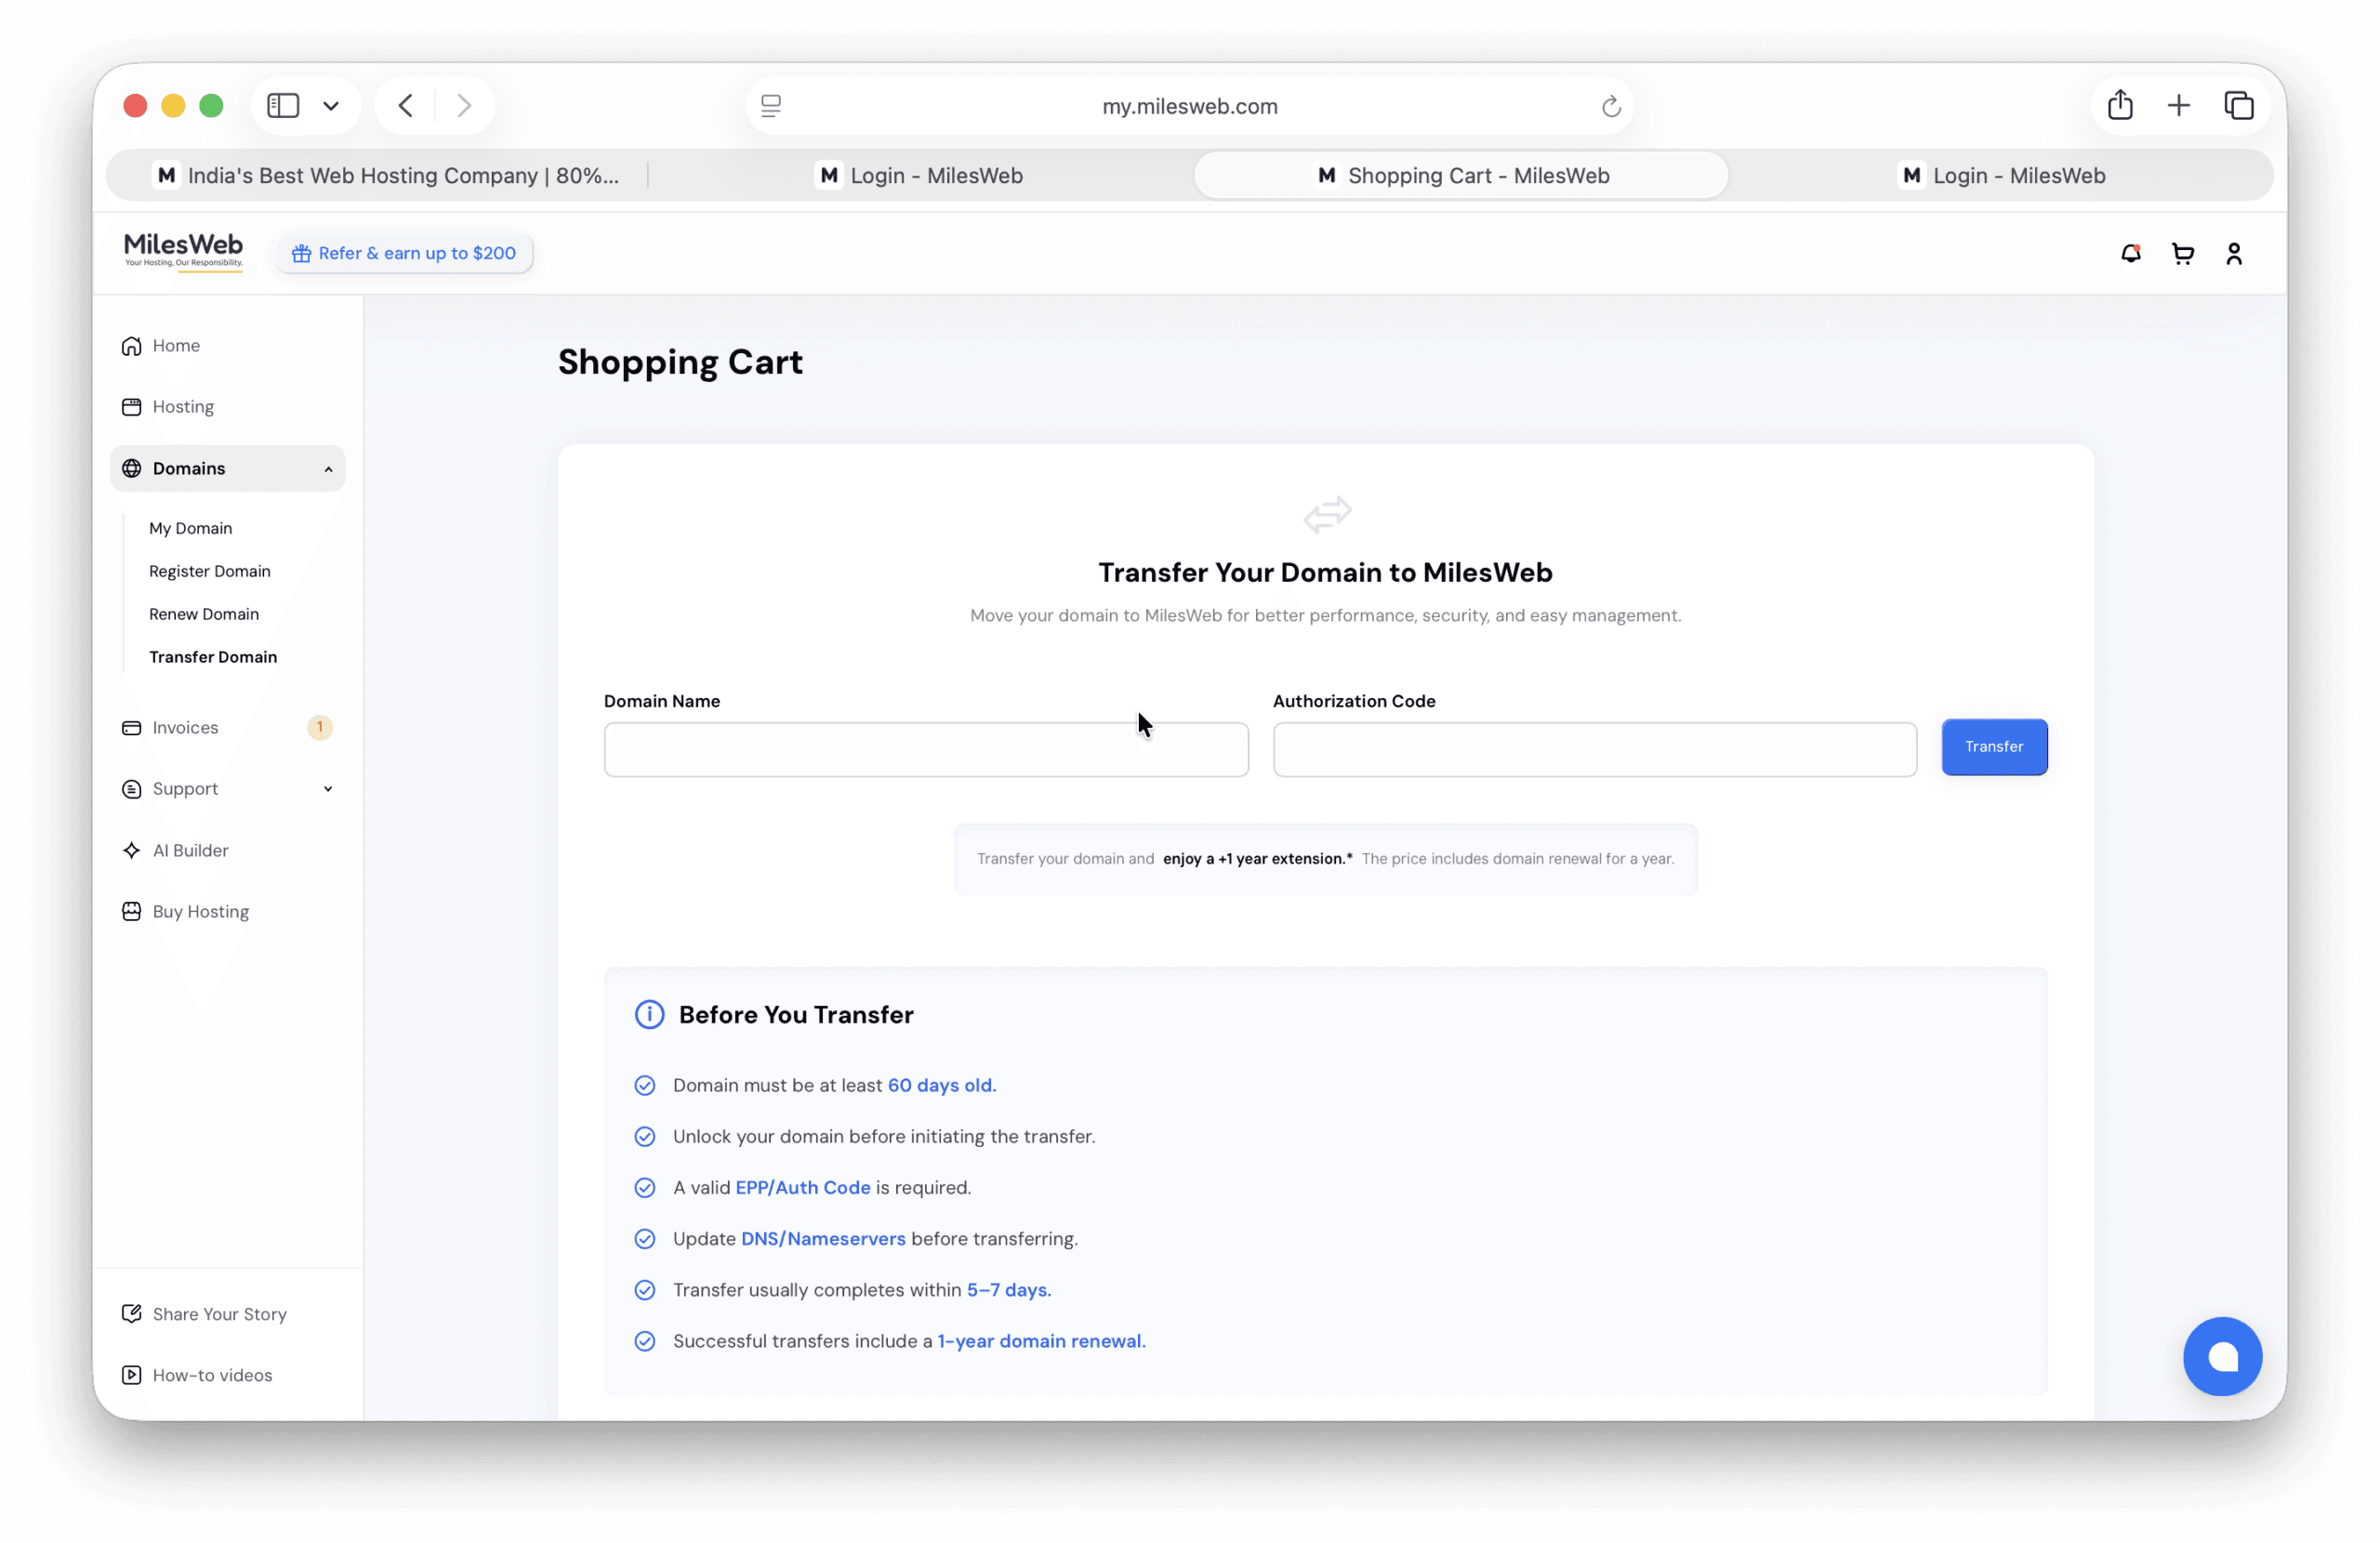
This is probably the part that looks the most technical when you’re doing it for the first time.
Your domain and hosting don’t automatically know about each other if they’re purchased from different providers.
You need to point your domain toward your MilesWeb hosting account.
The usual way to do this is by changing your nameservers.
Update Your Nameservers
First, log in to your MilesWeb account and find the nameservers provided for your hosting account.
Then go to the company where your domain is registered.
Look for something like:
Domain Settings → DNS / Nameservers
Choose the option for custom nameservers and enter the nameservers provided by MilesWeb.
Save the changes.
One important thing here: don’t copy nameservers from a random tutorial. Use the exact nameservers shown in your own MilesWeb account.
What About DNS Propagation?
After changing the nameservers, your website might not start working immediately.
This is normal.
DNS changes have to spread across different DNS servers, which is known as DNS propagation.
Sometimes the website starts working quite quickly, while in other cases you may need to wait longer. MilesWeb notes that nameserver changes can take up to around 24–48 hours to propagate.
So if your website doesn’t open immediately after changing the nameservers, give it some time before assuming something went wrong.
Upload Your Website
Now comes the part developers usually care about most: getting the actual website onto the server.
Once your hosting account is ready, open the hosting control panel and find File Manager.
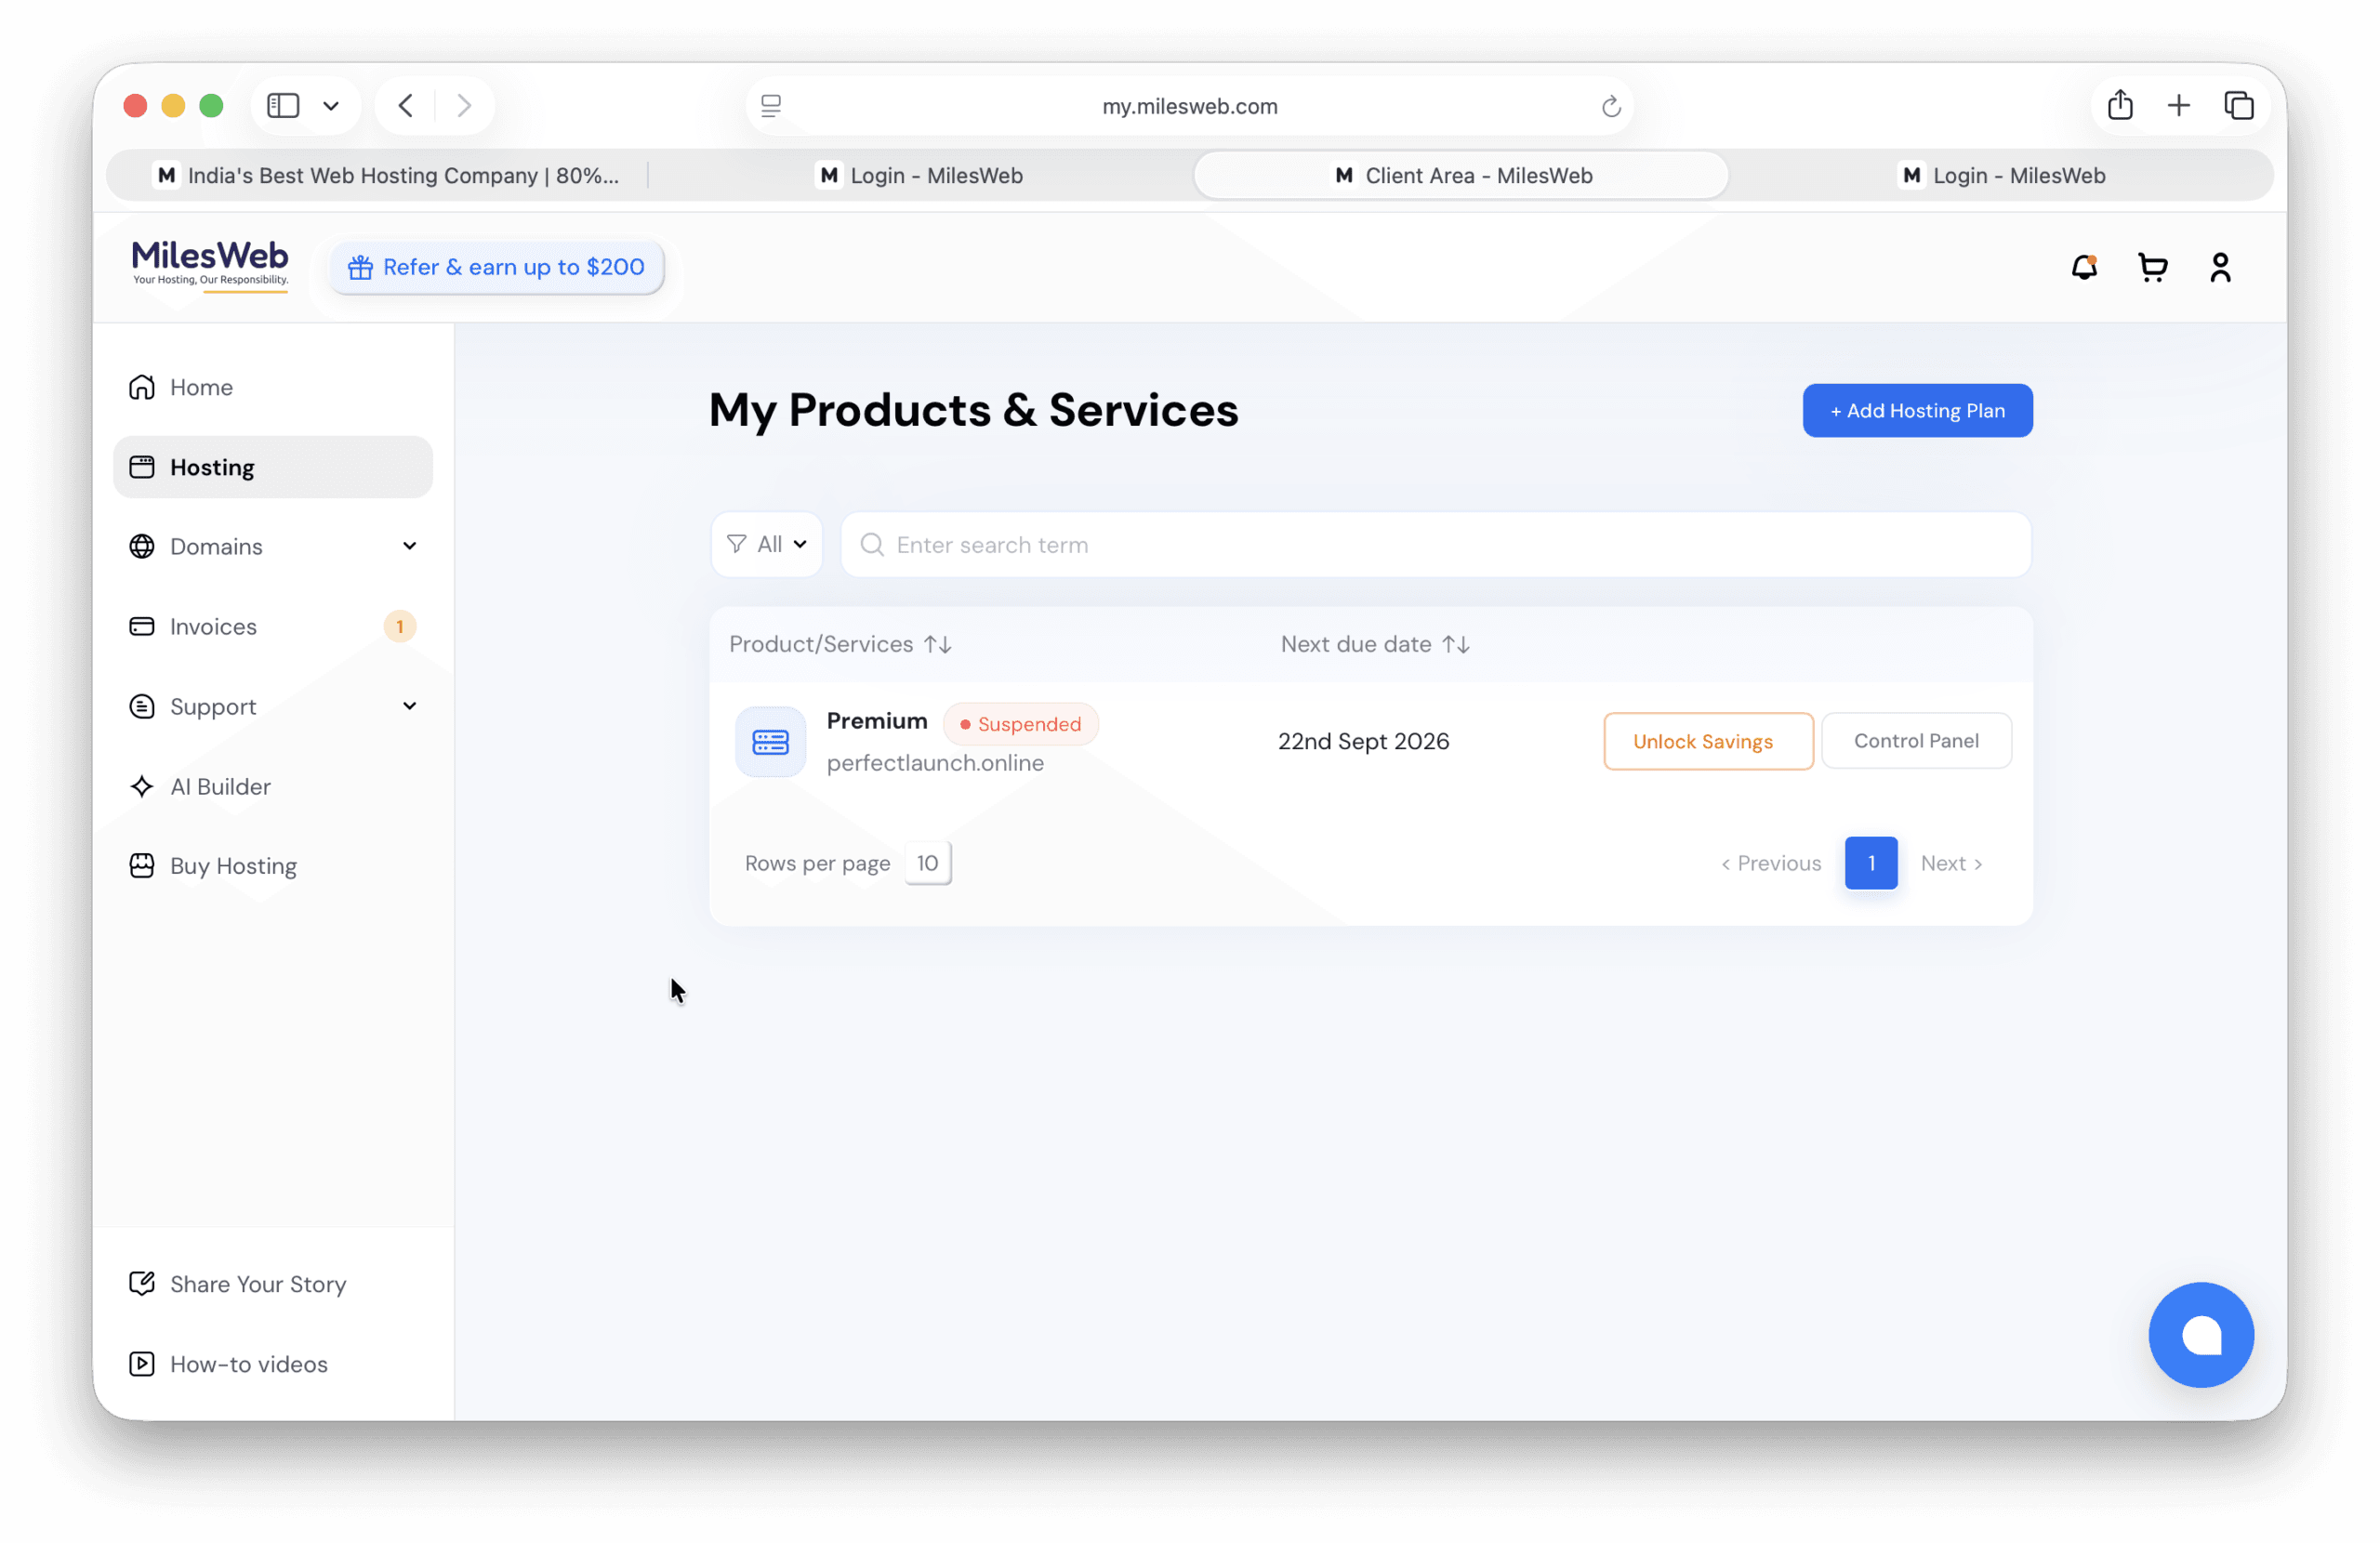
Inside File Manager, look for the folder called:
public_html
For a normal primary website, this is where your website files generally need to go.
Open public_html.
You can then upload your website files directly.
For example:
public_html/
│
├── index.html
├── style.css
├── script.js
├── images/
└── assets/
If you have a lot of files, you can also upload the website as a ZIP file and extract it on the server.
One Small Thing to Watch Out For
Make sure your index.html is actually in the correct location.
For example, this can cause problems:
public_html/
    mywebsite/
        index.html
if your domain is configured to look directly inside public_html.
You may instead need:
public_html/
    index.html
The same applies to CSS, JavaScript and image folders. Keep the folder structure the same as it was in your local project.
Enable SSL
Once your website files are uploaded, the next thing I recommend checking is SSL.
SSL is what allows your website to use:
https://
instead of:
http://
So instead of visitors seeing:
http://yourwebsite.com
you want:
https://yourwebsite.com
MilesWeb provides free SSL with its hosting plans.
From your hosting control panel, find the SSL/security section and activate SSL for your domain.
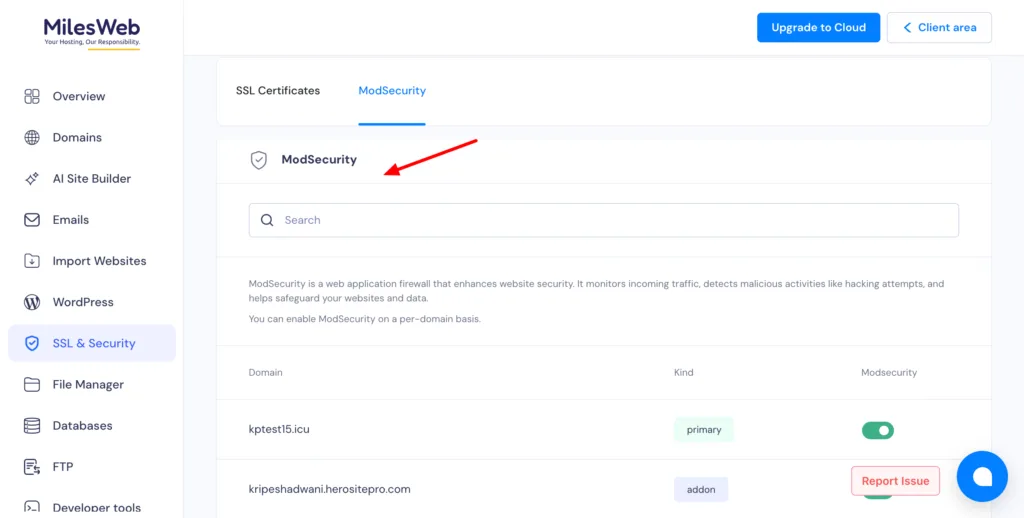
After the certificate has been activated, open your website using HTTPS.
You should see the secure connection indicator in the browser.
If it doesn’t work immediately, check whether your DNS has finished propagating and give the SSL setup some time.
Make Your Website Live
At this point, the main setup is done.
Now simply open your domain in a browser:
https://yourdomain.com
If everything is configured correctly, your website should appear.
But don’t just check whether the homepage opens.
Spend a few minutes testing the entire website.
Check Your Pages
Open your important pages one by one.
For example:
- Home
- About
- Services
- Contact
- Blog
- Login
Make sure none of them return errors.
Check Your Images
Scroll through the website and make sure all images are loading.
If you see broken images, the file path is probably wrong or the image wasn’t uploaded.
Check Your CSS
If the website opens but looks completely unstyled, check whether the CSS files were uploaded and whether the paths in your HTML are correct.
Check JavaScript
Try buttons, menus, forms and other interactive elements.
If something doesn’t work, open the browser Developer Tools and check the Console for errors.
Check Your Links
This is especially important if you developed the website locally.
Make sure you don’t still have links pointing to something like:
http://localhost:3000
Those links work on your computer but obviously won’t work for visitors.
Some Useful MilesWeb Features
Hosting is obviously the main reason you’d sign up, but there are a few other features worth mentioning.
Host Multiple Websites
If you work on multiple projects, this can be quite useful.
For example, the current Premium plan supports up to 25 websites.
So if you’re a freelancer or developer and have several small client or personal websites, you can manage them from the same hosting account.
You don’t have to keep buying a separate hosting plan for every small project.
Free Domain for the First Year
Another useful thing is the free domain offered with eligible hosting plans when you choose a 12-month or longer term.
This is particularly convenient if you’re starting a new website because you can get the hosting and domain together.
Just remember that the free domain applies to the initial eligible period; you’ll need to check the renewal pricing when the domain comes up for renewal.
Professional Email Accounts
MilesWeb also includes professional email accounts with its hosting plans.
For example, instead of using:
you can have:
For a business website, this small thing can make your communication look much more professional.
The current Premium plan lists up to 50 email accounts.
AI Website Builder
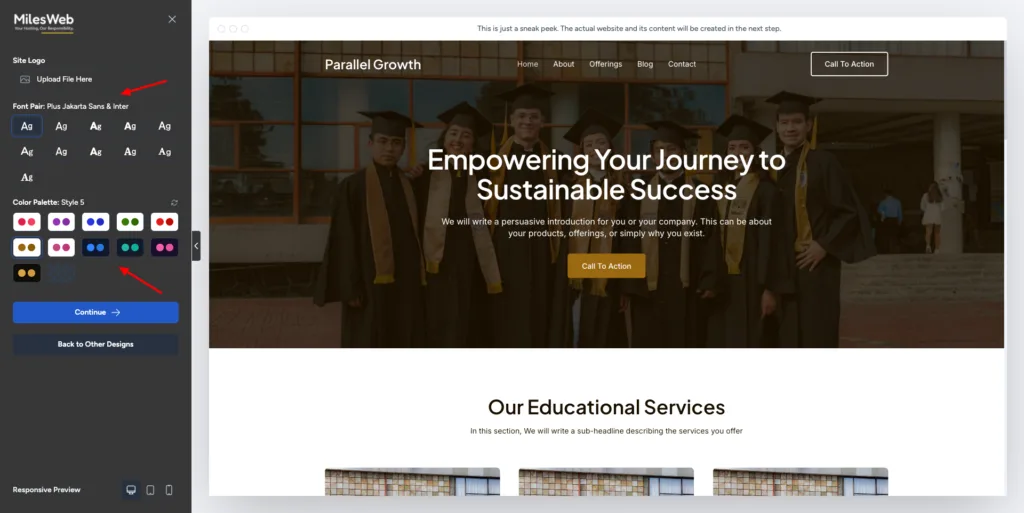
If you don’t have a website yet, MilesWeb also provides an AI website builder.
This is useful if you don’t want to start everything from an empty screen.
You can use the builder to create an initial website and then customize the content and design according to your needs.
It’s not necessarily something an experienced developer needs, but for someone who simply wants to get a basic website online quickly, it can save some time.
MilesWeb Load Management
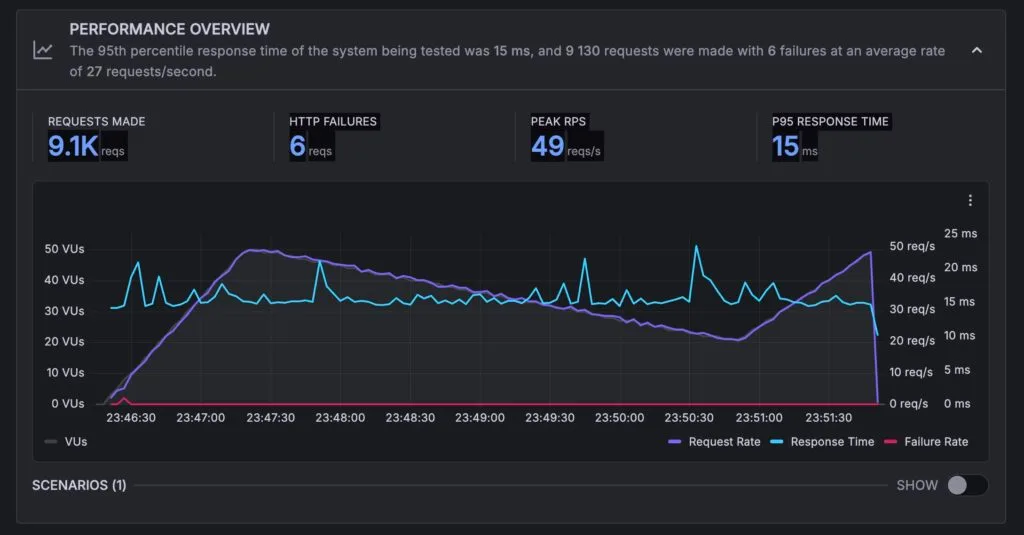
In order to evaluate how much load my website can handle, I sent 50 virtual users to it. They made a total of 9.1k requests, out of which only 6 requests failed.
Free Website Migration
Already have a website hosted somewhere else?
MilesWeb also offers free website migration.
This is useful because moving a website manually can sometimes involve more than simply copying files. Depending on the website, you may also have to move databases, email accounts, DNS records and other settings.
Having the hosting provider help with the migration can make the process easier.
24/7 Human Support
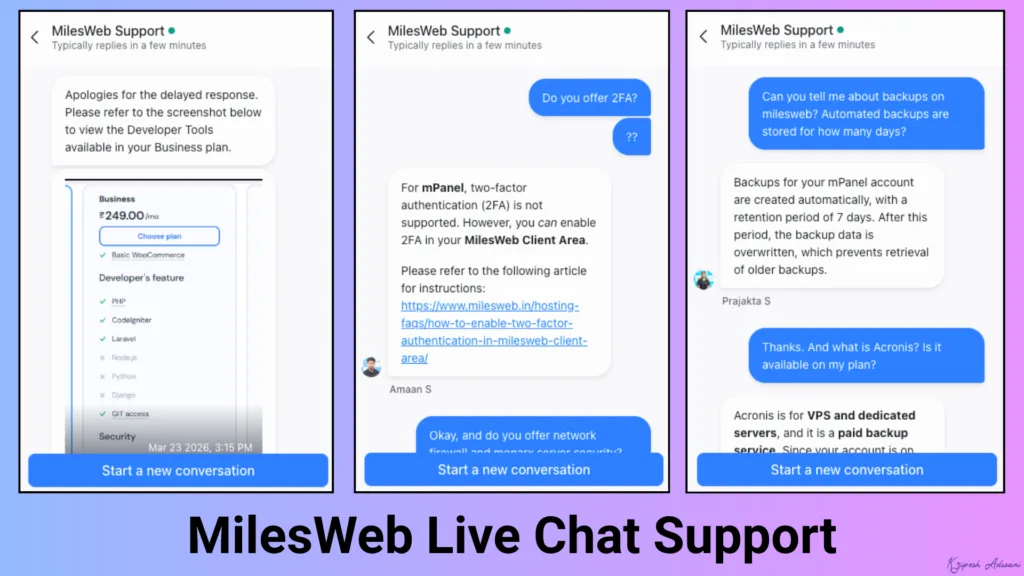
Another feature I found useful is 24/7 support.
If you’re new to hosting, there are going to be moments when something doesn’t work the way you expected.
Maybe your domain isn’t resolving, SSL isn’t working, or you’re not sure which DNS setting needs to be changed.
Having access to human support can be useful in those situations.
MilesWeb also provides support in English and Hindi, which is particularly convenient for Indian users.
MilesWeb Pricing
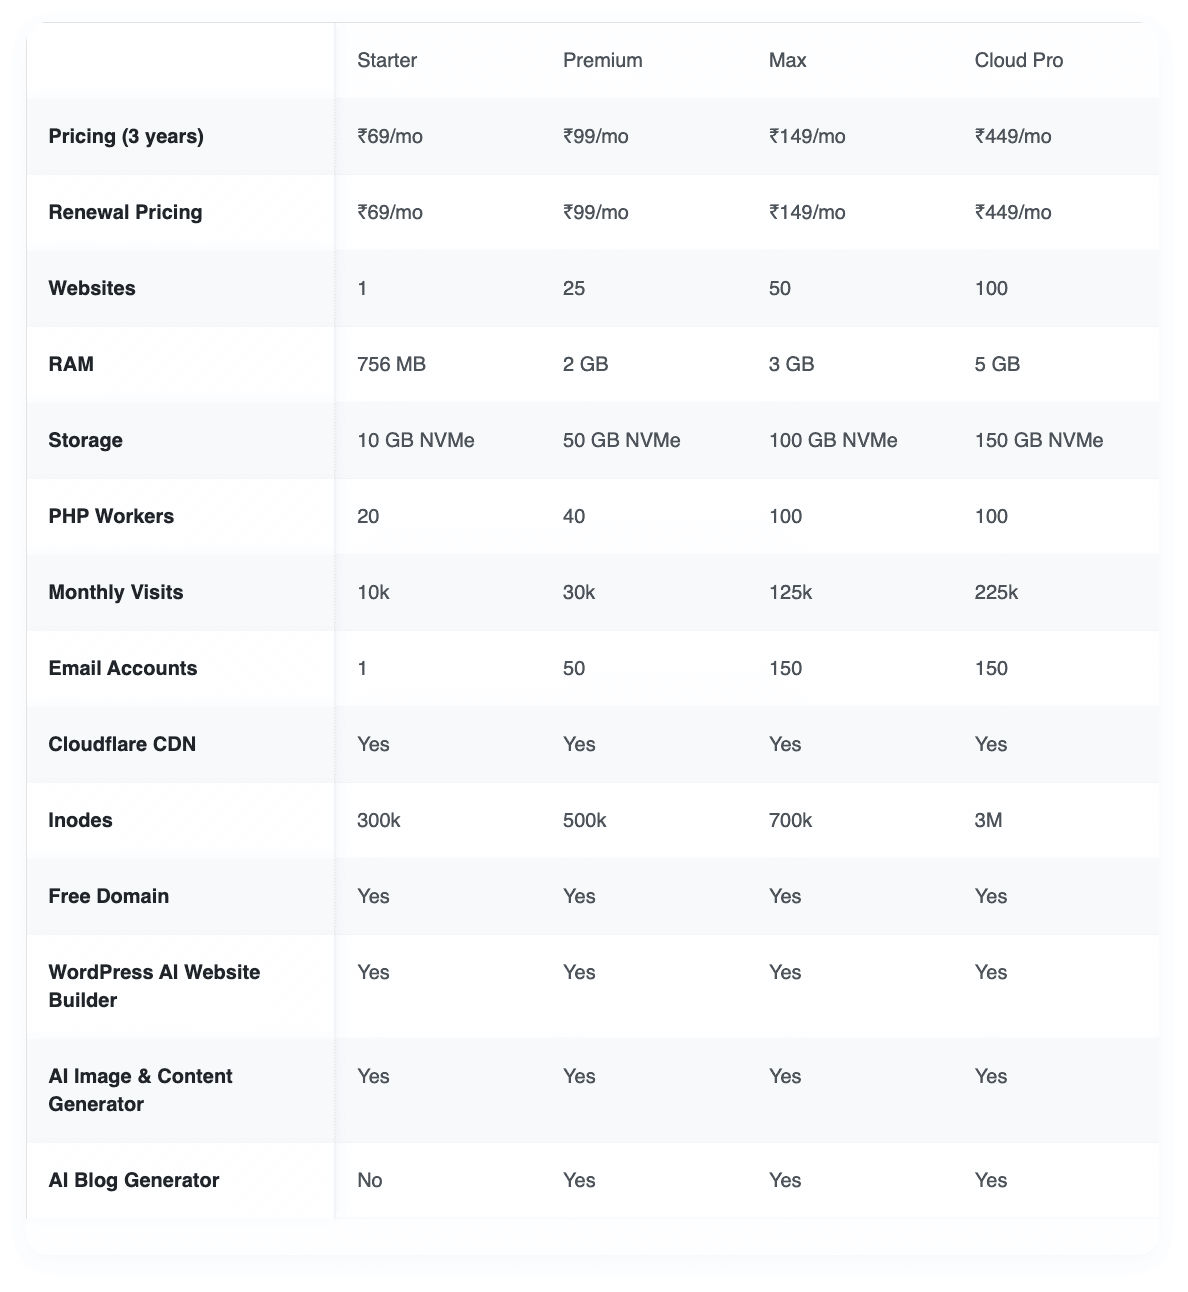
MilesWeb offers multiple shared hosting plans: Starter, Premium, Max, and the premium plan “Cloud Pro”. I have the Stellar plan of MilesWeb, which has been upgraded to the new one known as “Premium plan”.
The following table compares the key features of all the shared hosting plans. Let’s check it out.
Common Problems You Might Face
Even if you’ve followed all the steps, something can occasionally go wrong.
Here are some of the common issues and what you should check.
Website Isn’t Loading
First check your DNS.
If you recently changed nameservers, the changes may simply not have propagated yet.
Also check:
- Is your hosting account active?
- Are the files in the correct directory?
- Is
index.htmlpresent? - Is your domain pointing to the correct hosting account?
404 Error
A 404 usually means the requested page or file couldn’t be found.
Check the URL first.
Then check whether the file actually exists on your hosting account.
If you’re using a framework or CMS, routing configuration may also be responsible.
CSS or JavaScript Isn’t Working
If your website opens but looks broken, check the file paths.
For example, if your HTML contains:
<link rel="stylesheet" href="css/style.css">
make sure the server actually contains:
css/style.css
Also check the browser’s Developer Tools → Console and Network tabs for errors.
SSL Problems
If HTTPS isn’t working, check:
- Whether SSL has been activated.
- Whether your domain is pointing to the correct server.
- Whether DNS propagation has completed.
- Whether you’re opening the correct domain.
- Whether the certificate has been issued successfully.
Also check for mixed-content warnings if some resources are still being loaded over HTTP.
Final Checklist
Before you share your website with everyone, quickly go through this list:
- Domain connected
- Nameservers updated
- DNS propagation completed
- Hosting active
- Website files uploaded
index.htmlin the correct location- Images working
- CSS working
- JavaScript working
- All important links tested
- Contact forms tested
- SSL enabled
- HTTPS working
- Website checked on mobile
- No
localhostlinks remaining
If all of these are working, you’re ready to go.
Final Thoughts
Getting a website online sounds more complicated than it actually is.
Once you understand the basic flow, it becomes pretty straightforward:
Get hosting → connect domain → upload files → enable SSL → test the website.
For beginners, shared hosting is usually enough for a portfolio, blog, small business website or similar project. And if you’re working on multiple websites, features such as multiple website hosting, professional email accounts and migration support can be useful.
MilesWeb also gives you the option to move to more powerful hosting as your requirements grow.
So if you’re starting a new website and want to get it online without dealing with server management from day one, MilesWeb is one option worth checking out.
Ready to Get Started?
You can check the latest MilesWeb plans and hosting options here:
Get Started with MilesWeb Hosting
Disclosure: This article contains an affiliate link. If you purchase an eligible MilesWeb hosting plan through the link above, I may earn a commission at no additional cost to you.
FAQs
What are the payment methods supported by MilesWeb?
MilesWeb supports the following payment methods: Credit and debit cards, Local Card Schemes (RuPay), Bank Transfer, UPI, and E-Wallets (PayPal, GPay, PayTM, and PhonePe).
Does MilesWeb provide free SSL?
Yes. MilesWeb provides free SSL certificates with its hosting plans, so you can secure your website with HTTPS without purchasing a separate SSL certificate. The current hosting plans list free SSL for hosted websites.
Does MilesWeb have a refund policy?
Yes, you get a 30-day refund policy with MilesWeb. So, if you don’t find it valuable, you can cancel your subscription within 1 month and get your money back.
Does MilesWeb offer an uptime guarantee?
Yes, MilesWeb offers an uptime SLA of 99.9% on its hosting plans. In case the uptime guarantee is not fulfilled, you get 10-15% of service credits depending on the uptime percentage that month.
Do you have a discount coupon code for MilesWeb?
Yes, you can use my link and enter the coupon code KRIPESH at checkout to get a 10% off on your favorite hosting plan.