Creating Drag and Drop File Upload Using HTML, CSS, and JavaScript
Hey friends, You must have seen a drag-and-drop file upload option on various websites many times, so do you want to try to create one too?
Today we will see how to make this drag and drop File Upload Using HTML, CSS, and JavaScript. The full demo for this project is given below. Go through this drag-and-drop file upload example and make your website and projects more creative and useful.

Need of drag and drop file upload?
Now let’s see the general use of this project. Sometimes you may want to collect file inputs from your website user, at that time this HTML file upload drag and drop is a useful concept for users to upload files.
Let’s understand by an example :
| Code by | codingporium |
| Project Download | Link Available Below |
| Language used | HTML, CSS, and JavaScript |
| External link / Dependencies | Yes |
| Responsive | Yes |
Related articles – Restaurant Website Using HTML and CSS
Build A Notes App Using HTML , CSS & Javascript
10+ HTML CSS Projects For Beginners (Source Code)
Portfolio Website using HTML and CSS (Source Code)
Book Page Flip Animation Using HTML & Pure CSS
50+ HTML, CSS & JavaScript Projects With Source Code
Ecommerce Website Using HTML, CSS, & JavaScript (Source Code)
100+ JavaScript Projects With Source Code ( Beginners to Advanced)
Now let’s see the code!
HTML Code:
Paste the codes below:
NOTE: this is a Font Awesome CDN link so don’t forget to link in your HTML head section otherwise this drag and drop icon not show in your projects.
<link rel="stylesheet" href="https://cdnjs.cloudflare.com/ajax/libs/font-awesome/6.2.1/css/all.min.css" integrity="sha512-MV7K8+y+gLIBoVD59lQIYicR65iaqukzvf/nwasF0nqhPay5w/9lJmVM2hMDcnK1OnMGCdVK+iQrJ7lzPJQd1w==" crossorigin="anonymous" referrerpolicy="no-referrer" />
HTML CODE
  <div class="drag-area">
    <div class="icon"><i class="fas fa-cloud-upload-alt"></i></div>
    <header>Drag & Drop to Upload File</header>
    <span>OR</span>
    <button>Browse File</button>
    <input type="file" hidden>
  </div>
Explanation of the HTML code:
- In order to create a drag-area, we will use the <div> tag.
- Within the div tag, we will add a cloud upload icon inside the drag area, as well as the <header> element to add a heading to remind users to upload the file.
- We will also create a browse file button with the input type set to file.
ADVERTISEMENT
ADVERTISEMENT
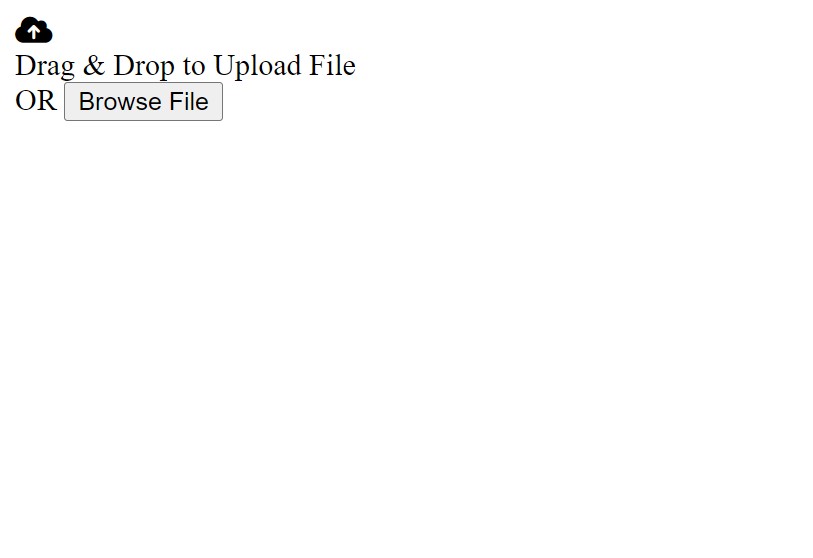
The output would be:
ADVERTISEMENT
ADVERTISEMENT
ADVERTISEMENT

Now let’s add CSS to our project to style it.
CSS Code:
 @import url('https://fonts.googleapis.com/css2?family=Poppins:wght@200;300;400;500;600;700&display=swap');
  *{
    margin: 0;
    padding: 0;
    box-sizing: border-box;
    font-family: "Poppins", sans-serif;
  }
  body{
    display: flex;
    align-items: center;
    justify-content: center;
    min-height: 100vh;
    background: #0fb8ac;
  }
  .drag-area{
    border: 2px dashed #fff;
    height: 500px;
    width: 700px;
    border-radius: 5px;
    display: flex;
    align-items: center;
    justify-content: center;
    flex-direction: column;
  }
  .drag-area.active{
    border: 2px solid #fff;
  }
  .drag-area .icon{
    font-size: 100px;
    color: #fff;
  }
  .drag-area header{
    font-size: 30px;
    font-weight: 500;
    color: #fff;
  }
  .drag-area span{
    font-size: 25px;
    font-weight: 500;
    color: #fff;
    margin: 10px 0 15px 0;
  }
  .drag-area button{
    padding: 10px 25px;
    font-size: 20px;
    font-weight: 500;
    border: none;
    outline: none;
    background: #fff;
    color: #0fb8ac;
    border-radius: 5px;
    cursor: pointer;
  }
  .drag-area img{
    height: 100%;
    width: 100%;
    object-fit: cover;
    border-radius: 5px;
  }
Explanation of the CSS Code:
Step1:
- We will first add a few new Google Fonts to our drag-and-drop share file.
- Then, using the universal selector, we will set the padding and margin to “zero,” the box-sizing property will be used to set the box size to “border-box,” and the font-family property will be used to set the font family to “Poppins.”
- We will then add various typeface styles to our upload file.
- The display will now be changed to “flex” using the body tag selector, and the items will be center-aligned using the align item property. We’ll change the background to “sea-green” using the background property.

Step 2:
- Now we will establish a border of 2px dashed with white color inside the drag area using the class selector (.drag-area).
- The display property is used to change the display to “flex” and the dimensions are 500 and 700 pixels, respectively.
- In a similar manner, we’ll style the icon and set the font size and weight to 30 px and 500 px, respectively, and the colour to white in other sections of the piece.
- Similar styling will be added to both the browse button and the button inside our drag region.

Now we will add JavaScript for functionality to our code:
JavaScript Code:
 //selecting all required elements
const dropArea = document.querySelector(".drag-area"),
dragText = dropArea.querySelector("header"),
button = dropArea.querySelector("button"),
input = dropArea.querySelector("input");
let file; //this is a global variable and we'll use it inside multiple functions


button.onclick = ()=>{
  input.click(); //if user click on the button then the input also clicked
}


input.addEventListener("change", function(){
  //getting user select file and [0] this means if user select multiple files then we'll select only the first one
  file = this.files[0];
  dropArea.classList.add("active");
  showFile(); //calling function
});
//If user Drag File Over DropArea
dropArea.addEventListener("dragover", (event)=>{
  event.preventDefault(); //preventing from default behaviour
  dropArea.classList.add("active");
  dragText.textContent = "Release to Upload File";
});


//If user leave dragged File from DropArea
dropArea.addEventListener("dragleave", ()=>{
  dropArea.classList.remove("active");
  dragText.textContent = "Drag & Drop to Upload File";
});


//If user drop File on DropArea
dropArea.addEventListener("drop", (event)=>{
  event.preventDefault(); //preventing from default behaviour
  //getting user select file and [0] this means if user select multiple files then we'll select only the first one
  file = event.dataTransfer.files[0];
  showFile(); //calling function
});


function showFile(){
  let fileType = file.type; //getting selected file type
  let validExtensions = ["image/jpeg", "image/jpg", "image/png"]; //adding some valid image extensions in array
  if(validExtensions.includes(fileType)){ //if user selected file is an image file
    let fileReader = new FileReader(); //creating new FileReader object
    fileReader.onload = ()=>{
      let fileURL = fileReader.result; //passing user file source in fileURL variable
      let imgTag = `<img src="${fileURL}" alt="image">`; //creating an img tag and passing user selected file source inside src
attribute
      dropArea.innerHTML = imgTag; //adding that created img tag inside dropArea container
    }
    fileReader.readAsDataURL(file);
  }else{
    alert("This is not an Image File!");
    dropArea.classList.remove("active");
    dragText.textContent = "Drag & Drop to Upload File";
  }
}
Explanation of the javascript code:
- The first thing we’ll do is make a constant variable using the const keyword, and then we’ll store the values of the HTML elements we’ll be choosing from the document inside of it.
- All HTML elements will be chosen using the query-selector technique.
- As soon as a user clicks the button to input data, we will generate a onclick function.
- Once clicked, the folders will be selected. In order to make a drag area, we will add an active class to the drag and drop file.
- Automatic file uploading occurs as soon as the user drags a file over the desired region.
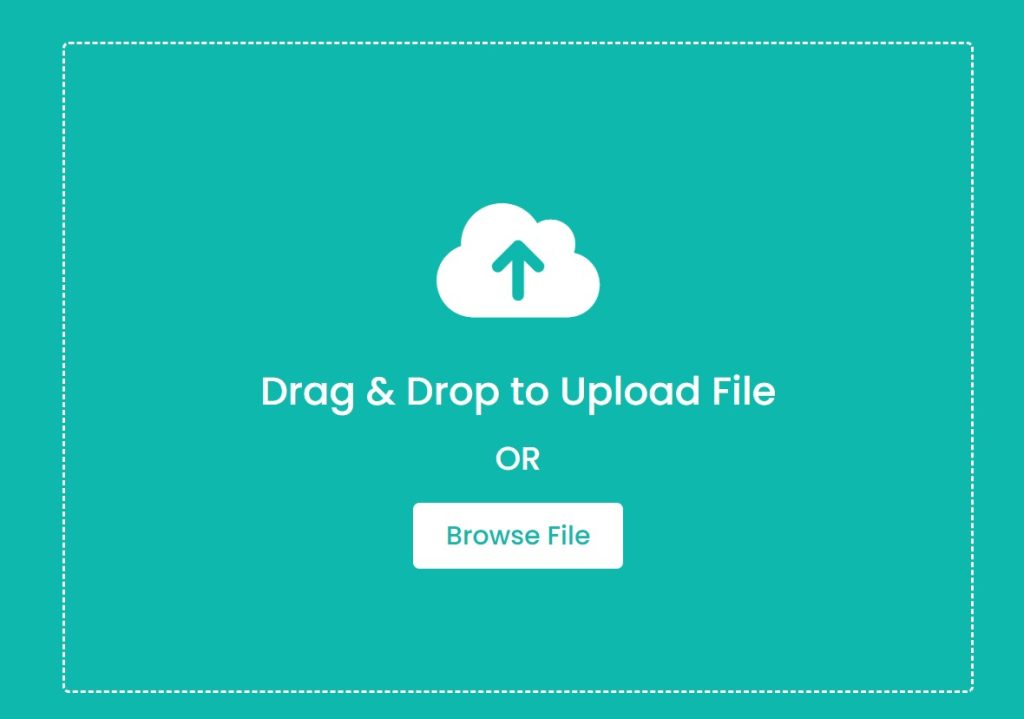
Final Output Of Drag and Drop File Upload

And that’s all for this project!
Now we have completed our Drag and Drop File Upload. Here is our updated output with JavaScript. I hope you like the Drag and Drop File Upload. you can see the output video and project screenshots. See our other blogs and gain knowledge in front-end development.
Thank you!
In this post, we learned how to create a drag and drop File Upload Using HTML, CSS, and JavaScript. For any queries, please drop a comment to reply or help you learn easily.
Final Output Of Drag and Drop File Upload Using JavaScript:
Codepen Preview:
written by @codingporium
Some FAQs of drag and drop file upload example
Which code editor do you use for this Drag and Drop File Upload coding?
I personally recommend using VS Code Studio, it’s straightforward and easy to use.
How do drag-and-drop upload work?
Drag and drop documents or folders into the drop zone from the file browser. The Uploader component functions as a drop area element by default. When you drag the files over the drop region, it becomes highlighted.
What is drag and drop file?
Web applications can drag and drop files onto a web website using HTML Drag and Drop interfaces. This interface provide user to upload files and folders.


