Create a Multi-Step Form Using HTML, CSS & JavaScript
Hello Coder! Welcome to Codewithrandom in this blog. We learn about how we can create a Multi steps form. In this article, we create Multi-Step Form Using HTML, CSS, and JavaScript.
Hope you enjoy our blog, first, let’s take a look at what a multi-step form is and when should we use the multistep form.
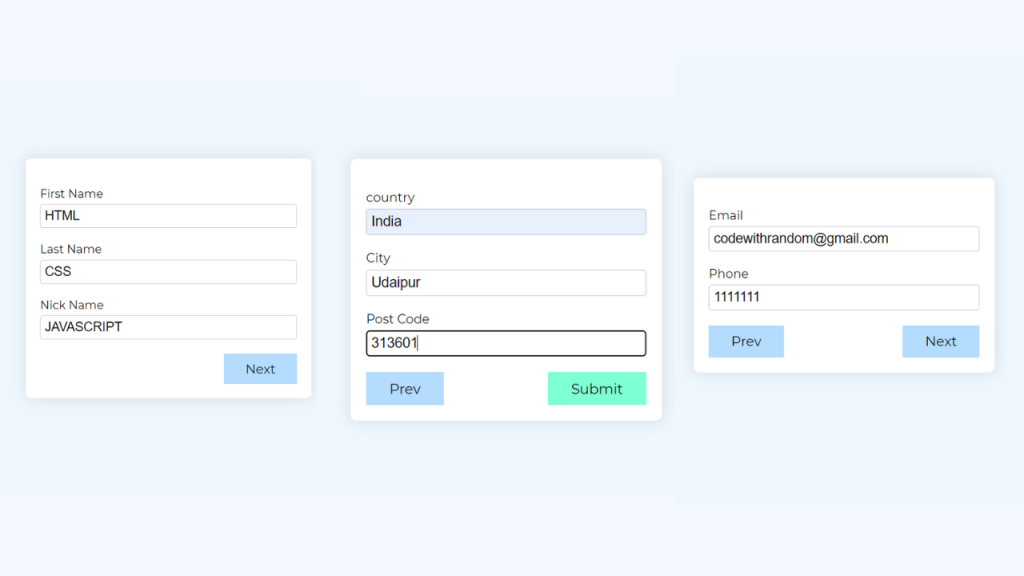
When a long form is divided up into several steps, it is called a multi-step form. Long forms, such as registration or shipment papers, are made easier to complete with their help. You may improve user experience and boost conversions by enabling customers and leads to enter their information in manageable pieces.
100+ JavaScript Projects With Source Code ( Beginners to Advanced)
In this blog post, we will discuss Create Multi-Step Form HTML, CSS & JavaScript with complete source code so you can just copy and paste them into your own project. Happy exploring and learning !!
| Code by | N/A |
| Project Download | Link Available Below |
| Language used | HTML , CSS, and JavaScript |
| External link / Dependencies | No |
| Responsive | YES |
What is the use of Multistep Form?
Usually, when a site wants some data from its user they ask them to fill out a form with the data required. Sometimes data tends to be more than usual which in turn makes the form look huge, but the problem arises when the user gets intimidated by the length of the form to tackle this situation we use a Multi-Step form.
50+ HTML, CSS &JavaScript Projects With Source Code
What is Multi-Step Form in HTML?
The multi-step form is nothing but a single long form broken into multiple pieces. This type of form is usually created for the government website, where the user needs to fill in a large amount of information. So to cover all this process, A single long form can be time-consuming and frustrating, so a multi-step form can easily create all the steps in a structured manner.
Now that we have a basic idea of what and when to use multi-step form let’s start with a basic HTML structure for multi-step form HTML CSS.
Multi-Step Form Html Code:-
<section>
    <div class="container">
        <form>
            <div class="step step-1 active">
                <div class="form-group">
                    <label for="firstName">First Name</label>
                    <input type="text" id="firstName" name="first-name" />
                </div>
                <div class="form-group">
                    <label for="lastName">Last Name</label>
                    <input type="text" id="lastName" name="last-name" />
                </div>
                <div class="form-group">
                    <label for="nickName">Nick Name</label>
                    <input type="text" id="nickName" name="nick-name" />
                </div>
                <button type="button" class="next-btn">Next</button>
            </div>
            <div class="step step-2">
                <div class="form-group">
                    <label for="email">Email</label>
                    <input type="text" id="email" name="email" />
                </div>
                <div class="form-group">
                    <label for="phone">Phone</label>
                    <input type="number" id="phone" name="phone-number" />
                </div>
                <button type="button" class="previous-btn">Prev</button>
                <button type="button" class="next-btn">Next</button>
            </div>
            <div class="step step-3">
                <div class="form-group">
                    <label for="country">country</label>
                    <input type="text" id="country" name="country" />
                </div>
                <div class="form-group">
                    <label for="city">City</label>
                    <input type="text" id="city" name="city" />
                </div>
                <div class="form-group">
                    <label for="postCode">Post Code</label>
                    <input type="text" id="postCode" name="post-code" />
                </div>
                <button type="button" class="previous-btn">Prev</button>
                <button type="submit" class="submit-btn">Submit</button>
            </div>
        </form>
    </div>
</section>
- First of all, using the section tag, we will create a main section for our multistep form.
- Now, inside our form, we will use the label tag to create the label for the user’s first name and the <input> tag with the type “text” to construct the first name input.
Similar to that, we’ll make a label and enter our last name and screen name.
To go to the next step of our multi-step form, we will now add a next button to our form. - Similarly, we will create a next step for the form here, where we will create the input for the contact details of the user and also add a next and previous button to our next form.
How to Create a Weather App using JavaScript
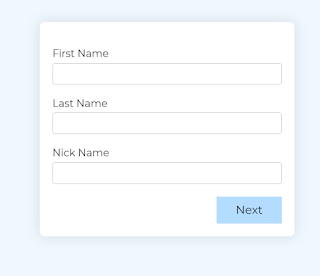
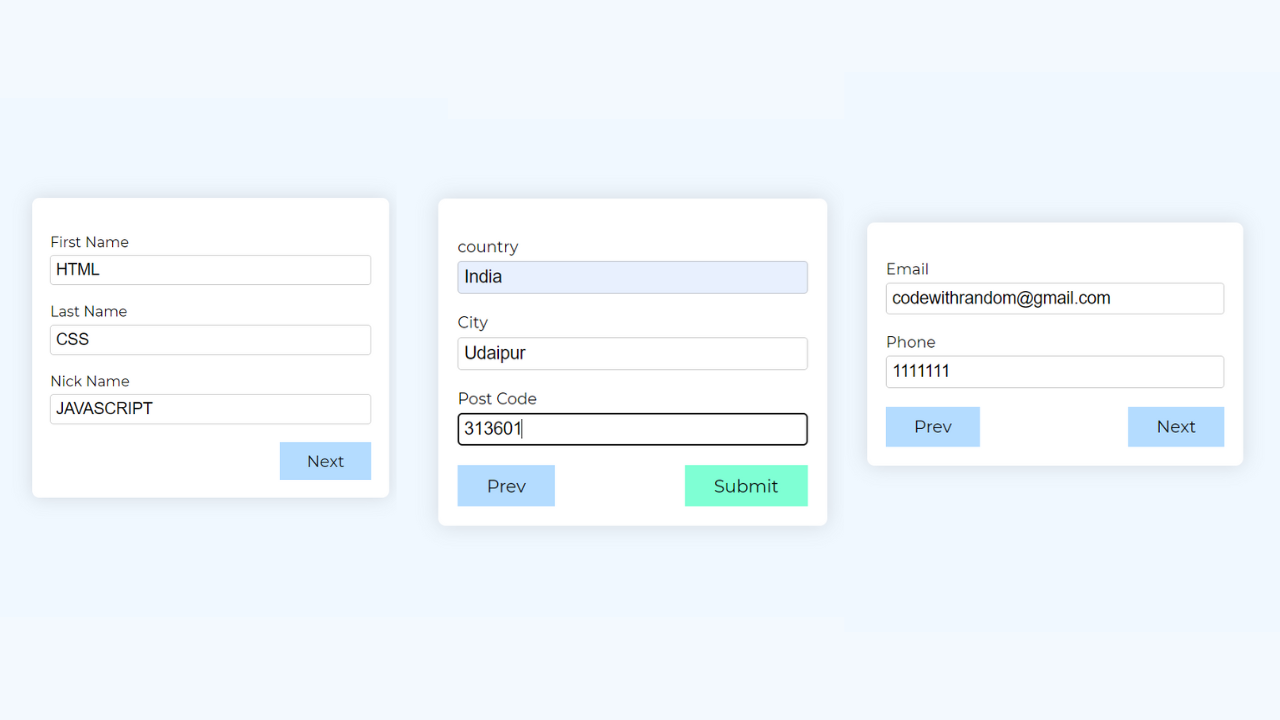
We have now added the basic structure of our webpage. Now we will be using our stylesheet to add styles to our Multi-step but first let’s take a look at our output.
Only HTML Code Output:-

Multi-step Form CSS Code:-
Cascading Style Sheets (CSS) is a markup language for describing the presentation of a document written in HTML or XML. CSS, like HTML and JavaScript, is a key component of the World Wide Web.
Now that the multistep form implementation is complete, we must add some CSS snippets to create the layout for our HTML content.
Portfolio Website using HTML and CSS (Source Code)
Use the following snippet of code on the page by adding it to a style element or an external CSS file.
* {
    padding: 0;
    margin: 0;
    box-sizing: border-box;
}
body {
    font-family: "Montserrat";
}
section {
    min-height: 100vh;
    width: 100%;
    display: flex;
    align-items: center;
    justify-content: center;
    background-color: aliceblue;
}
.container {
    max-width: 400px;
    width: 90%;
    padding: 20px;
    box-shadow: 0px 0px 20px #00000020;
    border-radius: 8px;
    background-color: white;
}
.step {
    display: none;
}
.step.active {
    display: block;
}
.form-group {
    width: 100%;
    margin-top: 20px;
}
.form-group input {
    width: 100%;
    border: 1.5px solid rgba(128, 128, 128, 0.418);
    padding: 5px;
    font-size: 18px;
    margin-top: 5px;
    border-radius: 4px;
}
button.next-btn,
button.previous-btn,
button.submit-btn {
    float: right;
    margin-top: 20px;
    padding: 10px 30px;
    border: none;
    outline: none;
    background-color: rgb(180, 220, 255);
    font-family: "Montserrat";
    font-size: 18px;
    cursor: pointer; /* text-align: right; */
}
button.previous-btn {
    float: left;
}
button.submit-btn {
    background-color: aquamarine;
}
Step 1: Using the universal selector (*), we will set the padding and margin to “zero” and the box size to “border-box.” Also, using the body tag selector, we will set the font family to “Montesrrat.”
ADVERTISEMENT
* {
    padding: 0;
    margin: 0;
    box-sizing: border-box;
}

body {
    font-family: "Montserrat";
}
Step 2:The min-height will now be set to 100 vh, the width to 100%, the display of our section will now be “flex,” and we will center the form container using the align item attribute using the tag selector (section).
ADVERTISEMENT
Dinosaur/Dino Game Using HTML, CSS & JavaScript Code
ADVERTISEMENT
section {
    min-height: 100vh;
    width: 100%;
    display: flex;
    align-items: center;
    justify-content: center;
    background-color: aliceblue;
}
Step 3 :We will now style our form components using the class selector, setting the width to 90% and giving our form container 20px padding. The display will now be set to “none” using the class selector (.step) and to “block” using the active method.
ADVERTISEMENT
We’ll use the child selector to set the width of our form input to 100%, and we’ll use the border property to give it a 1.5 px border. The background-color property is used to set the button’s color to blue and aquamarine.
ADVERTISEMENT
.container {
    max-width: 400px;
    width: 90%;
    padding: 20px;
    box-shadow: 0px 0px 20px #00000020;
    border-radius: 8px;
    background-color: white;
}

.step {
    display: none;
}

.step.active {
    display: block;
}

.form-group {
    width: 100%;
    margin-top: 20px;
}

.form-group input {
    width: 100%;
    border: 1.5px solid rgba(128, 128, 128, 0.418);
    padding: 5px;
    font-size: 18px;
    margin-top: 5px;
    border-radius: 4px;
}

button.next-btn,
button.previous-btn,
button.submit-btn {
    float: right;
    margin-top: 20px;
    padding: 10px 30px;
    border: none;
    outline: none;
    background-color: rgb(180, 220, 255);
    font-family: "Montserrat";
    font-size: 18px;
    cursor: pointer;
    /* text-align: right; */
}

button.previous-btn {
    float: left;
}

button.submit-btn {
    background-color: aquamarine;
}
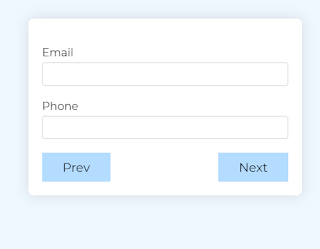
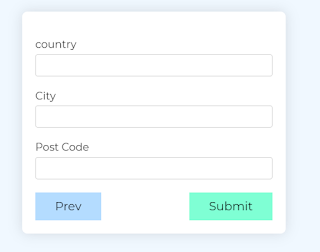
Here is the updated output with Html and CSS code.
Portfolio Website Using HTML CSS And JAVASCRIPT ( Source Code)
Multi-Step Form Javascript Code:-
 const steps = Array.from(document.querySelectorAll("form .step"));
 const nextBtn = document.querySelectorAll("form .next-btn");
 const prevBtn = document.querySelectorAll("form .previous-btn");
 const form = document.querySelector("form");
 nextBtn.forEach((button) => {
  button.addEventListener("click", () => {
   changeStep("next");
  });
 });
 prevBtn.forEach((button) => {
  button.addEventListener("click", () => {
   changeStep("prev");
  });
 });
 form.addEventListener("submit", (e) => {
  e.preventDefault();
  const inputs = [];
  form.querySelectorAll("input").forEach((input) => {
   const { name, value } = input;
   inputs.push({ name, value });
  });
  console.log(inputs);
  form.reset();
 });
 function changeStep(btn) {
  let index = 0;
  const active = document.querySelector(".active");
  index = steps.indexOf(active);
  steps[index].classList.remove("active");
  if (btn === "next") {
   index++;
  } else if (btn === "prev") {
   index--;
  }
  steps[index].classList.add("active");
 }
Inside our javascript, we will first select our HTML elements using the document. queryselectorAll () and then adding a click event listener as the user clicks on the button, the active class defined inside our CSS will help us to display the form section, and as the user clicks on the previous button, we will remove our active class from the elements and add the class to the previous button.
10+ HTML CSS Projects For Beginners (Source Code)
Now we completed all our HTML CSS JavaScript coding for the multi-step form. You can an output video at the bottom.
Final Output Multi-Step Form Using HTML, CSS & JavaScript:-
[su_button id=”download” url=”https://drive.google.com/drive/folders/1kNR–P_WcxARVTzPluUmEIgeExO4NcN5?usp=sharing” target=”blank” style=”3d” size=”11″ wide=”yes” center=”yes” icon=”icon: download”]DOWNLOAD CODE NOW[/su_button]
You can visit our other useful blog for collecting fronted development knowledge. thank you for visiting our website!
10+ Javascript Project Ideas For Beginners( Project Source Code)
In this post, we learn how to create multi-step forms with simple coding of HTML CSS and javascript. If we made a mistake or any confusion please drop a comment to give a reply or help you in easy learning.
written by – code with random/Anki
FAQ OF Multi-Step Form
Which code editor do you use for this Multi-Step Form project coding?
I personally recommend using VS Code Studio, it’s very simple and easy to use.
is this project responsive or not?
Yes! this project is a responsive project.
What is the use of Multistep Form?
Usually, when a site wants some data from its user they ask them to fill out a form with the data required. Sometimes data tends to be more than usual which in turn makes the form look huge, but the problem arises when the user gets intimidated by the length of the form to tackle this situation we use a Multi-Step form.



Awesome content �� very helpful for beginners like me
Very helpful pls keep it continue