Create Custom Tooltip Using HTML and CSS (Source Code)
Hello, Coders 👨💻! In today’s blog, we’ll use HTML and CSS to make our own custom tooltip.
Have you ever noticed those boxes with additional descriptions that appear when we hover over a button or another element?
That is a tooltip! They appear intimidating at first glance, but have you ever wondered why? How do developers incorporate them into their websites?
In this blog, we will learn how to create our own tooltips using HTML and CSS. This project is completely beginner-friendly and will assist you in incorporating your tooltip into your website.
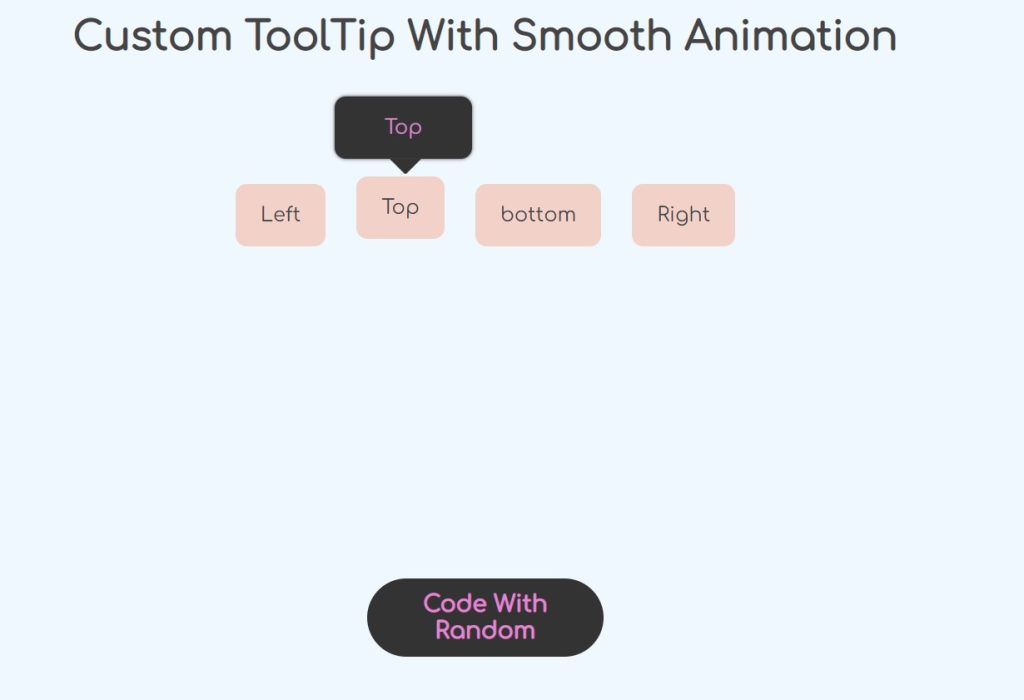
I hope you must have got an idea about the project.
So, let’s get started on the Custom Tooltip Project by adding the source codes. First, we’re going to use HTML code.
Step1: HTML code for Tooltip
<!DOCTYPE html>
<html>
  <head>
    <meta http-equiv="content-type" content="text/html; charset=utf-8" />
    <meta name="" content="" />
    <title>Tooltip</title>
    <link rel="stylesheet" href="style.css" />
  </head>
  <body>
    <h1>Custom ToolTip With Smooth Animation</h1>
    <!--    con = The Container for items -->
    <div class="con">
      <!-- Left tooltip -->
      <div class="con-tooltip left">
        <p>ToolTip1</p>
        <div class="tooltip">
          <p>Left Tooltip</p>
        </div>
      </div>

      <!-- Top tooltip-->
      <div class="con-tooltip top">
        <p>ToolTip2</p>
        <div class="tooltip">
          <p>Top Tooltip</p>
        </div>
      </div>

      <!-- Bottom tooltip-->
      <div class="con-tooltip bottom">
        <p>ToolTip3</p>
        <div class="tooltip">
          <p>bottom Tooltip</p>
        </div>
      </div>

      <!-- Right tooltip-->
      <div class="con-tooltip right">
        <p>ToolTip4</p>
        <div class="tooltip">
          <p>Right Tooltip</p>
        </div>
      </div>

      <!--End con = Container-->
    </div>

    <h3>Code With Random</h3>
  </body>
</html>
We used very basic HTML code. You will understand the code immediately. First, we used heading tags to create the main heading of our webpage. Then we used a div tag to create a container for our various types of tooltips. We created four different tooltips in this article, each with a different position, such as left, right, top, and bottom.
50+ Front-end Projects With Source Code | Front-end Projects With Source Code
For that, we created another div tag with a paragraph referring to our first tooltip element, as well as a sibling div tag with class “tooltip,” which will contain our tooltip and will appear whenever the user hovers the mouse cursor over the element with the mouse cursor.All of the other tooltips were created using a similar method.
Let’s take a look at our output that was created solely with HTML.
Output:
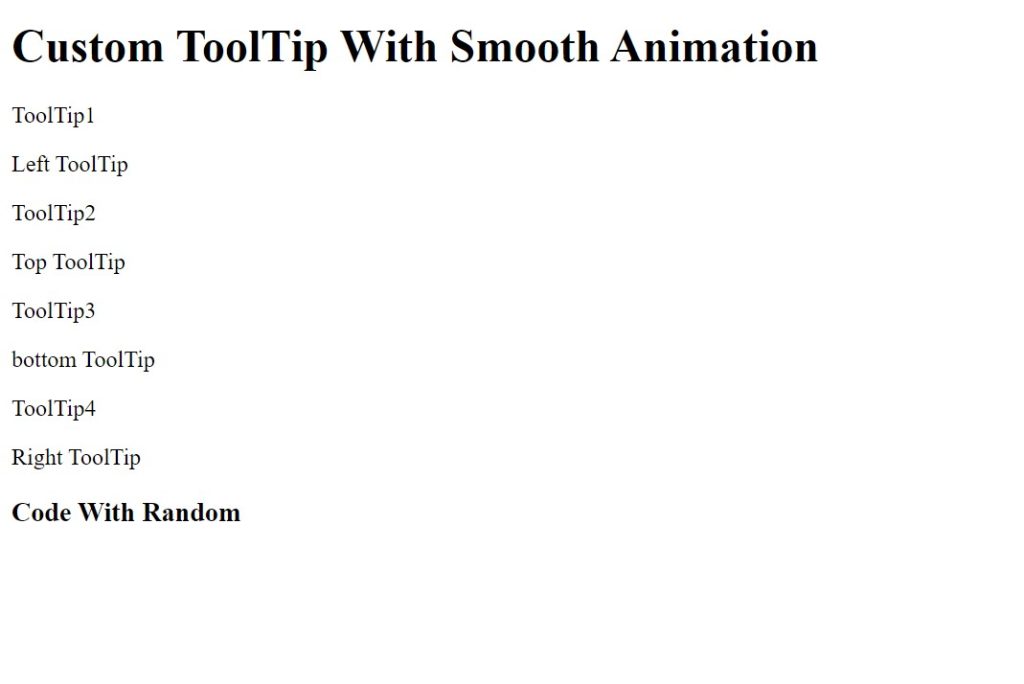
So we have added the HTML tags and Their contents, Now it’s time to make it attractive by adding the CSS code.
Step2: CSS code for Tooltip
Cascading Style Sheets (CSS) is a markup language for describing the presentation of a document written in HTML or XML. CSS, like HTML and JavaScript, is a key component of the World Wide Web.
Now we will look at our CSS code
/* Start Fonts from Google Fonts */
/*Google Fonts*/

@import url("https://fonts.googleapis.com/css?family=Arapey|Cantarell|Comfortaa|Khand|Russo+One|Ubuntu");

/*End Fonts*/

/* Start Body */

body {

  margin: 0;
  padding: 0;
  box-sizing: border-box;
  background-color: aliceblue;
  color: #444;
  font-family: "Comfortaa", cursive;
  text-align: center;
  font: 16px;
}

/* End Body */

h1 {
  margin-bottom: 7%;
}

/*tooltip Box*/
.con-tooltip {
  position: relative;
  background: #f2d1c9;

  border-radius: 9px;
  padding: 0 20px;
  margin: 10px;

  display: inline-block;

  transition: all 0.3s ease-in-out;
  cursor: default;
}

/*tooltip */
.tooltip {
  visibility: hidden;
  z-index: 1;
  opacity: 0.4;

  width: 100%;
  padding: 0px 20px;

  background: #333;
  color: #e086d3;

  position: absolute;
  top: -140%;
  left: -25%;

  border-radius: 9px;
  font: 16px;

  transform: translateY(9px);
  transition: all 0.3s ease-in-out;

  box-shadow: 0 0 3px rgba(56, 54, 54, 0.86);
}

/* tooltip  after*/
.tooltip::after {
  content: " ";
  width: 0;
  height: 0;

  border-style: solid;
  border-width: 12px 12.5px 0 12.5px;
  border-color: #333 transparent transparent transparent;

  position: absolute;
  left: 40%;
}

.con-tooltip:hover .tooltip {
  visibility: visible;
  transform: translateY(-10px);
  opacity: 1;
  transition: 0.3s linear;
  animation: odsoky 1s ease-in-out infinite alternate;
}
@keyframes odsoky {
  0% {
    transform: translateY(6px);
  }

  100% {
    transform: translateY(1px);
  }
}

/*hover ToolTip*/
.left:hover {
  transform: translateX(-6px);
}
.top:hover {
  transform: translateY(-6px);
}
.bottom:hover {
  transform: translateY(6px);
}
.right:hover {
  transform: translateX(6px);
}

/*left*/

.left .tooltip {
  top: -20%;
  left: -170%;
}

.left .tooltip::after {
  top: 40%;
  left: 90%;
  transform: rotate(-90deg);
}

/*bottom*/

.bottom .tooltip {
  top: 115%;
  left: -20%;
}

.bottom .tooltip::after {
  top: -17%;
  left: 40%;
  transform: rotate(180deg);
}

/*right*/

.right .tooltip {
  top: -20%;
  left: 115%;
}

.right .tooltip::after {
  top: 40%;
  left: -12%;
  transform: rotate(90deg);
}

h3 {
  background: #333;
  color: #e086d3;
  padding: 10px 20px;
  border-radius: 56px;
  width: 8em;
  margin: 20% auto 1% auto;
}

@media screen and (max-width:760px) {
  .left{
    display: block;
    width: 15%;
    height: 40px;
    border-radius: 9px;
    margin-left: 40%;
    text-align: center;
  }
  .left p{
    padding-top: 10px;
    text-align: center;
  }
  .left .tooltip {
    top: -20%;
    left: -140%;

  }
  .right{
    display: block;
    width: 15%;
    height: 40px;
    border-radius: 9px;
    margin-left: 40%;
    text-align: center;
  }
  .right p{
    padding-top: 10px;
    text-align: center;
  }
  .top .tooltip{
    top: -120%;
    left: -50%;

  }
  .bottom .tooltip{
    top: 115%;
    left: 20%;
  }
}
Now that we’ve included our CSS code in our article, let’s go over it step by step.
100+ Front-end Projects for Web developers (Source Code)
Step1: To begin with, we simply imported various Google fonts for the styling of our website. Starting with our body and setting the margin and padding to zero, as well as the box-sizing to borderbox, we simply applied the Alice Blue background colour to our website and aligned the text in the centre with the appropriate font family and size.
/* Start Fonts from Google Fonts */
/*Google Fonts*/

@import url("https://fonts.googleapis.com/css?family=Arapey|Cantarell|Comfortaa|Khand|Russo+One|Ubuntu");

/*End Fonts*/

/* Start Body */

body {
  margin: 0;
  padding: 0;
  box-sizing: border-box;
  background-color: aliceblue;
  color: #444;
  font-family: "Comfortaa", cursive;
  text-align: center;
  font: 16px;
}

/* End Body */
Step2: We will now select the main heading of our webpage and set the bottom margin to 7%. We’ll now use the class selector to make the container-defined position relative and the background colour coral candy.
We also specify the border-radius, padding, and margin of our container element. We also gave the element some smooth transition.
h1 {
  margin-bottom: 7%;
}

/*tooltip Box*/
.con-tooltip {
  position: relative;
  background: #f2d1c9;

  border-radius: 9px;
  padding: 0 20px;
  margin: 10px;

  display: inline-block;

  transition: all 0.3s ease-in-out;
  cursor: default;
}
Step3: Now we select our tooltip and define its visibility as hidden, width as 100%, background colour as black with font colour as lavender pink, position as absolute with font size as 16 px and border- radius 16 px, we have also used the transform property to define the position of our tooltip on the y axis, and we have defined the box shadow to our tooltip. The style we defined applies to all of our tooltips.
.tooltip {
  visibility: hidden;
  z-index: 1;
  opacity: 0.4;

  width: 100%;
  padding: 0px 20px;

  background: #333;
  color: #e086d3;

  position: absolute;
  top: -140%;
  left: -25%;

  border-radius: 9px;
  font: 16px;

  transform: translateY(9px);
  transition: all 0.3s ease-in-out;

  box-shadow: 0 0 3px rgba(56, 54, 54, 0.86);
}
Step4: We will now define the border colour, width, and type in our tooltip using the pseudo-CSS element (tooltip::after). Using the hover property on our container tooltip, we will now define the content visibility as visible with transition and smooth animation.
ADVERTISEMENT
We also included some keyframes to demonstrate the smooth animation.
ADVERTISEMENT
.tooltip::after {
  content: " ";
  width: 0;
  height: 0;

  border-style: solid;
  border-width: 12px 12.5px 0 12.5px;
  border-color: #333 transparent transparent transparent;

  position: absolute;
  left: 40%;
}

.con-tooltip:hover .tooltip {
  visibility: visible;
  transform: translateY(-10px);
  opacity: 1;
  transition: 0.3s linear;
  animation: odsoky 1s ease-in-out infinite alternate;
}
@keyframes odsoky {
  0% {
    transform: translateY(6px);
  }

  100% {
    transform: translateY(1px);
  }
}

/*hover ToolTip*/
.left:hover {
  transform: translateX(-6px);
}
.top:hover {
  transform: translateY(-6px);
}
.bottom:hover {
  transform: translateY(6px);
}
.right:hover {
  transform: translateX(6px);
}

/*left*/

.left .tooltip {
  top: -20%;
  left: -170%;
}

.left .tooltip::after {
  top: 40%;
  left: 90%;
  transform: rotate(-90deg);
}

/*bottom*/

.bottom .tooltip {
  top: 115%;
  left: -20%;
}

.bottom .tooltip::after {
  top: -17%;
  left: 40%;
  transform: rotate(180deg);
}

/*right*/

.right .tooltip {
  top: -20%;
  left: 115%;
}

.right .tooltip::after {
  top: 40%;
  left: -12%;
  transform: rotate(90deg);
}
Step5: In this step we jsut made our page responsive according to the window screen size using media query if the size of the window will b less than the defined width the content inside it will automatically adjust its shape and size .
ADVERTISEMENT
@media screen and (max-width:760px) {
  .left{
    display: block;
    width: 15%;
    height: 40px;
    border-radius: 9px;
    margin-left: 40%;
    text-align: center;
  }
  .left p{
    padding-top: 10px;
    text-align: center;
  }
  .left .tooltip {
    top: -20%;
    left: -140%;

  }
  .right{
    display: block;
    width: 15%;
    height: 40px;
    border-radius: 9px;
    margin-left: 40%;
    text-align: center;
  }
  .right p{
    padding-top: 10px;
    text-align: center;
  }
  .top .tooltip{
    top: -120%;
    left: -50%;

  }
  .bottom .tooltip{
    top: 115%;
    left: 20%;
  }
}
Now we have completed our css code and below👇here is the output after styling our webpage.
ADVERTISEMENT
Output:
ADVERTISEMENT
The project is now finished, and as you can see, we customised our scrollbar with HTML and CSS. Now look at the live preview.
Final Output Custom Tooltip Using HTML and CSS
Now We have Successfully created our Custom tooltip project. You can use this project directly by copying into your IDE. WE hope you understood the project , If you any doubt feel free to comment!!
If you find out this Blog helpful, then make sure to search code with random on google for Front End Projects with Source codes and make sure to Follow the Code with Random Instagram page.
