How To Create a Student Registration Form Using HTML and CSS?
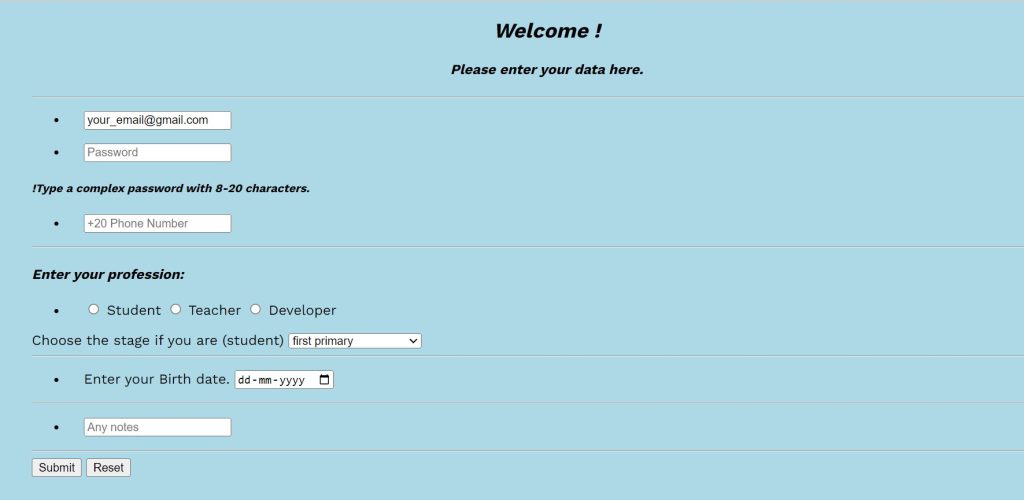
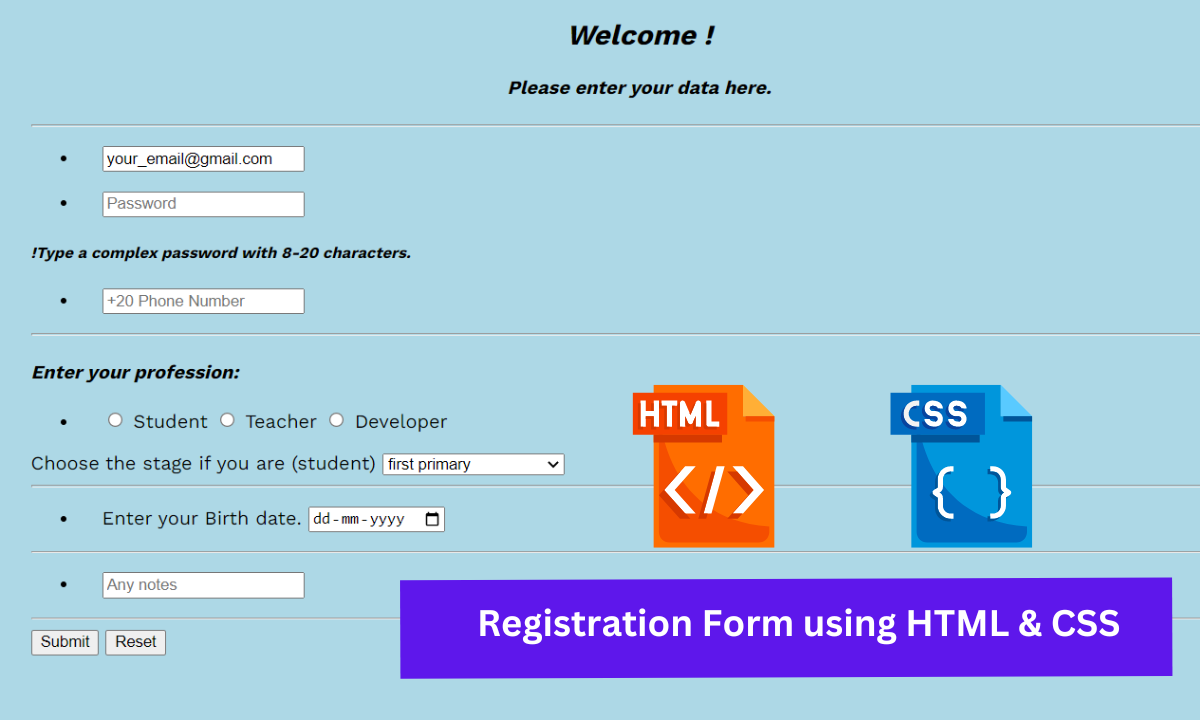
Hey Coder! Welcome back to Codewithrandom Blog. Today We’ll learn how to create a Student Registration form using HTML and CSS. We have an email id, password, phone number, profession selected, date picker, and a textarea in the Registration Form.
Registration form templates that are easy to find and fill out on your website can help you get members, event attendees, email subscribers, customers, and more.

When we surf a site when we are willing to enroll for some courses, seminars, workshops,s, etc. We have to contact the event organizer and for that, we have to fill out the registration form basically, it is formed that takes the details of the user and saves them in the database of the website so that the admin can contact him and deliver the info regarding the events.
50+ HTML, CSS & JavaScript Projects With Source Code
So Let’s see the code to create a registration form using HTML & CSS easily you can copy and paste the code into your project. I hope you got the idea of the project.
HTML Code For Registration form
<!DOCTYPE html>
<html lang="en">

<head>
  <meta charset="UTF-8" />
  <link rel="stylesheet" href="master.css" />
  <title>Registration Form</title>
  <link href="https://fonts.googleapis.com/css2?family=Work+Sans:wght@200;300;400;500;600;700;800&display=swap" rel="stylesheet" />
</head>

<body style="background-color: lightblue">
  <center>
    <i>
      <h2>Welcome !</h2>
    </i>
    <i>
      <h4>Please enter your data here.</h4>
    </i>
  </center>
  <hr />
  <form method="post" target="_blank">
    <div>
      <ul class="ul1">
        <li class="li1">
          <input type="email" required placeholder="Email" value="[email protected]" name="email" autofocus />
        </li>
      </ul>
    </div>
    <div>
      <ul>
        <li class="li2">
          <input type="password" required placeholder="Password" name="Password" minlength="8" maxlength="20" />
        </li>
      </ul>
      <h5>
        <i>
          <p>!Type a complex password with 8-20 characters.</p>
        </i>
      </h5>
    </div>
    <div>
      <ul>
        <li class="li3">
          <input type="number" required placeholder="+20 Phone Number" name="Phone Number" />
        </li>
      </ul>
    </div>
    <hr />
    <h4>
      <i>
        <p>Enter your profession:</p>
      </i>
    </h4>
    <ul>
      <li class="li4">
        <input id="Student" type="radio" , name="Profession" value="Student" />
        <label for="Student">Student</label>
        <input id="Teacher" type="radio" , name="Profession" value="Teacher" />
        <label for="Teacher">Teacher</label>
        <input id="Developer" type="radio" , name="Profession" value="Developer" />
        <label for="Developer">Developer</label>
      </li>
    </ul>
    <label for="stage">Choose the stage if you are (student)</label>
    <select name="stage" id="stage">
      <optgroup label="Primary stage">
        <option value="first primary">first primary</option>
        <option value="second primary">second primary</option>
        <option value="third primary">third primary</option>
        <option value="Fourth primary">Fourth primary</option>
        <option value="Fifth primary">Fifth primary</option>
        <option value="sixth primary">sixth primary</option>
      </optgroup>
      <optgroup label="Preparatory stage">
        <option value="first preparatory">first preparatory</option>
        <option value="second preparatory">second preparatory</option>
        <option value="third preparatory">third preparatory</option>
      </optgroup>
      <optgroup label="Secondary stage">
        <option value="first secondary">first secondary</option>
        <option value="second secondary">second secondary</option>
        <option value="third secondary">third secondary</option>
      </optgroup>
    </select>
    <hr />
    <ul>
      <li class="li5">
        <label for="d">Enter your Birth date.</label>
        <input type="date" name="date" id="d" />
      </li>
    </ul>
    <hr />
    <div>
      <ul>
        <li class="li6">
          <input type="text" placeholder="Any notes" name="Nots" />
        </li>
      </ul>
    </div>
    <hr />
    <input type="submit" />
    <input type="reset" value="Reset" />
  </form>
  <br />
  <br />
  <br />
  <center>
    <font>
      <h6>
        <i>
          <p>Developed by @Thomas.</p>
        </i>
      </h6>
      <a href="https://github.com/ThomasDev82" target="_blank">
        <font>
          <h5><i>Github</i></h5>
        </font>
      </a>
    </font>
  </center>
</body>

</html>
In this code we have defined the structure of the form in which we have created a textbox in which the user will enter their email and password then we have also added a textbox for numbers we have created a radio button which is basically used to enter gender because it only takes one option then we have the calendar so that the user can describe the DOB.
Restaurant Website Using HTML and CSS
Now we have defined the structure now we have to style the form so that it doesn’t look like a common and basic form.
HTML Output:

CSS Code for Registration Form
body {
  font-family: "Work Sans", sans-serif;
  padding-left: 30px;
  padding-right: 30px;
}

.li1 {
  padding-left: 20px;
  list-style-image: url("sharp_arrow_right_black_24dp.png");
}
.li2 {
  padding-left: 20px;
  list-style-image: url("sharp_arrow_right_black_24dp.png");
}
.li3 {
  padding-left: 20px;
  list-style-image: url("sharp_arrow_right_black_24dp.png");
}
.li4 {
  padding-left: 20px;
  list-style-image: url("sharp_arrow_right_black_24dp.png");
}
.li5 {
  padding-left: 20px;
  list-style-image: url("sharp_arrow_right_black_24dp.png");
}
.li6 {
  padding-left: 20px;
  list-style-image: url("sharp_arrow_right_black_24dp.png");
}
Using the body tag selector, we will establish the font family and apply 30px of padding to the left and right. We will now pick each list item selector using the class selector, add 20 px of padding, and use the life-sttlw-image. We will pick a different background each time using the list-style image.
In this styling code of CSS, we have just set the fonts and alignment of the attributes which we have defined in the structure file i.e., HTML code. Now let us see the output of this project.
Portfolio Website using HTML and CSS (Source Code)
Video Output Of Student Registration Form :
Final Output for Student Registration Form
We have successfully created our Student Registration Form using HTML and CSS. You can use this project for your personal needs and the respective lines of code are given with the code pen link mentioned below.
10+ HTML CSS Projects For Beginners (Source Code)
If you find out this Blog helpful, then make sure to search code random on google for Front End Projects with Source codes and make sure to Follow the Code with Random Instagram page.
Thank You And Happy Learning!!
Written By – Harsh Sawant
Code By – Thomas
How to make a registration form using HTML CSS?
A developer must be familiar with two key ideas in order to create a registration form: one is to concentrate on html concepts, and the other is how to use styling to add styling inside the registration.
What is the use of registration form?
When it comes to gathering a lot of data from various groups, registration forms are crucial. They help in the simultaneous collection of data from various organisations.
ADVERTISEMENT


