How to Create a Weather App using JavaScript?
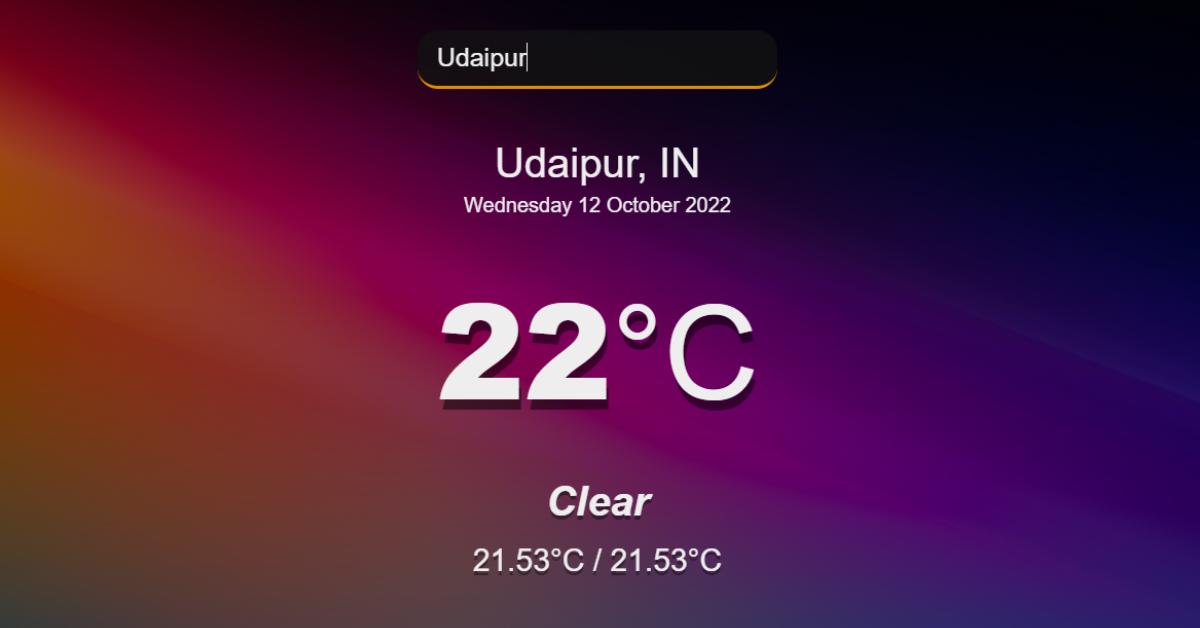
This post will teach you how to use JavaScript to build a weather app. You may learn about the weather in any location with the aid of our JavaScript weather app. Any city’s information, including the temperature, date, and sky conditions, can be found below if you enter its name in the input box below.
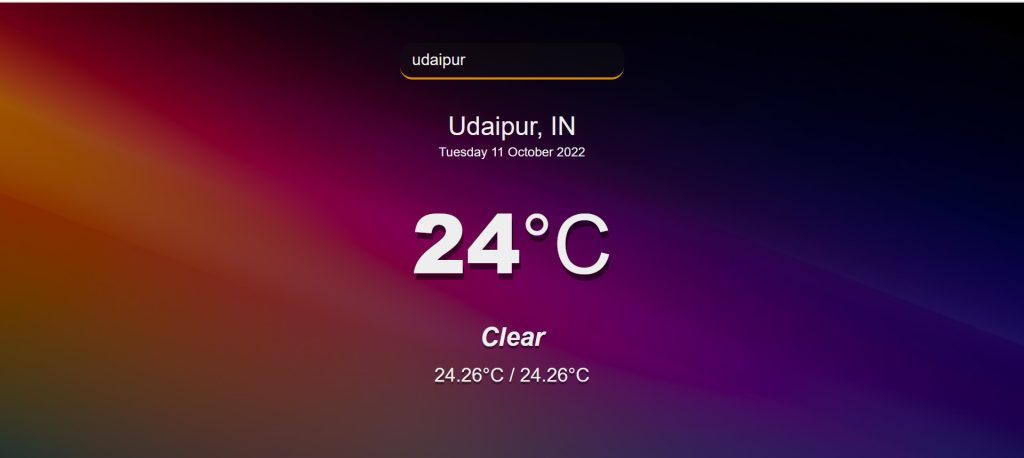
The weather in any city in the world can be simply known with the use of this straightforward weather application. With the aid of JQuery, this design is simple to create. The creation of this application in pure JavaScript is simple, though, if you choose.
You certainly need to understand JavaScript at a basic level. It’s fairly simple to do if you have a basic understanding of JS. Since this is intended for beginners, I’ve provided a thorough, step-by-step explanation of why I chose to utilize that particular code line.
The weather information for all towns and nations was fetched using the APIs in our weather app. I’m not sure how many of you are familiar with APIs, but if you’re not, don’t worry; we designed this project beginner-friendly, so we will explain every concepts that we used in our project.
100+ JavaScript Projects With Source Code ( Beginners to Advanced)
What is an API?
Application Programming Interface is referred to as API. The term “application” in the context of APIs refers to any software with a specific purpose. A contract of service between two apps can be compared to an interface. This agreement specifies the requests and responses that the two computer will use to communicate. Developers can find instructions in their API documentation on how to format those requests and responses.
If you want to know more about the API, just follow the link. – API Documentation
HTML Code
The basic structure of this Weather App has been created using the following HTML and CSS code. This structure will contain all the information.Step-by-step we explained our code.
To link them all together, we will start by including links for JavaScript and CSS in our HTML. Therefore, the Javascript will be in the body section and the CSS link will be in the head part.
<!DOCTYPE html>
<html lang="en">

<head>
    <meta charset="UTF-8" />
    <meta http-equiv="X-UA-Compatible" content="IE=edge" />
    <meta name="viewport" content="width=device-width, initial-scale=1.0" />
    <title>Quiz App</title>
    <link rel="stylesheet" href="style.css" />
</head>

<body>

    <script src="index.js"></script>
</body>

</html>
We will now create a div with the class (app-wrap), which will hold the webpage’s structure. Using the header> tag, we will insert a header section into it. We will make a text-only input box there, which we will use to search for towns and nations to learn more about their weather.
<header>
   <input type="text" autocomplete="off" class="search-box" placeholder="Search for a city">
</header>
We will now build a main section, a location section with two divs—one for the city and one for the date—and a current section with three divs. The location section will be contained in the main section. They will include the temperature at the moment, the weather, and the high and low temperatures.
<main>
            <section class="location">
                <div class="city">Manila, Las Pinas</div>
                <div class="date">Monday 30 May</div>
            </section>

            <div class="current">
                <div class="temp">15<span>°C</span></div>
                <div class="weather">Sunny</div>
                <div class="hi-low">13°C / 16°C</div>
            </div>
        </main>
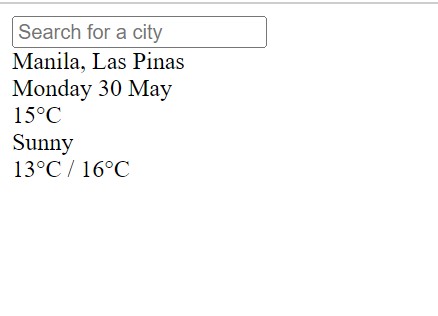
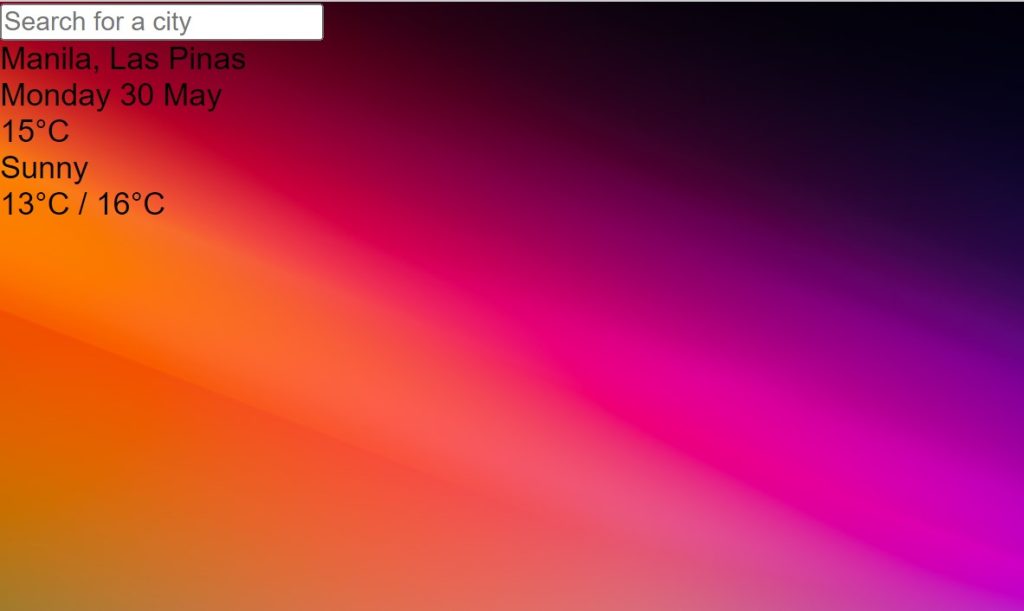
We have now added a basic structure to our webpage. Now let’s take a look at our structure.
Responsive Resume/CV Website Using HTML & CSS
Output:
CSS Code For Weather App
Step1: We will start by adding styling to our HTML website. We will add a margin, set padding to “zero,” and set box-sizing to “border-box” using the universal selector.
We’ll add the “Outfit” font family to our website . Everybody agrees that a website should have a pleasing visual appearance, thus we used the background of our weather app as a gradient image to achieve this we have used the background property. utilizing “Cover” to fill the entire area while using the background-size.
* {
  margin: 0;
  padding: 0;
  box-sizing: border-box;
}
body {
  font-family: "Outfit", sans-serif;
  background-image: url("	https://images3.alphacoders.com/109/1091500.jpg");
  background-size: cover;
  background-position: top center;
}
Step2:Using the class selector, we will now style the main div container for our weather app (.app-wrap). In addition to setting a minimum height for our container and adding a linear background, we have the display set to flex in a column-wise .
Simple Portfolio Website Using Html And Css With Source Code
Using the input tag selector, we will now style our input box for that. We added a maximum width of 280px and set the width to 100%. We also added some padding to the input box, adjusted the backdrop color to “dark-grey,” and added a bottom border that is 3 pixels wide and solid mustard. WE also added a transition that eases out. Our input box’s font size is set to 24 px.
.app-wrap {
  display: flex;
  flex-direction: column;
  min-height: 100vh;
  background-image: linear-gradient(
    to bottom,
    rgba(0, 0, 0, 0.3),
    rgba(0, 0, 0, 0.6)
  );
}
header {
  display: flex;
  justify-content: center;
  align-items: center;
  padding: 50px 15px 15px;
}
header input {
  width: 100%;
  max-width: 280px;
  padding: 10px 15px;
  border: none;
  outline: none;
  background-color: rgba(18, 18, 18, 0.4);
  border-radius: 16px;
  border-bottom: 3px solid #df8e00;

  font-size: 20px;
  font-weight: 300;
  transition: 0.2s ease-out;
  color: #eeeeee;
}
header input:focus {
  background-color: rgba(18, 18, 18, 0.8);
}
Step3:To style our main part, let’s do that now. We’ll give our main section some display and padding, and inside the main section, for things like location and date that we’ll add using the class selector, we’ll set the font-color to “white” and the font-size to 32px.
main {
  flex: 1 1 100%;
  padding: 25px 25px 50px;
  display: flex;
  flex-direction: column;
  align-items: center;
  text-align: center;
}
.location .city {
  color: #eeeeee;
  font-size: 32px;
  font-weight: 500;
  margin-bottom: 5px;
}
.location .date {
  color: #eeeeee;
  font-size: 16px;
}
.current .temp {
  color: #eeeeee;
  font-size: 102px;
  font-weight: 900;
  margin: 30px 0;
  text-shadow: 2px 8px rgba(0, 0, 0, 0.5);
}
.current .temp span {
  font-weight: 200;
}
.current .weather {
  color: #eeeeee;
  font-size: 32px;
  font-weight: 700;
  font-style: italic;
  margin-bottom: 15px;
  text-shadow: 0 3px rgba(0, 0, 0, 0.4);
}
.current .hi-low {
  color: #eeeeee;
  font-size: 24px;
  font-weight: 500;
  text-shadow: 0 3px rgba(0, 0, 0, 0.4);
}
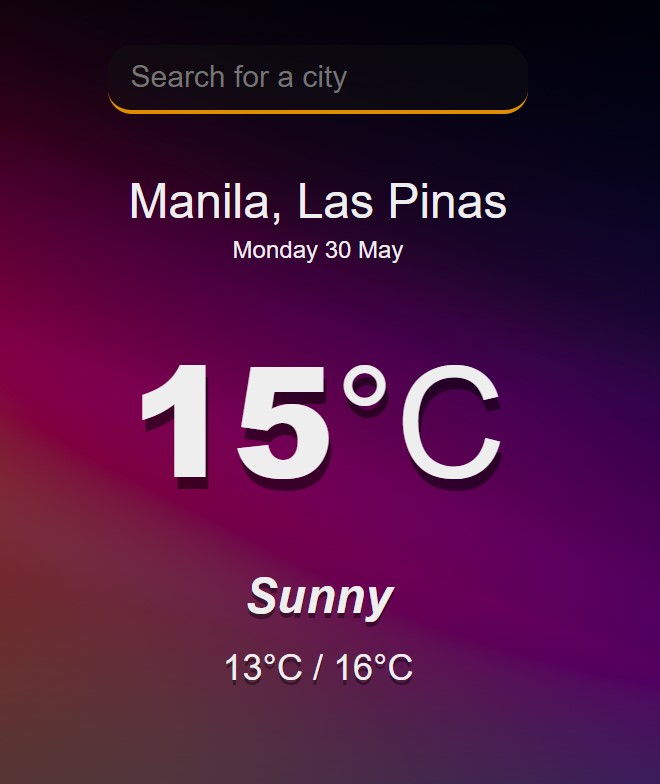
Let’s look at the finished result now that we have finished styling.
Output:
JavaScript Code For Weather App
const api = {
  key: "2fa73590fd8b5a4c6e68098ad5625395",
  base: "https://api.openweathermap.org/data/2.5/"
};

const searchbox = document.querySelector(".search-box");
searchbox.addEventListener("keypress", setQuery);

function setQuery(evt) {
  if (evt.keyCode == 13) {
    getResults(searchbox.value);
  }
}

function getResults(query) {
  fetch(`${api.base}weather?q=${query}&units=metric&APPID=${api.key}`)
    .then((weather) => {
      return weather.json();
    })
    .then(displayResults);
}

function displayResults(weather) {
  console.log(weather);
  let city = document.querySelector(".location .city");
  city.innerText = `${weather.name}, ${weather.sys.country}`;

  let now = new Date();
  let date = document.querySelector(".location .date");
  date.innerText = dateBuilder(now);

  let temp = document.querySelector(".current .temp");
  temp.innerHTML = `${Math.round(weather.main.temp)}<span>°C</span>`;

  let weather_el = document.querySelector(".current .weather");
  weather_el.innerText = weather.weather[0].main;

  let hilow = document.querySelector(".hi-low");
  hilow.innerText = `${weather.main.temp_min}°C / ${weather.main.temp_max}°C`;
}

function dateBuilder(d) {
  let months = [
    "January",
    "February",
    "March",
    "April",
    "May",
    "June",
    "July",
    "August",
    "September",
    "October",
    "November",
    "December"
  ];
  let days = [
    "Sunday",
    "Monday",
    "Tuesday",
    "Wednesday",
    "Thursday",
    "Friday",
    "Saturday"
  ];

  let day = days[d.getDay()];
  let date = d.getDate();
  let month = months[d.getMonth()];
  let year = d.getFullYear();

  return `${day} ${date} ${month} ${year}`;
}
- We will first create a constant object variable, which will store our object base and key value.
- Now using thedocument.queryselector We will select our input search box and we will add a Keypress EventListener to it, which we will attach to a function called setQuery.
- Now, using the function, we will check if our key value is 13 digits long or not. If it is, then it will search for the city or country you are searching for using the search box.
- Now we will create another function which we fetch the weather details using the API, and then it will return the weather details using the.json() method.
- Now we will create a function that will push all the output into our HTML element so that we can display the weather details on our webpage.
- We will also create the function by which we will fetch the current date and year from the user’s browser.
- Now inside that, we will create an array for the months in a year.
- a week’s worth of days in an array
- Now using the.getDay and date() methods, we will fetch the current date and store it into the variables, and using those variables, we will display it as our output.
Now we’ve completed our simple weather app using JavaScript. I hope you understood the whole project. Let’s take a look at our Live Preview.
How to Create Responsive Hamburger Menu Using HTML & CSS
Output:
ADVERTISEMENT
Here Below we will we provide you the link to the zip file for downloading the source code of our Webpage.
[su_button id=”download” url=”https://drive.google.com/file/d/1AevQW4IgzJzaHFPCGLLrgHlsYOShVBdR/view?usp=sharing” target=”blank” style=”3d” size=”11″ wide=”yes” center=”yes” icon=”icon: download”]DOWNLOAD CODE NOW[/su_button]
ADVERTISEMENT
Now We have Successfully created our Weather App using HTML , CSS & Javascript . You can use this project directly by copying into your IDE. WE hope you understood the project , If you any doubt feel free to comment!!
ADVERTISEMENT
We have also created an article where you can find 10+ front-end project . if you intreseted you can checkout the below link.
ADVERTISEMENT
Front-End Projcets
If you find out this Blog helpful, then make sure to search code with random on google for Front End Projects with Source codes and make sure to Follow the Code with Random Instagram page.
ADVERTISEMENT
