How to create Memory Game using HTML, CSS & JavaScript
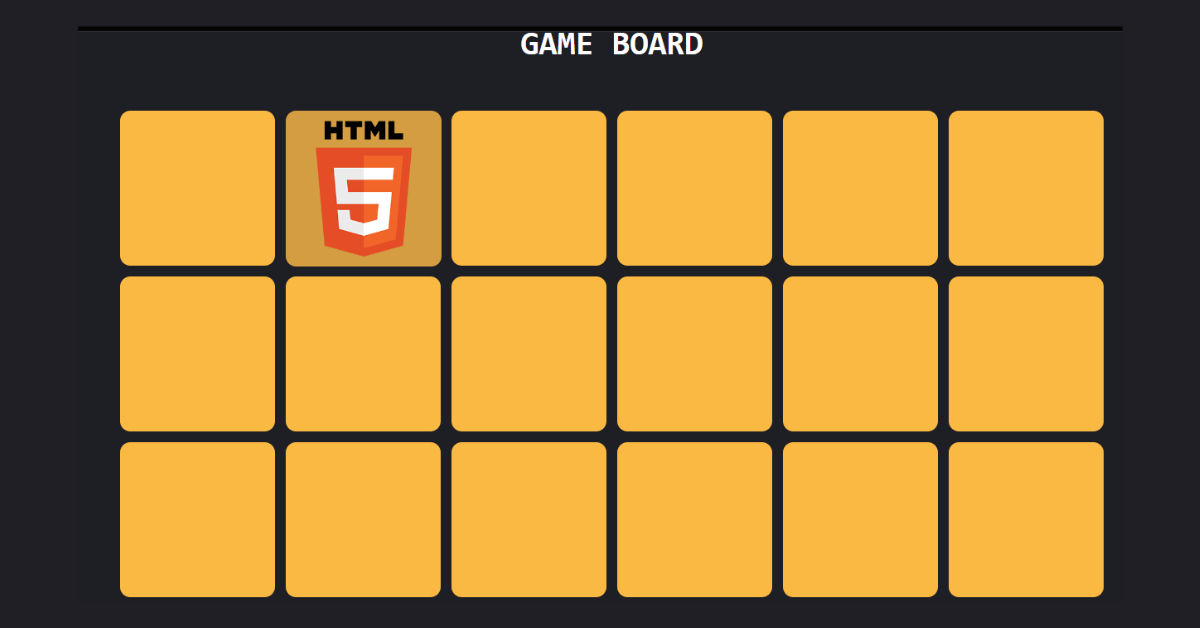
Hello everyone. Welcome to today’s tutorial on Codewithrandom. We’ll learn how to make a memory game? in which it will be testing the user memory that where are the same objects and find its pair.
How to make a memory game in HTML, CSS, and JavaScript?
In Today’s session, We will use HTML, CSS, and JavaScript to complete this Project. We will go in three steps.
- Step 1 – The HTML (Hypertext Markup Language) code will help us to prepare a game board and the necessary elements to create the structure.
- Step 2 – The CSS (Cascading Stylesheet) code will help to style the project with suitable bgcolor and some alignment to the necessary elements.
- Step 3 – Then the JS(JavaScript) code will contain the images of the game and then we’ll make it a grid and some functions to make it responsive at the user end.
I hope you have got an idea about the project.
| Project Name | Memory Game |
| Code By | @Harshh9 |
| Written By | Harsh Sawant |
| Project Download | Copy Code From Given Code Snippets And Codepen Embed |
| Language Used | HTML, CSS, And JavaScript |
| External Link / Dependencies | No |
| Responsive | No |
Step 1 – HTML Code for Memory Game
In the HTML code we have Structured the game board and a heading. And we have linked some style template and the JS code to make it responsive later on
We have < tag for heading. We haveh1> <div> for game board container which Id name is game-board Let’s code the CSS part to add some styling and aligned the structure.
<html lang="en">
<head>
    <meta charset="UTF-8">
    <meta name="viewport" content="width=device-width, initial-scale=1.0">
    <title>Javascript Memory Game</title>
    <link rel="stylesheet" href="style.css">
</head>
<body>
  <h1>GAME BOARD</h1>
    <div id="game-board"></div>

    <script src="main.js"></script>
</body>
</html>
Read also:
100+ JavaScript Projects With Source Code ( Beginners to Advanced)
Step 2 – CSS Code for Memory Game
This CSS code is very vast because, the structure only contains the gameboard but the remaining part is defined in the JS code, and we have aligned that using the id names and class names.
We have added padding and set some margin for each picture so that it looks good and doesn’t get messy.
We have using transform: rotateY() property for grid card flip effects, on user click.
Let’s code the JavaScript part to make it user responsive.
*,
*::before,
*::after {
  box-sizing: border-box;
}

body {
  margin: 20px 0;
  background: #1E1E25;
}

h1 {
  font-family: sans-serif;
  text-align: center;
  padding: 20px;
  color: white;
  font-family: 'Roboto Mono', monospace;
}

.grid {
  max-width: 960px;
  margin: 0 auto;
  display: flex;
  flex-wrap: wrap;
  justify-content: space-evenly;
}

.card {
  position: relative;
  transition: all .4s linear;
  transform-style: preserve-3d;
  margin: 5px;
}

.card,
.back,
.front {
  height: 150px;
  width: 150px;
  border-radius:10px;
}

.back,
.front {
  position: absolute;
  backface-visibility: hidden;
}

.front {
  z-index: 2;
  background: #FAB942 url('../img/question.gif') no-repeat center center / contain;
}

.back {
  transform: rotateY(180deg);
  background-color: #D49D42;
  background-size: contain;
  background-repeat: no-repeat;
  background-position: center center;
}

.selected {
  transform: rotateY(180deg);
}

.match .front {
  background: #6589F9 !important;
}
Read also:
Portfolio Website using HTML and CSS (Source Code)
Step 3 – JavaScript Code for Memory Game
In the JavaScript code We Have Added The Image Which Will The Essential Part Of The Game.
Then We Have Added A Logic To Make It Rotate 180 Degree And Defined Some Functions To Make Responsive And Make It Click On The Image.
Basically we have created a variable is called cardsArray, and we have created array of all cards. We have a another variable called gameGrid , where declared a array.concat function to duplicate cards array to Create A Match For Each Cards.
Like these we have also created some other variables and declared fuctions. We have commented about all the logics and fuction in given JavaScript code below.
Logic Is Also Added To Make 1 Click At A Time To See The Image. Let Us See The Final Output Of The Project Memory Game Using HTML, CSS & JavaScript.
var cardsArray = [
    {    'name': 'CSS',    'img': 'https://github.com/robgmerrill/img/blob/master/css3-logo.png?raw=true',  },
    {    'name': 'HTML',    'img': 'https://github.com/robgmerrill/img/blob/master/html5-logo.png?raw=true',  },
    {    'name': 'jQuery',    'img': 'https://github.com/robgmerrill/img/blob/master/jquery-logo.png?raw=true',  },
    {    'name': 'JS',    'img': 'https://github.com/robgmerrill/img/blob/master/js-logo.png?raw=true',  },
    {    'name': 'Node',    'img': 'https://github.com/robgmerrill/img/blob/master/nodejs-logo.png?raw=true',  },
    {    'name': 'Photo Shop',    'img': 'https://github.com/robgmerrill/img/blob/master/photoshop-logo.png?raw=true',  },
    {    'name': 'PHP',    'img': 'https://github.com/robgmerrill/img/blob/master/php-logo_1.png?raw=true',  },
    {    'name': 'Python',    'img': 'https://github.com/robgmerrill/img/blob/master/python-logo.png?raw=true',  },
    {    'name': 'Ruby',    'img': 'https://github.com/robgmerrill/img/blob/master/rails-logo.png?raw=true',  },
    {    'name': 'Sass',    'img': 'https://github.com/robgmerrill/img/blob/master/sass-logo.png?raw=true',  },
    {    'name': 'Sublime',    'img': 'https://github.com/robgmerrill/img/blob/master/sublime-logo.png?raw=true',  },
    {    'name': 'Wordpress',    'img': 'https://github.com/robgmerrill/img/blob/master/wordpress-logo.png?raw=true',  },
  ];

//Duplicate cardsArray to create a match for each card
var gameGrid = cardsArray.concat(cardsArray);

//Randomize game grid on each load
gameGrid.sort(function() {
    return 0.5 - Math.random();
})

//grab the div with an id of game-board and assign to a variable game
var game = document.getElementById("game-board");

//Create a section element and assign it to variable grid
var grid = document.createElement('section');

//Give section element a class of grid.
grid.setAttribute('class', 'grid');

//Append the grid section to the game-board div
game.appendChild(grid);

//Loop through each item in our cards array
for(var i =0; i < gameGrid.length ; i++) {

    //create a div element and assign to variable card
    var card = document.createElement('div');
    //Apply a card class to that div
    //card.classList.add('card');
    card.setAttribute('class','card');
    //Set the data-name attribute of the div to the cardsArray name
    //card.dataset.name = cardsArray[i].name;
    card.setAttribute('data-name',gameGrid[i].name);

    //Create front of card
    var front = document.createElement('div');
    front.classList.add('front');

    //Create back of card´
    var back = document.createElement('div');
    back.classList.add('back');
    back.style.backgroundImage = `url(${gameGrid[i].img})`;

    //Append card to grid
    grid.appendChild(card);
    card.appendChild(front);
    card.appendChild(back);
}

var firstGuess='';
var secondGuess = '';


//Set count to 0
var count = 0;
var previousTarget = null;

var delay = 1200;


//Add match CSS
var match = function() {
    var selected = document.querySelectorAll('.selected');
    //loop through the array like object containing 'selected' class
    for (i=0; i<selected.length; i++) {
        selected[i].classList.add('match');
    }
};

// Reset guesses after two attempts
var resetGuesses = function() {
    firstGuess = '';
    secondGuess = '';
    count = 0;
    previousTarget = null;

    var selected = document.querySelectorAll('.selected');
    for ( i = 0; i < selected.length; i++) {
        selected[i].classList.remove('selected');

    }
};


//Add event listener to grid
grid.addEventListener('click', function(event) {
    //Declare variable to target our clicked item
    var clicked = event.target;
    //Do not allow the grid section itself to be selected;
    //only select divs inside the grid
    if(clicked.nodeName === 'SECTION' || clicked === previousTarget || clicked.parentNode.classList.contains ('match') || clicked.parentNode.classList.contains('selected')) {
        return;
    }

    //We only want to add 'selected' class if the current count is less than 2
    if (count < 2) {
        count++;

    if (count === 1) {
        //Assign firts guess
        firstGuess = clicked.parentNode.dataset.name;
        clicked.parentNode.classList.add('selected');
    } else {
        //Assign second guess
        secondGuess = clicked.parentNode.dataset.name;
        clicked.parentNode.classList.add('selected');
    }
    //If both guesses are not empty
    if (firstGuess !== '' && secondGuess !== '') {
        //An the firtsGuess macthes secondGuess
        if (firstGuess === secondGuess) {
            //Run the macth function
            setTimeout(match,delay);
            setTimeout(resetGuesses,delay);
        } else {
            setTimeout(resetGuesses,delay);
        }
    }
    previousTarget = clicked;
    }

});
Read also:
Weather App Using Html,Css And JavaScript
Final Output Of Memory Game Using HTML, CSS & JavaScript
We have Successfully created ourMemory Game using HTML, CSS & JavaScript. You can use this project for your personal needs and the respective lines of code are given with the code pen link mentioned above.
If you find out this Blog helpful, then make sure to search code with random on google for Front End Projects with Source codes and make sure to Follow the Code with Random Instagram page.
ADVERTISEMENT
Written By – Harsh Sawant
ADVERTISEMENT
Code By – @harshh9
ADVERTISEMENT
How to make a memory game in HTML, CSS, and JavaScript?
Step 1 – The HTML (Hypertext Markup Language) code will help us to prepare a game board and the necessary elements to create the structure.
ADVERTISEMENT
Step 2 – The CSS (Cascading Stylesheet) code will help to style the project with suitable bgcolor and some alignment to the necessary elements.
ADVERTISEMENT
Step 3 – Then the JS(JavaScript) code will contain the images of the game and then we’ll make it a grid and some functions to make it responsive at the user end.
How to create Memory Game using HTML, CSS & JavaScript
In Today’s session, We will use HTML, CSS, and JavaScript to complete this Project. We will go in three steps.
Step 1 – The HTML (Hypertext Markup Language) code will help us to prepare a game board and the necessary elements to create the structure.
Step 2 – The CSS (Cascading Stylesheet) code will help to style the project with suitable bgcolor and some alignment to the necessary elements.
Step 3 – Then the JS(JavaScript) code will contain the images of the game and then we’ll make it a grid and some functions to make it responsive at the user end.


