Cookie Consent Box using HTML, CSS and JavaScript
Good day to all. Thanks for visiting Codewithrandom’s newest, most interesting tutorial. The creation of a Cookie Consent form will be covered in today’s tutorial. HTML, CSS, and pure Javascript are required to complete this project.
While creating a cookie consent form . We need to understand what cookies are and why we utilise them.
What are Cookies?
A cookie is a short text file comprising bits of data stored on the client computer or browser by the web server that has a maximum size of 4 KB. Cookies make guarantee the user has the best possible website experience. This blog post will demonstrate how to utilise javascript to put cookies in a cookie consent box in the user’s browser.

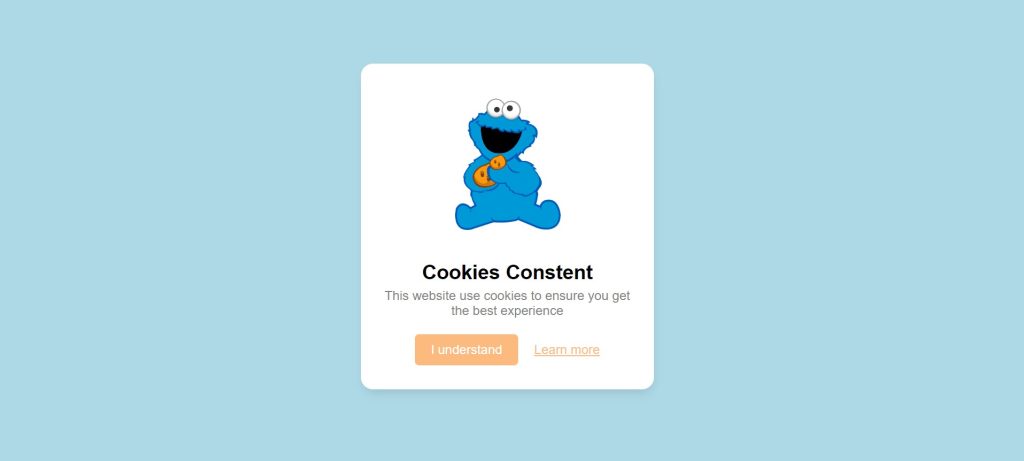
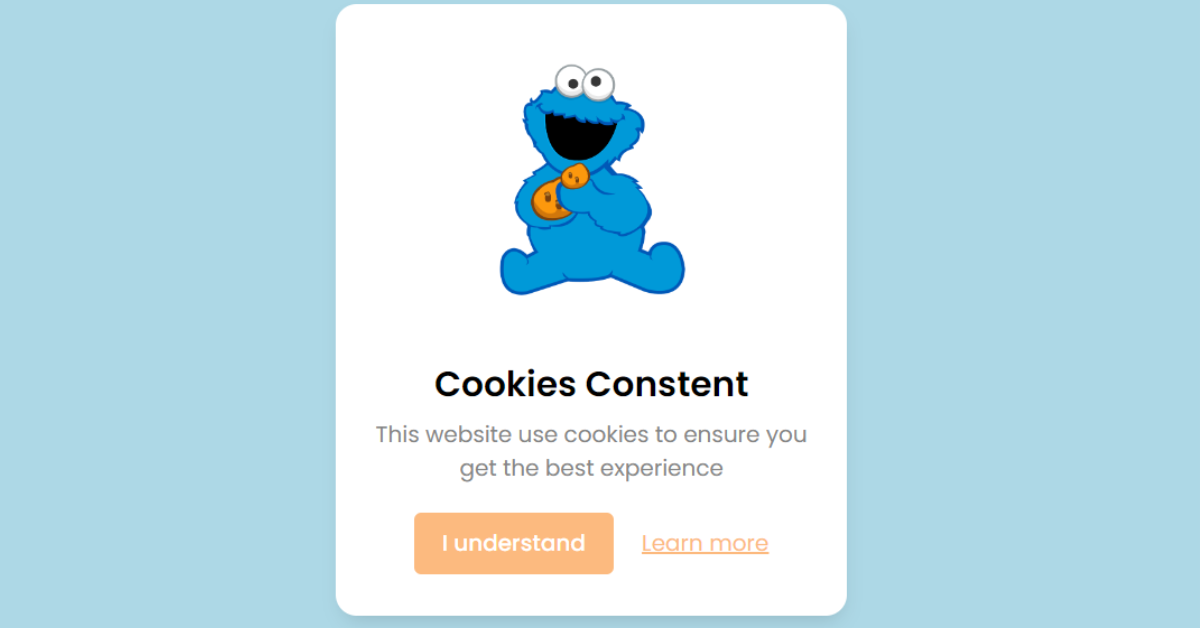
The web page first contains a cookie consent box, which is visible in the preceding preview screenshot. In this box, there is a cookie image, header, succinct description, cookie acceptance button, and hyperlink for further information about this cookie. Until you allow cookies for your browser, this cookie box won’t go away no matter how many times you reload the website.
This tutorial will walk you through each step I took to create the Accept Cookies Consent form. You must be familiar with basic HTML , CSS & Javascript concepts in order to create it.
Step1: Adding the basic Structure
<html lang="en">

<head>
    <meta charset="UTF-8" />
    <meta http-equiv="X-UA-Compatible" content="IE=edge" />
    <meta name="viewport" content="width=device-width, initial-scale=1.0" />
    <title>Add Cookies</title>
    <link rel="stylesheet" href="style.css" />
</head>

<body>
    <div class="wrapper">
        <img
            src="https://2.bp.blogspot.com/-hIyV0x4yKpM/XGm5Irou9dI/AAAAAAAAITs/6G7qGPyS9xcbppciDvAgjNIbJUMh_XqFACLcBGAs/s1600/CAT_Cute%2BSesame%2BClipart%2B3.png">
        <div class="content">
            <header>Cookies Constent</header>
            <p>This website use cookies to ensure you get the best experience</p>
            <div class="buttons">
                <button class="item">I understand</button>
                <a href="#" class="item">Learn more</a>
            </div>
        </div>
    </div>
    <script src="script.js"></script>
</body>
Before beginning to add structure to our password Strength checker, We need to update some links. Because we used two separate files for our HTML and CSS in this project, we need to connect them all.To link CSS to our HTML file we need add the css link inside the head section and to add javascript feature inside our project we need to add the javascript link inside body section.
Restaurant Website Using HTML And CSS With Source Code
//Head section
<link rel="stylesheet" href="style.css" />
//Body Section
<script src="script.js"></script>
Now let’s Add the structure for our Cookies Consent.
- The first thing we’ll do is construct a div container with the class “wrapper,” which will serve as the main container for our cookie consent form.
- We will now add an image to our structure using the image tag and a URL.
- Using the <Header> tag we will add a heading for our Cookies Consent.
- Now, using the paragraph tag, we will add a brief detail about our cookies consent.
- Now we will create another div with class “button” which will act as container for our accept button and learn more about cookies link.
- Using the button tag we will create a accept cookies button and using the anchor link we will a learn more about consent form.
We have now added the basic structure of our webpage. Now we will be using our stylesheet to add styles to our Cookies consent form but first let’s take a look at our output.
Output:

Step2: Adding CSS Code
Cascading Style Sheets (CSS) is a markup language for describing the presentation of a document written in HTML or XML. CSS, like HTML and JavaScript, is a key component of the World Wide Web.
50+ Html ,Css & Javascript Projects With Source Code
Now we will look at our CSS code.
* {
  padding: 0;
  margin: 0;
  box-sizing: border-box;
  font-family: "Poppins", sans-serif;
}
body {
  background: lightblue;
  text-align: center;
}
.wrapper {
  position: absolute;
  top: 100px;
  left: 450px;
  background: #fff;
  max-width: 365px;
  border-radius: 15px;
  text-align: center;
  padding: 25px 25px 30px 25px;
  box-shadow: 1px 7px 14px -5px rgba(0, 0, 0, 0.15);
}
.wrapper.hide {
  opacity: 0;
  pointer-events: none;
  transform: scale(0.8);
  transition: all 0.3s ease;
}
::selection {
  color: #fff;
  background: #fcba7f;
}
.wrapper img {
  max-width: 150px;
}
.wrapper .content {
  margin-top: 20px;
}
.wrapper header {
  font-size: 25px;
  font-weight: 600;
}
.content {
  margin-top: 10px;
}
.content p {
  color: #858585;
  margin: 5px 0 20px 0;
}
.content .buttons {
  display: flex;
  align-items: center;
  justify-content: center;
}
.buttons .item {
  margin: 0 10px;
}
.buttons button {
  padding: 10px 20px;
  background: #fcba7f;
  border: none;
  outline: none;
  font-size: 16px;
  font-weight: 500;
  color: #fff;
  cursor: pointer;
  border-radius: 5px;
}
.buttons button:hover {
  transform: scale(0.97);
}
.buttons a {
  color: #fcba7f;
}
After we’ve added the CSS code, we’ll go over it step by step. To save time, you can simply copy this code and paste it into your IDE. Let us now examine our code step by step.
Step1: Using the universal selector, we will apply some styling to our body. We’ve set the box-sizing to “border-box,” the padding and margin to “zero,” the font-family property to “Poppins,” and the padding and margin to “zero.”
100+ JavaScript Projects With Source Code ( Beginners to Advanced)
We will use the body selector to change the background colour to “light blue” and the text-align property to centre the text.
* {
  padding: 0;
  margin: 0;
  box-sizing: border-box;
  font-family: "Poppins", sans-serif;
}
body {
  background: lightblue;
  text-align: center;
}
Step2: We’ll use the class selector (wrapper) to set the position to absolute, and we’ll use the top and left attributes to leave a space of 100 pixels at the top and 450 pixels to the left. Our container’s background colour is set to white, and we will set the maximum width to 365px using the maximum-width property. Finally, we will align the text to the container using the text-align property.
Javascript will be used to add this styling using the.hide class. By using the pointer event to set the pointer to none and the transform property to scale the wrapper to 0.8, the opacity is set to 0. A transition of 0.3 has also been easily introduced.
.wrapper {
  position: absolute;
  top: 100px;
  left: 450px;
  background: #fff;
  max-width: 365px;
  border-radius: 15px;
  text-align: center;
  padding: 25px 25px 30px 25px;
  box-shadow: 1px 7px 14px -5px rgba(0, 0, 0, 0.15);
}
.wrapper.hide {
  opacity: 0;
  pointer-events: none;
  transform: scale(0.8);
  transition: all 0.3s ease;
}
::selection {
  color: #fff;
  background: #fcba7f;
}
Step3: Now we will add styling to our cookies consent element individually using the child element selector (img) we will set the maximum – width to 150px.
Portfolio Website using HTML and CSS (Source Code)
similarly using the tag selector (p) we will set the color to dark grey and margin is set to 5px from top and 20px from bottom. Similarly we will add styling to the button we will change its background color and set the font-size as 16px.
.wrapper img {
  max-width: 150px;
}
.wrapper .content {
  margin-top: 20px;
}
.wrapper header {
  font-size: 25px;
  font-weight: 600;
}
.content {
  margin-top: 10px;
}
.content p {
  color: #858585;
  margin: 5px 0 20px 0;
}
.content .buttons {
  display: flex;
  align-items: center;
  justify-content: center;
}
.buttons .item {
  margin: 0 10px;
}
.buttons button {
  padding: 10px 20px;
  background: #fcba7f;
  border: none;
  outline: none;
  font-size: 16px;
  font-weight: 500;
  color: #fff;
  cursor: pointer;
  border-radius: 5px;
}
.buttons button:hover {
  transform: scale(0.97);
}
.buttons a {
  color: #fcba7f;
}

Step3: JavaScript Code
const cookieBox = document.querySelector(".wrapper"),
            acceptBtn = cookieBox.querySelector(".buttons button");

            acceptBtn.onclick = ()=>{
                document.cookie = "CookieBy=Vkive; max-age="+60 * 60 * 24 * 30;
                if (document.cookie) {
                    cookieBox.classList.add("hide");
                } else {
                    alert("Cookie can't be set!");
                }
            }
            let checkCookie = document.cookie.indexOf("CookieBy=Vkive");
            checkCookie != -1 ? cookieBox.classList.add("hide"): cookieBox.classList.remove("hide");
We will first select our HTML element using the document.querselector method and storing its value inside a variable and then using the variable we will select the our HTML button and we will add an click event on our button as the user clicks on the button we will set a maximum age for our cookies it sets the amount of time a cookie can be stored before it is removed from your system.
If document.cookie is not equal to -1, the conditional expressions will add or delete the hidden class as necessary.
Now we’ve completed our cookies consent popup using JavaScript. I hope you understood the whole project. Let’s take a look at our Live Preview.
Portfolio Website Using HTML ,CSS and Javascript Source Code
Output:
ADVERTISEMENT
Live Preview Of Accept Cookies Consent Form using HTML, CSS & JavaScript
Now We have Successfully created Accept Cookies Consent Form using HTML, CSS & JavaScript You can use this project directly by copying into your IDE. WE hope you understood the project , If you any doubt feel free to comment!!
ADVERTISEMENT
If you find out this Blog helpful, then make sure to search code with random on google for Front End Projects with Source codes and make sure to Follow the Code with Random Instagram page.
ADVERTISEMENT


