Hangman Game Using HTML ,CSS and JavaScript
Hello to everyone. Welcome to today’s tutorial. In this lesson, we will learn how to make the hangman game. We’ll need HTML, CSS, and vanilla JavaScript to make this game.

A Javascript Hangman is a word-guessing game. In this game, the user is offered with a variety of game themes such as fruit, animals, and French gastronomy. We will present a word guessing game as the user selects one of the topics connected to that subject. If the user is unable to complete the quiz, a hangman will be formed for each incorrect response.
Prerequisites:
index.html – For adding structure to the project
styles.css: For adding styling to the project
script.js – For adding drag and drop or browse features.
I hope now you have a general idea of what the project entails. In our article, we will go over this project step by step.
Step1: HTML Code
Create an HTML file called index.html and paste the following codes into it. Remember to save the file with the .html extension.
<!DOCTYPE html>
<html lang="en">

<head>
    <meta charset="UTF-8" />
    <meta http-equiv="X-UA-Compatible" content="IE=edge" />
    <meta name="viewport" content="width=device-width, initial-scale=1.0" />
    <link rel="stylesheet" href="style.css" />
    <title>Hangman Game</title>
</head>

<body>
    <div class="container flex">
        <div class="left_side gallows">
            <div class="crossbarOne"></div>
            <div class="floor"></div>
            <div class="crossbar"></div>
            <div class="post">
                <div class="deadguy head"></div>
                <div class="deadguy body">
                    <div class="deadguy right-arm"></div>
                    <div class="deadguy left-arm"></div>
                    <div class="deadguy left-leg"></div>
                    <div class="deadguy right-leg"></div>
                </div>
            </div>
        </div>
        <div class="right_side">
            <h1>Hangman game</h1>
            <div class="choose_theme">
                Choose a theme<br><br>
                <button type="button" class="theme" value="0">City</button>
                <button type="button" class="theme" value="1">Fruit</button>
                <button type="button" class="theme" value="2">French food</button>
            </div>
            <div id="theme_display"></div>
            <div id="result_display"></div>
            <div id="word_display"></div><br>
            <div id="keybord"></div>
            <br>
            <button type="button" class="new_game">New game</button>
        </div>
    </div>
    <script src="script.js"></script>
</body>

</html>
We’ll begin by adding the project’s structure, but first we’ll need to include certain items inside the link, such as the fact that we’ve used multiple CSS and javascript files, which we’ll need to link up inside our HTML file.
Restaurant Website Using HTML and CSS
//Head Section
<link rel="stylesheet" href="style.css">
//Body Section
<script src="script.js"></script>
Adding the Structure for our Hangman Game:
- We’ll start by using the <div> tag to create a container for our hangman game.
- We divided our game into two section in the left side we will create the hangman structure and using the right side we will create the quiz section
- we will create five divs that will be used to make the hangman stand and hangman with help of css and javascript.
- We will now add the framework to our quiz. First and foremost, we will give our game a heading by using the <h1> tag.
- Then we’ll make a div for each theme, and inside our theme container, we’ll make three buttons for selecting a theme.
- We’ll now add four more divs to our quiz section: one to display the theme, another to display the result, a third to display the word, and a fourth to create an on-screen keyboard.
- Now we’ll make a button to launch the new game.
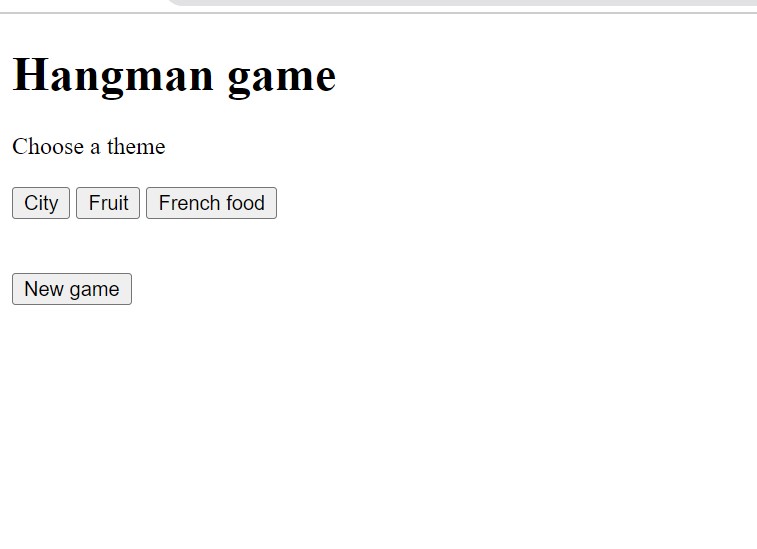
We’ll just use some basic HTML tags to build the structure for our palindrome checker, but first let’s take a look at it.
Output:

Step2: Adding CSS Code
In your stylesheet, copy and paste the CSS code provided below. To add styling to our browser, we will use the class selector.
@import url("https://fonts.googleapis.com/css2?family=Open+Sans:wght@300;700&display=swap");
@import url("https://fonts.googleapis.com/css2?family=VT323&display=swap");

body {
  font-family: "Open Sans", sans-serif;
  color: white;
  background-color: #333;
  width: 100%;
  margin: 0;
}

p,
button {
  font-family: "Open Sans", sans-serif;
  font-size: 1.1em;
  padding: 5px 10px;
  margin: 2px;
}

#word_display {
  font-family: "VT323", monospace;
  font-size: 3em;
  height: fit-content;
  padding-top: 10px;
}

#result_display {
  font-family: "VT323", monospace;
  font-size: 3em;
  height: 40px;
  padding-top: 10px;
}

.container {
  width: 80%;
  margin: auto;
}

.flex {
  display: flex;
  justify-content: space-around;
  flex-wrap: wrap;
}

.space {
  width: 120px;
}

.right_side {
  width: 500px;
}

.gallows {
  position: relative;
}

.post {
  width: 10px;
  height: 200px;
  background-color: #666;
}

.crossbar {
  width: 80px;
  height: 10px;
  background-color: #666;
}

.crossbarOne {
  width: 10px;
  height: 40px;
  background-color: #666;
  position: relative;
  left: 70px;
  top: 50px;
  border-radius: 25px;
}

.floor {
  width: 180px;
  height: 10px;
  background-color: #666;
  position: relative;
  top: 210px;
  left: -30px;
  border-radius: 25px;
}

.head {
  position: relative;
  left: 63px;
  top: 30px;
  width: 25px;
  height: 25px;
  background: khaki;
  border-radius: 30px;
}

.body {
  position: relative;
  width: 6px;
  height: 50px;
  left: 73px;
  top: 20px;
  border-radius: 25px;
  background-color: khaki;
}

.right-arm {
  position: relative;
  width: 5px;
  height: 30px;
  left: 10px;
  top: 10px;
  border-radius: 25px;
  background-color: khaki;
  transform: rotate(-45deg);
}

.left-arm {
  position: relative;
  width: 5px;
  height: 30px;
  left: -9px;
  top: -20px;
  border-radius: 25px;
  background-color: khaki;
  transform: rotate(45deg);
}

.right-leg {
  position: relative;
  width: 5px;
  height: 40px;
  left: 12px;
  top: -58px;
  border-radius: 25px;
  background-color: khaki;
  transform: rotate(-35deg);
}

.left-leg {
  position: relative;
  width: 5px;
  height: 40px;
  left: -11px;
  top: -18px;
  border-radius: 25px;
  background-color: khaki;
  transform: rotate(35deg);
}
Step1:Using the Google import link, we will add the fonts “open+sans” and “VT323” to our project. The font family is then inserted into the framework.
Using the body tag selector, we’ll change the font family to “open-sans,” the text colour to “white,” and the body background colour to “black.” Our body’s width is set to “100%” and the margin is set to 0.
@import url("https://fonts.googleapis.com/css2?family=Open+Sans:wght@300;700&display=swap");
@import url("https://fonts.googleapis.com/css2?family=VT323&display=swap");

body {
  font-family: "Open Sans", sans-serif;
  color: white;
  background-color: #333;
  width: 100%;
  margin: 0;
}

Step2:Using the tag selector, we will now style the paragraph and button directly. We’ll use the font-family property to specify “open sans” as the font family and 1.1 rem as the font size. Padding has been increased by 5 pixels from top to bottom and 10 pixels from left to right.
p,
button {
  font-family: "Open Sans", sans-serif;
  font-size: 1.1em;
  padding: 5px 10px;
  margin: 2px;
}
Step3: We will now add styling to our div’s (#word display) using the id selector. The font family for our word display is “VT323,” the font size is 3 em, and the height is determined by the fit-content property. We’ve also added a 10 pixel top padding to our word display div.
10+ Javascript Projects For Beginners With Source Code
Similarly, we will add padding to our result display.
#word_display {
  font-family: "VT323", monospace;
  font-size: 3em;
  height: fit-content;
  padding-top: 10px;
}

#result_display {
  font-family: "VT323", monospace;
  font-size: 3em;
  height: 40px;
  padding-top: 10px;
}Step4:We will now create the hangman stand with CSS and then use the classes. We will make a hangman out of all of these classes. I believe that after reading the code, you will understand the entire concept.
.container {
  width: 80%;
  margin: auto;
}

.flex {
  display: flex;
  justify-content: space-around;
  flex-wrap: wrap;
}

.space {
  width: 120px;
}

.right_side {
  width: 500px;
}

.gallows {
  position: relative;
}

.post {
  width: 10px;
  height: 200px;
  background-color: #666;
}

.crossbar {
  width: 80px;
  height: 10px;
  background-color: #666;
}

.crossbarOne {
  width: 10px;
  height: 40px;
  background-color: #666;
  position: relative;
  left: 70px;
  top: 50px;
  border-radius: 25px;
}

.floor {
  width: 180px;
  height: 10px;
  background-color: #666;
  position: relative;
  top: 210px;
  left: -30px;
  border-radius: 25px;
}

.head {
  position: relative;
  left: 63px;
  top: 30px;
  width: 25px;
  height: 25px;
  background: khaki;
  border-radius: 30px;
}

.body {
  position: relative;
  width: 6px;
  height: 50px;
  left: 73px;
  top: 20px;
  border-radius: 25px;
  background-color: khaki;
}

.right-arm {
  position: relative;
  width: 5px;
  height: 30px;
  left: 10px;
  top: 10px;
  border-radius: 25px;
  background-color: khaki;
  transform: rotate(-45deg);
}

.left-arm {
  position: relative;
  width: 5px;
  height: 30px;
  left: -9px;
  top: -20px;
  border-radius: 25px;
  background-color: khaki;
  transform: rotate(45deg);
}

.right-leg {
  position: relative;
  width: 5px;
  height: 40px;
  left: 12px;
  top: -58px;
  border-radius: 25px;
  background-color: khaki;
  transform: rotate(-35deg);
}

.left-leg {
  position: relative;
  width: 5px;
  height: 40px;
  left: -11px;
  top: -18px;
  border-radius: 25px;
  background-color: khaki;
  transform: rotate(35deg);
}

Step3: JavaScript Code
Finally, create a JavaScript file called script.js and paste the following codes into it. Remember to save the file with the.js extension.
document.addEventListener("DOMContentLoaded", () => {
function shuffle(array) {
for (let i = array.length - 1; i > 0; i--) {
const j = Math.floor(Math.random() * (i + 1));
[array[i], array[j]] = [array[j], array[i]];
}
}
// Variables
var i, alphabet, newAlphabet, letters, letter, themeId, themeText, theWord;
var space = "_",
hiddenWord = "",
count = 0,
fail = 0,
alphabetArray = [],
hiddenWordSplit = [],
theWordSplit = [];
var themes = document.querySelectorAll(".theme"),
wordDisplayed = document.getElementById("word_display"),
keybordDisplay = document.getElementById("keybord"),
resultDisplay = document.getElementById("result_display"),
themeButton = document.querySelector(".choose_theme"),
themeDisplay = document.getElementById("theme_display"),
newGameButton = document.querySelector(".new_game");
var guessWord = [
{
theme: "City",
word: [
"Washington",
"Lisbon",
"Bangkok",
"Leipzig",
"Liverpool",
"Florence",
],
},
{
theme: "Fruit",
word: [
"Pineapple",
"Strawberry",
"Watermelon",
"Blackberry",
"Dragon fruit",
],
},
{
theme: "French food",
word: [
"Croissant",
"Fromage",
"Baguette",
"Pain au chocolat",
"Cassoulet",
],
},
];
window.onload = function () {
themes.forEach((theme) => theme.addEventListener("click", startGame));
newGameButton.style.display = "none";
keybordDisplay.style.display = "none";
themeDisplay.style.display = "none";
};
// Set the theme and choose a random word
function startGame() {
newGameButton.style.display = "inline";
themeDisplay.style.display = "inline";
themeId = this.getAttribute("value");
themeText = this.innerHTML;
themeDisplay.innerHTML += "Theme: " + themeText;
shuffle(guessWord[themeId].word);
theWord = guessWord[themeId].word[0].toUpperCase();
displayWord();
}
// Display same number of "_" space as the stocked word
function displayWord() {
themeButton.style.display = "none";
keybordDisplay.style.display = "block";
theWordSplit = theWord.split("");
for (i = 1; i <= theWord.length; i++) {
hiddenWord = hiddenWord + space;
}
hiddenWordSplit = hiddenWord.split("");
for (i = 0; i < theWordSplit.length; i++) {
if (theWordSplit[i] === " ") {
theWordSplit[i] = " ";
hiddenWordSplit[i] = " ";
count++;
}
}
wordDisplayed.innerHTML = hiddenWordSplit.join(" ");
}
// Display keyboard
function keyboard() {
alphabet = "azertyuiopqsdfghjklmwxcvbn ";
newAlphabet = alphabet.toUpperCase();
alphabetArray = newAlphabet.split("");
for (i = 0; i < alphabetArray.length - 1; i++) {
if (alphabetArray[i] == " ") {
alphabetArray[i] = " ";
}
keybordDisplay.innerHTML +=
'<button type="button" class="letter">' +
alphabetArray[i] +
"</button>";
if (i == 9 || i == 19) {
keybordDisplay.innerHTML += "<br>";
}
}
letters = document.querySelectorAll(".letter");
letters.forEach((letter) => letter.addEventListener("click", pressedKey));
}
keyboard();
// Collect user's letter choice
function pressedKey() {
letter = this.innerHTML;
this.setAttribute("disabled", "");
checkMatch();
}
// Check the letter
function checkMatch() {
if (theWordSplit.indexOf(letter) == -1) {
fail++;
drawHangman();
if (fail == 6) {
resultDisplay.innerHTML =
"<span style='color: orange;'>> Game over!</span>";
endGame();
}
}
for (i = 0; i < theWord.length; i++) {
if (theWordSplit[i] === letter) {
count++;
hiddenWordSplit[i] = letter;
}
wordDisplayed.innerHTML = hiddenWordSplit.join(" ");
}
if (count === theWord.length) {
resultDisplay.innerHTML =
"<span style='color: greenyellow;'>> You win!</span>";
endGame();
}
}
// Draw the hangman if wrong letter
function drawHangman() {
switch (fail) {
case 0:
document.querySelector(".deadguy.head").style.visibility = "hidden";
document.querySelector(".deadguy.body").style.visibility = "hidden";
document.querySelector(".deadguy.right-arm").style.visibility =
"hidden";
document.querySelector(".deadguy.left-arm").style.visibility = "hidden";
document.querySelector(".deadguy.left-leg").style.visibility = "hidden";
document.querySelector(".deadguy.right-leg").style.visibility =
"hidden";
break;
case 1:
document.querySelector(".deadguy.head").style.visibility = "visible";
break;
case 2:
document.querySelector(".deadguy.body").style.visibility = "visible";
break;
case 3:
document.querySelector(".deadguy.right-arm").style.visibility =
"visible";
break;
case 4:
document.querySelector(".deadguy.left-arm").style.visibility =
"visible";
break;
case 5:
document.querySelector(".deadguy.left-leg").style.visibility =
"visible";
break;
case 6:
document.querySelector(".deadguy.right-leg").style.visibility =
"visible";
break;
default:
break;
}
}
drawHangman();
// End the game
function endGame() {
newGameButton.style.display = "inline";
letters.forEach((letter) =>
letter.removeEventListener("click", pressedKey)
);
}
// Start a new game
newGameButton.addEventListener("click", newGame);
function newGame() {
fail = 0;
count = 0;
theWordSplit = [];
hiddenWordSplit = [];
wordDisplayed.innerHTML = "";
resultDisplay.innerHTML = "";
themeDisplay.innerHTML = "";
space = "_";
hiddenWord = "";
themeButton.style.display = "block";
keybordDisplay.style.display = "none";
newGameButton.style.display = "none";
letters.forEach(function (letter) {
letter.removeAttribute("disabled", "");
});
letters.forEach((letter) => letter.addEventListener("click", pressedKey));
drawHangman();
}
});
To add functionality to our hangman in javascript, we only need to understand the principles of event listeners, arrays, and how to use the switch case. In this situation, we will use the event listener with content loading.
We will get a random word as the material is loaded by utilising the math random function. The themes are chosen by the user, and we will record similar terms for each theme in an array. Then, using the switch case statement, we will see if the character picked by the user matches the character of the word; if so, the word will be placed to the blank; otherwise, one of the hangman body parts will be inserted from CSS.
50+ Html ,Css & Javascript Projects With Source Code
I believe that after going through the code, you will grasp the entire concept quickly, and if you have any questions, please leave them in the comment box, and we will respond as soon as possible.
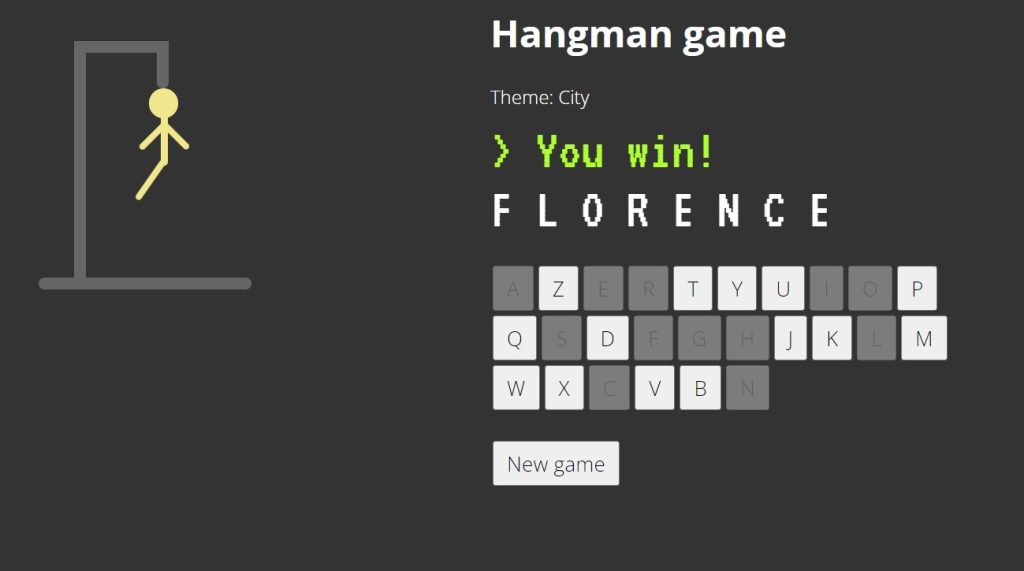
Now we’ve completed our hangman game using HTML , CSS & javascript. I hope you understood the whole project. Let’s take a look at our Live Preview.
ADVERTISEMENT
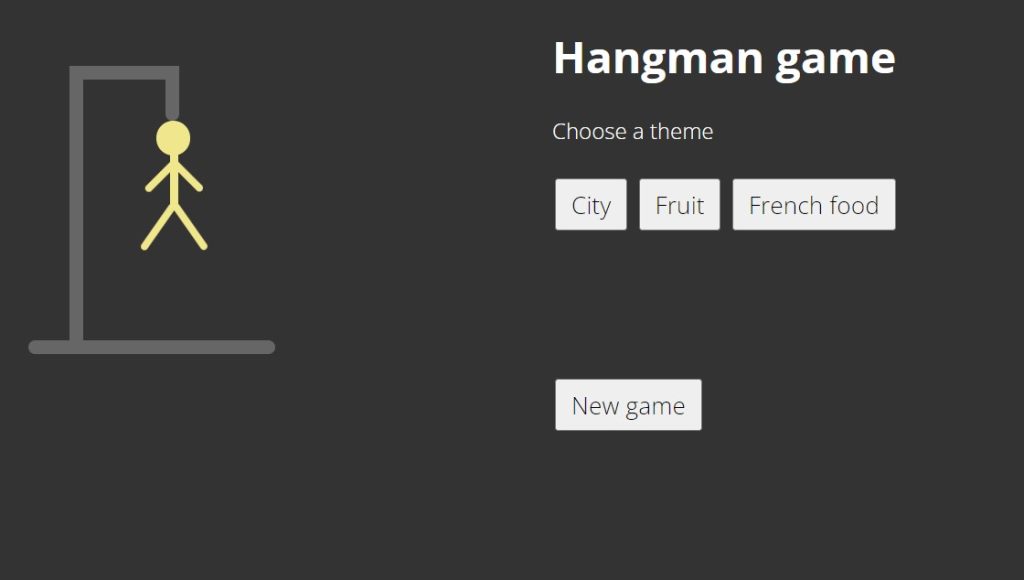
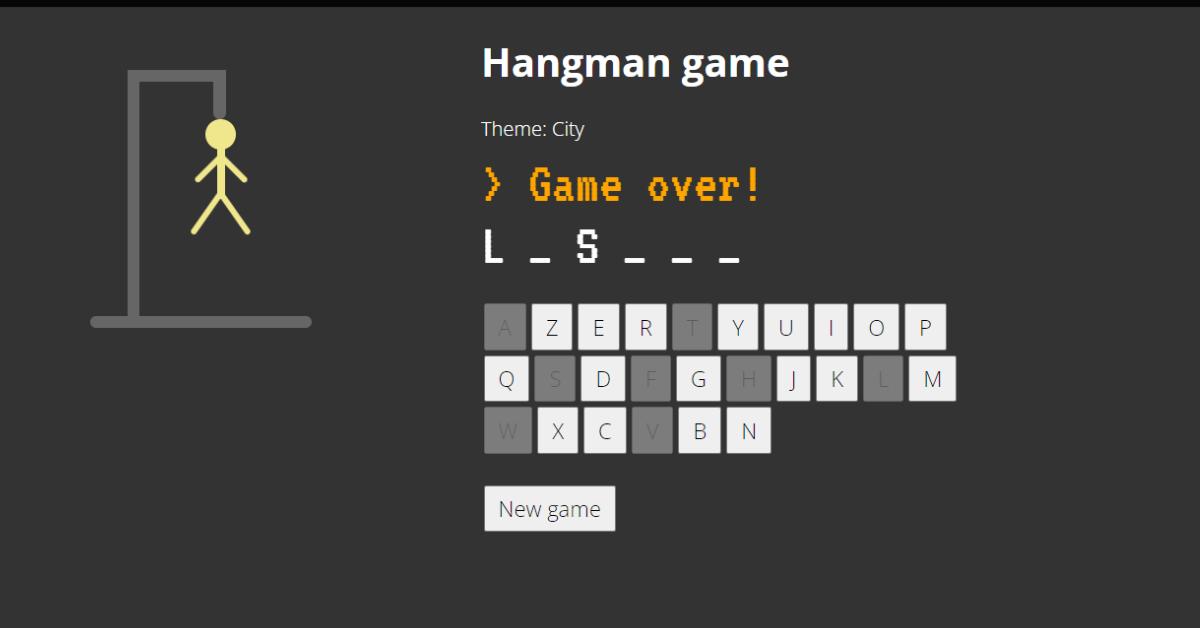
Output:
ADVERTISEMENT
Live Preview Of Hangman Game using HTML , CSS & Javascript
Now We have Successfully created our Hangman Game using HTML , CSS & javascript. You can use this project directly by copying into your IDE. WE hope you understood the project , If you any doubt feel free to comment!!
ADVERTISEMENT
If you find out this Blog helpful, then make sure to search code with random on google for Front End Projects with Source codes and make sure to Follow the Code with Random Instagram page.
ADVERTISEMENT


