How to Create a Vertical Timeline Using HTML & CSS
Good day, programmers Your ability to develop a responsive vertical timeline design using HTML and CSS will be demonstrated in today’s blog post. We will use fundamental html and CSS concepts to build responsive vertical timelines in this software, which is entirely beginner-friendly.
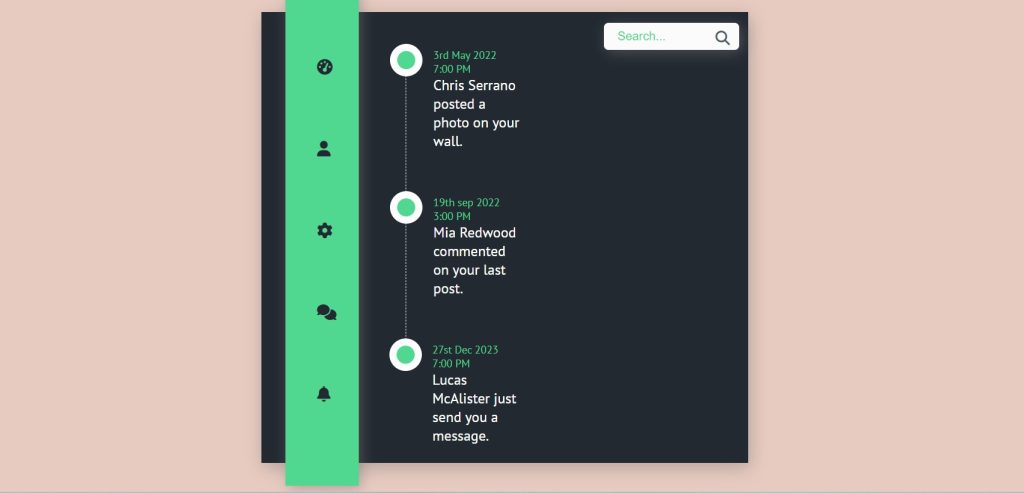
What is Timeline?
A timeline helps viewers quickly understand temporal relationships by presenting an event’s chronological order along a drawn line. Sometimes the definition of the term is broadened to include conceptual, year-by-year, or tabular chronologies. Infographics that incorporate text and graphic images for a better presentation are being used more frequently to illustrate timelines.
You can copy the source code of this application if you wish it; it is provided below with the timeline design.
Step1: Adding HTML Markup
<!DOCTYPE html>
<html lang="en">

<head>
    <meta charset="UTF-8" />
    <meta http-equiv="X-UA-Compatible" content="IE=edge" />
    <meta name="viewport" content="width=device-width, initial-scale=1.0" />
    <link rel="stylesheet" href="style.css" />
    <script src="https://kit.fontawesome.com/1cf483120b.js" crossorigin="anonymous"></script>
    <title>Timeline</title>
</head>

<body>
    <div class="container">

        <div class="box">
            <div class="container-3">
                <span class="icon"><i class="fa fa-search"></i></span>
                <input type="search" id="search" placeholder="Search..." />
            </div>
        </div>

        <div class="leftbox">
            <nav>
                <a id="dashboard"><i class="fas fa-tachometer-alt"></i></a>
                <a id="profile"> <i class="fas fa-user"></i> </a>
                <a id="settings"> <i class="fas fa-cog"></i> </a>
                <a id="messages"> <i class="fas fa-comments"></i> </a>
                <a id="notification"> <i class="fas fa-bell"></i> </a>
            </nav>
        </div>
        <div class="rightbox">
            <div class="rb-container">
                <ul class="rb">
                    <li class="rb-item" ng-repeat="itembx">
                        <div class="timestamp">
                            3rd May 2022<br> 7:00 PM
                        </div>
                        <div class="item-title">Chris Serrano posted a photo on your wall.</div>

                    </li>
                    <li class="rb-item" ng-repeat="itembx">
                        <div class="timestamp">
                            19th sep 2022<br> 3:00 PM
                        </div>
                        <div class="item-title">Mia Redwood commented on your last post.</div>

                    </li>

                    <li class="rb-item" ng-repeat="itembx">
                        <div class="timestamp">
                            27st Dec 2023<br> 7:00 PM
                        </div>
                        <div class="item-title">Lucas McAlister just send you a message.</div>

                    </li>

                </ul>

            </div>
        </div>
    </div>
</body>

</html>
The project’s structure will be included first, but first we must include certain information inside the link, such as the fact that we utilised a CSS file, which we must connect inside our HTML code. In order to incorporate the icons into our project, we also used some icons on our Timeline page, so we needed to include some icon links inside the head part of our HTML.
<link rel="stylesheet" href="style.css" />
<script src="https://kit.fontawesome.com/1cf483120b.js" crossorigin="anonymous"></script>
Adding the Structure for our Timeline page:
- We will now use the <div> tag and the class “container” to create a container for our timeline structure in order to add structure to our timeline page.
- We will now create the container for our various time lines using the three distinct div tags with the various classes (box, left box, and right box). Now, using the fontawesome classes, we will add a search icon to our div element with class (.box), and we will use the input tag with type text to create a search bar to our timeline page.
- We will now add some new icons to our timeline page inside our left box container, and for those, we will use the various FontAwesome classes for various icons. Now, using the <nav> tag and under our nav tag, we will add the icons for profile, dashboard, settings, notifications, and messages.
- We’ll use the unordered list to make three separate list items for our right-side box container. Using the div tag, we will add the date and task that we need to complete to our timeline.
50+ HTML, CSS & JavaScript Projects With Source Code
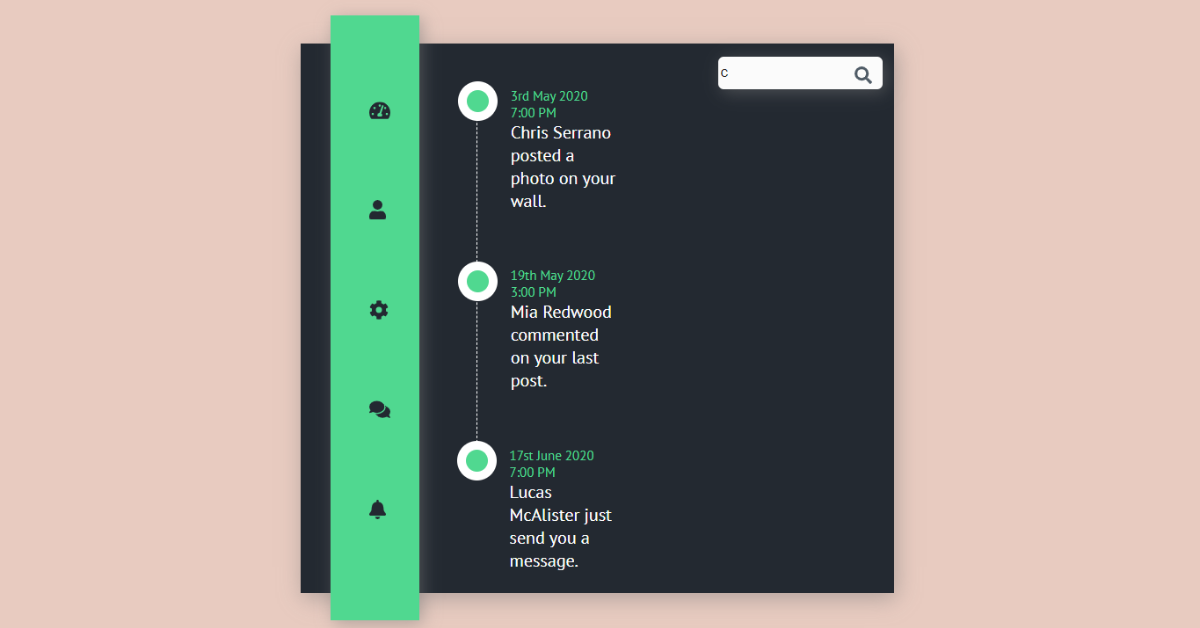
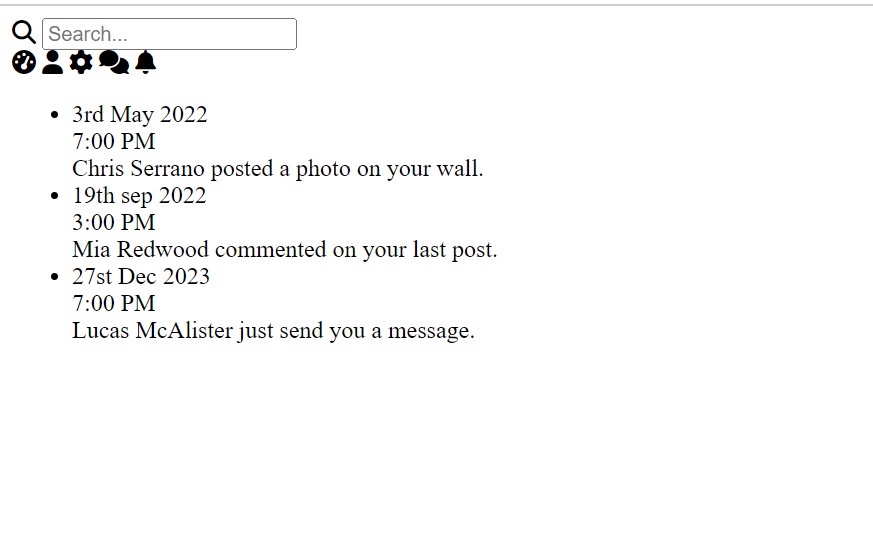
Let’s have a look at our timeline structure now that we’ve added structure of our timeline.
Output:
Step2: Styling the Timeline Page (CSS)
In your stylesheet, copy and paste the CSS code provided below. To add styling to our timeline page we will use the class selector.
@import url("https://fonts.googleapis.com/css2?family=PT+Sans&display=swap");

body {
  background: #e8cbc0;
}

.container {
  background: #232931;
  width: 540px;
  height: 500px;
  margin: 0 auto;
  position: relative;
  margin-top: 10%;
  box-shadow: 2px 5px 20px rgba(119, 119, 119, 0.5);
}

.leftbox {
  top: -5%;
  left: 5%;
  position: absolute;
  width: 15%;
  height: 110%;
  background-color: #50d890;
  box-shadow: 3px 3px 15px rgba(119, 119, 119, 0.5);
}

nav {
  margin: 2.6em auto;
}

nav a {
  list-style: none;
  padding: 35px;
  color: #232931;
  font-size: 1.1em;
  display: block;
  transition: all 0.5s ease-in-out;
}

.rightbox {
  padding: 0em 34rem 0em 0em;
  height: 100%;
}

.rb-container {
  font-family: "PT Sans", sans-serif;
  width: 50%;
  margin: auto;
  display: block;
  position: relative;
}

.rb-container ul.rb {
  margin: 2.5em 0;
  padding: 0;
  display: inline-block;
}

.rb-container ul.rb li {
  list-style: none;
  margin: auto;
  margin-left: 10em;
  min-height: 50px;
  border-left: 1px dashed #fff;
  padding: 0 0 50px 30px;
  position: relative;
}

.rb-container ul.rb li:last-child {
  border-left: 0;
}

.rb-container ul.rb li::before {
  position: absolute;
  left: -18px;
  top: -5px;
  content: " ";
  border: 8px solid rgba(255, 255, 255, 1);
  border-radius: 500%;
  background: #50d890;
  height: 20px;
  width: 20px;
  transition: all 500ms ease-in-out;
}

.rb-container ul.rb li:hover::before {
  border-color: #232931;
  transition: all 1000ms ease-in-out;
}

ul.rb li .timestamp {
  color: #50d890;
  position: relative;
  width: 100px;
  font-size: 12px;
}

.item-title {
  color: #fff;
}

.container-3 {
  width: 5em;
  vertical-align: right;
  white-space: nowrap;
  position: absolute;
}

.container-3 input#search {
  width: 150px;
  height: 30px;
  background: #fbfbfb;
  border: none;
  font-size: 10pt;
  color: #262626;
  -webkit-border-radius: 5px;
  -moz-border-radius: 5px;
  border-radius: 5px;
  margin: 0.9em 0 0 28.5em;
  box-shadow: 3px 3px 15px rgba(119, 119, 119, 0.5);
}

.container-3 .icon {
  margin: 1.3em 3em 0 31.5em;
  position: absolute;
  width: 150px;
  height: 30px;
  z-index: 1;
  color: #4f5b66;
}

input::placeholder {
  padding: 5em 5em 1em 1em;
  color: #50d890;
}
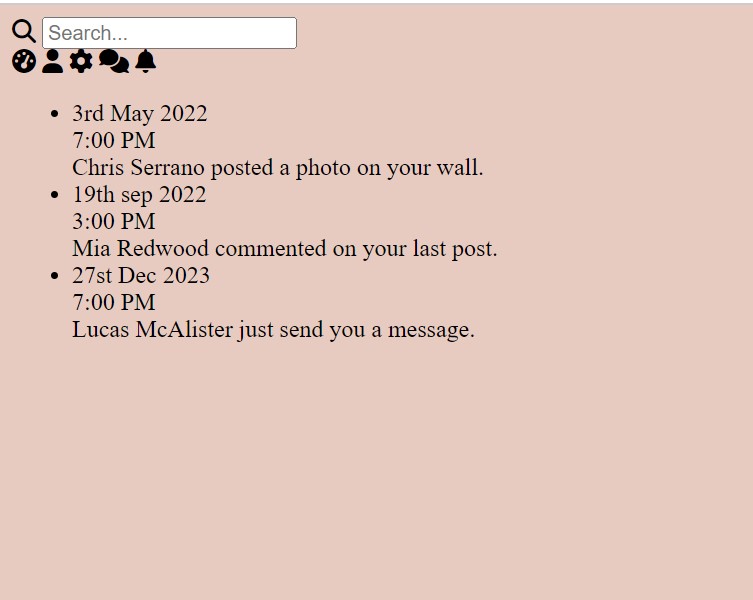
Step1:In order to change the default fonts, we will first utilise the import link to import a few new fonts from Google Fonts. After that, we will use the font-family property.
Using the background attribute in our selector and the body tag selector, we will now make the background colour peach.
@import url("https://fonts.googleapis.com/css2?family=PT+Sans&display=swap");

body {
  background: #e8cbc0;
}
Step2:Using the class selector (.container), we will now add styling to our timeline container and set the background to “black.” The margin is set to “auto,” and the width and height are both set to 540 and 500 pixels, respectively. Using the margin-top property, we’ll set the top margin to 10%. Our timline container will also receive the box-shadow property.
Portfolio Website Using HTML CSS And JAVASCRIPT ( Source Code)
We will add a 5% space by using the top and left properties of the class selector (.leftbox). Our left box’s background colour is set to “green” and the position is set to “absolute.”
.container {
  background: #232931;
  width: 540px;
  height: 500px;
  margin: 0 auto;
  position: relative;
  margin-top: 10%;
  box-shadow: 2px 5px 20px rgba(119, 119, 119, 0.5);
}

.leftbox {
  top: -5%;
  left: 5%;
  position: absolute;
  width: 15%;
  height: 110%;
  background-color: #50d890;
  box-shadow: 3px 3px 15px rgba(119, 119, 119, 0.5);
}Step3:We will now add styling to our leftbox elements by giving the navbar a margin of 2.6em and a padding of 35px using the nav tag. Our icons on the left side have a font size of 1 rem. Our icons will all appear in separate lines because the display is set to “block” them all.
nav {
  margin: 2.6em auto;
}

nav a {
  list-style: none;
  padding: 35px;
  color: #232931;
  font-size: 1.1em;
  display: block;
  transition: all 0.5s ease-in-out;
}

Step4: Using the same class selector, we will now add styling to our right container. We will do this by setting the height to 100%, the font family to “PT Sans,” and the display to block. We will also use the (.rightbox) property to provide styling to our right container.
15 Add to Cart button Using HTML & JavaScript
We will now style our unordered list and give our undordered some padding and margin using the child selector. You may comprehend the CSS concepts we employed, which are straightforward and simple to understand, by simply reading the code.
.rightbox {
  padding: 0em 34rem 0em 0em;
  height: 100%;
}

.rb-container {
  font-family: "PT Sans", sans-serif;
  width: 50%;
  margin: auto;
  display: block;
  position: relative;
}

.rb-container ul.rb {
  margin: 2.5em 0;
  padding: 0;
  display: inline-block;
}

.rb-container ul.rb li {
  list-style: none;
  margin: auto;
  margin-left: 10em;
  min-height: 50px;
  border-left: 1px dashed #fff;
  padding: 0 0 50px 30px;
  position: relative;
}

.rb-container ul.rb li:last-child {
  border-left: 0;
}

.rb-container ul.rb li::before {
  position: absolute;
  left: -18px;
  top: -5px;
  content: " ";
  border: 8px solid rgba(255, 255, 255, 1);
  border-radius: 500%;
  background: #50d890;
  height: 20px;
  width: 20px;
  transition: all 500ms ease-in-out;
}

.rb-container ul.rb li:hover::before {
  border-color: #232931;
  transition: all 1000ms ease-in-out;
}

ul.rb li .timestamp {
  color: #50d890;
  position: relative;
  width: 100px;
  font-size: 12px;
}

.item-title {
  color: #fff;
}

.container-3 {
  width: 5em;
  vertical-align: right;
  white-space: nowrap;
  position: absolute;
}

.container-3 input#search {
  width: 150px;
  height: 30px;
  background: #fbfbfb;
  border: none;
  font-size: 10pt;
  color: #262626;
  -webkit-border-radius: 5px;
  -moz-border-radius: 5px;
  border-radius: 5px;
  margin: 0.9em 0 0 28.5em;
  box-shadow: 3px 3px 15px rgba(119, 119, 119, 0.5);
}

.container-3 .icon {
  margin: 1.3em 3em 0 31.5em;
  position: absolute;
  width: 150px;
  height: 30px;
  z-index: 1;
  color: #4f5b66;
}

input::placeholder {
  padding: 5em 5em 1em 1em;
  color: #50d890;
}
Now we’ve completed our Timeline page using HTML & CSS. I hope you understood the whole project. Let’s take a look at our Live Preview.
10+ Javascript Projects For Beginners With Source Code
Output:
ADVERTISEMENT
Live Preview Of Timeline Page Using HTML & CSS
Now We have Successfully created our Timeline page Using HTML & CSS. You can use this project directly by copying into your IDE. WE hope you understood the project , If you any doubt feel free to comment!!
ADVERTISEMENT
If you find out this Blog helpful, then make sure to search code with random on google for Front End Projects with Source codes and make sure to Follow the Code with Random Instagram page.
ADVERTISEMENT
