Create Stopwatch Using HTML,CSS and JavaScript

A excellent independent project is Stopwatch. In essence, many websites use a timer to monitor how long visitors spend browsing the site. For the front-end developer, it is a JavaScript Intermediate assignment.
100+ HTML,CSS and JavaScript Projects With Source Code ( Beginners to Advanced)
We are building a timer that functions similarly to a conventional stopwatch for timing events.A Stop watch calculates hours, minutes and seconds.
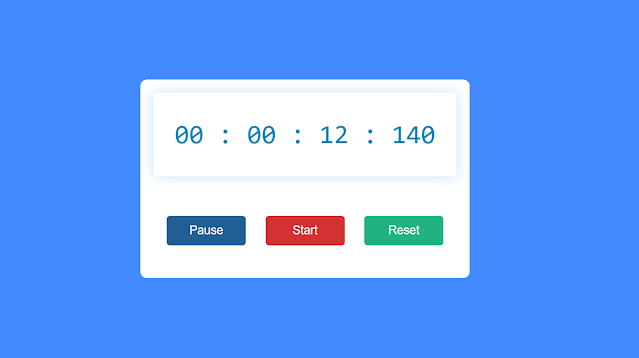
The stopwatch we are creating is similar to a regular stopwatch that is used to keep track of time. Albeit, it is unique in its ability to track hours, minutes, seconds, and milliseconds.
| Code by | Ankit Joshi |
| Project Download | Link Available Below |
| Language used | HTML, CSS and JavaScript |
| External link / Dependencies | No |
| Responsive | Yes |
50+ HTML, CSS & JavaScript Projects With Source Code
Prerequisites for this project:
This article requires a basic understanding of HTML, CSS, and a little bit of Javascript. I’ll explain the project in a manner that makes it easy to follow even for complete beginners with a basic understanding of the listed technologies.
Live Demo Of Stopwatch Using HTML,CSS and JavaScript:
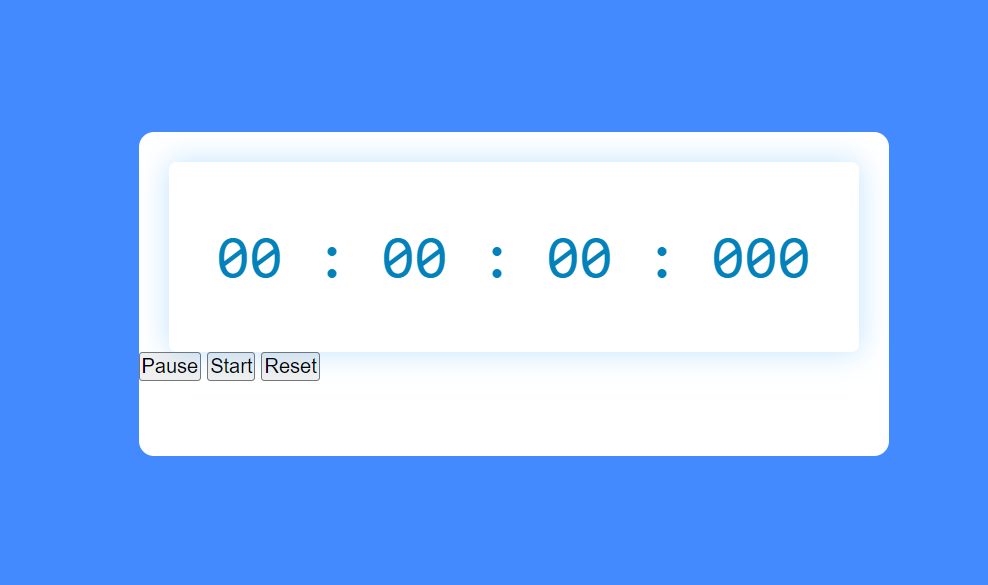
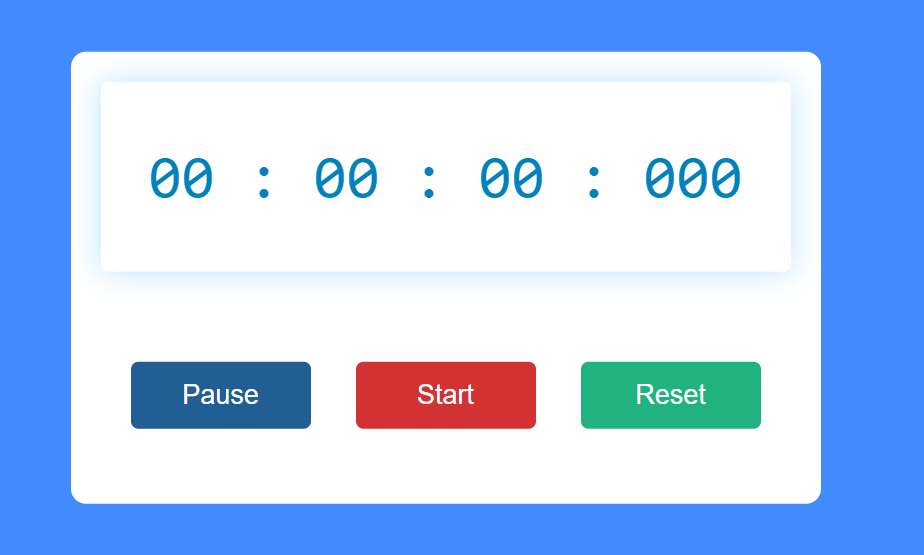
Before we start the programming, let’s discuss the UI of the project. First, we are creating a stopwatch container that will have a screen to display the current stopwatch time. The stopwatch also has three buttons — Pause, Start, Reset — to control the stopwatch.
Step 1: Create the basic structure of the stopwatch
After writing the HTML boilerplate and connecting it with the CSS file, we create the basic framework of this timer.
<div class="container">
 </div>
Here, I am using blue as the webpage’s background color and white as the design’s background color. You can customize the color as per your choice.
ADVERTISEMENT
ADVERTISEMENT
*,
*:before,
*:after {
    padding: 0;
    margin: 0;
    box-sizing: border-box;
}
body {
    background: #448aff;
}
ADVERTISEMENT
This box has width: 40% and a minimum width of 500px. There is no specified height; the height will be determined by the amount of content.
ADVERTISEMENT
Simple Portfolio Website Using Html And Css With Source Code
ADVERTISEMENT
.container {
    background-color: #ffffff;
    width: 40%;
    min-width: 500px;
    position: absolute;
    transform: translate(-50%, -50%);
    top: 50%;
    left: 50%;
    padding: 20px 0;
    padding-bottom: 50px;
    border-radius: 10px;
}
Step 2: Create a display to see the time
We will create a div element to display the current time — hours, minutes, seconds, and milliseconds.
<div class="timerDisplay"> 00 : 00 : 00 : 000 </div>
Next, style the display using CSS.
.timerDisplay {
    position: relative;
    width: 92%;
    background: #ffffff;
    left: 4%;
    padding: 40px 0;
    font-family: "Roboto mono", monospace;
    color: #0381bb;
    font-size: 40px;
    display: flex;
    align-items: center;
    justify-content: space-around;
    border-radius: 5px;
    box-shadow: 0 0 20px rgba(0, 139, 253, 0.25);
}

Step 3: Create 3 buttons in Stopwatch using HTML CSS
After the display block, we will create three buttons to control the stopwatch. The three buttons — Pause, Start, Reset — pause the countdown, start the countdown, and restart the countdown all over again. Use HTML’s button tag to create these buttons.
<div class="buttons">
    <button id="pauseTimer">Pause</button>
    <button id="startTimer">Start</button>
    <button id="resetTimer">Reset</button>
</div>
To arrange buttons in a same horizontal line and responsively adjust them vertically for smaller screens, we will use flex display for the buttons container.
.buttons {
    width: 90%;
    margin: 60px auto 0 auto;
    display: flex;
    justify-content: space-around;
}
.buttons button {
    width: 120px;
    height: 45px;
    background-color: #205e94;
    color: #ffffff;
    border: none;
    font-family: "Poppins", sans-serif;
    font-size: 18px;
    border-radius: 5px;
    cursor: pointer;
    outline: none;
}

I changed the background color of the second and third buttons using the following two lines of CSS code. Nth-last-child has been used to change the background color.
50+ HTML, CSS & JavaScript Projects With Source Code
.buttons button:nth-last-child(2) {
    background-color: #d23332;
}
.buttons button:nth-last-child(1) {
    background-color: #20b380;
}
Step 4: Activate Simple Stopwatch using JavaScript
Now the user interface of our stopwatch is ready and it is time to add functionality to the project using JavaScript.
First, we are initializing milliseconds, seconds, minutes, and hours variables to store their respective information. Initially, all these values are set equal to zero.
Initialize a variable (timerRef) for the display block.
let [milliseconds,
seconds,
minutes,
hours]=[0,
0,
0,
0];
let timerRef=document.querySelector('.timerDisplay');
let currentInterval=null;
Using JavaScript, we will activate the start button. When you press this button, a countdown begins.
document.getElementById("startTimer").addEventListener("click", () => {
    if (currentInterval !== null) {
        clearInterval(currentInterval);
    }
    currentInterval = setInterval(displayTimer, 10);
});
Also, add functionality to the pause button. As a result, if you hit this button during the stopwatch, the countdown will come to a halt.
Ecommerce Website Using HTML, CSS, & JavaScript (Source Code)
document.getElementById("pauseTimer").addEventListener("click", () => {
    clearInterval(currentInterval);
});
The following codes creates the reset button. Hours, minutes, seconds, and milliseconds will be 0 when you click the reset button.
document.getElementById("resetTimer").addEventListener("click", () => {
    clearInterval(currentInterval);
    [milliseconds, seconds, minutes, hours] = [0, 0, 0, 0];
    timerRef.innerHTML = "00 : 00 : 00 : 000 ";
});
Next create a displayTimer function that controls the display.
function displayTimer() {
    milliseconds += 10;
    if (milliseconds == 1000) {
        milliseconds = 0;
        seconds++;
        if (seconds == 60) {
            seconds = 0;
            minutes++;
            if (minutes == 60) {
                minutes = 0;
                hours++;
            }
        }
    }
Before each one-digit interval, we add zero. When the values of hours, minutes, and seconds are less than ten we add zero before the number. Moreover, in the case of milliseconds if the value is less than 10 we add ’00’ before the number, and if the value is between 10 and 100 add ‘0’ before the number.
Animated Login Form Using HTML and CSS (Source Code)
let h = hours < 10 ? "0" + hours : hours;
let m = minutes < 10 ? "0" + minutes : minutes;
let s = seconds < 10 ? "0" + seconds : seconds;
let ms =
    milliseconds < 10
        ? "00" + milliseconds
        : milliseconds < 100
        ? "0" + milliseconds
        : milliseconds;
Finally we display these values in the display block of our stopwatch, using innerHTML.
timerRef.innerHTML = ` ${h} : ${m} : ${s} : ${ms}`;Create Todo List Template Using HTML, CSS & JavaScript
This is how the Javascript file will look at the end.
let [milliseconds, seconds, minutes, hours] = [0, 0, 0, 0];
let timerRef = document.querySelector(".timerDisplay");
let currentInterval = null;
document.getElementById("startTimer").addEventListener("click", () => {
    if (currentInterval !== null) {
        clearInterval(currentInterval);
    }
    currentInterval = setInterval(displayTimer, 10);
});
document.getElementById("pauseTimer").addEventListener("click", () => {
    clearInterval(currentInterval);
});
document.getElementById("resetTimer").addEventListener("click", () => {
    clearInterval(currentInterval);
    [milliseconds, seconds, minutes, hours] = [0, 0, 0, 0];
    timerRef.innerHTML = "00 : 00 : 00 : 000 ";
});
function displayTimer() {
    milliseconds += 10;
    if (milliseconds == 1000) {
        milliseconds = 0;
        seconds++;
        if (seconds == 60) {
            seconds = 0;
            minutes++;
            if (minutes == 60) {
                minutes = 0;
                hours++;
            }
        }
    }
    let h = hours < 10 ? "0" + hours : hours;
    let m = minutes < 10 ? "0" + minutes : minutes;
    let s = seconds < 10 ? "0" + seconds : seconds;
    let ms =
        milliseconds < 10
            ? "00" + milliseconds
            : milliseconds < 100
            ? "0" + milliseconds
            : milliseconds;
    timerRef.innerHTML = ` ${h} : ${m} : ${s} : ${ms}`;
}
Our stopwatch is ready to use, now you can add it to your GitHub and share it with your friends.
Video Output Of Stopwatch in JavaScript:
Thanks for reading!
Which code editor do you use for this Stopwatch coding?
I personally recommend using VS Code Studio, it’s straightforward and easy to use.
What is a Stopwatch?
A web-based program called a stopwatch is used to keep track of the duration. The total time is calculated using a stopwatch, which typically measures time in hours, minutes, seconds, and microseconds.
What is the purpose of stopwatch?
To determine how long an event will last, you can hit the buttons on a stopwatch at its beginning and end.


