Portfolio is a major part of every developer’s life. It is the main component that helps developers present their skills and projects to a large number of professionals at the same time. This digital resume is the best way for developers who are seeking jobs. But creating a simple portfolio in HTML, CSS,CSS and JavaScript can be difficult, and there are not many features available for creating unique projects.

Today in this blog, I’ll be telling you the best way to create a professional and decent-looking portfolio, or reactfolio, using the React framework. Before we start with our project, I want to tell you that we have pre-built it.We will be learning about all the neccessay components in simple and easy way.
I’ll be sharing a download link through which you can just download the zip file of the project, extract the project files, and open it in the VS code.
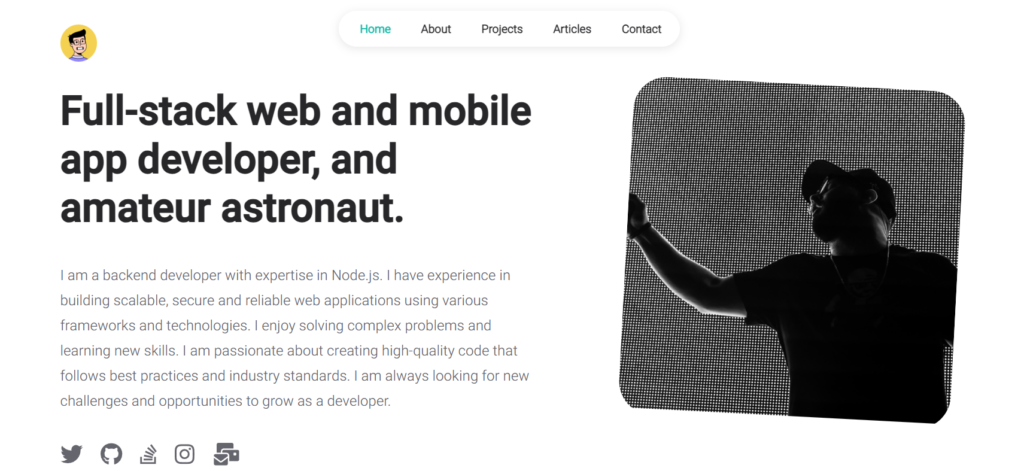
Your project interface will look like this.

You guys take a minute and first download and complete the step 1 first , till then I m waiting for you.
Step2: Installing Libraries and Dependencies:
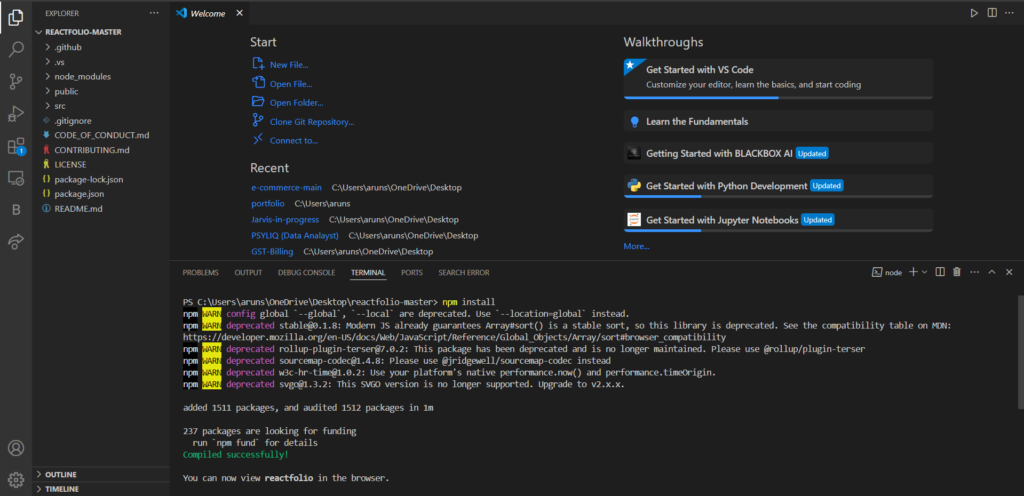
Guys, we now need to install some major dependencies and react libraries for our project. For that, you need to open a command terminal inside the VS code and type in the command “npm install.” This command will install all the important packages and folders.

Step3: Running Local Server:
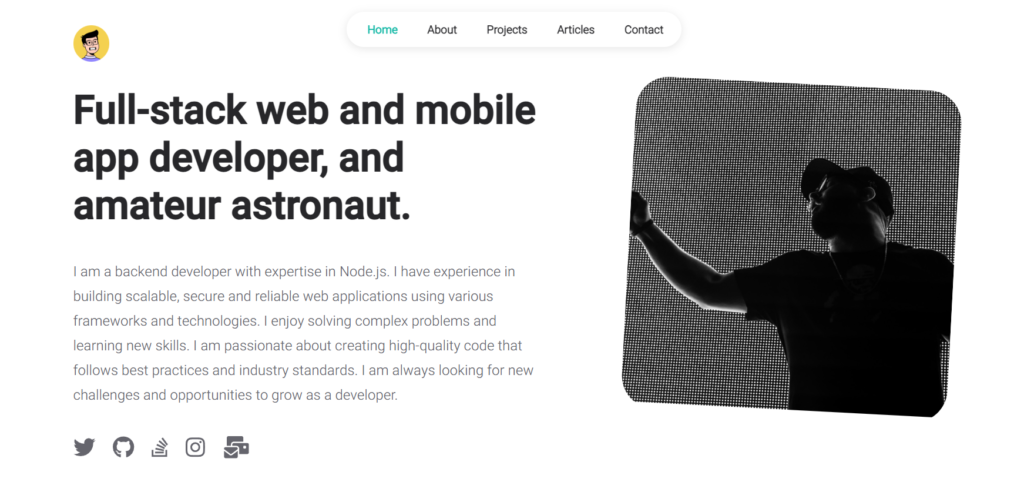
After installing and compiling all the major resources for our Reactfolio, we now need to run a live server for our React application so that we can look at the output of our project. We need to use the command “npm start.” This command runs a javascript function, which helps in running a local server on our browsers.

Project Output:

Understanding Components and function:
we have to focus on the src folder inside our reactfolio folder because all the major files and functions are stored inside the src folder. It contains the components, like the different sections folder, and also contains the media files and video used in our project.
Creating Homepage:
Using the import function, we will be importing the react component, and we have also used some icons inside our homepage, so we will be using the fontawesome import link for importing all those icons and also using the work. CSS, we will be adding the styling to our homepage.
Note: For all the Portuguese sections, we have created separate CSS files in their respective folders for adding styling to our particular sections.
Now, using the works function, we will create the default structure of our work section inside the homepage, and using basic HTML tags, we will create the structure of our portfolio project.
import React from "react";
import { faBriefcase } from "@fortawesome/free-solid-svg-icons";

import Card from "../common/card";

import "./styles/works.css";

const Works = () => {
	return (
		<div className="works">
			<Card
				icon={faBriefcase}
				title="Work"
				body={
					<div className="works-body">
						<div className="work">
							<img
								src="./facebook.png"
								alt="facebook"
								className="work-image"
							/>
							<div className="work-title">Facebook</div>
							<div className="work-subtitle">
								Software Engineer
							</div>
							<div className="work-duration">2019 - Present</div>
						</div>

						<div className="work">
							<img
								src="./twitter.png"
								alt="twitter"
								className="work-image"
							/>
							<div className="work-title">Twitter</div>
							<div className="work-subtitle">
								Software Engineer
							</div>
							<div className="work-duration">2019 - Present</div>
						</div>
					</div>
				}
			/>
		</div>
	);
};

export default Works;
Similarly, we will be creating the About Section, the Project Section, and the Contact Section. We will be using the same method for creating our complete portfolio. I will create subfolders for each section and create functions for each portfolio section.
Creating a Index.Js:
This index.js file contains all the major components of our project section, and this will help us in compiling all the resources and combining them into one file.
It uses the reactDOM method root for creating the root element inside the HTML document with ID “root,” and using the restrict method, we will render all the website components from the app file using using import function. Inside the app file, we create the function for rendering all the components together and displaying them in the browser.
import React from "react";
import ReactDOM from "react-dom/client";
import "./index.css";
import App from "./App";
import reportWebVitals from "./reportWebVitals";
import { BrowserRouter } from "react-router-dom";

const root = ReactDOM.createRoot(document.getElementById("root"));
root.render(
	<React.StrictMode>
		<BrowserRouter>
			<App />
		</BrowserRouter>
	</React.StrictMode>
);

// If you want to start measuring performance in your app, pass a function
// to log results (for example: reportWebVitals(console.log))
// or send to an analytics endpoint. Learn more: https://bit.ly/CRA-vitals
reportWebVitals();
Adding Functionality inside the App.js
The main component of a React application is called an app. It imports necessary dependencies from React, React Router, and a library called react-ga4 for Google Analytics.
We will be using the import function importing internal webpage components such as homepage, about, projects and contact section.The App component uses the useEffect hook to initialize Google Analytics with the provided tracking ID. Then, it returns a JSX structure representing the application’s routes using Routes and Route components from React Router.
Each route corresponds to a specific URL path and renders the appropriate component based on the URL. If none of the defined paths match the URL, it renders a Not Found component.
import { useEffect } from "react";
import { Routes, Route } from "react-router-dom";
import ReactGA from "react-ga4";

import Homepage from "./pages/homepage";
import About from "./pages/about";
import Projects from "./pages/projects";
import Articles from "./pages/articles";
import ReadArticle from "./pages/readArticle";
import Contact from "./pages/contact";
import Notfound from "./pages/404";

import { TRACKING_ID } from "./data/tracking";
import "./app.css";

function App() {
	useEffect(() => {
		if (TRACKING_ID !== "") {
			ReactGA.initialize(TRACKING_ID);
		}
	}, []);

	return (
		<div className="App">
			<Routes>
				<Route path="/" element={<Homepage />} />
				<Route path="/about" element={<About />} />
				<Route path="/projects" element={<Projects />} />
				<Route path="/articles" element={<Articles />} />
				<Route path="/article/:slug" element={<ReadArticle />} />
				<Route path="/contact" element={<Contact />} />
				<Route path="*" element={<Notfound />} />
			</Routes>
		</div>
	);
}

export default App;
Finally, we have completely built and compiled our project. Let’s take a look at the project in the form of a demo video, and if you guys want to add customization according to your choice, then you can do that as well inside the CSS file for any particular section of the portfolio.
Demo:
ADVERTISEMENT
ADVERTISEMENT
Conclusion:
I hope you liked our project and tried to follow along with our blog to create your own personal portfolio using React. If you find any difficulty through the project, feel free to comment down. I will try my best to give a solution to your query.
ADVERTISEMENT
If you like this project, share it with friends and subscribe to our codewithrandom website for more such helpful projects.
ADVERTISEMENT
Code By : Truethari
ADVERTISEMENT
Author: Arun


