E-commerce is a digital business platform that allows customers to buy different types of products online mode.Nowadays, customers prefer online shopping, where products are delivered to their doorstep without any extra cost and with an easy return option.All these features interest users to do window shopping with the ease of acess from their home.
Project Overview:
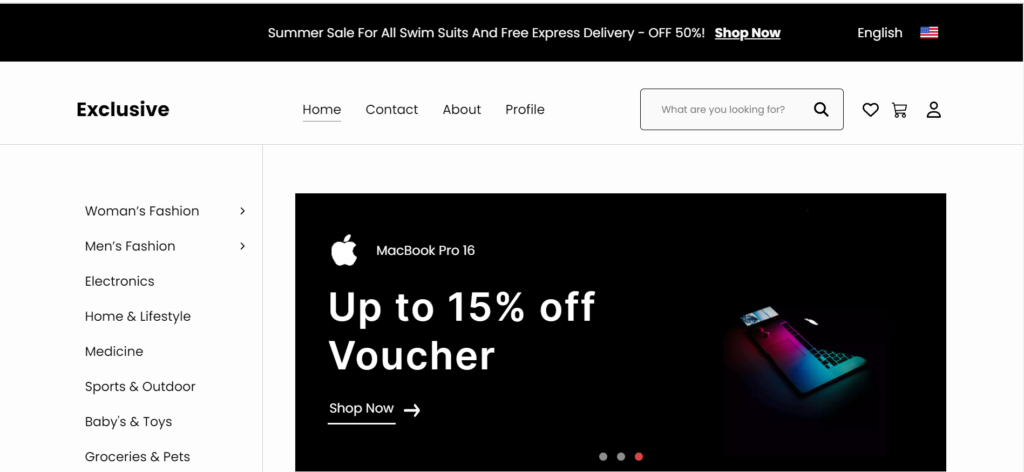
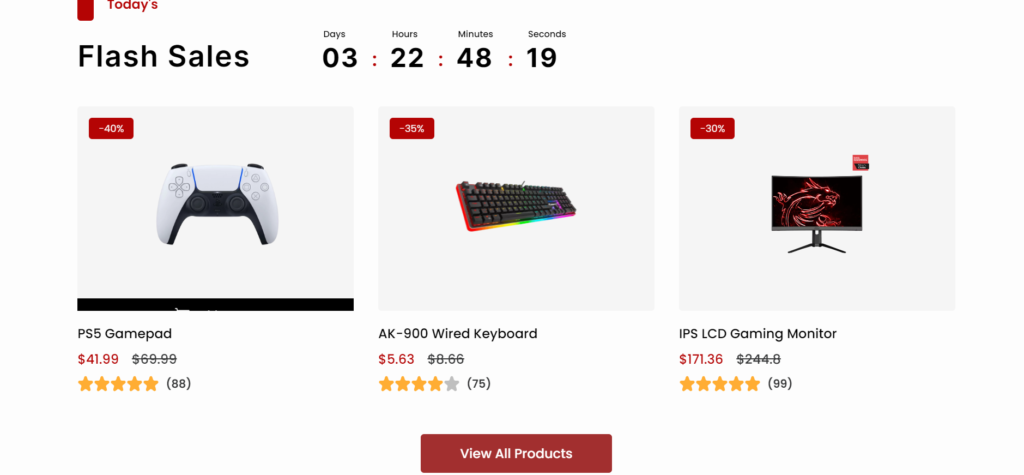
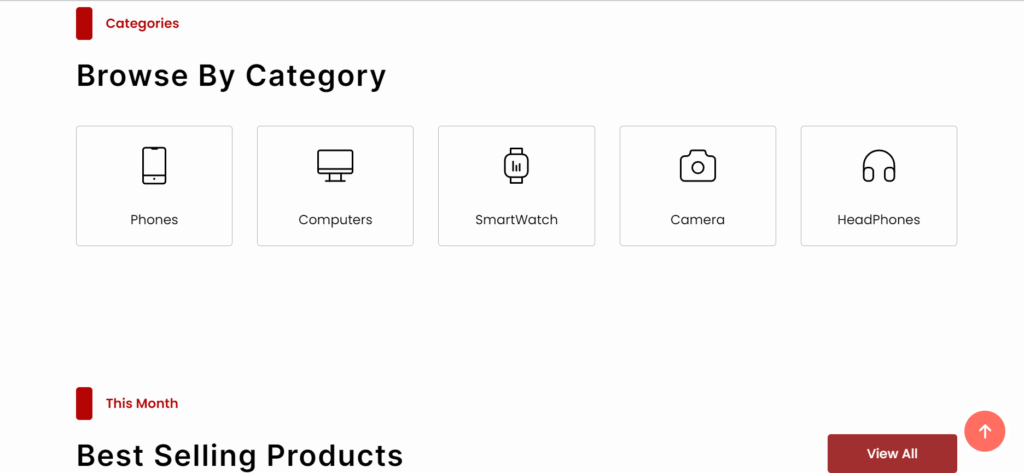
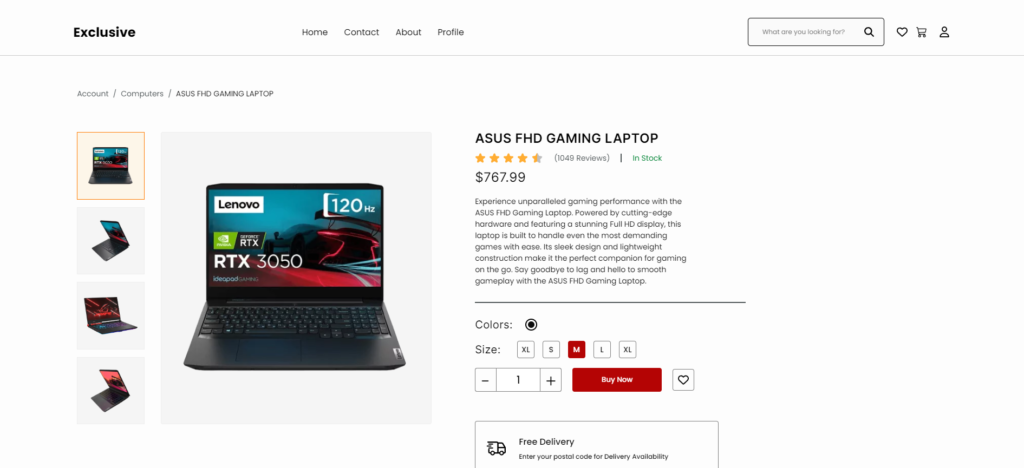

E-Commerce Website Using React
In this blog, I’ll be teaching you the step for creating our own E-commerce website in a step by step manner using React. This is an advance version of normal e-commerce website which was created using HTML ,CSS and Javascript. Here we will be using the React framework for creating a responsive and platform independent project , Which can be created using Simple react libraries , you guys just have to follow along with our article and by the end of this blog you will have your own e-commerce web application.
50+ Interesting React JS Project ideas With Source Code from Beginner and Intermediate-level
General Concepts?
Q1. What is the need of Creating E-commerce Website?
Ans: An e-commerce website is an advanced project that every developer should practice while preparing for their full-stack developer road map. Here we learn a lot about project design, tools, and technologies, as well as client satisfaction with the project. Basically, we learn about all the real-world experience on real projects.
Q2. What Framework and Technology used for E-commerce website?
Ans: We will be using Javascript and react application for creating this project inside which we will be CSS and basic javacript function for creating the structure of e-commerce website.
Note: Those Who want to download the source and want to practice through the predefined code then you can click on the button below to download the zip file.
Installing the React libraries:
Now to install the react libraries and related files , we need to use the command prompt for installing all the major dependencies. We will first change the directory to our e-commerce folder and then using the command
npm install
This command installs all important files and folders inside our e-commerce folder . in which we will be importing details and libraries such as the project name, version, and type of framework. All the necessary data is installed using this command only.
Running local Server:
Running local server is important for displaying the output of our project and helps in making our project repsonsive , for running a local server which we will store all the project files . We will use a command inside the command prompt.
npm run dev
npm run dev is a command that runs a script file, which stores a collection of commands that run a local server on our browser.
Creating HTML file:
The Main file which is used inside our project is “index.html” , this file contains the major structure and the links for our e-commerce project . Here inside our HTML file we will add the link for the favicon icon (which appear on the top left corner of the title bar) and the link for the external css and javascript files.
<!doctype html>
<html lang="en" dir="ltr">

<head>
  <meta charset="UTF-8" />
  <meta name="viewport" content="width=device-width, initial-scale=1" />
  <meta name="description" content="Your ultimate destination for effortless online shopping.
    Discover curated collections, easily add items to your cart and wishlist,
    and enjoy detailed product descriptions with captivating previews.
    Experience convenience like never before with our intuitive interface.
    Shop smarter with us today.">
  <meta name="author" content="Moamal Alaa Kareem">
  <meta name="theme-color" content="#181818">
  <title>E-Commercew</title>
  <!-- Favicon -->
  <link rel="shortcut icon" href="src/Assets/Images/favicon.png" type="image/x-icon">
  <!-- Manifest [PWA] -->
  <link rel="manifest" href="./manifest.json" />
</head>

<body>
  <div id="root"></div>
  <script type="module" src="src/main.jsx"></script>
</body>

</html>
Now to create the major part of the website, we need to create an src folder inside which we will be importing all the assets and components of our project and also adding the structure of our e-commerce store. As this is a multipage project, we will be adding multiple pages inside our src folder and linking them up for easy inner page access.
Creating Asset Folder
We all know that projects are the combination of different media files such as image, videos, SVG’s , audio files , so all these asset we need to store inside the asset folder in the parent src folder so that all the media files are stored inside one particular section.

Creating Components for Structure:
We will now create a folder called component in which ,we will create sub folder for each section of our e-commerce web application.

Now we will be creating the structure of our website, we will first create our homepage, for that we will create a child folder inside which we will create a home.jsx file through which we will create the structure of our homepage using javascript functions.
Creating header:
The header is the top element of the website and contains all the major links to the website, which helps in easy navigation through the website. We will be using the javascript function for creating the header part of our website. We will create a subfolder inside which we will be adding the details of the products.
import { useTranslation } from "react-i18next";
import { Link } from "react-router-dom";
import s from "./FirstHeader.module.scss";
import LanguageSelector from "./LanguageSelector";

const FirstHeader = () => {
  const { t } = useTranslation();

  return (
    <div className={s.header}>
      <div className={s.container}>
        <div className={s.space} />

        <div className={s.headerContent}>
          <p className={s.discount}>
            <span>{t("firstHeader.saleMessage")}</span>
            <Link to="/products">{t("firstHeader.shopNow")}</Link>
          </p>

          <LanguageSelector />
        </div>
      </div>
    </div>
  );
};

export default FirstHeader;

Main Header:
import { Link } from "react-router-dom";
import useNavToolsProps from "src/Hooks/App/useNavToolsProps";
import NavTools from "../../Shared/MidComponents/NavTools/NavTools";
import s from "./Header.module.scss";
import MobileNavIcon from "./MobileNavIcon";
import Nav from "./Nav";

const Header = () => {
  const navToolsProps = useNavToolsProps();

  return (
    <header className={s.header}>
      <div className={s.container}>
        <h1>
          <Link to="/">Exclusive</Link>
        </h1>

        <div className={s.headerContent}>
          <Nav />
          <NavTools {...navToolsProps} />
        </div>

        <MobileNavIcon />
      </div>
    </header>
  );
};

export default Header;

Creating the Intro Section:
import { Helmet } from "react-helmet-async";
import useScrollOnMount from "src/Hooks/App/useScrollOnMount";
import CategoriesSection from "./CategoriesSection/CategoriesSection";
import FeaturedSection from "./FeaturedSection/FeaturedSection";
import s from "./Home.module.scss";
import MainSlider from "./Introduction/MainSlider";
import SectionsMenu from "./Introduction/SectionsMenu";
import OurProductsSection from "./OurProductsSection/OurProductsSection";
import ProductPoster from "./ProductPoster/ProductPoster";
import ThisMonthSection from "./ThisMonthSection/ThisMonthSection";
import TodaySection from "./TodaySection/TodaySection";

const Home = () => {
  useScrollOnMount(0);

  return (
    <>
      <Helmet>
        <title>E-Commercew</title>
      </Helmet>

      <div className={s.home}>
        <div className={s.container}>
          <div className={s.introductionContainer}>
            <SectionsMenu />

            <div className={s.line}></div>

            <MainSlider />
          </div>

          <TodaySection />
          <CategoriesSection />
          <ThisMonthSection />
          <ProductPoster />
          <OurProductsSection />
          <FeaturedSection />
        </div>
      </div>
    </>
  );
};

export default Home;
This is the first page that is visible to the user as soon as the website is loaded in the browser. In this file, using the import function, I will first import some of the libraries and other file data using the import function, and then, using the function called “home(),” I will create the title of the page and the navigation menu for the important sections.
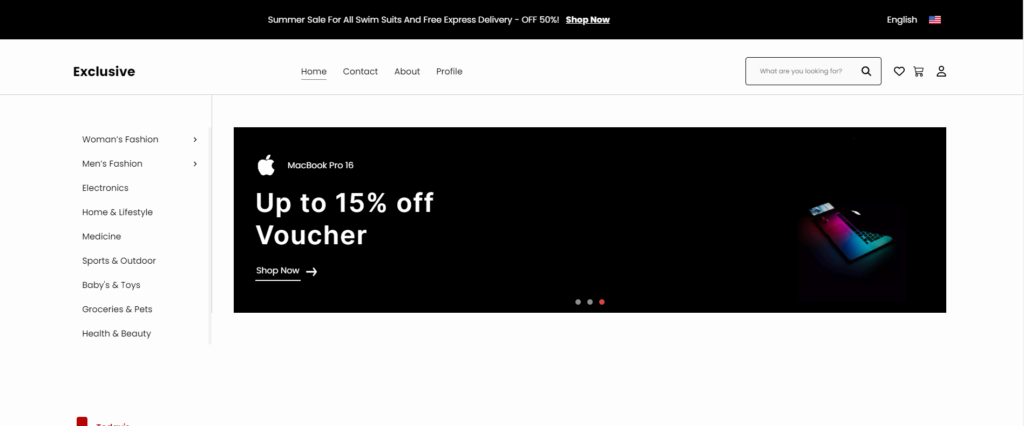
Similarly, we will create each element of our webpage one by one using the javascript function. We will create the header, footer, contact section, and product section. We will be creating all these sections in a similar manner. If you download our code from the source, all these will be predefined for you.
In this manner we will be adding multiple pages inside our webpage and then using the app.jsx and main.jsx file we will be combining all the data and the using the hooks, we will be creating a local function that will help in running a local server on our browser.
import { StrictMode } from "react";
import ReactDOM from "react-dom/client";
import { HelmetProvider } from "react-helmet-async";
import { Provider } from "react-redux";
import App from "./App.jsx";
import { store } from "./App/store.jsx";
import "./Styles/main.scss";
import "./Translations/i18n";

ReactDOM.createRoot(document.getElementById("root")).render(
  <StrictMode>
    <Provider store={store}>
      <HelmetProvider>
        <App />
      </HelmetProvider>
    </Provider>
  </StrictMode>
);

// servicerWorker.register();
In this javascript file we will use the react strict component that checks all the function and api working fine or not and catching any error displayed by api’s and using the DOM library is used to convert react component into DOM Element. the helment provide is a component of react framework which helps in maging the title and the meta tags of the html file.
ADVERTISEMENT
import "./Styles/main.scss";
import "./Translations/i18n";
These two functions are used for importing the styling sheet and adding style to each element through their reference classes. In the style sheet, we just used the classes of the particular elements for adding styling to our e-commerce app and making it unique and dynamic.
ADVERTISEMENT
ReactDOM.createRoot(document.getElementById("root")).render(
  <StrictMode>
    <Provider store={store}>
      <HelmetProvider>
        <App />
      </HelmetProvider>
    </Provider>
  </StrictMode>
);

// servicerWorker.register();
This DOM model restricts the function and properties of the element with id as root in the app file and uses the strict mode to keep checking the errors inside the files. The main work of this function is to ensure that the application is built and rendered properly without any errors.
ADVERTISEMENT
Final output:
Conclusion:
I hope you like our project and tried to follow along with our blog to create your own personalized e-commerce website .
ADVERTISEMENT
If you like this project, share it with friends and subscribe to our codewithrandom website for more such helpful projects.
ADVERTISEMENT
Code By : Moamal
Author: Arun

