Password Generator Using HTML, CSS, And JavaScript
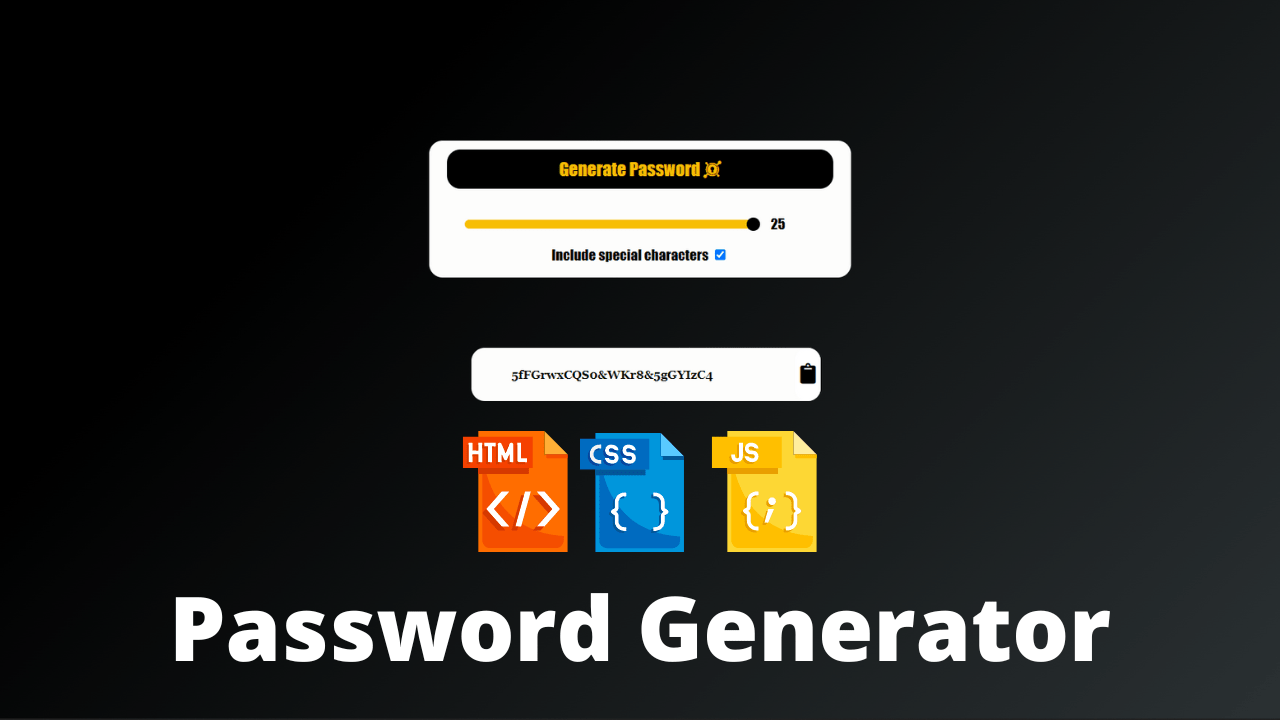
Dear Reader, Let’s build a password generator which generates passwords of different lengths and which can include or exclude special characters in the generated passwords based on user selection. This is going to be simple. Stay with me till the end. In this article, we’ll be going to create Password Generator Using HTML, CSS, And JavaScript.
Folder structure:
1. index.html — contains the HTML layout which defines the element structure that would be shown on the page.
2.style.css- contains CSS code for styling. Using CSS we can style the different portions to make them more visually appealing.
3.script.js — contains JavaScript code where all the functions are placed.
*Please be aware that different browsers and JavaScript implementations give different bit-depth results for Math. random(). If you are running in an old browser or Safari, this might mean (in the worst case scenario) you get a shorter password than 8 characters. Though, you could solve this by simply concatenating two strings, and then slicing it back down to 8 characters again.
HTML Code For Password Generator:
<!DOCTYPE html>
<html lang="en">
  <head>
    <meta charset="UTF-8" />
    <meta http-equiv="X-UA-Compatible" content="IE=edge" />
    <meta name="viewport" content="width=device-width, initial-scale=1.0" />
    <title>Password Generator</title>
    <link
      rel="stylesheet"
      href="https://cdnjs.cloudflare.com/ajax/libs/font-awesome/5.15.4/css/all.min.css"
    />
    <link rel="stylesheet" href="style.css" />
  </head>

  <body>
    <div class="wrapper">
      <button id="generate" class="action-btn">
        Generate Password <i class="fab fa-keycdn"></i>
      </button>
      <div class="slider_main">
        <input
          type="range"
          value="8"
          min="1"
          max="25"
          class="slider"
          oninput="this.nextElementSibling.value = this.value"
          id="slider"
        />
        <output>8</output>
      </div>
      <label class="container" style="font-family: fantasy; color: rgb(3, 3, 3)"
        >Include special characters
        <input type="checkbox" checked="checked" id="checkbox" />
        <span class="checkmark"></span>
      </label>
    </div>

    <div class="wrapper_main">
      <h5 id="pwd_txt"></h5>
      <button id="clipboard" class="clipboard">
        <i class="fas fa-clipboard"></i>
      </button>
    </div>
    <script src="script.js"></script>
  </body>
</html>
This tells the browser that it should use UTF-8 encoding for all text in this document. The next line is a meta HTTP-equiv=”X-UA-Compatible” content=”IE=edge”. This tells the browser to render this page using Internet Explorer 11 standards, which means that IE11 will be able to display CSS3 and HTML5 elements properly. It also sets up compatibility mode so that IE11 can render web pages without any problems even if they are not designed for it specifically.
50+ Html ,Css & Javascript Projects With Source Code
Next comes a meta name=”viewport” content=”width=device-width, initial-scale=1.0″. The viewport tag specifies how much of the screen’s width should be used when rendering the page on different devices (e.g., mobile phones). The initial scale value indicates how big an object appears when first displayed on screen; 1 is normal size, 2 is twice as large, etc… Then there are some stylesheets: one from Font Awesome and another from style.css. These two files contain CSS code that makes our website look nice and professional!
The code is a password generator that uses the Font Awesome font. The code starts with the HTML document, which includes a meta tag for character encoding and one for viewport. Next, it includes the CSS file from Google’s CDN and then some stylesheets to be used in the body of the document.
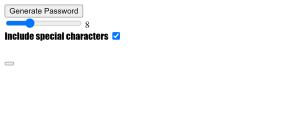
The next line of code is where we get into what makes this script work: This button will generate a random password using an input range slider with an output value of 8.
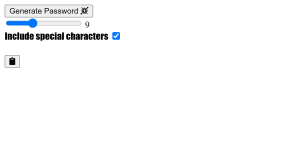
HTML Output
JavaScript logic For Password Generator
const password_ele = document.getElementById("pwd_txt");
var string = "ABCDEFGHIJKLMNOPQRSTUVWXYZacdefghijklnopqrstuvwxyz0123456789";
const special_chars = "@#$%^&*";
const generate = document.getElementById("generate");
const clipboard = document.getElementById("clipboard");
var pwd_length = document.getElementById("slider");

generate.addEventListener("click", () => {
  let password = "";
  var checked = document.getElementById("checkbox").checked;
  var final_string = string;
  console.log(checked);
  if (checked) {
    final_string += "@#$%^&*";
  }
  for (var i = 0; i < pwd_length.value; i++) {
    let pwd = final_string[Math.floor(Math.random() * final_string.length)];
    password += pwd;
  }
  password_ele.innerText = password;
  final_string = string;
});

clipboard.addEventListener("click", () => {
  navigator.clipboard.writeText(password_ele.innerText);
  alert("Password copied to clipboard");
});
Random Password Generator is a JavaScript project that can generate strong and unique passwords automatically. I made a box in everyone’s first web page. I have used a heading or title. Below the title is an input box where the password can be generated.
We need to generate the password by selecting characters randomly. The length slider value given by the user will determine the length of the password and the user can choose whether to include special characters or not using the checkbox. To implement this functionality let’s fetch the required elements and store them in the below constants and variables.
password_ele — To store the h5 element which is used to set the generated password.
string — To store the characters used to generate passwords except for special characters.
10+ Javascript Projects For Beginners With Source Code
special_chars —Used to store special characters, based on check box value we can add special characters to the password.
generate — Used to store the Generate Password button.
clipboard — Used to store clipboard button.
pwd_length — Used to store the slider element.
On clicking Generate Password button we will execute some lines of codes to generate the password using Math.random() function. If checkbox is checked then we will add special characters to our original string. Original string contains “ABCDEFGHIJKLMNOPQRSTUVWXYZacdefghijklnopqrstuvwxyz0123456789”.
Loop through the string to fetch the character randomly and in each loop add the randomly selected character to the password variable which was empty initially. The number of times the loop is executed is equal to the slider length so, the length of the password will be equal to the length given by the user.
You Might Like This:
- Advanced Multi-Step Form
- Responsive Flat Pricing Card
- Indian Flag Source Code Html And CSS
- QR Code generator using JavaScript
CSS Code For Password Generator
html {
  min-height: 100%;
}

body {
  min-height: 100%;
  background-color: #2d3436;
  background-image: linear-gradient(315deg, #2d3436 0%, #000000 74%);
  text-align: center;
}

.slider {
  -webkit-appearance: none;
  width: 70%;
  height: 10px;
  background: #f7be04;
  border-radius: 15px;
  opacity: 1;
  -webkit-transition: 0.2s;
  transition: opacity 0.2s;
  margin-left: 40px;
  margin-top: 25px;
  margin-bottom: 20px;
}

.slider:hover {
  opacity: 0.5;
}

.slider::-webkit-slider-thumb {
  -webkit-appearance: none;
  width: 15px;
  height: 15px;
  background: #000000;
  border-radius: 50%;
  cursor: pointer;
}

.action-btn {
  background-color: #000;
  border: 0;
  color: #f7be04;
  font-size: 20px;
  cursor: pointer;
  padding: 10px;
  margin: 10px 20px;
  border-radius: 15px;
  font-family: fantasy;
  opacity: 1;
  transition: opacity 0.2s;
}

.action-btn:hover {
  opacity: 0.5;
}

.wrapper {
  display: flex;
  background-color: rgb(253, 253, 252);
  flex-direction: column;
  width: 30%;
  margin-top: 10%;
  margin-left: 35%;
  border-radius: 15px;
  font-family: fantasy;
  padding-bottom: 1%;
}

.slider_main {
  display: flex;
  flex-direction: row;
}

output {
  margin-top: 20px;
  margin-left: 10px;
}

.wrapper_main {
  display: flex;
  background-color: rgb(253, 253, 252);
  flex-direction: row;
  width: 22%;
  margin-top: 5%;
  margin-left: 38%;
  border-radius: 15px;
  font-family: Georgia, serif;
  padding-left: 45px;
}

.clipboard {
  margin-left: auto;
  cursor: pointer;
  border: 0;
  background-color: white;
  color: black;
  border-radius: 15px;
  font-size: 23px;
  opacity: 1;
  transition: opacity 0.2s;
}

.clipboard:hover {
  opacity: 0.5;
}
ADVERTISEMENT
The code starts with a body tag. The min-height property is set to 100% so that the height of the browser window will be equal to the height of the document. Then, there are two divs: one for the slider and another for a button. The slider has three properties: width, height, and background color. It also has an opacity property which changes its opacity when it’s hovered over by changing from 0 (fully transparent) to 1 (fully opaque).
ADVERTISEMENT
There is also a transition on this property which makes it change smoothly from 0 to 1 in .2 seconds. Finally, there is margin-left and margin-top on both sides of the slider as well as margin-bottom at its bottom edge. The code is an example of a slider.
ADVERTISEMENT
The following are the required CSS properties for the slider: -WebKit-appearance: none; width: 70%; height: 10px; background: #f7be04; border-radius: 15px; opacity: 1; -WebKit-transition: 0.2s; transition: opacity 0.2s; margin-left: 40px; margin-top: 25px; margin-bottom: 20px; .slider::-WebKit-slider-thumb { -WebKit-appearance: none; width: 15px; height: 15px; background:#000000; border-radius: 50%; cursor: pointer ; }
ADVERTISEMENT
The first button is the “action-btn” and it has an opacity of 0.5 when hovered over, while the second button is called “wrapper_main”. The wrapper_main has a background color of RGB(253, 253, 252) and flex-direction of row. It also has a margin-top set to 5% and a margin-left set to 38%.
ADVERTISEMENT
The code attempts to create a slider with the main wrapper being used as the slider’s body. The main wrapper has two flex items, one for the left and one for the right.
50+ Html ,Css Javascript Projects With Source Code
Final Output
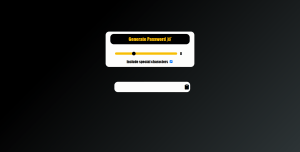
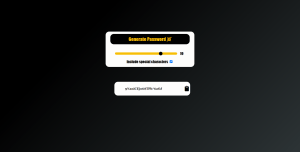
You have completed learning Password Generator Using Html, CSS, And JavaScript. I hope I have explained to you in this tutorial how I created this random password system with the help of JavaScript.
If you enjoyed reading this post and have found it useful for you, then please give a share with your friends, and follow me to get updates on my upcoming posts. You can connect with me on Instagram.
if you have any confusion Comment below or you can contact us by filling out our contact us form from the home section.
Thank You And Keep Learning!!
Code By – Divyamcm
written by – Ninja_webTech
