How to Add Image in Checkbox in HTML?
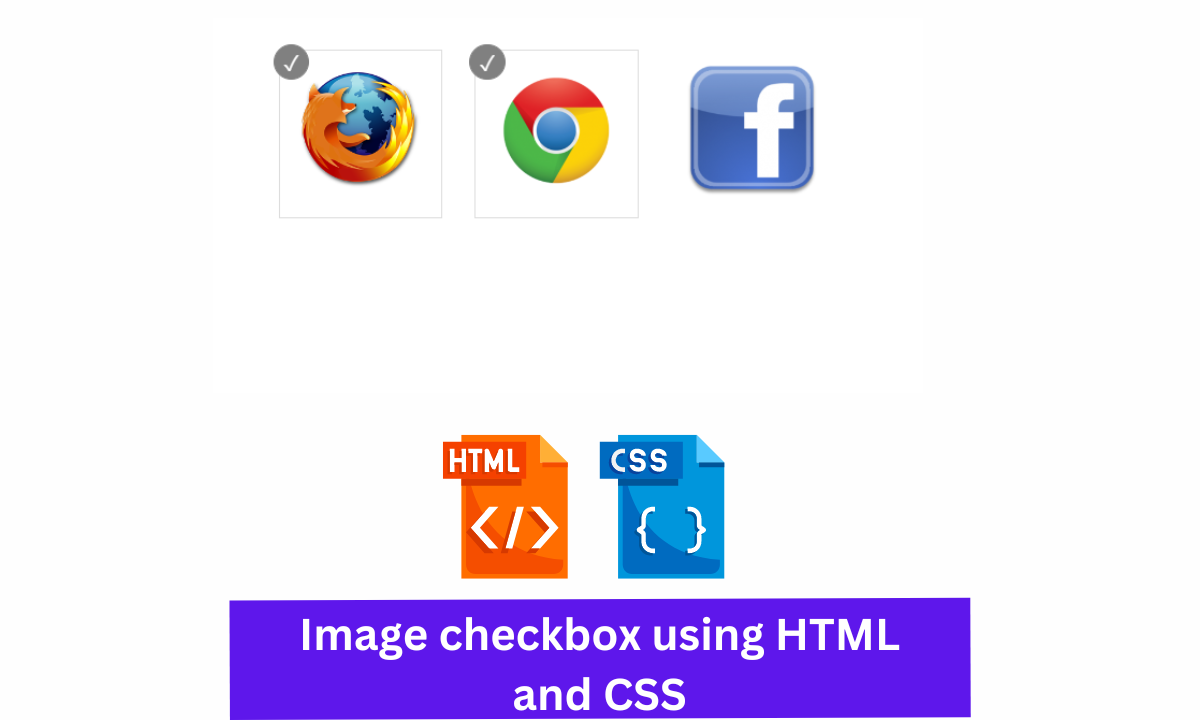
Hey Guys, Welcome To Our Blog, In Today’s Blog We Are Going To Learn How to Add an Image in a Checkbox in HTML. An Image checkbox is nothing but when we click on a particular image the image will be responded to as checked by showing a tick symbol which is known as an image checkbox.

In this article, we learn how to add images to the checkbox in HTML and style using CSS. So now we are going to create this project, and for that, we added the HTML code first. An image checkbox is an option image type in which, as the user clicks on the image, the checkbox image will get checked.
What is a Checkbox?
A checkbox is an input in the form. It is a square box that, when selected, shows a tick mark inside the box. This type of form element is used in the survey form, where the user needs to select multiple items in the form.
What is the use of Checkboxes?
We can use checkboxes in various projects such as we can use checkboxes for selecting multiple options from the list of options in a survey form, and we can also use checkboxes in the website menu for filtering the data based on the selection and in the database to view the selected data.
50+ HTML, CSS & JavaScript Projects With Source Code
HTML CODE For Image Checkbox
<ul>
  <li>
    <input type="checkbox" id="myCheckbox1" />
    <label for="myCheckbox1"><img src="http://townandcountryremovals.com/wp-content/uploads/2013/10/firefox-logo-200x200.png" /></label>
  </li>
  <li>

    <input type="checkbox" id="myCheckbox2" />
    <label for="myCheckbox2"><img src="http://tech21info.com/admin/wp-content/uploads/2013/03/chrome-logo-200x200.png" /></label>
  </li>
  <li>

    <input type="checkbox" id="myCheckbox3" />
    <label for="myCheckbox3"><img src="http://www.thebusinessofsports.com/wp-content/uploads/2010/10/facebook-icon-200x200.png" /></label>
  </li>
</ul>
In this HTML code, we are first adding an input tag with an option checkbox, and inside of it, we are adding a label tag with an image, which comes under the list types. The list types were specifically used for any purpose in CSS.
Portfolio Website Using HTML CSS And JAVASCRIPT ( Source Code)
Likewise, we are creating another two classes by adding specific images that are the same as the first, but the change in class names would appear. So that’s all for HTML code. Now we can move onto CSS for making some stylings and adding checkbox arrows to it.
HTML Output:

The Respective code is given down below.
CSS CODE For Image Checkbox
ul {
  list-style-type: none;
}

li {
  display: inline-block;
}

input[type="checkbox"][id^="myCheckbox"] {
  display: none;
}

label {
  border: 1px solid #fff;
  padding: 10px;
  display: block;
  position: relative;
  margin: 10px;
  cursor: pointer;
}

label:before {
  background-color: white;
  color: white;
  content: " ";
  display: block;
  border-radius: 50%;
  border: 1px solid grey;
  position: absolute;
  top: -5px;
  left: -5px;
  width: 25px;
  height: 25px;
  text-align: center;
  line-height: 28px;
  transition-duration: 0.4s;
  transform: scale(0);
}

label img {
  height: 100px;
  width: 100px;
  transition-duration: 0.2s;
  transform-origin: 50% 50%;
}

:checked + label {
  border-color: #ddd;
}

:checked + label:before {
  content: "✓";
  background-color: grey;
  transform: scale(1);
}

:checked + label img {
  transform: scale(0.9);
  /* box-shadow: 0 0 5px #333; */
  z-index: -1;
}
In the first part, we fix all the images to be list-style-type for none, so when we click on them, the border won’t appear. In the second part, we call the li and make it display in the same line by using the display: block property.
Ecommerce Website Using Html Css And Javascript Source Code
In the third part, we are adding the input option to be none, and next, we are aligning and adding some styling properties to the label class, which contains the image. The properties are just a margin and padding and a position, border, and display. These are used for making contents, which means images relative to another content, and to make it lie all the images in a straight line, we are using blocks in the display property.
ul {
  list-style-type: none;
}

li {
  display: inline-block;
}

input[type="checkbox"][id^="myCheckbox"] {
  display: none;
}

label {
  border: 1px solid #fff;
  padding: 10px;
  display: block;
  position: relative;
  margin: 10px;
  cursor: pointer;
}

After this, we are adding some properties to images and the images checkbox by adding the properties that make them look like a checked option.
label:before {
  background-color: white;
  color: white;
  content: " ";
  display: block;
  border-radius: 50%;
  border: 1px solid grey;
  position: absolute;
  top: -5px;
  left: -5px;
  width: 25px;
  height: 25px;
  text-align: center;
  line-height: 28px;
  transition-duration: 0.4s;
  transform: scale(0);
}

label img {
  height: 100px;
  width: 100px;
  transition-duration: 0.2s;
  transform-origin: 50% 50%;
}
The last thing is that we are adding animation for the checkbox to appear the symbol at a given time and for displaying the check option when the user clicks on it. The z-index may be used for lapping with elements, which means that symbol.
100+ JavaScript Projects With Source Code ( Beginners to Advanced)
ADVERTISEMENT
The main thing used here is the transform scale property, which makes the tick symbol, and other common and repeated properties.
ADVERTISEMENT
:checked + label {
  border-color: #ddd;
}

:checked + label:before {
  content: "✓";
  background-color: grey;
  transform: scale(1);
}

:checked + label img {
  transform: scale(0.9);
  /* box-shadow: 0 0 5px #333; */
  z-index: -1;
}
Now We completed adding the source code to our project, and we came to an end now, but before we could make use of the project preview in the given output section,
ADVERTISEMENT
CSS Output:

ADVERTISEMENT
Video Output:
Add Image in Checkbox in HTML and CSS
Now We have Successfully created our Image Checkbox Using HTML & CSS. You can use this project for your personnel needs and the respective lines of code are given with the code pen link mentioned below.
ADVERTISEMENT
Simple Portfolio Website Using Html And Css With Source Code
If you find out this Blog helpful, then make sure to search code with random on google for Front End Projects with Source codes and make sure to Follow the Code with Random Instagram page.
REFER CODE – Kadir Firat
WRITTEN BY – Ragunathan S
What are the types of Checkboxes?
Checkboxes can be made using text, pictures, or other graphics. A checkbox’s primary function is to allow the selection of one choice.
How to create an input box in HTML?
In HTML, we use <input type=”checkbox”> to create an input box.
What is a Checkbox?
A checkbox is an input in the form. It is a square box that, when selected, shows a tick mark inside the box. This type of form element is used in the survey form, where the user needs to select multiple items in the form.
What is the use of Checkboxes?
We can use checkboxes in various projects such as we can use checkboxes for selecting multiple options from the list of options in a survey form, and we can also use checkboxes in the website menu for filtering the data based on the selection and in the database to view the selected data.
