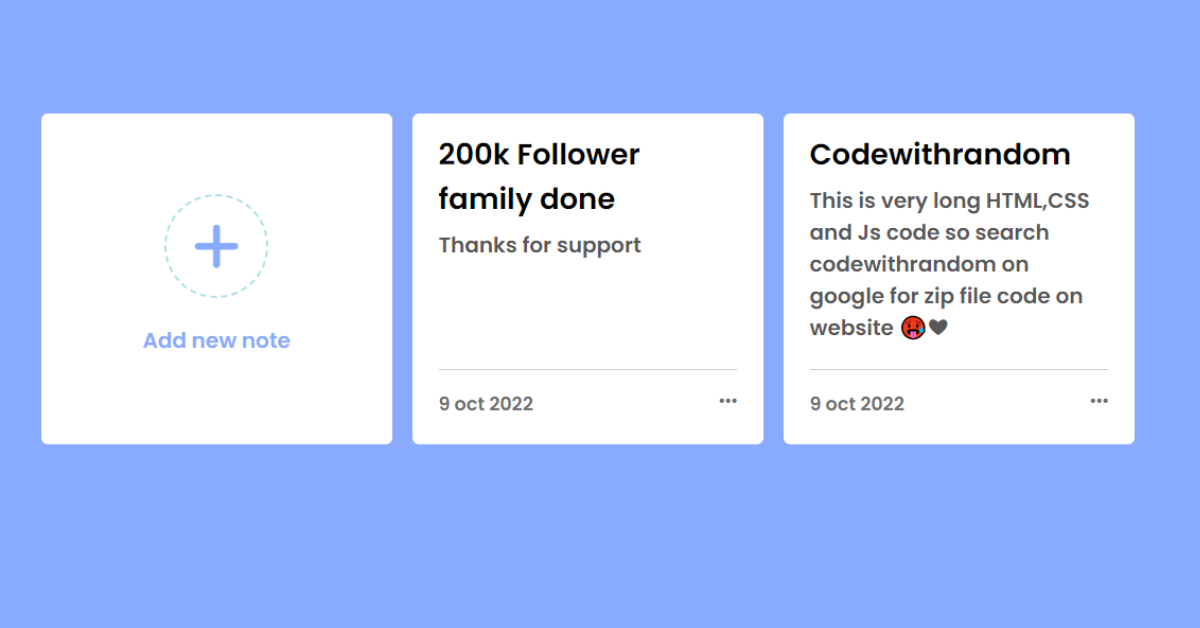
Hey friends, today you’ll learn how to create a Notes application using HTML, CSS, and JavaScript in this blog. In this notes taking app users can add, modify, or remove notes with ease with this note-taking app. Pure JavaScript is used to store the notes the user has added to this app in the local storage of the browser, preventing their removal upon page refresh or tab closure.
How To Build A Notes App Using HTML ,CSS & Javascript?
The idea of the javascript array method is used to create these notes. We advise that, even if you are a total newbie, you be familiar with javascript terms like array, event listener, and local storage file. You are in the proper place if you have already studied this concept but are unsure of how to put it into practise. Here, we’ll gradually put all of these ideas into practise.
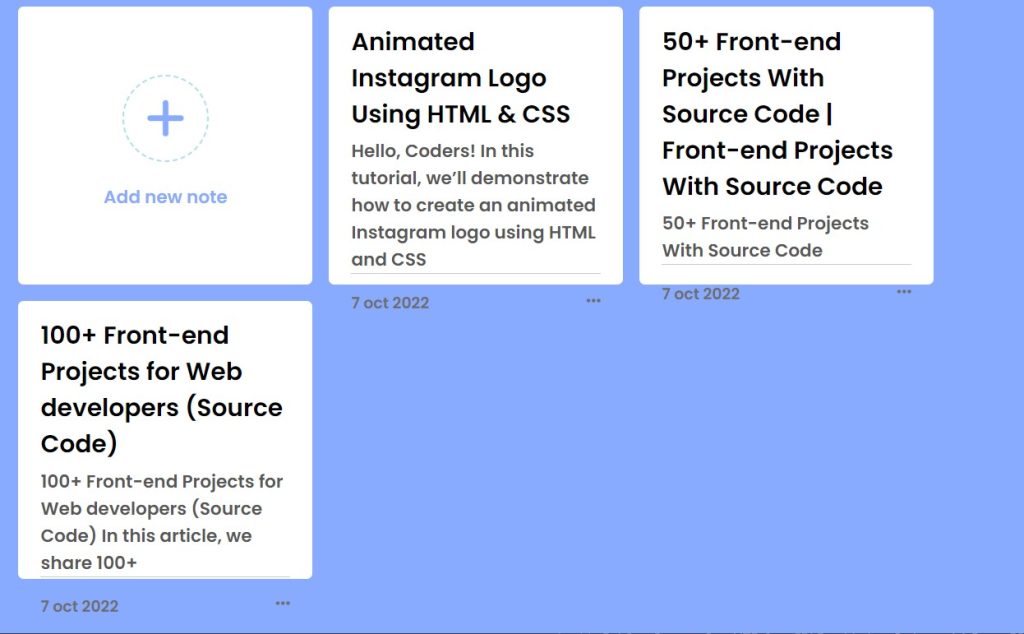
I hope you must have got an idea about the project.
So, Let’s start Project By Adding The Source Codes. For That, First, We Are Using The Html Code.
Step1: HTML code
HTML is used to design the website’s layout. So, first, we create the layout, then we style it, and finally, we add features to the button (on clicking the button menu opens ).
Now we’ll look at our HTML code.
<!DOCTYPE html>
<html lang="en">

<head>
    <meta charset="UTF-8" />
    <meta http-equiv="X-UA-Compatible" content="IE=edge" />
    <meta name="viewport" content="width=device-width, initial-scale=1.0" />
    <title>notes taking app</title>

    <script src="https://kit.fontawesome.com/5eb2c51ffb.js" crossorigin="anonymous"></script>

    <link rel="stylesheet" href="style.css" />
</head>

<body>
    <div class="popup-box">
        <div class="popup">
            <div class="content">
                <header>
                    <p>Add a new note</p>
                    <i class="fa-solid fa-xmark"></i>
                </header>
                <form action="#">
                    <div class="row title">
                        <label for="">Title</label>
                        <input type="text" name="" id="">
                    </div>
                    <div class="row description">
                        <label for="">Description</label>
                        <textarea></textarea>
                    </div>
                    <button>Add Note</button>
                </form>
            </div>
        </div>
    </div>
    <div class="wrapper">
        <li class="add-box">
            <div class="icon"><i class="fa-solid fa-plus"></i></div>
            <p>Add new note</p>
        </li>
    </div>

    <script src="index.js"></script>
</body>

</html>
Before beginning to add structure to our notes-taking app. We need to update some links. Because we utilised three distinct files for our HTML, CSS, and Javascript in this project, we need to link them all together. To do this, please include the links for our CSS and Javascript.
<link rel="stylesheet" href="style.css" />  //Add this link into the head section of our HTML.

<script src="index.js"></script>   //Add this link inside the body just before the closing body tag of our HTML.
To build the notes we utilised this icon for, we also used additional font-awesome icons, such as the plus(+) sign. The URL below must be added to your header area though, in order to import these icons from Font Awesome.
Portfolio Website Using HTML ,CSS and Javascript Source Code
<script src="https://kit.fontawesome.com/5eb2c51ffb.js" crossorigin="anonymous"></script>
Now we will be adding the structure of our notes taking app using simple HTML concepts.
- First, we will add text to “Add a New Note” using the paragraph <p> tag.
- The (+) icon will now be added inside our structure utilising the <i> tag and font-awesome class. Under our header section, this content will be wrapped.
- We will now create a form with the form tag that we will later use for taking notes.
- For the title of our notes app, we will add a label and text input box inside the form. The label and textarea for the description of our material will be created in a similar manner.
- Using the button tag we will create a button to add a New note.
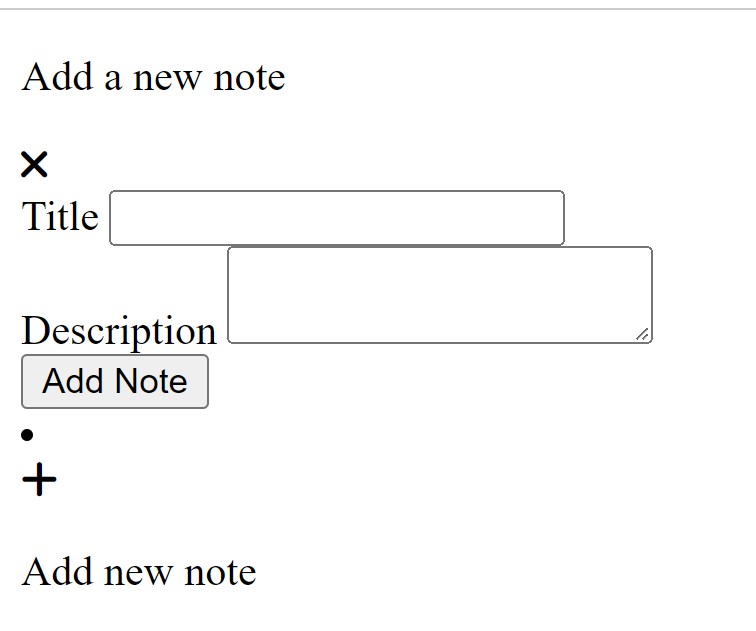
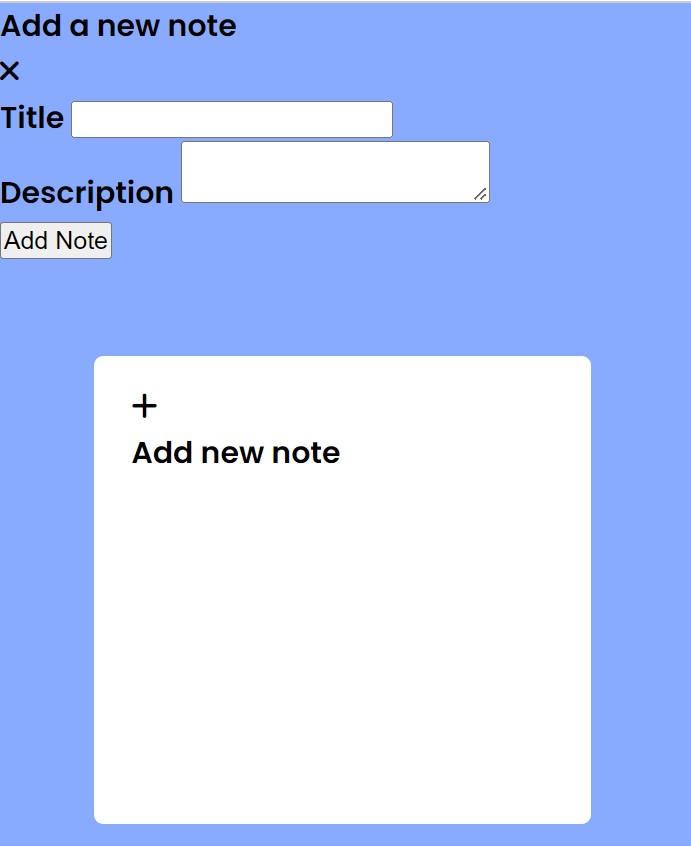
We have added the basic structure for our notes taking app . Let’s take look at our output.
Output:
Step2: Adding the CSS Code.
Cascading Style Sheets (CSS) is a markup language for describing the presentation of a document written in HTML or XML. CSS, like HTML and JavaScript, is a key component of the World Wide Web.
Now we will look at our CSS code.
@import url("https://fonts.googleapis.com/css2?family=Poppins:wght@600;900&display=swap");

* {
  box-sizing: border-box;
  margin: 0;
  padding: 0;
}

body {
  font-family: "Poppins", sans-serif;
  background-color: #88abff;
}

.wrapper {
  margin: 50px;
  display: grid;
  grid-template-columns: repeat(auto-fill, 265px);
  gap: 15px;
}

.wrapper li {
  background-color: #fff;
  list-style: none;
  height: 250px;
  border-radius: 5px;
  padding: 15px 20px 20px;
}
.wrapper .note {
  display: flex;
  flex-direction: column;
  justify-content: space-between;
}

.add-box,
.icon,
.bottom-content {
  display: flex;
  justify-content: center;
  align-items: center;
  flex-direction: column;
}

.add-box .icon {
  height: 78px;
  width: 78px;
  border-radius: 50%;
  border: 2px dashed powderblue;
  font-size: 40px;
  color: #88abff;
  cursor: pointer;
}

.add-box p {
  font-weight: 500;
  margin-top: 20px;
  color: #88abff;
}

.note p {
  font-size: 22px;
  font-weight: 500;
}

.note span {
  display: block;
  font-size: 16px;
  color: #575757;
  margin-top: 5px;
}

.note .bottom-content {
  flex-direction: row;
  justify-content: space-between;
  padding-top: 10px;
  border-top: 1px solid #ccc;
}

.bottom-content span {
  color: #6d6d6d;
  font-size: 14px;
}

.bottom-content .settings i {
  cursor: pointer;
  font-size: 15px;
  color: #6d6d6d;
}

.settings {
  position: relative;
}

.settings .menu {
  box-shadow: 0 0 6px rgba(0, 0, 0, 0.15);
  position: absolute;
  bottom: 0;
  padding: 5px 0;
  border-radius: 4px;
  background-color: #fff;
  right: -4px;

  transform: scale(0);
  transform-origin: bottom right;
  transition: transform 0.2s ease;
}

.settings.show .menu {
  transform: scale(1);
}

.settings .menu li {
  height: 25px;
  border-radius: 0;
  display: flex;
  align-items: center;
  justify-content: flex-start;
  cursor: pointer;
  font-size: 16px;
  padding: 17px 15px;
}

.menu li i {
  padding-right: 8px;
}

.menu li:hover {
  background-color: #f5f5f5;
}

.popup-box {
  position: fixed;
  top: 0;
  left: 0;
  width: 100%;
  height: 100%;
  background-color: rgba(0, 0, 0, 0.4);
}

.popup-box .popup {
  position: absolute;
  top: 50%;
  left: 50%;
  transform: translate(-50%, -50%);
  z-index: 2;
  max-width: 400px;
  width: 100%;
}

.popup .content {
  background-color: #fff;
  border-radius: 5px;
}

.popup .content header {
  border-bottom: 1px solid #ccc;
  display: flex;
  justify-content: space-between;
  padding: 15px 25px;
}

.popup .content header p {
  font-weight: 500;
  font-size: 20px;
}

.popup .content header i {
  font-size: 23px;
  cursor: pointer;
  color: #8b8989;
}

.content form {
  margin: 15px 25px 35px;
}

.content form :where(input, textarea) {
  width: 100%;
  height: 50px;
  outline: none;
  font-size: 17px;
  border-radius: 4px;
  border: 1px solid #999;
  padding: 0 15px;
}

form .row label {
  margin-bottom: 6px;
  font-size: 18px;
  display: block;
}
.content form textarea {
  height: 150px;
  resize: none;
  padding: 8px 15px;
}

.content form button {
  background-color: #6a93f8;
  height: 50px;
  width: 100%;
  margin: 15px 0;
  border: none;
  font-size: 17px;
  cursor: pointer;
  border-radius: 4px;
  color: #fff;
}

.popup-box,
.popup-box.popup {
  opacity: 0;
  pointer-events: none;
  transition: all 0.25s ease;
}

.popup-box.show {
  opacity: 1;
  pointer-events: auto;
}

.hide-icon {
  display: none;
}
After we’ve added the CSS code, we’ll go over it step by step. To save time, you can simply copy this code and paste it into your IDE. Let us now examine our code step by step.
100+ JavaScript Projects With Source Code ( Beginners to Advanced)
Step1: We will begin by importing the Poppins fonts from Google Fonts. We will set the padding and margins to “zero” and add the box-sizing as “border-box” using the universal selector.
With the use of the body tag, we will give our body a blue backdrop and set the font family to “Poppins.”
@import url("https://fonts.googleapis.com/css2?family=Poppins:wght@600;900&display=swap");

* {
  box-sizing: border-box;
  margin: 0;
  padding: 0;
}

body {
  font-family: "Poppins", sans-serif;
  background-color: #88abff;
}
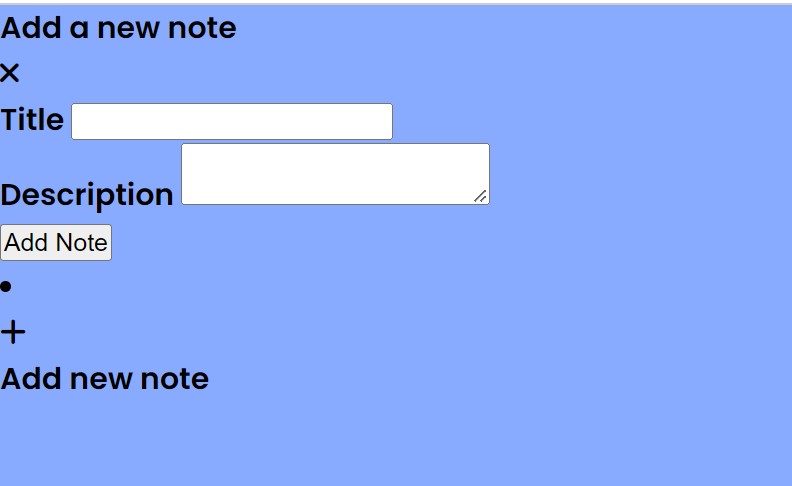
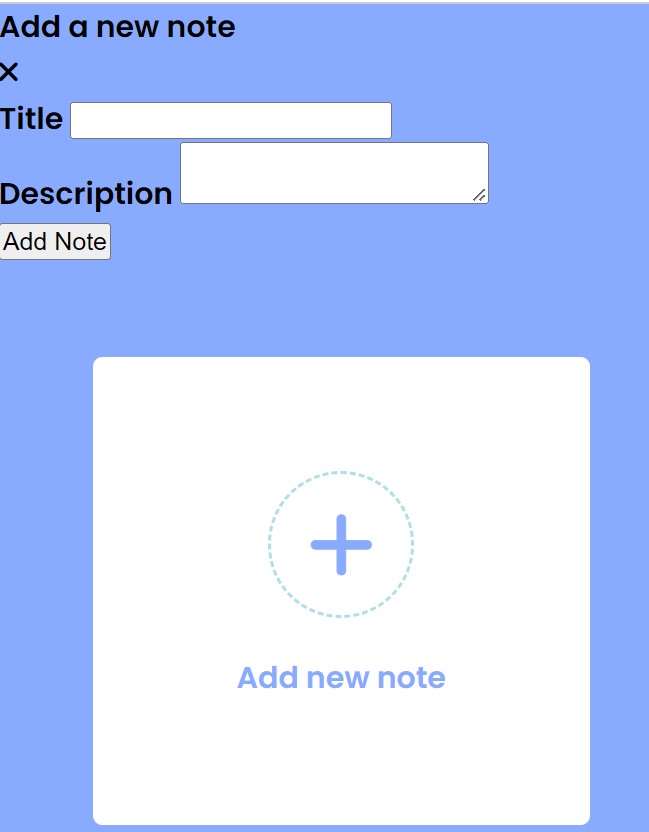
Step2: Our notes container will now be styled using the “.wrapper” class. We include a 50 px margin on all sides. The display is configured to a grid, and a “15 px” distance between each one is specified. The height is set to “250px” and the background colour is “white.” The border radius attribute was also used to give the boundaries of our notes app a curved appearance.
.wrapper {
  margin: 50px;
  display: grid;
  grid-template-columns: repeat(auto-fill, 265px);
  gap: 15px;
}

.wrapper li {
  background-color: #fff;
  list-style: none;
  height: 250px;
  border-radius: 5px;
  padding: 15px 20px 20px;
}
Step3: Our notes will now have style added. We’ve set the flex-direction to “column” and the display to “flex.” We will insert an equal amount of space between each note using the justify-content attribute.
We are now going to give our icon some style. The border radius will be used to convert the shape to a circle, and the dimensions are set to “78 px” for height and width. A border with dashed type was added; it has a width of 2 pixels and is powder blue in colour.
ADVERTISEMENT
.add-box,
.icon,
.bottom-content {
  display: flex;
  justify-content: center;
  align-items: center;
  flex-direction: column;
}

.add-box .icon {
  height: 78px;
  width: 78px;
  border-radius: 50%;
  border: 2px dashed powderblue;
  font-size: 40px;
  color: #88abff;
  cursor: pointer;
}

.add-box p {
  font-weight: 500;
  margin-top: 20px;
  color: #88abff;
}
ADVERTISEMENT
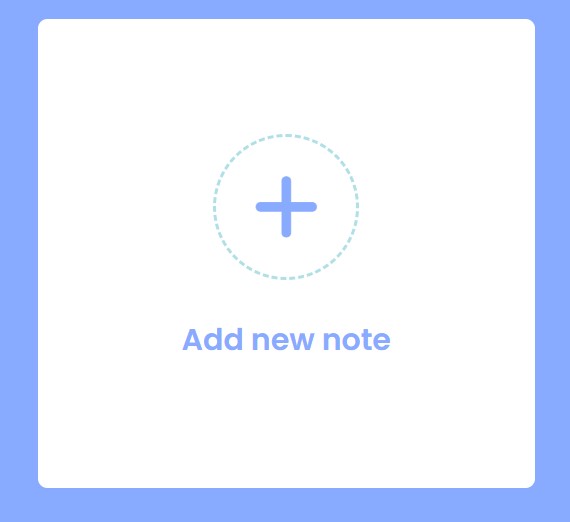
Step5: We will now use our JavaScript approach to implement the styling for our note-taking application. As you read through the code, you will be able to see which style we applied for which element because our styling definitions are straightforward. Therefore, I would simply advise looking at our CSS code.
ADVERTISEMENT
bottom-content span {
  color: #6d6d6d;
  font-size: 14px;
}

.bottom-content .settings i {
  cursor: pointer;
  font-size: 15px;
  color: #6d6d6d;
}

.settings {
  position: relative;
}

.settings .menu {
  box-shadow: 0 0 6px rgba(0, 0, 0, 0.15);
  position: absolute;
  bottom: 0;
  padding: 5px 0;
  border-radius: 4px;
  background-color: #fff;
  right: -4px;

  transform: scale(0);
  transform-origin: bottom right;
  transition: transform 0.2s ease;
}

.settings.show .menu {
  transform: scale(1);
}

.settings .menu li {
  height: 25px;
  border-radius: 0;
  display: flex;
  align-items: center;
  justify-content: flex-start;
  cursor: pointer;
  font-size: 16px;
  padding: 17px 15px;
}

.menu li i {
  padding-right: 8px;
}

.menu li:hover {
  background-color: #f5f5f5;
}

.popup-box {
  position: fixed;
  top: 0;
  left: 0;
  width: 100%;
  height: 100%;
  background-color: rgba(0, 0, 0, 0.4);
}

.popup-box .popup {
  position: absolute;
  top: 50%;
  left: 50%;
  transform: translate(-50%, -50%);
  z-index: 2;
  max-width: 400px;
  width: 100%;
}

.popup .content {
  background-color: #fff;
  border-radius: 5px;
}

.popup .content header {
  border-bottom: 1px solid #ccc;
  display: flex;
  justify-content: space-between;
  padding: 15px 25px;
}

.popup .content header p {
  font-weight: 500;
  font-size: 20px;
}

.popup .content header i {
  font-size: 23px;
  cursor: pointer;
  color: #8b8989;
}

.content form {
  margin: 15px 25px 35px;
}

.content form :where(input, textarea) {
  width: 100%;
  height: 50px;
  outline: none;
  font-size: 17px;
  border-radius: 4px;
  border: 1px solid #999;
  padding: 0 15px;
}

form .row label {
  margin-bottom: 6px;
  font-size: 18px;
  display: block;
}
.content form textarea {
  height: 150px;
  resize: none;
  padding: 8px 15px;
}

.content form button {
  background-color: #6a93f8;
  height: 50px;
  width: 100%;
  margin: 15px 0;
  border: none;
  font-size: 17px;
  cursor: pointer;
  border-radius: 4px;
  color: #fff;
}

.popup-box,
.popup-box.popup {
  opacity: 0;
  pointer-events: none;
  transition: all 0.25s ease;
}

.popup-box.show {
  opacity: 1;
  pointer-events: auto;
}

.hide-icon {
  display: none;
}
Step3: Adding Javascript Code
const addBox = document.querySelector(".add-box");
const popupBox = document.querySelector(".popup-box");

const months = [
  "jan",
  "feb",
  "mar",
  "apr",
  "may",
  "jun",
  "jul",
  "aug",
  "sep",
  "oct",
  "nov",
  "dec",
];

const closeBox = popupBox.querySelector("header i");
const titleTag = popupBox.querySelector("input");
const descTag = popupBox.querySelector("textarea");
const addBtn = popupBox.querySelector("button");

const notes = JSON.parse(localStorage.getItem("notes") || "[]");

const menuel = document.querySelector(".iconel");

const showNotes = () => {
  document.querySelectorAll(".note").forEach((note) => note.remove());
  notes.forEach((note, index) => {
    let litag = `<li class="note">
                            <div class="details">
                                <p> ${note.title} </p>
                                <span>${note.description}
                                </span>
                            </div>
                            <div class="bottom-content">
                                <span>${note.date}</span>
                                <div class="settings">
                                    <i onclick=showMenu(this) class="fa-solid fa-ellipsis iconel"></i>
                                    <ul class="menu">
                                        <li onclick="editNote(${index},'${note.title}','${note.description}')"><i class="fa-light fa-pen"></i>Edit</li>
                                        <li onclick="deleteNote(${index})"><i class="fa-duotone fa-trash"></i>Delete</li>
                                    </ul>
                                </div>
                            </div>
                     </li>`;

    addBox.insertAdjacentHTML("afterend", litag);
  });
};

function showMenu(elem) {
  elem.parentElement.classList.add("show");
  document.onclick = (e) => {
    if (e.target.tagName != "I" || e.target != elem) {
      elem.parentElement.classList.remove("show");
    }
  };
  // console.log(elem)
}

function deleteNote(noteId) {
  notes.splice(noteId, 1);

  localStorage.setItem("notes", JSON.stringify(notes));
  showNotes();
}

function editNote(noteId, title, description) {
  titleTag.value = title;
  descTag.value = description;
  addBox.click();

  deleteNote(noteId);
  // console.log(noteId)
}

addBox.onclick = () => popupBox.classList.add("show");
closeBox.onclick = () => {
  titleTag.value = "";
  descTag.value = "";
  popupBox.classList.remove("show");
};

addBtn.onclick = (e) => {
  e.preventDefault();
  //    menuel.classList.add('hide-icon')

  let ti = titleTag.value;
  let desc = descTag.value;

  let currentDate = new Date();
  let month = months[currentDate.getMonth()];
  let day = currentDate.getDate();
  let year = currentDate.getFullYear();

  let noteInfo = {
    title: ti,
    description: desc,
    date: `${day} ${month} ${year}`,
  };

  notes.push(noteInfo);

  localStorage.setItem("notes", JSON.stringify(notes));

  closeBox.click();

  //    menuel.classList.remove('hide-icon')
  showNotes();
};

showNotes();
- We will first use the document.querySelector to choose our elements, and then we will store their values in a constant variable.
- Now we will create an array of months which will store the value all the months .We will now use the popup window to choose each note element individually using the popupBox.querySelector. We’ll pick out each of the input, textarea, and button elements separately and place their values in another constant variable.
- Now using the JSON.parse method we will store the value of note inside our browser.
- Now we will be creating an anonmyous function inside that we will be creating our form and using the Click Eventlistener when the user click over the icon the notes form will popup.
Just to add functionality, we used the fundamental javascript concept. The user will see the notes form when they click on the icon, and we’ve also included edit and delete buttons using our javascript.
ADVERTISEMENT
The project is now finished, we have completed Notes taking app using HMTL ,CSS and Javascript. Now look at the live preview.
ADVERTISEMENT
Output:
Codepen Preview Of Build A Notes App Using HTML ,CSS & Javascript
Now We have Successfully created our Notes Takin App using HTML , CSS & Javascript . You can use this project directly by copying into your IDE. WE hope you understood the project , If you any doubt feel free to comment!!
You may use this OTP input field on a signup and login form we’ve developed using HTML, CSS to authenticate users on your website.
OTP Input
If you find out this Blog helpful, then make sure to search code with random on google for Front End Projects with Source codes and make sure to Follow the Code with Random Instagram page.
