Build a Multi-Step Form With Step Progress Bar Using HTML,CSS, and JavaScript
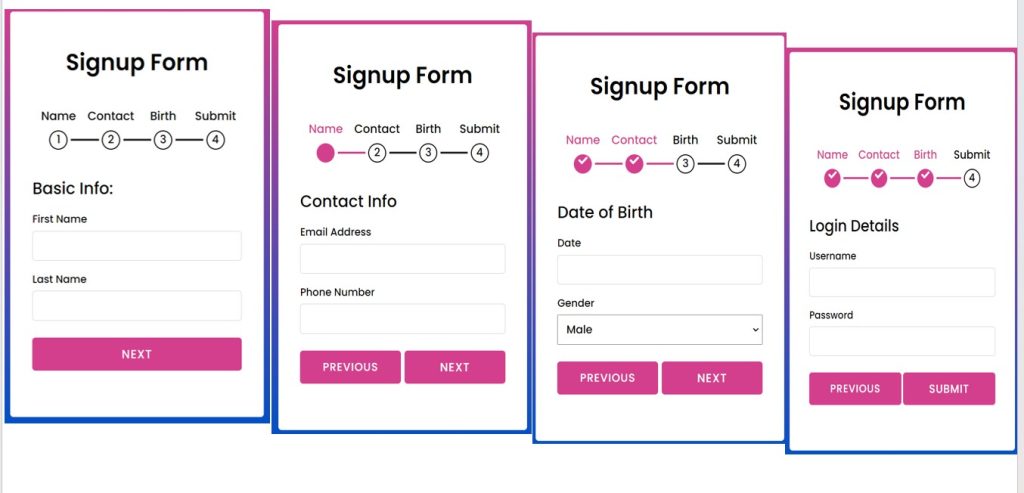
In this tutorial, I’ll walk you through each step of adding a Multi-Step Form With a Step Progress Bar Using HTML, CSS, and JavaScript. As we continue to fill out the form, stages will be displayed above the form, representing the progress bar. “Prev” and “Next” buttons will be present on each form step. You can move between the steps using these buttons.
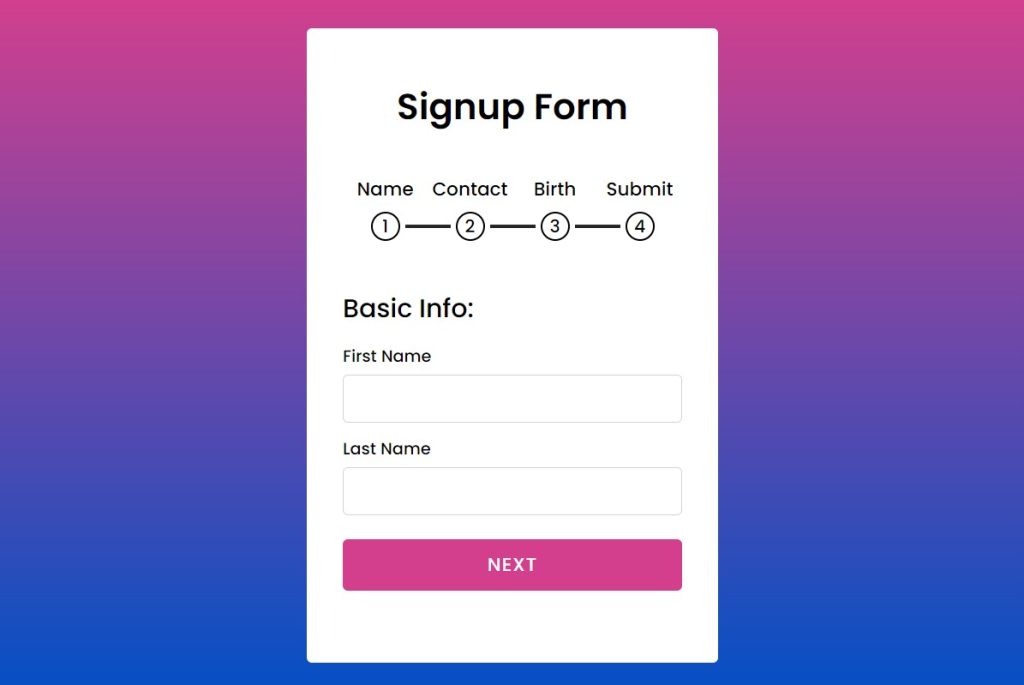
When you wish to divide a very large form into smaller, more manageable forms, multi-step forms are quite helpful. It resembles a wizard in that you must click “Next” to advance to the following screen.
50+ HTML, CSS & JavaScript Projects With Source Code
We must divide long, complicated forms into several steps in order to handle them. The form will feel more manageable and keep users from getting overwhelmed by a sea of form fields by just displaying a few inputs on a screen at once.
Build Multi-Step Form in 3 Easy Steps
Step1: Create the HTML markup
Step 2: Adding Styling to our markup
Step3: Add EventListeners
I hope you have a general idea of what the project entails. In our article, we will go over this project step by step.
Step1: Adding HTML Markup
HTML stands for HyperText Markup Language. This is a markup language. Its main job is to give our project structure. We will provide our project structure by utilising this markup language. So let’s look at our HTML code.
<!DOCTYPE html>
<html lang ="en" dir="ltr">
<head>
  <meta charset="utf-8">
  <link rel="stylesheet" type="text/css" href="style.css">
  <script src="https://kit.fontawesome.com/a076d05399.js"></script>
  <meta name="viewport" content="width-device-width, initial-scale=1.0">
  <title>Multi Step Form</title>
  </head>
<body>
  <div class="container">
    <header>Signup Form</header>
    <div class= "progress-bar">
      <div class="step">
        <p>Name</p>
        <div class="bullet">
          <span>1</span>
      </div>
      <div class="check fas fa-check">
      </div>
    </div>

      <div class="step">
        <p>Contact</p>
        <div class="bullet">
          <span>2</span>
      </div>
      <div class="check fas fa-check">
      </div>
      </div>

      <div class="step">
        <p>Birth</p>
        <div class="bullet">
          <span>3</span>
      </div>
      <div class="check fas fa-check">
      </div>
      </div>

      <div class="step">
        <p>Submit</p>
        <div class="bullet">
          <span>4</span>
      </div>
      <div class="check fas fa-check">
      </div>
      </div>
    </div>
    <div class="form-outer">
      <form action="#">
        <div class="page slidepage">
          <div class="title">Basic Info:</div>
          <div class="field">
            <div class="label">First Name</div>
            <input type="text">
          </div>
          <div class="field">
            <div class="label">Last Name</div>
            <input type="text">
          </div>
          <div class="field nextBtn">
            <button>Next</button>
          </div>
          </div>

        <div class="page">
          <div class="title">Contact Info</div>
          <div class="field">
            <div class="label">Email Address</div>
            <input type="text">
          </div>
          <div class="field">
            <div class="label">Phone Number</div>
            <input type="number">
          </div>
          <div class="field btns">
            <button class="prev-1 prev">Previous</button>
            <button class="next-1 next">Next</button>
          </div>
          </div>

        <div class="page">
          <div class="title">Date of Birth</div>
          <div class="field">
            <div class="label">Date</div>
            <input type="text">
          </div>
          <div class="field">
            <div class="label">Gender</div>
            <select>
              <option>Male</option>
              <option>Female</option>
              <option>Other</option>
            </select>
          </div>
          <div class="field btns">
            <button class="prev-2 prev">Previous</button>
            <button class="next-2 next">Next</button>
          </div>
          </div>


        <div class="page">
          <div class="title">Login Details</div>
          <div class="field">
            <div class="label">Username</div>
            <input type="text">
          </div>
          <div class="field">
            <div class="label">Password</div>
            <input type="password">
          </div>
          <div class="field btns">
            <button class="prev-3 prev">Previous</button>
            <button class="Submit">Submit</button>
          </div>
          </div>
        </form>
      </div>
  </div>
  <script src="index.js"></script>
</body>
</html>
The basic structure of Multi-Step form has been created using the following HTML code. This structure will contain all the information.Step-by-step we explained our code.
Restaurant Website Using HTML and CSS
To link them all together, we will start by including links for JavaScript and CSS in our HTML. Therefore, the Javascript will be in the body section and the CSS link will be in the head part.
We have also added some icons to our multi-step form so to add them in our form we need to add the link of font-awesome into the head section of our form.
//Head Section
 <link rel="stylesheet" type="text/css" href="style.css">
  <script src="https://kit.fontawesome.com/a076d05399.js"></script>
//Body Section
  <script src="index.js"></script>
Now let’s Add the structure for ourMulti-Step Form.
- For our multi-step form, we first fill a container with the div tag.
- We’ll give our form a heading using the <header> tag.
- Now we add a progress bar to our form for that we will create a div with class progress bar.
- Using the <p> tag we will give heading to our different step of form and using the <span> tag we will add the number to our steps.
- Using the step 4 we will be creating 3 additional steps in the same method for our multi-step form.
- Now we will be creating form for each steps.
- We will create a div with class “form-outer” which will be container for our form.
- Using the <form> tag we will add the basic info for our first step. Inside the form tag we will create two input box with type as “text” and we will also create a next button to move to the next step.
- Using the step8 only we will create the form for other steps.
- We will add form for other step using the same method.
Gym Website Using HTML and CSS With Source Code
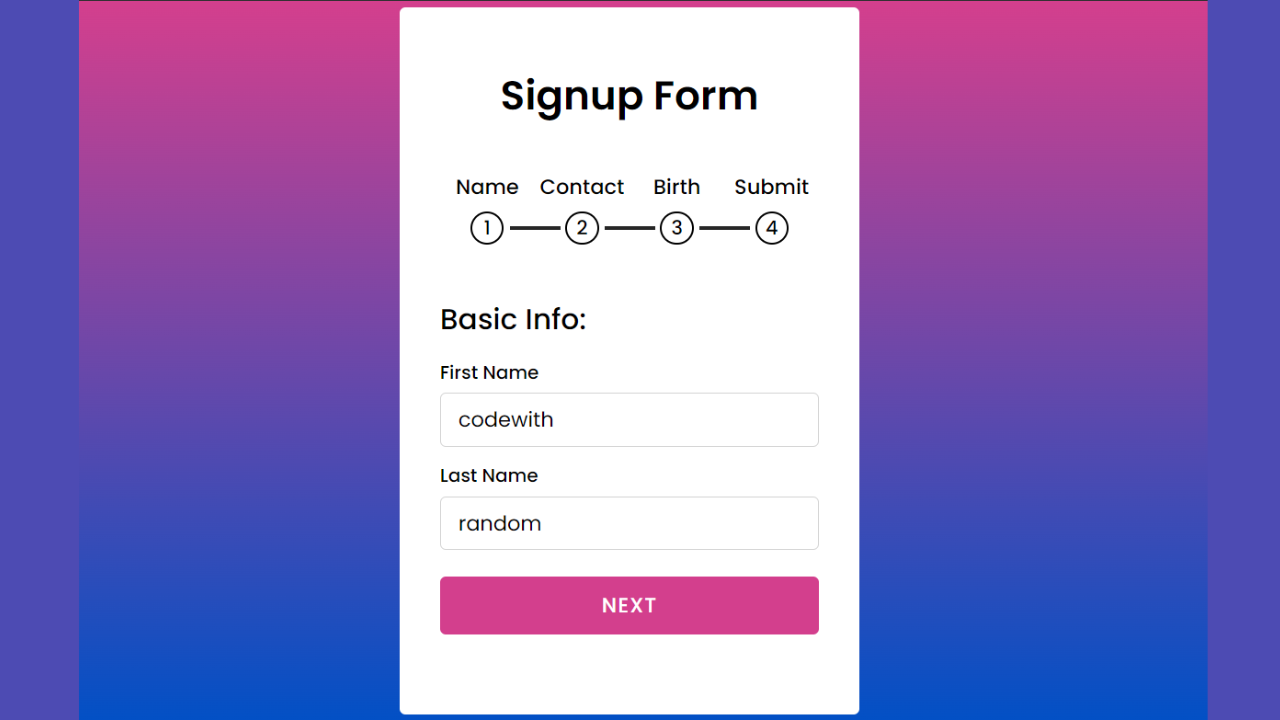
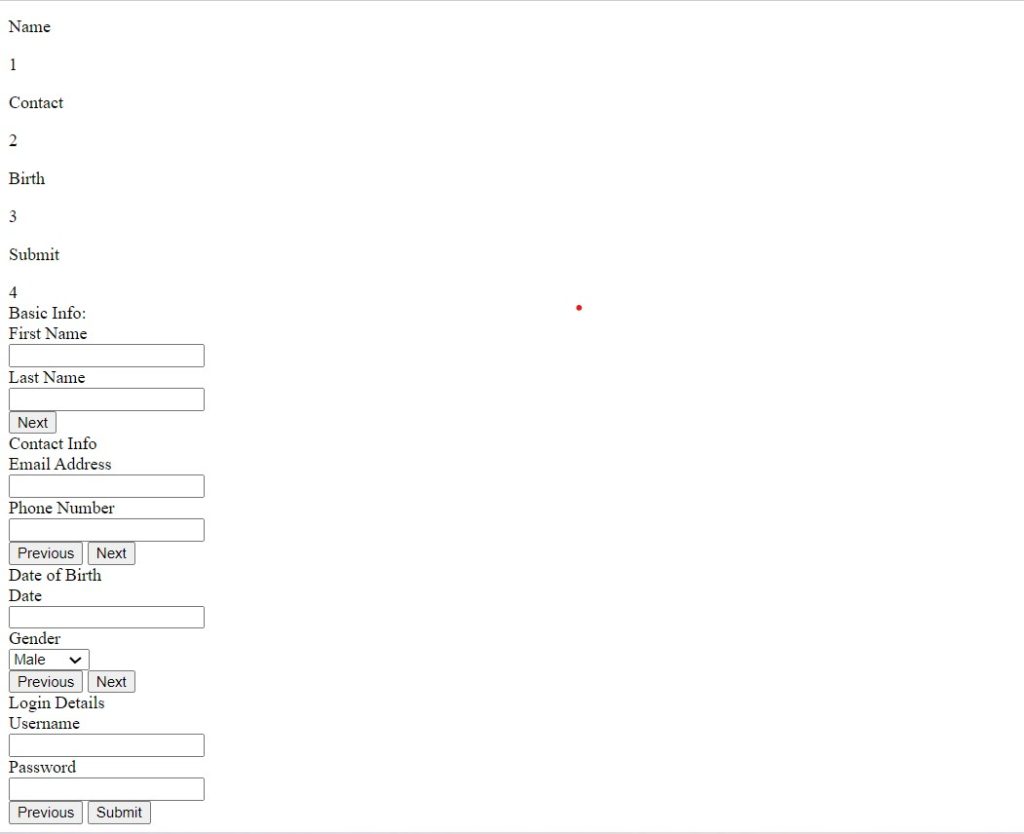
We have now added the basic structure of our webpage. Now we will be using our stylesheet to add styles to our Multi-step for with progress bar but first let’s take a look at our output.
Output:
Step 2: Adding Styling to our markup
Cascading Style Sheets (CSS) is a markup language for describing the presentation of a document written in HTML or XML. CSS, like HTML and JavaScript, is a key component of the World Wide Web.
Now that the multistep form implementation is complete, we must add some CSS snippets to create the layout for our HTML content.
Portfolio Website using HTML and CSS (Source Code)
Use the following snippet of code on the page by adding it to a style element or an external CSS file.
ADVERTISEMENT
@import url('https://fonts.googleapis.com/css?family=Poppins:400,500,600,700&display=swap');
*{
  margin: 0;
  padding: 0;
  outline: none;
  font-family: 'Poppins', sans-serif;
}
body{
  display: flex;
  align-items: center;
  justify-content: center;
  min-height: 100vh;
  overflow: hidden;
  background: url("bg.png"), -webkit-linear-gradient(bottom, #0250c5, #d43f8d);
}
::selection{
  color: #fff;
  background: #d43f8d;
}
.container{
  width: 330px;
  background: #fff;
  text-align: center;
  border-radius: 5px;
  padding: 50px 35px 10px 35px;
}
.container header{
  font-size: 35px;
  font-weight: 600;
  margin: 0 0 30px 0;
}
.container .form-outer{
  width: 100%;
  overflow: hidden;
}
.container .form-outer form{
  display: flex;
  width: 400%;
}
.form-outer form .page{
  width: 25%;
  transition: margin-left 0.3s ease-in-out;
}
.form-outer form .page .title{
  text-align: left;
  font-size: 25px;
  font-weight: 500;
}
.form-outer form .page .field{
  width: 330px;
  height: 45px;
  margin: 45px 0;
  display: flex;
  position: relative;
}
form .page .field .label{
  position: absolute;
  top: -30px;
  font-weight: 500;
}
form .page .field input{
  height: 100%;
  width: 100%;
  border: 1px solid lightgrey;
  border-radius: 5px;
  padding-left: 15px;
  font-size: 18px;
}
form .page .field select{
  width: 100%;
  padding-left: 10px;
  font-size: 17px;
  font-weight: 500;
}
form .page .field button{
  width: 100%;
  height: calc(100% + 5px);
  border: none;
  background: #d33f8d;
  margin-top: -20px;
  border-radius: 5px;
  color: #fff;
  cursor: pointer;
  font-size: 18px;
  font-weight: 500;
  letter-spacing: 1px;
  text-transform: uppercase;
  transition: 0.5s ease;
}
form .page .field button:hover{
  background: #000;
}
form .page .btns button{
  margin-top: -20px!important;
}
form .page .btns button.prev{
  margin-right: 3px;
  font-size: 17px;
}
form .page .btns button.next{
  margin-left: 3px;
}
.container .progress-bar{
  display: flex;
  margin: 40px 0;
  user-select: none;
}
.container .progress-bar .step{
  position: relative;
  text-align: center;
  width: 100%;
}
.container .progress-bar .step p{
  font-size: 18px;
  font-weight: 500;
  color: #000;
  margin-bottom: 8px;
  transition: 0.2s;
}
.progress-bar .step p.active{
  color: blue;
}
.progress-bar .step .bullet{
  height: 25px;
  width: 25px;
  border: 2px solid #000;
  display: inline-block;
  border-radius: 50%;
  position: relative;
  transition: 0.2s;
  font-weight: 500;
  font-size: 17px;
  line-height: 25px;
}
.progress-bar .step .bullet.active{
  border-color: #d43f8d;
  background: #d43f8d;
}
.progress-bar .step .bullet span{
  position: absolute;
  left: 50%;
  transform: translateX(-50%);
}
.progress-bar .step .bullet.active span{
  display: none;
}
.progress-bar .step .bullet:before,
.progress-bar .step .bullet:after{
  position: absolute;
  content: '';
  bottom: 11px;
  right: -51px;
  height: 3px;
  width: 44px;
  background: #262626;
}
.progress-bar .step .bullet.active:after{
  background: #d43f8d;
  transform: scaleX(0);
  transform-origin: left;
  animation: animate 0.3s linear forwards;
}
@keyframes animate {
  100%{
    transform: scaleX(1);
  }
}
.progress-bar .step:last-child .bullet:before,
.progress-bar .step:last-child .bullet:after{
  display: none;
}
.progress-bar .step p.active{
  color: #d43f8d;
  transition: 0.2s linear;
}
.progress-bar .step .check{
  position: absolute;
  left: 50%;
  top: 70%;
  font-size: 15px;
  transform: translate(-50%, -50%);
  display: none;
}
.progress-bar .step .check.active{
  display: block;
  color: #fff;
}
Step1: We’ll include the poppins font family using the import link. This typeface will be used in our project.
ADVERTISEMENT
Using the universal selector we will set the margin & padding as “zero” to our webpage. Using the font-family property we will set the font -family to ‘poppins’.
ADVERTISEMENT
10+ Javascript Projects For Beginners With Source Code
ADVERTISEMENT
Using the body tag we will set the display to “flex” and using the align-item property we will align the item to the center and using the minimum -height we will set the minimum height of 100vh .
ADVERTISEMENT
Using the background property we will add gradient background of blue & pink color
@import url('https://fonts.googleapis.com/css?family=Poppins:400,500,600,700&display=swap');
*{
  margin: 0;
  padding: 0;
  outline: none;
  font-family: 'Poppins', sans-serif;
}
body{
  display: flex;
  align-items: center;
  justify-content: center;
  min-height: 100vh;
  overflow: hidden;
  background: url("bg.png"), -webkit-linear-gradient(bottom, #0250c5, #d43f8d);
}
::selection{
  color: #fff;
  background: #d43f8d;
}
Output:
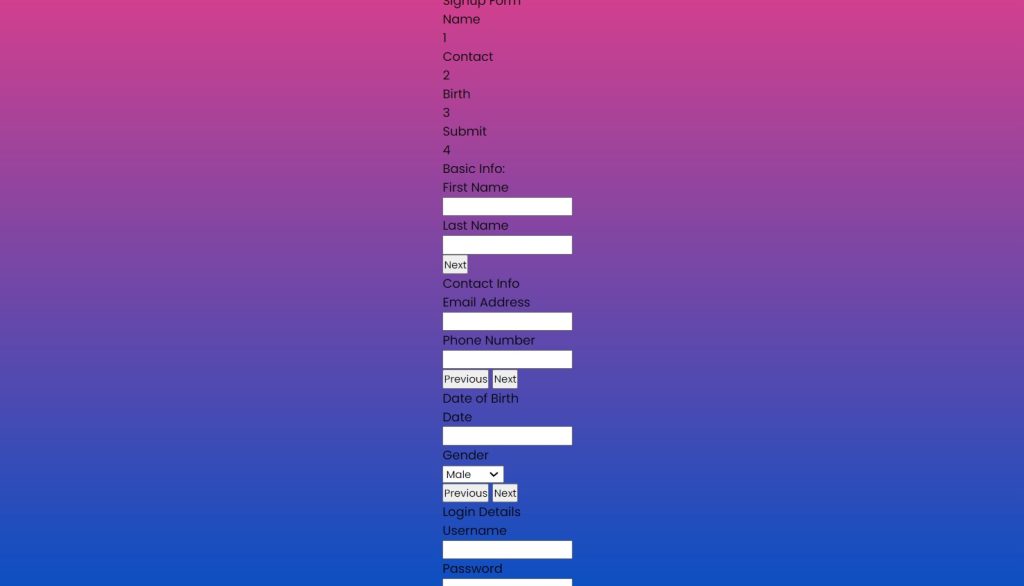
Step2: Using the class selector we will add styling to our container . We added some width of 330px and using the text -align property we will align the text to the center & using the border-radius we will add some curnvess to our container.
Using the child selector method we will addd styling to the header of our form . The font-size set to 35px and font-weight is set to 600.
How to Create a Weather App using JavaScript
We will add the styling to all the form element in our multi -step form just once go through the code you will understand the code easily and i will suggest you to add styling to your project. which help you in better understanding the project.
.container .form-outer{
  width: 100%;
  overflow: hidden;
}
.container .form-outer form{
  display: flex;
  width: 400%;
}
.form-outer form .page{
  width: 25%;
  transition: margin-left 0.3s ease-in-out;
}
.form-outer form .page .title{
  text-align: left;
  font-size: 25px;
  font-weight: 500;
}
.form-outer form .page .field{
  width: 330px;
  height: 45px;
  margin: 45px 0;
  display: flex;
  position: relative;
}
form .page .field .label{
  position: absolute;
  top: -30px;
  font-weight: 500;
}
form .page .field input{
  height: 100%;
  width: 100%;
  border: 1px solid lightgrey;
  border-radius: 5px;
  padding-left: 15px;
  font-size: 18px;
}
form .page .field select{
  width: 100%;
  padding-left: 10px;
  font-size: 17px;
  font-weight: 500;
}
form .page .field button{
  width: 100%;
  height: calc(100% + 5px);
  border: none;
  background: #d33f8d;
  margin-top: -20px;
  border-radius: 5px;
  color: #fff;
  cursor: pointer;
  font-size: 18px;
  font-weight: 500;
  letter-spacing: 1px;
  text-transform: uppercase;
  transition: 0.5s ease;
}
form .page .field button:hover{
  background: #000;
}
form .page .btns button{
  margin-top: -20px!important;
}
form .page .btns button.prev{
  margin-right: 3px;
  font-size: 17px;
}
form .page .btns button.next{
  margin-left: 3px;
}
.container .progress-bar{
  display: flex;
  margin: 40px 0;
  user-select: none;
}
.container .progress-bar .step{
  position: relative;
  text-align: center;
  width: 100%;
}
.container .progress-bar .step p{
  font-size: 18px;
  font-weight: 500;
  color: #000;
  margin-bottom: 8px;
  transition: 0.2s;
}
.progress-bar .step p.active{
  color: blue;
}
.progress-bar .step .bullet{
  height: 25px;
  width: 25px;
  border: 2px solid #000;
  display: inline-block;
  border-radius: 50%;
  position: relative;
  transition: 0.2s;
  font-weight: 500;
  font-size: 17px;
  line-height: 25px;
}
.progress-bar .step .bullet.active{
  border-color: #d43f8d;
  background: #d43f8d;
}
.progress-bar .step .bullet span{
  position: absolute;
  left: 50%;
  transform: translateX(-50%);
}
.progress-bar .step .bullet.active span{
  display: none;
}
.progress-bar .step .bullet:before,
.progress-bar .step .bullet:after{
  position: absolute;
  content: '';
  bottom: 11px;
  right: -51px;
  height: 3px;
  width: 44px;
  background: #262626;
}
.progress-bar .step .bullet.active:after{
  background: #d43f8d;
  transform: scaleX(0);
  transform-origin: left;
  animation: animate 0.3s linear forwards;
}
@keyframes animate {
  100%{
    transform: scaleX(1);
  }
}
.progress-bar .step:last-child .bullet:before,
.progress-bar .step:last-child .bullet:after{
  display: none;
}
.progress-bar .step p.active{
  color: #d43f8d;
  transition: 0.2s linear;
}
.progress-bar .step .check{
  position: absolute;
  left: 50%;
  top: 70%;
  font-size: 15px;
  transform: translate(-50%, -50%);
  display: none;
}
.progress-bar .step .check.active{
  display: block;
  color: #fff;
}
Output:

Step3: Adding Javascript Code
const slidePage = document.querySelector(".slidepage");
const firstNextBtn = document.querySelector(".nextBtn");
const prevBtnSec = document.querySelector(".prev-1");
const nextBtnSec = document.querySelector(".next-1");
const prevBtnThird = document.querySelector(".prev-2");
const nextBtnThird = document.querySelector(".next-2");
const prevBtnFourth = document.querySelector(".prev-3");
const submitBtn = document.querySelector(".submit");
const progressText = document.querySelectorAll(".step p");
const progressCheck = document.querySelectorAll(".step .check");
const bullet = document.querySelectorAll(".step .bullet");
let max = 4;
let current = 1;


firstNextBtn.addEventListener("click", function (){
    slidePage.style.marginLeft = "-25%";
    bullet[current - 1].classList.add("active");
    progressText[current - 1].classList.add("active");
    progressCheck[current - 1].classList.add("active");
    current += 1;
})
nextBtnSec.addEventListener("click", function (){
    slidePage.style.marginLeft = "-50%";
    bullet[current - 1].classList.add("active");
    progressText[current - 1].classList.add("active");
    progressCheck[current - 1].classList.add("active");
    current += 1;
})
nextBtnThird.addEventListener("click", function (){
    slidePage.style.marginLeft = "-75%";
    bullet[current - 1].classList.add("active");
    progressText[current - 1].classList.add("active");
    progressCheck[current - 1].classList.add("active");
    current += 1;
})
submitBtn.addEventListener("click", function (){
    bullet[current - 1].classList.add("active");
    progressText[current - 1].classList.add("active");
    progressCheck[current - 1].classList.add("active");
    current += 1;
    setTimeout(function (){
        alert("You´re successfully Signed up ♥");
        location.reload();
    }, 800)
})

prevBtnSec.addEventListener("click", function (){
    slidePage.style.marginLeft = "0%";
    bullet[current - 2].classList.remove("active");
    progressText[current - 2].classList.remove("active");
    progressCheck[current - 2].classList.remove("active");
    current -= 1;
})
prevBtnThird.addEventListener("click", function (){
    slidePage.style.marginLeft = "-25%";
    bullet[current - 2].classList.remove("active");
    progressText[current - 2].classList.remove("active");
    progressCheck[current - 2].classList.remove("active");
    current -= 1;
})
prevBtnFourth.addEventListener("click", function (){
    slidePage.style.marginLeft = "-50%";
    bullet[current - 2].classList.remove("active");
    progressText[current - 2].classList.remove("active");
    progressCheck[current - 2].classList.remove("active");
    current -= 1;
})- First of all we create some constant variable using the const keyword .
- Inside the variable we will select our HTML elements using the document.queryselector() method.
- We will also create two variable max & current using the let keyword and inside that we will define the maximum value to 4 and minimum value to 1.
- Now we will add an EventListener to our Next button. As the user will click on the next button margin left will set to -25% and three class will be active and the next form will appear and the current value increases by 1.
- In the same method we will add an event listener to the second & third button and accordingly the value of margin and class we will be added .
- Now we will add Event listener to our previous button we will just change the value of left margin and using the classList.remove method we will remove the class .
We have added the javascript concepts if look through the code once you will understand whole if will try to explain all the lines step -by -step.
Create Rock Paper Scissors Game Using JavaScript
The project is now finished, we have completed our Multi-step form HMTL ,CSS and Javascript. Now look at the live preview.
Output:
Live Preview Of Of Multi-Step Form With Step Progress Bar Using JavaScript
Now We have Successfully created our Captcha verification using HTML , CSS & Javascript. You can use this project directly by copying into your IDE. WE hope you understood the project , If you any doubt feel free to comment!!
If you find out this Blog helpful, then make sure to search code with random on google for Front End Projects with Source codes and make sure to Follow the Code with Random Instagram page.
What is a multi-step form?
When you wish to divide a very large form into smaller, more manageable forms, multi-step forms are quite helpful. It resembles a wizard in that you must click “Next” to advance to the following screen.
Why Use a multi-step form?
The fact that multi-step forms divide the form into smaller sections to lessen the visitor’s question overload makes them fascinating tools for increasing customer engagement.
