How to Create Card Slider Using HTML, CSS & JavaScript
Welcome to Code With Random blog. In this blog, we learn how we create a Card Slider. We use HTML, CSS, and JavaScript for this Card Slider.
I hope you enjoy our blog so let’s start with a basic HTML structure for a Card Slider.
HTML Code for Card Slider
<div class="swiper-container">
<div class="swiper-wrapper">
<div class="slider-item swiper-slide">
<div class="slider-image-wrapper">
<img class="slider-image" src="https://images.unsplash.com/photo-1498307833015-e7b400441eb8?ixid=MXwxMjA3fDB8MHxwaG90by1wYWdlfHx8fGVufDB8fHw%3D&ixlib=rb-1.2.1&auto=format&fit=crop&w=2600&q=80" alt="SliderImg">
</div>
<div class="slider-item-content">
<h1>Postcards From Italy</h1>
<p>Lorem ipsum dolor sit amet, consectetur adipiscing elit, sed do eiusmod tempor incididunt ut labore</p>
</div>
</div>
<div class="slider-item swiper-slide">
<div class="slider-image-wrapper">
<img class="slider-image" src="https://images.unsplash.com/photo-1491900177661-4e1cd2d7cce2?ixid=MXwxMjA3fDB8MHxwaG90by1wYWdlfHx8fGVufDB8fHw%3D&ixlib=rb-1.2.1&auto=format&fit=crop&w=2250&q=80" alt="SliderImg">
</div>
<div class="slider-item-content">
<h1>Bunker</h1>
<p>Lorem ipsum dolor sit amet, consectetur adipiscing elit, sed do eiusmod tempor incididunt ut labore</p>
</div>
</div>
<div class="slider-item swiper-slide">
<div class="slider-image-wrapper">
<img class="slider-image" src="https://images.unsplash.com/photo-1482192505345-5655af888cc4?ixlib=rb-1.2.1&ixid=MXwxMjA3fDB8MHxwaG90by1wYWdlfHx8fGVufDB8fHw%3D&auto=format&fit=crop&w=2600&q=80" alt="SliderImg">
</div>
<div class="slider-item-content">
<h1>Small Mountain</h1>
<p>Lorem ipsum dolor sit amet, consectetur adipiscing elit, sed do eiusmod tempor incididunt ut labore</p>
</div>
</div>
<div class="slider-item swiper-slide">
<div class="slider-image-wrapper">
<img class="slider-image" src="https://images.unsplash.com/photo-1564604761388-83eafc96f668?ixid=MXwxMjA3fDB8MHxwaG90by1wYWdlfHx8fGVufDB8fHw%3D&ixlib=rb-1.2.1&auto=format&fit=crop&w=2250&q=801.2.1&auto=format&fit=crop&w=2167&q=80" alt="SliderImg">
</div>
<div class="slider-item-content">
<h1>Walking On a Dream</h1>
<p>Lorem ipsum dolor sit amet, consectetur adipiscing elit, sed do eiusmod tempor incididunt ut labore</p>
</div>
</div>
</div>
<div class="slider-buttons">
<button class="swiper-button-prev">Prev</button>
<button class="swiper-button-next">Next</button>
</div>
<div class="swiper-pagination"></div>
</div>
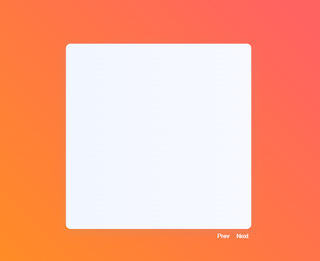
There is all the HTML code for the Card Slider. Now, you can see output without CSS, then we write Css and Javascript for Card Slider.
Make Travel Booking App Ui Clone Using Html, Css And, Javascript
output
* {
box-sizing: border-box;
}
html {
width: 100%;
margin: 0;
padding: 0;
height: 100%;
}
body {
font-family: 'Montserrat', sans-serif;
margin: 0;
width: 100%;
height: 100vh;
background-image: linear-gradient(45deg, rgba(255, 166, 0, 1) 14.7%, rgba(255, 99, 97, 1) 73%);
background-size: 200% 200%;
animation: gradient 15s ease infinite;
display: flex;
justify-content: center;
align-items: center;
flex-direction: column;
padding: 32px;
}
@keyframes gradient {
0% {
background-position: 0% 50%;
}
50% {
background-position: 100% 50%;
}
100% {
background-position: 0% 50%;
}
}
h1 {
margin: 0;
font-weight: bold;
font-size: 24px;
line-height: 32px;
color: #26384e;
transform: translateY(20px);
transition: all 0.4s ease;
transition-delay: 0.2s;
overflow: hidden;
max-width: 100%;
text-overflow: ellipsis;
white-space: nowrap;
}
@media screen and (max-width: 520px) {
h1 {
font-size: 16px;
line-height: 24px;
}
}
p {
font-size: 16px;
line-height: 24px;
color: #889db8;
transform: translateY(20px);
transition: all 0.4s ease;
transition-delay: 0.3s;
display: -webkit-box;
-webkit-line-clamp: 3;
-webkit-box-orient: vertical;
overflow: hidden;
text-overflow: ellipsis;
}
@media screen and (max-width: 520px) {
p {
font-size: 14px;
line-height: 20px;
}
}
.swiper-wrapper {
width: 100%;
height: 100%;
display: flex;
align-items: center;
z-index: 1;
position: relative;
}
.swiper-container {
background: linear-gradient(270deg, rgba(247, 249, 255, 1) 0%, rgba(242, 246, 255, 1) 100%);
box-shadow: rgba(149, 157, 165, 0.2) 0px 8px 24px;
width: 100%;
position: relative;
max-width: 420px;
height: 100%;
max-height: 420px;
border-radius: 10px;
}
.slider-image-wrapper {
height: 200px;
width: 100%;
overflow: hidden;
}
.slider-item {
width: 100%;
height: 100%;
border-radius: 10px;
overflow: hidden;
display: flex;
flex-direction: column;
flex-shrink: 0;
opacity: 0;
background: linear-gradient(270deg, rgba(247, 249, 255, 1) 0%, rgba(242, 246, 255, 1) 100%);
cursor: grab;
}
.slider-item-content {
padding: 32px;
display: flex;
flex-direction: column;
justify-content: center;
transition: 0.4s;
}
.slider-item-content > * {
opacity: 0;
transform: translateY(20px);
}
.swiper-slide-active .slider-item-content > * {
transform: translateY(0px);
opacity: 1;
}
.slider-image {
width: 100%;
height: 100%;
object-fit: cover;
transition: 0.2s;
}
.swiper-pagination {
position: absolute;
left: 50%;
bottom: 8px;
transform: translatex(-50%);
z-index: 1;
width: auto !important;
}
.swiper-pagination-bullet {
border-radius: 0;
width: 8px;
height: 8px;
border-radius: 50%;
line-height: 30px;
font-size: 12px;
opacity: 1;
background: rgba(255, 185, 0, 0.3);
display: inline-block;
margin-right: 8px;
cursor: pointer;
transition: all 0.2s;
}
.swiper-pagination-bullet-active {
background: #ffb200;
width: 20px;
border-radius: 10px;
}
.slider-buttons {
position: absolute;
display: flex;
top: 100%;
justify-content: flex-end;
width: 100%;
padding-top: 8px;
}
.swiper-button-next, .swiper-button-prev {
background-color: transparent;
border: none;
cursor: pointer;
outline: none;
color: #fff;
position: relative;
margin-left: 4px;
}
.swiper-button-next:before, .swiper-button-prev:before {
content: '';
position: absolute;
background-color: #fff;
height: 1px;
width: 0;
left: 0;
bottom: -1px;
transition: 0.2s;
}
.swiper-button-next:hover:before, .swiper-button-prev:hover:before {
width: 100%;
}
.socials {
position: fixed;
top: 12px;
right: 16px;
display: flex;
align-items: center;
}
.socials .social-link {
display: inline-block;
margin-left: 8px;
color: #fff;
}
@media screen and (max-width: 520px) {
.swiper-button-next:hover:before, .swiper-button-prev:hover:before {
display: none;
}
}
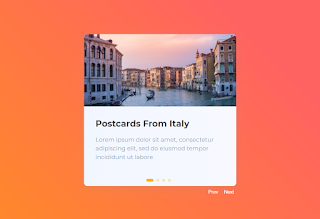
We have completed our CSS section, Here is our updated output HTML + CSS.
output
Sticky Notes Javascript source code
JavaScript Code for Card Slider
Note-: use this CDN link of jQuery and Swiper-bundle link in the Html file With <Script src=”” > tag so javascript Code Work.
https://cdnjs.cloudflare.com/ajax/libs/jquery/3.5.1/jquery.min.js
https://cdnjs.cloudflare.com/ajax/libs/Swiper/6.4.5/swiper-bundle.min.js
var swiper = new Swiper('.swiper-container', {
slidesPerView: 1,
spaceBetween: 20,
effect: 'fade',
loop: true,
speed: 300,
mousewheel: {
invert: false,
},
pagination: {
el: '.swiper-pagination',
clickable: true,
dynamicBullets: true
},
// Navigation arrows
navigation: {
nextEl: '.swiper-button-next',
prevEl: '.swiper-button-prev',
}
});
Final Output Of Card Slider Using HTML, CSS & JavaScript
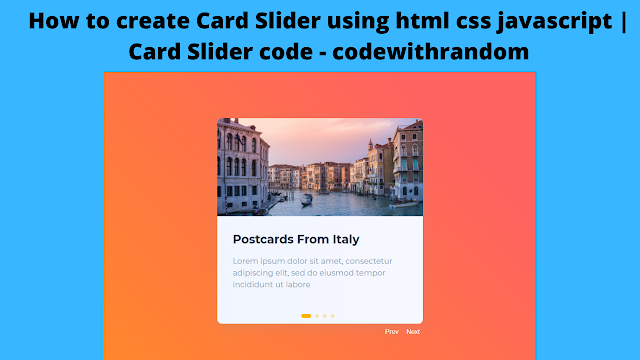
Now we have completed our Card Slider Project. Here is our updated output with javascript. Hope you like the Card Slider. you can see the output video and project screenshots. See our other blogs and gain knowledge in front-end development.
In this post, we learn how to create a Card Slider Using HTML, CSS, and JavaScript. If we made a mistake or any confusion, please drop a comment to reply or help you in easy learning.
Thank You And Happy Learning!!!
Written by – Code With Random/Anki
Code by – Aybüke Ceylan
ADVERTISEMENT
