Music Player Using HTML ,CSS and JavaScript
Hello Coder, Welcome to the Codewithrandom Blog. In this article, we Create Music Player Project Using HTML, CSS, and JavaScript. We create a full-featured Music Player system with buttons for play, pause, advance, and back Using JavaScript Code.

What is a Music Player Project?
| Code by | N/A |
| Project Download | Link Available Below |
| Language used | HTML, CSS, and JavaScript |
| External link / Dependencies | No |
| Responsive | YES |
100+ HTML,CSS and JavaScript Projects With Source Code ( Beginners to Advanced)
We all know that managing code is important while building a project so that it will be easy for the user to use that code in the future as well. So we will follow the same method we will be creating the different files for creating our project.
- index.html -defines the element structure that would be displayed on the page through the HTML layout.
- style.css- includes styling CSS code. We may style the various parts with CSS to improve the visual appeal.
- Index.js – includes JavaScript programming. For the player to perform all of its functions, a number of functions must cooperate. For instance, the ability to play, pause, switch between songs, pop up the song’s title and progress bar when it is playing, and allow the user to click on the progress bar to get to a certain place in the song are all examples of features.
Step 1: Html Music Player Code:-
 <!DOCTYPE html>
<html lang="en">
<head>
<meta charset="UTF-8" />
<meta name="viewport" content="width=device-width, initial-scale=1.0" />
<link rel="stylesheet" href="style.css" />
<link
rel="stylesheet"
href="https://cdnjs.cloudflare.com/ajax/libs/font-awesome/4.7.0/css/font-awesome.css"
/>
<title>Music Player</title>
</head>
<body>
<h1>Music Player</h1>
<div class="music-container" id="music-container">
<div class="music-info">
<h4 class="title" id="title"></h4>
<div class="progress-container" id="progress-container">
<div class="progress" id="progress"></div>
</div>
</div>
<audio src="./music/happyrock.mp3" id="audio"></audio>
<div class="img-container">
<img src="./images/happyrock.jpg" alt="music-cover" id="cover" />
</div>
<div class="navigation">
<button id="prev" class="action-btn">
<i class="fa fa-backward" aria-hidden="true"></i>
</button>
<button id="play" class="action-btn action-btn-big">
<i class="fa fa-play" aria-hidden="true"></i>
</button>
<button id="next" class="action-btn">
<i class="fa fa-forward" aria-hidden="true"></i>
</button>
</div>
</div>
<script src="script.js"></script>
</body>
</html>
First, let’s make the index.html file. We will include the CSS for our Style.css there. We will use some icons in this project, thus we will include the font-awesome link to our Head section in order to incorporate those icons into our project.
Portfolio Website using HTML and CSS (Source Code)
We will now integrate the Javascript function into our project by adding the link to our Javascript. Because we want the browser to render our javascript at the end and because we want our function to only run after our project body, we will include the link inside our body.
//Head Section
<link rel="stylesheet" href="style.css" />
<link rel="stylesheet" href="https://cdnjs.cloudflare.com/ajax/libs/font-awesome/4.7.0/css/font-awesome.css" />
//Body Section
<script src="app.js"></script>
Adding the Structure for our Music Player Html:
- First of all using the <h1> tag selector we will give a heading to our music player.
- Now, inside the container we just created for the music, we’ll construct another div for the music information. Finally, we’ll add the music title using the <h4> tag. All of this will be done using the
<div> tag. - The next, previous, and play/pause buttons will now be included as icons to the music navigation section.
There is all the HTML code for the Music player. Now, you can see output without CSS, then we write CSS for our music player.
Gym Website Using HTML ,CSS and JavaScript (Source Code)
Only Html Code Output:-
Step-2- CSS Music Player Code:-
@import url("https://fonts.googleapis.com/css2?family=Open+Sans:wght@400;600;700&display=swap");
* {
outline: none;
box-sizing: border-box;
}
body {
background-image: linear-gradient(
0deg,
rgba(247, 247, 247, 1) 23.8%,
rgba(252, 221, 221, 1) 92%
);
font-family: "Open Sans", sans-serif;
margin: 0;
height: 100vh;
display: flex;
align-items: center;
justify-content: center;
flex-direction: column;
}
.music-container {
background-color: #fff;
border-radius: 15px;
box-shadow: 0 20px 20px 0 rgba(252, 169, 169, 0.6);
display: flex;
padding: 20px 30px;
position: relative;
margin: 100px 0;
z-index: 10;
}
.img-container {
position: relative;
width: 110px;
}
.img-container::after {
content: "";
background-color: #fff;
border-radius: 50%;
position: absolute;
bottom: 100%;
left: 50%;
width: 20px;
height: 20px;
transform: translate(-50%, 50%);
box-shadow: 0 0 0px 10px #000;
}
.img-container img {
border-radius: 50%;
object-fit: cover;
height: 110px;
width: inherit;
position: absolute;
bottom: 0;
left: 0;
animation: rotate 3s linear infinite;
animation-play-state: paused;
}
.music-container.play .img-container img {
animation-play-state: running;
}
@keyframes rotate {
from {
transform: rotate(0deg);
}
to {
transform: rotate(360deg);
}
}
.navigation {
display: flex;
align-items: center;
justify-content: center;
z-index: 1;
}
.action-btn {
background-color: #fff;
border: 0;
color: #dfdbdf;
font-size: 20px;
cursor: pointer;
padding: 10px;
margin: 0 20px;
}
.action-btn.action-btn-big {
color: #cdc2d0;
font-size: 30px;
}
.music-info {
background-color: rgba(255, 255, 255, 0.5);
width: calc(100% - 40px);
padding: 10px 10px 10px 150px;
border-radius: 15px 15px 0px 0px;
position: absolute;
top: 0;
left: 20px;
opacity: 0;
transform: translateY(0%);
transition: transform 0.3s ease-in, opacity 0.3s ease-in;
z-index: 0;
}
.music-container.play .music-info {
opacity: 1;
transform: translateY(-100%);
}
.music-info h4 {
margin: 0;
}
.progress-container {
background-color: #fff;
border: 5px;
cursor: pointer;
margin: 10px 0;
height: 4px;
width: 100%;
}
.progress {
background-color: #fe8daa;
border-radius: 5px;
height: 100%;
width: 0%;
transform: width 0.1s linear;
}We will apply a linear gradient backdrop to the body of the webpage using the body tag selector. We will also use the font-family property to set the font family as “open-sans,” and the text-align property to center the text.
@import url("https://fonts.googleapis.com/css2?family=Open+Sans:wght@400;600;700&display=swap");
* {
outline: none;
box-sizing: border-box;
}
body {
background-image: linear-gradient(
0deg,
rgba(247, 247, 247, 1) 23.8%,
rgba(252, 221, 221, 1) 92%
);
font-family: "Open Sans", sans-serif;
margin: 0;
height: 100vh;
display: flex;
align-items: center;
justify-content: center;
flex-direction: column;
}Step2:We will now style the music container using the class selector. We’ll make the background white, and we’ll give our audio container a box shadow using the box shadow property. We also gave our music container a 100-pixel margin.
Using the keyframes we will add an animation effect to our music player we will add rotate effect to the music disc and we will also add different keyframes to add the rotating look to our music player.
.img-container img {
border-radius: 50%;
object-fit: cover;
height: 110px;
width: inherit;
position: absolute;
bottom: 0;
left: 0;
animation: rotate 3s linear infinite;
animation-play-state: paused;
}
.music-container.play .img-container img {
animation-play-state: running;
}
@keyframes rotate {
from {
transform: rotate(0deg);
}
to {
transform: rotate(360deg);
}
}
.navigation {
display: flex;
align-items: center;
justify-content: center;
z-index: 1;
}
.action-btn {
background-color: #fff;
border: 0;
color: #dfdbdf;
font-size: 20px;
cursor: pointer;
padding: 10px;
margin: 0 20px;
}
.action-btn.action-btn-big {
color: #cdc2d0;
font-size: 30px;
}
.music-info {
background-color: rgba(255, 255, 255, 0.5);
width: calc(100% - 40px);
padding: 10px 10px 10px 150px;
border-radius: 15px 15px 0px 0px;
position: absolute;
top: 0;
left: 20px;
opacity: 0;
transform: translateY(0%);
transition: transform 0.3s ease-in, opacity 0.3s ease-in;
z-index: 0;
}
.music-container.play .music-info {
opacity: 1;
transform: translateY(-100%);
}
.music-info h4 {
margin: 0;
}
Step3: The progress bar will now have styling added using the class selector (.progress-container). We’ll choose white as the backdrop colour and give our progress bar a 5 px border.
Create A Todo List App in HTML CSS & JavaScript
.progress-container {
background-color: #fff;
border: 5px;
cursor: pointer;
margin: 10px 0;
height: 4px;
width: 100%;
}
.progress {
background-color: #fe8daa;
border-radius: 5px;
height: 100%;
width: 0%;
transform: width 0.1s linear;
}Step 3: JavaScript Music Player Code:-
const musicContainer = document.getElementById("music-container");
const playBtn = document.getElementById("play");
const prevBtn = document.getElementById("prev");
const nextBtn = document.getElementById("next");
const audio = document.getElementById("audio");
const progress = document.getElementById("progress");
const progressContainer = document.getElementById("progress-container");
const title = document.getElementById("title");
const cover = document.getElementById("cover");
// Songs Titles
const songs = ["happyrock", "jazzyfrenchy", "ukulele"];
// KeepTrack of song
let songIndex = 0;
// Initially load song details into DOM
loadSong(songs[songIndex]);
// Update song details
function loadSong(song) {
title.innerText = song;
audio.src = `./music/${song}.mp3`;
cover.src = `./images/${song}.jpg`;
}
// Play Song
function playSong() {
musicContainer.classList.add("play");
playBtn.querySelector("i.fa").classList.remove("fa-play");
playBtn.querySelector("i.fa").classList.add("fa-pause");
audio.play();
}
// Pause Song
function pauseSong() {
musicContainer.classList.remove("play");
playBtn.querySelector("i.fa").classList.add("fa-play");
playBtn.querySelector("i.fa").classList.remove("fa-pause");
audio.pause();
}
// Previous Song
function prevSong() {
songIndex--;
if (songIndex < 0) {
songIndex = songs.length - 1;
}
loadSong(songs[songIndex]);
playSong();
}
// Next Song
function nextSong() {
songIndex++;
if (songIndex > songs.length - 1) {
songIndex = 0;
}
loadSong(songs[songIndex]);
playSong();
}
// Update Progress bar
function updateProgress(e) {
const { duration, currentTime } = e.srcElement;
const progressPerCent = (currentTime / duration) * 100;
progress.style.width = `${progressPerCent}%`;
}
// Set Progress
function setProgress(e) {
const width = this.clientWidth;
const clickX = e.offsetX;
const duration = audio.duration;
audio.currentTime = (clickX / width) * duration;
}
// Event Listeners
playBtn.addEventListener("click", () => {
const isPlaying = musicContainer.classList.contains("play");
if (isPlaying) {
pauseSong();
} else {
playSong();
}
});
// Change Song
prevBtn.addEventListener("click", prevSong);
nextBtn.addEventListener("click", nextSong);
// Time/Song Update
audio.addEventListener("timeupdate", updateProgress);
// Click On progress Bar
progressContainer.addEventListener("click", setProgress);
// Song End
audio.addEventListener("ended", nextSong);
To manage all of the player’s functions, a number of functions cooperate. Accessing the HTML components and defining all the variables.
The required HTML layout components that must be altered dynamically are first chosen using the getElementById() method, and then they are assigned to variable names so they may be accessed and updated.
Gym Website Using HTML ,CSS and JavaScript (Source Code)
Now, we’ll write various functions for various functionalities. A playsonf function will be created in the function, and after that, we’ll just add another class by using the add.classlist method. Changes to the play and pause icons will be made using the add.classlist function.
Similar to the previous event, we’ll develop a function for it and employ the click event listener when the user clicks the symbol, triggering the click event and altering the music player.
Final Output Of Music Player Website Source Code:-
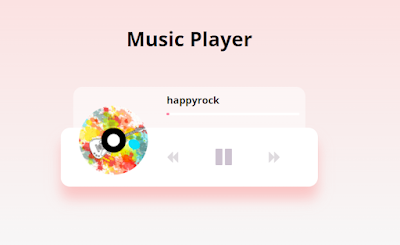
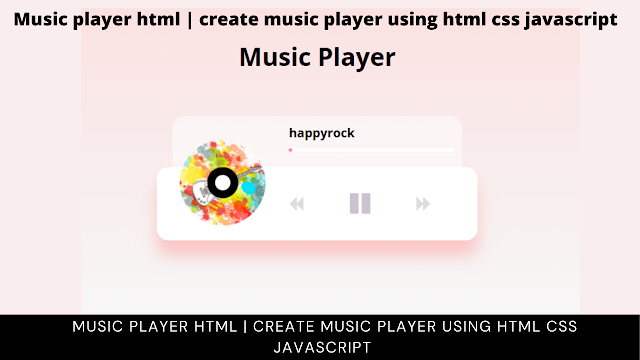
note- use music & image in music player yourself!
ADVERTISEMENT
We have completed our javascript section for the music players, Here is our updated output with javascript. Hope you like the Music player code using html,css, and javascript. You can see the output video and project screenshots. See our other blogs and gain knowledge in front-end development. Thank you
ADVERTISEMENT
50+ HTML, CSS & JavaScript Projects With Source Code
ADVERTISEMENT
In this post, we learn how to create a Music player using simple HTML and CSS, and javascript. If we made a mistake or any confusion, please drop a comment to reply or help you in easy learning.
ADVERTISEMENT
Written by – Code With Random/Anki
ADVERTISEMENT
FAQ For Music Player Project
What is Music Player Project?
A music player is a tool that is used to play audio music in formats like MP3, WAV, etc. When listening to songs, a music player is useful. We regularly listen to music on a music player. Spotify, Google Music, and other popular music streaming services are some examples of music players.
What are the features of a music player?
Music Player has multiple features, such as:
1. Background play.
2. Also, play local files.
3. Easily change songs through music controllers.
4. Provide details about songs.



sir i wiil try but i am not understand is javascript put the song file i am beinger web developer sir place fast slove my problam