Build Multi-Step Form with Progress Bar using HTML & jQuery
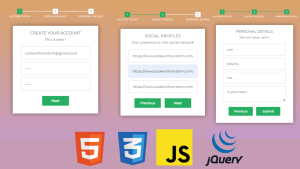
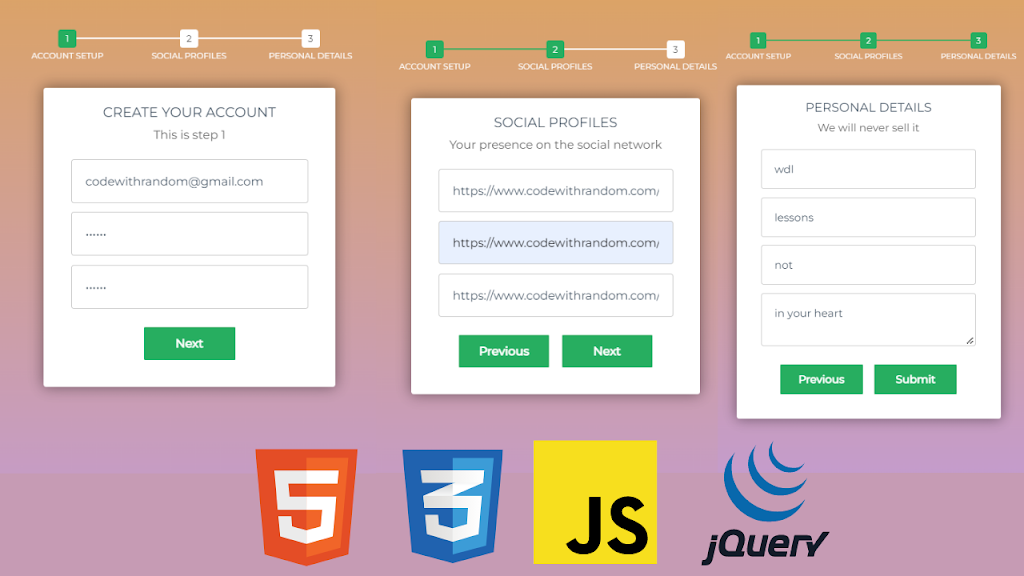
Welcome to Code With Random blog. In this blog, we learn how we create a Multi-Step Form with Progress Bar Using HTML, Css, and jQuery. Multi-Step Form Form Input is divided into Section like Basic Information then the user clicks next and fills Email id or phone number then Click on Next fill in the country or state then submit the form.
In this process, we do not change or redirect the user we just create 3 sections on the same page called Multi-Step Form and we add a progress bar that shows how much you fill like 5% complete process or like that.
So we use jQuery, Html, and Css to build this Multi-Step Form with progress bar functionality so let’s start coding.
100+ JavaScript Projects With Source Code ( Beginners to Advanced)
| Code by | Atakan Goktepe |
| Project Download | Link Available Below |
| Language used | HTML, CSS and JavaScript(jQuery) |
| External link / Dependencies | Yes |
| Responsive | Yes |
I hope you enjoy our blog so let’s start with a basic HTML Structure for the Multi-Step Form with Progress Bar.
HTML Code For Multi-Step Form with Progress Bar
 <!DOCTYPE html>
<html lang="en">
<head>
<meta charset="UTF-8">
<meta http-equiv="X-UA-Compatible" content="IE=edge">
<meta name="viewport" content="width=device-width, initial-scale=1.0">
<title>Multi-Step Form</title>
<link rel="stylesheet" href="style.css">
</head>
<body>
<!-- multistep form -->
<form id="msform">
<!-- progressbar -->
<ul id="progressbar">
<li class="active">Account Setup</li>
<li>Social Profiles</li>
<li>Personal Details</li>
</ul>
<!-- fieldsets -->
<fieldset>
<h2 class="fs-title">Create your account</h2>
<h3 class="fs-subtitle">This is step 1</h3>
<input type="text" name="email" placeholder="Email" />
<input type="password" name="pass" placeholder="Password" />
<input type="password" name="cpass" placeholder="Confirm Password" />
<input type="button" name="next" class="next action-button" value="Next" />
</fieldset>
<fieldset>
<h2 class="fs-title">Social Profiles</h2>
<h3 class="fs-subtitle">Your presence on the social network</h3>
<input type="text" name="twitter" placeholder="Twitter" />
<input type="text" name="facebook" placeholder="Facebook" />
<input type="text" name="gplus" placeholder="Google Plus" />
<input type="button" name="previous" class="previous action-button" value="Previous" />
<input type="button" name="next" class="next action-button" value="Next" />
</fieldset>
<fieldset>
<h2 class="fs-title">Personal Details</h2>
<h3 class="fs-subtitle">We will never sell it</h3>
<input type="text" name="fname" placeholder="First Name" />
<input type="text" name="lname" placeholder="Last Name" />
<input type="text" name="phone" placeholder="Phone" />
<textarea name="address" placeholder="Address"></textarea>
<input type="button" name="previous" class="previous action-button" value="Previous" />
<input type="submit" name="submit" class="submit action-button" value="Submit" />
</fieldset>
</form>
<script src="//cdnjs.cloudflare.com/ajax/libs/jquery/2.1.3/jquery.min.js"></script>
<script src="//cdnjs.cloudflare.com/ajax/libs/jquery-easing/1.3/jquery.easing.min.js"></script>
</body>
</html>
Ecommerce Website Using HTML, CSS, & JavaScript (Source Code)
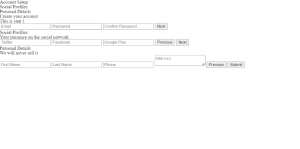
There is all the Html Code for the Multi-Step Form with Progress Bar. Now, you can see output without Css and JavaScript Code. then we write Css and JavaScript for Multi-Step Form with Progress Bar.
Output
CSS Code For Multi-Step Form with Progress Bar
/*custom font*/
@import url(https://fonts.googleapis.com/css?family=Montserrat);
/*basic reset*/
* {margin: 0; padding: 0;}
html {
height: 100%;
/*Image only BG fallback*/
/*background = gradient + image pattern combo*/
background:
linear-gradient(rgba(196, 102, 0, 0.6), rgba(155, 89, 182, 0.6));
}
body {
font-family: montserrat, arial, verdana;
}
/*form styles*/
#msform {
width: 400px;
margin: 50px auto;
text-align: center;
position: relative;
}
#msform fieldset {
background: white;
border: 0 none;
border-radius: 3px;
box-shadow: 0 0 15px 1px rgba(0, 0, 0, 0.4);
padding: 20px 30px;
box-sizing: border-box;
width: 80%;
margin: 0 10%;
/*stacking fieldsets above each other*/
position: relative;
}
/*Hide all except first fieldset*/
#msform fieldset:not(:first-of-type) {
display: none;
}
/*inputs*/
#msform input, #msform textarea {
padding: 15px;
border: 1px solid #ccc;
border-radius: 3px;
margin-bottom: 10px;
width: 100%;
box-sizing: border-box;
font-family: montserrat;
color: #2C3E50;
font-size: 13px;
}
/*buttons*/
#msform .action-button {
width: 100px;
background: #27AE60;
font-weight: bold;
color: white;
border: 0 none;
border-radius: 1px;
cursor: pointer;
padding: 10px 5px;
margin: 10px 5px;
}
#msform .action-button:hover, #msform .action-button:focus {
box-shadow: 0 0 0 2px white, 0 0 0 3px #27AE60;
}
/*headings*/
.fs-title {
font-size: 15px;
text-transform: uppercase;
color: #2C3E50;
margin-bottom: 10px;
}
.fs-subtitle {
font-weight: normal;
font-size: 13px;
color: #666;
margin-bottom: 20px;
}
/*progressbar*/
#progressbar {
margin-bottom: 30px;
overflow: hidden;
/*CSS counters to number the steps*/
counter-reset: step;
}
#progressbar li {
list-style-type: none;
color: white;
text-transform: uppercase;
font-size: 9px;
width: 33.33%;
float: left;
position: relative;
}
#progressbar li:before {
content: counter(step);
counter-increment: step;
width: 20px;
line-height: 20px;
display: block;
font-size: 10px;
color: #333;
background: white;
border-radius: 3px;
margin: 0 auto 5px auto;
}
/*progressbar connectors*/
#progressbar li:after {
content: '';
width: 100%;
height: 2px;
background: white;
position: absolute;
left: -50%;
top: 9px;
z-index: -1; /*put it behind the numbers*/
}
#progressbar li:first-child:after {
/*connector not needed before the first step*/
content: none;
}
/*marking active/completed steps green*/
/*The number of the step and the connector before it = green*/
#progressbar li.active:before, #progressbar li.active:after{
background: #27AE60;
color: white;
}
Portfolio Website Using HTML ,CSS ,Bootstrap and JavaScript
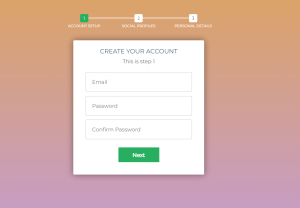
Html + Css Updated output
jQuery Code For Multi-Step Form with Progress Bar
//jQuery time
var current_fs, next_fs, previous_fs; //fieldsets
var left, opacity, scale; //fieldset properties which we will animate
var animating; //flag to prevent quick multi-click glitches
$(".next").click(function(){
if(animating) return false;
animating = true;
current_fs = $(this).parent();
next_fs = $(this).parent().next();
//activate next step on progressbar using the index of next_fs
$("#progressbar li").eq($("fieldset").index(next_fs)).addClass("active");
//show the next fieldset
next_fs.show();
//hide the current fieldset with style
current_fs.animate({opacity: 0}, {
step: function(now, mx) {
//as the opacity of current_fs reduces to 0 - stored in "now"
//1. scale current_fs down to 80%
scale = 1 - (1 - now) * 0.2;
//2. bring next_fs from the right(50%)
left = (now * 50)+"%";
//3. increase opacity of next_fs to 1 as it moves in
opacity = 1 - now;
current_fs.css({
'transform': 'scale('+scale+')',
'position': 'absolute'
});
next_fs.css({'left': left, 'opacity': opacity});
},
duration: 800,
complete: function(){
current_fs.hide();
animating = false;
},
//this comes from the custom easing plugin
easing: 'easeInOutBack'
});
});
$(".previous").click(function(){
if(animating) return false;
animating = true;
current_fs = $(this).parent();
previous_fs = $(this).parent().prev();
//de-activate current step on progressbar
$("#progressbar li").eq($("fieldset").index(current_fs)).removeClass("active");
//show the previous fieldset
previous_fs.show();
//hide the current fieldset with style
current_fs.animate({opacity: 0}, {
step: function(now, mx) {
//as the opacity of current_fs reduces to 0 - stored in "now"
//1. scale previous_fs from 80% to 100%
scale = 0.8 + (1 - now) * 0.2;
//2. take current_fs to the right(50%) - from 0%
left = ((1-now) * 50)+"%";
//3. increase opacity of previous_fs to 1 as it moves in
opacity = 1 - now;
current_fs.css({'left': left});
previous_fs.css({'transform': 'scale('+scale+')', 'opacity': opacity});
},
duration: 800,
complete: function(){
current_fs.hide();
animating = false;
},
//this comes from the custom easing plugin
easing: 'easeInOutBack'
});
});
$(".submit").click(function(){
return false;
})
50+ Html ,Css & Javascript Projects With Source Code
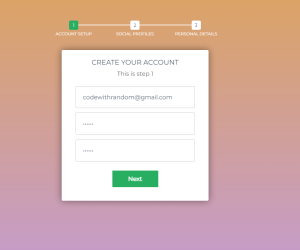
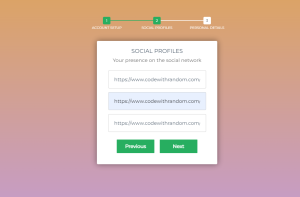
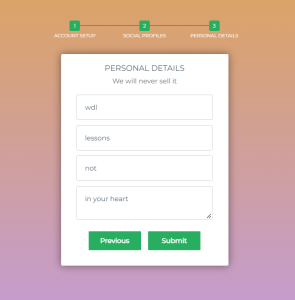
Final Output Multi-Step Form with Progress Bar
How To Create OTP Input Field Using HTML , CSS & Javascript
Now that we have completed our Multi-Step Form with Progress Bar. Here is our updated output with Html,Css and jQuery. Hope you like the Multi-Step Form with Progress Bar. you can see the output video and project screenshots. See our other blogs and gain knowledge in front-end development.
Thank you!
In this post, we learn how to create a Multi-Step Form with Progress Bar using Html, Css, and jQuery. If we made a mistake or any confusion, please drop a comment to reply or help you in easy learning.
Written by – Code With Random/Anki
Code by – Atakan Goktepe
Which code editor do you use for this Multi-Step Form with Progress Bar coding?
I personally recommend using VS Code Studio, it’s straightforward and easy to use.
is this project responsive or not?
Yes! this is a responsive project
Do you use any external links to create this project?
Yes!
ADVERTISEMENT
