Create Carousel Rotate Slider With Image Using HTML and JavaScript
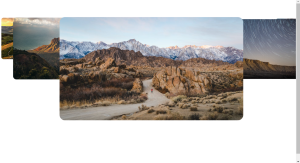
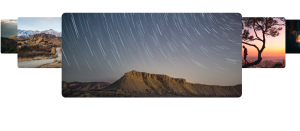
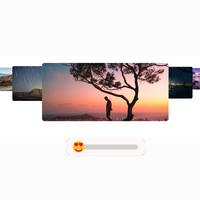
Welcome to the Codewithrandom blog. This blog teaches us how to create a Carousel Rotate Slider With Image Using HTML, CSS, and JavaScript. In this Carousel Rotate Slider Image Rotating Automatically we don’t have any button for next or previous we just see that every 10-second image changes and slides next to next.
I hope you enjoy our blog so let’s start with a basic HTML Structure for the Rotate Slider With Image.

| Code by | PedalsUp |
| Project Download | Link Available Below |
| Language used | HTML , CSS and JavaScript |
| External link / Dependencies | No |
| Responsive | Yes |

CSS Code For Rotate Slider With Image
.container {
  width: 100vw;
  height: 80vh;
  display: flex;
  justify-content: center;
  align-items: center;
}
.slider {
  height: 750px;
  width: 100vw;
  display: flex;
  perspective: 1000px;
  position: relative;
  align-items: center;
}
.box1 {
  background: url("https://images.pexels.com/photos/842711/pexels-photo-842711.jpeg?auto=compress&cs=tinysrgb&w=1260&h=750&dpr=1");
  background-size: cover;
  background-position: center center;
}
.box2 {
  background: url("https://images.pexels.com/photos/2559941/pexels-photo-2559941.jpeg?auto=compress&cs=tinysrgb&w=1260&h=750&dpr=1");
  background-size: cover;
  background-position: center center;
}
.box3 {
  background: url("https://images.pexels.com/photos/2356059/pexels-photo-2356059.jpeg?auto=compress&cs=tinysrgb&w=1260&h=750&dpr=1");
  background-size: cover;
  background-position: center center;
}
.box4 {
  background: url("https://images.pexels.com/photos/3274903/pexels-photo-3274903.jpeg?auto=compress&cs=tinysrgb&w=1260&h=750&dpr=1");
  background-size: cover;
  background-position: center center;
}
.box5 {
  background: url("https://images.pexels.com/photos/3618162/pexels-photo-3618162.jpeg?auto=compress&cs=tinysrgb&w=1260&h=750&dpr=1");
  background-size: cover;
  background-position: center center;
}
.box6 {
  background: url("https://images.pexels.com/photos/4256852/pexels-photo-4256852.jpeg?auto=compress&cs=tinysrgb&w=1260&h=750&dpr=1");
  background-size: cover;
  background-position: center center;
}
.box7 {
  background: url("https://images.pexels.com/photos/1891234/pexels-photo-1891234.jpeg?auto=compress&cs=tinysrgb&w=1260&h=750&dpr=1");
  background-size: cover;
  background-position: center center;
}

.slider [class*="box"] {
  /*   float: left; */
  overflow: hidden;
  border-radius: 20px;
  transition: all 1s cubic-bezier(0.68, -0.6, 0.32, 1.6);
  position: absolute;
}
.slider [class*="box"]:nth-child(7),
.slider [class*="box"]:nth-child(1) {
  width: 100vh;
  height: 60vh;
  transform: scale(0.2) translate(-50%, -50%);
  top: 10%;
  z-index: 1;
}
.slider [class*="box"]:nth-child(2),
.slider [class*="box"]:nth-child(6) {
  width: 100vh;
  height: 60vh;
  transform: scale(0.4) translate(-50%, -50%);
  top: 20%;
  z-index: 2;
}
.slider [class*="box"]:nth-child(3),
.slider [class*="box"]:nth-child(5) {
  width: 100vh;
  height: 60vh;
  transform: scale(0.6) translate(-50%, -50%);
  top: 30%;
  z-index: 3;
}
.slider [class*="box"]:nth-child(4) {
  width: 60vw;
  height: 60vh;
  border-color: #c92026;
  color: #fff;
  transform: scale(1) translate(-50%, -50%);
  top: 50%;
  z-index: 4;
}
.slider [class*="box"]:nth-child(1) {
  left: -13%;
}
.slider [class*="box"]:nth-child(2) {
  left: -5%;
}
.slider [class*="box"]:nth-child(3) {
  left: 10%;
}
.slider [class*="box"]:nth-child(4) {
  left: 50%;
}
.slider [class*="box"]:nth-child(5) {
  left: 71%;
}
.slider [class*="box"]:nth-child(6) {
  left: 85%;
}
.slider [class*="box"]:nth-child(7) {
  left: 100%;
}
.slider .firstSlide {
  -webkit-animation: firstChild 1s;
  animation: firstChild 1s;
}
/*Animation for buyers landing page slider*/
@-webkit-keyframes firstChild {
  0% {
    left: 100%;
    transform: scale(0.2) translate(-50%, -50%);
  }
  100% {
    left: -13%;
    transform: scale(0.2) translate(-50%, -50%);
  }
}
@keyframes firstChild {
  0% {
    left: 100%;
    transform: scale(0.2) translate(-50%, -50%);
  }
  100% {
    left: -13%;
    transform: scale(0.2) translate(-50%, -50%);
  }
}
Responsive Resume/CV Website Using HTML & CSS
Html + Css Updated Output

JavaScript Code For Rotate Slider With Image
function rotate() {
    var lastChild = $('.slider div:last-child').clone();
    /*$('#test').html(lastChild)*/
    $('.slider div').removeClass('firstSlide')
    $('.slider div:last-child').remove();
    $('.slider').prepend(lastChild)
    $(lastChild).addClass('firstSlide')
  }

  window.setInterval(function(){
    rotate()
  }, 4000);
100+ JavaScript Projects With Source Code ( Beginners to Advanced)
this is javascript (jQuery) code and add in a JavaScript file we already Add the CDN of jQuery in Html File So let’s see preview below👇
Final Output Of Final Auto Rotate Slider With Image

Now that we have completed our Auto Rotate Slider With Image our updated output with javascript. I hope you like the Auto Rotate Slider With the Image. you can see the output video and project screenshots. See our other blogs and gain knowledge in front-end development.
Ecommerce Website Using HTML, CSS, & JavaScript (Source Code)
Thank you!
This post teaches us how to create an Auto Rotate Slider With Image Using HTML, CSS, and JavaScript. If we made a mistake or any confusion, please drop a comment to reply or help you learn quickly.
Written by – Code With Random/Anki
Code By – PedalsUp
Which code editor do you use for this Auto Rotate Slider With Image coding?
I personally recommend using VS Code Studio, it’s straightforward and easy to use.
is this project responsive or not?
Yes! this is a responsive project
Do you use any external links to create this project?
No!


