Navbar Using Html, Css And, And Javascript ( Source Code)
Introduction:
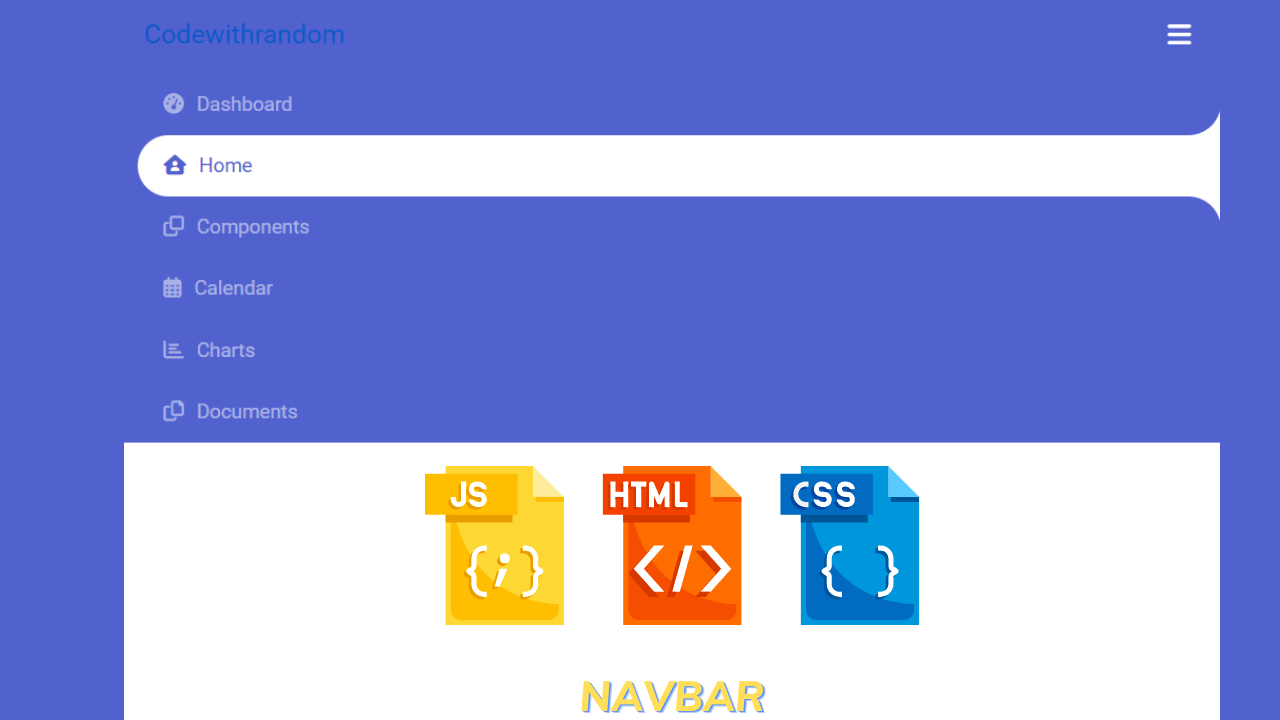
Hello coders, a very warm welcome to codewithrandom today’s blog in which we are going to create a navbar with the help of html, css & javascript. We have seen this feature on a number of websites and also witness the way of presentation. Today we’ll make a navbar and in that, we’ll play with effects because the navbar among all the websites is doing the same work but the difference which makes them different in the way of presentation is effects. We create them and add a tab effect, which we have seen in our browsers such as google chrome, safari & opera.
Let us see the coding part.
Navbar html code:
In html we create the basic layout/skelton of the website. I hope you are concerned with the basics of html like div, span classes, and ids, anchor tag, and list tag for unordered lists.
So here we are using icons for icons we are using fontawesome
<nav class="navbar navbar-expand-custom navbar-mainbg">
    <a class="navbar-brand navbar-logo" href="#">Codewithrandom</a>
    <button
        class="navbar-toggler"
        type="button"
        aria-controls="navbarSupportedContent"
        aria-expanded="false"
        aria-label="Toggle navigation"
    >
        <i class="fas fa-bars text-white"></i>
    </button>
    <div class="collapse navbar-collapse" id="navbarSupportedContent">
        <ul class="navbar-nav ml-auto">
            <div class="hori-selector">
                <div class="left"></div>
                <div class="right"></div>
            </div>
            <li class="nav-item">
                <a class="nav-link" href="javascript:void(0);"
                    ><i class="fas fa-tachometer-alt"></i>Dashboard</a
                >
            </li>
            <li class="nav-item active">
                <a class="nav-link" href="javascript:void(0);"
                    ><i class="fas fa-house-user"></i>Home</a
                >
            </li>
            <li class="nav-item">
                <a class="nav-link" href="javascript:void(0);"
                    ><i class="far fa-clone"></i>Components</a
                >
            </li>
            <li class="nav-item">
                <a class="nav-link" href="javascript:void(0);"
                    ><i class="far fa-calendar-alt"></i>Calendar</a
                >
            </li>
            <li class="nav-item">
                <a class="nav-link" href="javascript:void(0);"
                    ><i class="far fa-chart-bar"></i>Charts</a
                >
            </li>
            <li class="nav-item">
                <a class="nav-link" href="javascript:void(0);"
                    ><i class="far fa-copy"></i>Documents</a
                >
            </li>
        </ul>
    </div>
</nav>
In this html code, we have defined the nav tag and in that, we have called anchor tag in class we have defined a logo and given a heading similar we have done this for all the labels to create the menu of the navbar and given a specific id as per the requirement.
Html output of navbar:
Navbar css code:
We are using some basic properties of styling like border-box, flex-box, css class, and id selectors.
@import url("https://fonts.googleapis.com/css?family=Roboto");
 @import url("https://stackpath.bootstrapcdn.com/font-awesome/4.7.0/css/font-awesome.min.css");
 body {
      font-family: "Roboto", sans-serif;
 }
 * {
      margin: 0;
      padding: 0;
 }
 i {
      margin-right: 10px;
 }
 /*----------bootstrap-navbar-css------------*/
 .navbar-logo {
      padding: 15px;
      color: #fff;
 }
 .navbar-mainbg {
      background-color: #5161ce;
      padding: 0px;
 }
 #navbarSupportedContent {
      overflow: hidden;
      position: relative;
 }
 #navbarSupportedContent ul {
      padding: 0px;
      margin: 0px;
 }
 #navbarSupportedContent ul li a i {
      margin-right: 10px;
 }
 #navbarSupportedContent li {
      list-style-type: none;
      float: left;
 }
 #navbarSupportedContent ul li a {
      color: rgba(255, 255, 255, 0.5);
      text-decoration: none;
      font-size: 15px;
      display: block;
      padding: 20px 20px;
      transition-duration: 0.6s;
      transition-timing-function: cubic-bezier(0.68, -0.55, 0.265, 1.55);
      position: relative;
 }
#navbarSupportedContent > ul > li.active > a {
    color: #5161ce;
    background-color: transparent;
    transition: all 0.7s;
}
#navbarSupportedContent a:not(:only-child):after {
    content: "f105";
    position: absolute;
    right: 20px;
    top: 10px;
    font-size: 14px;
    font-family: "Font Awesome 5 Free";
    display: inline-block;
    padding-right: 3px;
    vertical-align: middle;
    font-weight: 900;
    transition: 0.5s;
}
#navbarSupportedContent .active > a:not(:only-child):after {
    transform: rotate(90deg);
}
.hori-selector {
    display: inline-block;
    position: absolute;
    height: 100%;
    top: 0px;
    left: 0px;
    transition-duration: 0.6s;
    transition-timing-function: cubic-bezier(0.68, -0.55, 0.265, 1.55);
    background-color: #fff;
    border-top-left-radius: 15px;
    border-top-right-radius: 15px;
    margin-top: 10px;
}
.hori-selector .right,
.hori-selector .left {
    position: absolute;
    width: 25px;
    height: 25px;
    background-color: #fff;
    bottom: 10px;
}
.hori-selector .right {
    right: -25px;
}
.hori-selector .left {
    left: -25px;
}
.hori-selector .right:before,
.hori-selector .left:before {
    content: "";
    position: absolute;
    width: 50px;
    height: 50px;
    border-radius: 50%;
    background-color: #5161ce;
}
.hori-selector .right:before {
    bottom: 0;
    right: -25px;
}
.hori-selector .left:before {
    bottom: 0;
    left: -25px;
}
@media (min-width: 992px) {
    .navbar-expand-custom {
        -ms-flex-flow: row nowrap;
        flex-flow: row nowrap;
        -ms-flex-pack: start;
        justify-content: flex-start;
    }
    .navbar-expand-custom .navbar-nav {
        -ms-flex-direction: row;
        flex-direction: row;
    }
    .navbar-expand-custom .navbar-toggler {
        display: none;
    }
    .navbar-expand-custom .navbar-collapse {
        display: -ms-flexbox !important;
        display: flex !important;
        -ms-flex-preferred-size: auto;
        flex-basis: auto;
    }
}
@media (max-width: 991px) {
    #navbarSupportedContent ul li a {
        padding: 12px 30px;
    }
    .hori-selector {
        margin-top: 0px;
        margin-left: 10px;
        border-radius: 0;
        border-top-left-radius: 25px;
        border-bottom-left-radius: 25px;
    }
    .hori-selector .left,
    .hori-selector .right {
        right: 10px;
    }
    .hori-selector .left {
        top: -25px;
        left: auto;
    }
    .hori-selector .right {
        bottom: -25px;
    }
    .hori-selector .left:before {
        left: -25px;
        top: -25px;
    }
    .hori-selector .right:before {
        bottom: -25px;
        left: -25px;
    }
}
In this snippet of css, we have styled the horizontal selector for each and every menu that this labeled in the html code for left and right so that there is no glitch while the pointer is been selected by the user. We have also defined the pixel for each and every selector so that it should not be less than the defined value.
Facebook Clone Ui Template Using Html, Css, And Javascript
Let us see the css output before writing the javascript for the navbar.
Css output of navbar:
Javascript code navbar:-
// ---------Responsive-navbar-active-animation-----------
function test() {
     var tabsNewAnim = $("#navbarSupportedContent");
     var selectorNewAnim = $("#navbarSupportedContent").find("li").length;
     var activeItemNewAnim = tabsNewAnim.find(".active");
     var activeWidthNewAnimHeight = activeItemNewAnim.innerHeight();
     var activeWidthNewAnimWidth = activeItemNewAnim.innerWidth();
     var itemPosNewAnimTop = activeItemNewAnim.position();
     var itemPosNewAnimLeft = activeItemNewAnim.position();
     $(".hori-selector").css({
          top: itemPosNewAnimTop.top + "px",
          left: itemPosNewAnimLeft.left + "px",
          height: activeWidthNewAnimHeight + "px",
          width: activeWidthNewAnimWidth + "px"
     });
     $("#navbarSupportedContent").on("click", "li", function (e) {
          $("#navbarSupportedContent ul li").removeClass("active");
          $(this).addClass("active");
          var activeWidthNewAnimHeight = $(this).innerHeight();
          var activeWidthNewAnimWidth = $(this).innerWidth();
          var itemPosNewAnimTop = $(this).position();
          var itemPosNewAnimLeft = $(this).position();
          $(".hori-selector").css({
               top: itemPosNewAnimTop.top + "px",
               left: itemPosNewAnimLeft.left + "px",
               height: activeWidthNewAnimHeight + "px",
               width: activeWidthNewAnimWidth + "px"
          });
     });
}
$(document).ready(function () {
     setTimeout(function () {
          test();
     });
});
$(window).on("resize", function () {
     setTimeout(function () {
          test();
     }, 500);
});
$(".navbar-toggler").click(function () {
     $(".navbar-collapse").slideToggle(300);
     setTimeout(function () {
          test();
     });
});
// --------------add active class-on another-page move----------
jQuery(document).ready(function ($) {
     // Get current path and find target link
     var path = window.location.pathname.split("/").pop();
     // Account for home page with empty path
     if (path == "") {
          path = "index.html";
     }
     var target = $('#navbarSupportedContent ul li a[href="' + path + '"]');
     // Add active class to target link
     target.parent().addClass("active");
});
// Add active class on another page linked
// ==========================================
// $(window).on('load',function () {
//   var current = location.pathname;
//   console.log(current);
//   $('#navbarSupportedContent ul li a').each(function(){
//     var $this = $(this);
//     // if the current path is like this link, make it active
//     if($this.attr('href').indexOf(current) !== -1){
//       $this.parent().addClass('active');
//       $this.parents('.menu-submenu').addClass('show-dropdown');
//       $this.parents('.menu-submenu').parent().addClass('active');
//     }else{
//       $this.parent().removeClass('active');
//     }
//   })
// });
In this JavaScript Code, we have defined the variable as var for the animation of the navbar and we have passed on some statement that checks the condition and acts according to it. So that there is no lag or glitch at the user end.
Final Output Navbar:
Summary:
We have created a Navbar but here the effect and the way of presentation make it different and then we created an HTML file in which we have defined the nav tag and coded the necessary attributes and label the nav item menu. Then we created an External CSS and in that we styled the tags and classes present in the HTML code and some effects for the navbar to make it attractive at the end of the user. If you loved it do comment as it boosts our motivation to bring new projects for you guys. If you face any difficulty while performing you can reachout to us with the help of the comment section.
Happy Coding
Written by @Harsh_9 &Himanshu Singh


