Learners, In this article we are going to design a very interactive and impressive project which is a TODO LIST (A Day Scheduler) with detailed functionality.
Learners, as we are a programmer so we have a very strict schedule for setting on the front of the screen. We achieve it successfully because we have a very effective and flawless Todo-list that we write or draft in the morning.
So as many of you very well know about we have a digital to-do schedule available to us and if you are currently using this just as a replacement for the paper scheduler. If you are looking for the same means if you want to build this cool stuff then you are in right place.
Learn How to Make a Todo List using JavaScript
In this Blog, Something similar, we are going to clone a To-do List by ourselves .
Hey learners!
Welcome to our today’s blog with code with random. In this blog, we gonna learn how we can design a TODO LIST (A Day Scheduler) project Using HTML CSS JAVASCRIPT.
I hope you must have got an idea about the project.
Let’s have a look at our project.

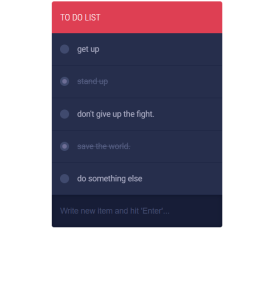
As you are looking in the project preview how the thing is organized in the single container.
Following is the feature of our project:-
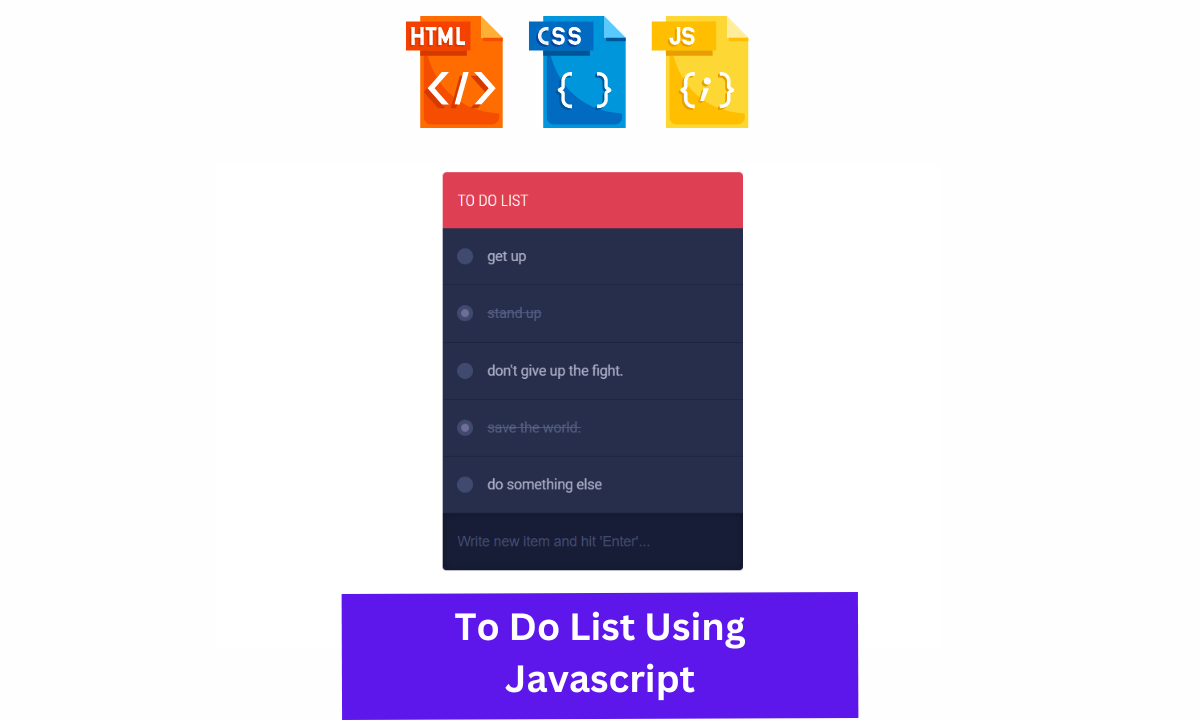
Like here we have a container where the top heading is available and below it, some tasks are attached.
In the task you will be able to observe few of them are struck over it, it means it has been completed and those who are not are still in progress.
HTML SECTION For Todo List
Here I’m not going to add a structure of the HTML file from scratch, I will just paste the body part, it is so because the body is the main part of our designing a browser.
We have the following part in the HTML section.
First, we have a container that will enclose all other parts of the to-do project.
Then with div with class tdl-content that is followed by ul and with in it li tag is available with a mention task list.
Go through the below code and run it in your IDE or where you used to design just HTML without CSS styling.
<div class="tdl-holder">
    <h2>TO DO LIST</h2>
    <div class="tdl-content">
        <ul>
            <li><label><input type="checkbox"><i></i><span>get up</span><a href='#'>–</a></label></li>
            <li><label><input type="checkbox" checked><i></i><span>stand up</span><a href='#'>–</a></label></li>
            <li><label><input type="checkbox"><i></i><span>don't give up the fight.</span><a href='#'>–</a></label></li>
            <li><label><input type="checkbox" checked><i></i><span>save the world.</span><a href='#'>–</a></label></li>
            <li><label><input type="checkbox"><i></i><span>do something else</span><a href='#'>–</a></label></li>
        </ul>
    </div>
    <input type="text" class="tdl-new" placeholder="Write new item and hit 'Enter'...">
</div>
CSS SECTION For Todo List
By CSS we will design our container and will bring in the center and then we will design each Li component.
Ecommerce Website Using Html Css And Javascript Source Code
The Below code will analyze you more. So just add in your HTML half-complete file and wait to watch some magic.
@import url(https://fonts.googleapis.com/css?family=Roboto:100,300,400,500,700,900);
@import url(https://fonts.googleapis.com/css?family=Roboto+Condensed:300,400,700);

body{
    color:#4a5b65;
    font-family: "Roboto", Arial, sans-serif;
    font-size:14px;
    line-height: 20px;
}

*:focus{outline:none !important;}


/* TO DO LIST
================================================== */
.tdl-holder{
    margin:0px auto;
    width: 300px;
}

.tdl-holder h2{
    background-color: #de3f53;
    border-top-left-radius: 4px;
    border-top-right-radius: 4px;
    color:#fff;
    font-family:"Roboto Condensed", Arial, sans-serif;
    font-size:16px;
    font-weight: 100;
    line-height: 56px;
    padding-left: 15px;
    margin:0;
}

.tdl-holder ul, .tdl-holder li {
    list-style: none;
    margin:0;
    padding:0;
}

.tdl-holder li{
    background-color: #262e4c;
    border-bottom:1px solid #1c2340;
    color: #b1b2c9;
}

.tdl-holder li span{
    margin-left:30px;
    -webkit-transition: all .2s linear;
       -moz-transition: all .2s linear;
         -o-transition: all .2s linear;
            transition: all .2s linear;
}

.tdl-holder label{
    cursor:pointer;
    display:block;
    line-height: 56px;
    padding: 0 15px;
    position: relative;
}

.tdl-holder label:hover{
    background-color: #2a3353;
    color:#8284a3;
}

.tdl-holder label a{
    background-color:#de3f53;
    border-radius:50%;
    color:#fff;
    display:none;
    float:right;
    font-weight: bold;
    line-height: normal;
    height:16px;
    margin-top: 20px;
    text-align: center;
    text-decoration: none;
    width:16px;
    -webkit-transition: all .2s linear;
       -moz-transition: all .2s linear;
         -o-transition: all .2s linear;
            transition: all .2s linear;
}

.tdl-holder label:hover a{
    display: block;
}

.tdl-holder label a:hover{
    background-color:#fff;
    color:#de3f53;
}

.tdl-holder input[type="checkbox"]{
    cursor: pointer;
    opacity: 0;
    position: absolute;
}

.tdl-holder input[type="checkbox"] + i{
    background-color: #404a6e;
    border-radius: 50%;
    display: block;
    height: 16px;
    position: absolute;
    top:20px;
    width: 16px;
    z-index: 1;
}

.tdl-holder input[type="checkbox"]:checked + i::after{
    background-color: #6E6E96;
    border-radius: 50%;
    content: '';
    display: block;
    height:8px;
    left:4px;
    position: absolute;
    top:4px;
    width:8px;
    z-index: 2;
}

.tdl-holder input[type="checkbox"]:checked ~ span{
    color: #586186;
    text-decoration: line-through;
}

.tdl-holder input[type="text"]{
    background-color: #171d37;
    border: none;
    border-bottom-left-radius: 4px;
    border-bottom-right-radius: 4px;
    box-shadow: inset 0 0 8px 0 #0e1329;
    color: #464f72;
    font-size:14px;
    margin:0;
    padding:20px 15px;
    width:270px;
    -webkit-transition: all .2s linear;
       -moz-transition: all .2s linear;
         -o-transition: all .2s linear;
            transition: all .2s linear;
}

.tdl-holder input[type="text"]:hover{
    color:#4c577f;
}

.tdl-holder input[type="text"]:focus{
    color:#fff;
}

.tdl-holder ::-webkit-input-placeholder {color: #464f72;} /* WebKit browsers */
.tdl-holder :-moz-placeholder 			{color: #464f72;} /* Mozilla Firefox 4 to 18 */
.tdl-holder ::-moz-placeholder 			{color: #464f72;} /* Mozilla Firefox 19+ */
.tdl-holder :-ms-input-placeholder 		{color: #464f72;} /* Internet Explorer 10+ */


.tdl-holder li.remove{
    -webkit-animation:collapseItem 300ms ease;
            animation:collapseItem 300ms ease;
    -webkit-transform-origin: 50% 0%;
        -ms-transform-origin: 50% 0%;
            transform-origin: 50% 0%;

}

.tdl-holder li.remove span{
    color: #586186;
    text-decoration: line-through;
}

@keyframes collapseItem {
    0% 		{ -ms-transform: perspective(500px) rotateX(0deg);transform: perspective(500px) rotateX(0deg); 	}
    100% 	{ -ms-transform: perspective(500px) rotateX(-90deg);transform: perspective(500px) rotateX(-90deg); }
}

@-webkit-keyframes collapseItem {
    0% 		{ -webkit-transform: perspective(500px) rotateX(0deg); 	}
    100% 	{ -webkit-transform: perspective(500px) rotateX(-90deg);}
}
Javascript Section For Todo List
In the Javascript part, we will add magic logic as initially when our page will be loaded then only beatify container will be previewed for removing accomplished task and striking recently finished test is only done by js file, So, we need to update it.
For observing this magic for this project then you should add the js file with the rest of the HTML and CSS file and enjoy this project and deploy it on Github.
Must ADD Jquery CDN LINK – For Cdn Click Here <<<<
/* TO DO LIST */
$(".tdl-new").bind('keypress', function(e){
  var code = (e.keyCode ? e.keyCode : e.which);
  if(code == 13) {
    var v = $(this).val();
    var s = v.replace(/ +?/g, '');
    if (s == ""){
      return false;
    }else{
      $(".tdl-content ul").append("<li><label><input type='checkbox'><i></i><span>"+ v +"</span><a href='#'>–</a></label></li>");
      $(this).val("");
    }
  }
});


$(".tdl-content a").bind("click", function(){
  var _li = $(this).parent().parent("li");
      _li.addClass("remove").stop().delay(100).slideUp("fast", function(){
        _li.remove();
      });
  return false;
});

// for dynamically created a tags
$(".tdl-content").on('click', "a", function(){
  var _li = $(this).parent().parent("li");
      _li.addClass("remove").stop().delay(100).slideUp("fast", function(){
        _li.remove();
      });
  return false;
});
A live preview of our project is attached below refer to this codepen
Final Output Of Todo List Project Using Javascript
By this blog… We have learned how we can design a TO DO LIST (A Day Scheduler) Project HTML CSS JAVASCRIPT.
ADVERTISEMENT
Now I’m looking for your reviews.
So, How was the blog , Learners!
ADVERTISEMENT
If you want a more crisp blog like this then please check our Blogs sites CodewithRandom. keep tuned with us because every day you will learn something new here.
ADVERTISEMENT
50+ Front-end Projects With Source Code | Front-end Projects With Source Code
ADVERTISEMENT
I hope that I’m able to make you understand this topic and that you have learned something new from this blog. If you faced any difficulty feel free to drop a comment down your problems and if you liked it, please show your love in the comment section. This fills bloggers’ hearts with enthusiasm for writing more new blogs.
ADVERTISEMENT
You can follow me on Instagram
Written by @Ankit kumar


