Create Responsive Animated Navbar Using Bootstrap
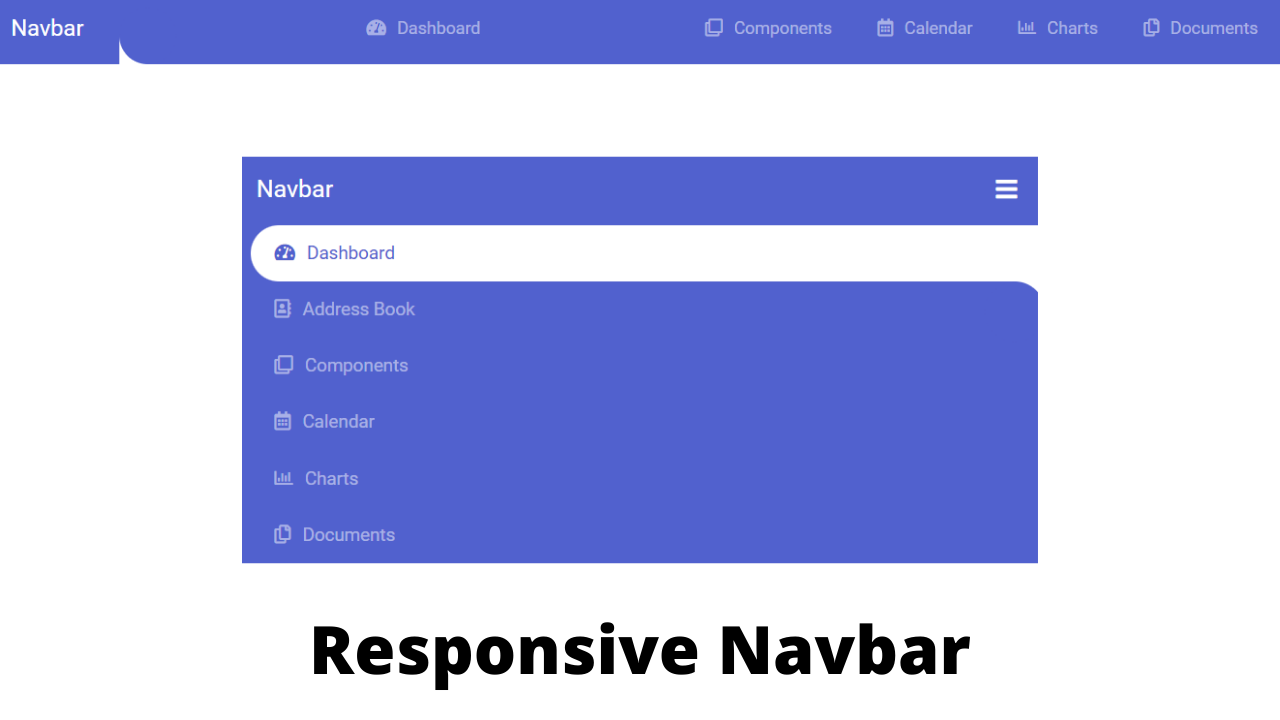
Welcome To The Codewithrandom Blog. In this blog, We learn how to Create a Responsive Animated Navbar Using Bootstrap, Html, Css, and JavaScript. This navbar is completely animated when you hover over any link or open and close navbar animation is included.

The navigation bar on a webpage is a user interface element that contains links to other webpage sections. The navigation bar of a website often displays at the top of each page as a horizontal list of links. The process of adding a search bar is similar to adding a new database search option to the navbar. Care must be used while deciding where to place the search bar. Make sure it is presented individually in the navbar.
| Code by | Piyush |
| Project Download | Link Available Below |
| Language used | HTML, CSS and JavaScript |
| External link / Dependencies | Yes |
| Responsive | Yes |
50+ HTML, CSS & JavaScript Projects With Source Code
We Hope You Enjoy Our Blog So Let’s Start With A Basic Html Structure For A Bootstrap Navbar.
HTML Code For Bootstrap Navbar
<nav class="navbar navbar-expand-custom navbar-mainbg">
<a class="navbar-brand navbar-logo" href="#">Navbar</a>
<button class="navbar-toggler" type="button" aria-controls="navbarSupportedContent" aria-expanded="false" aria-label="Toggle navigation">
<i class="fas fa-bars text-white"></i>
</button>
<div class="collapse navbar-collapse" id="navbarSupportedContent">
<ul class="navbar-nav ml-auto">
<div class="hori-selector"><div class="left"></div><div class="right"></div></div>
<li class="nav-item">
<a class="nav-link" href="javascript:void(0);"><i class="fas fa-tachometer-alt"></i>Dashboard</a>
</li>
<li class="nav-item active">
<a class="nav-link" href="javascript:void(0);"><i class="far fa-address-book"></i>Address Book</a>
</li>
<li class="nav-item">
<a class="nav-link" href="javascript:void(0);"><i class="far fa-clone"></i>Components</a>
</li>
<li class="nav-item">
<a class="nav-link" href="javascript:void(0);"><i class="far fa-calendar-alt"></i>Calendar</a>
</li>
<li class="nav-item">
<a class="nav-link" href="javascript:void(0);"><i class="far fa-chart-bar"></i>Charts</a>
</li>
<li class="nav-item">
<a class="nav-link" href="javascript:void(0);"><i class="far fa-copy"></i>Documents</a>
</li>
</ul>
</div>
</nav>
We will use the bootstrap framework to create the navbar using the navbar tag with predefined classes we will create a navbar and then using the button tag we will create a collapse and expand button and using the the unordered list tag we will create the list item inside our navbar .we will also add the font icons inside our navbar along the nav links.
There is all the html code for the bootstrap navbar. Now, you can see output without css and javascript. Then we write css & javascript for the bootstrap navbar.
Create Dot Image Slider in HTML CSS (Source Code)
Output Bootstrap Responsive Navbar

CDN link of Bootstrap and Fontawesome Icons
 https://cdn.jsdelivr.net/npm/[email protected]/dist/css/bootstrap.min.css
https://cdnjs.cloudflare.com/ajax/libs/font-awesome/5.10.2/css/all.css
Add this 2 cdn link in html code with link tag for working css bootstrap code
Simple Portfolio Website Using Html And Css With Source Code
CSS Code For Bootstrap Navbar
@import url('https://fonts.googleapis.com/css?family=Roboto');
body{
font-family: 'Roboto', sans-serif;
}
* {
margin: 0;
padding: 0;
}
i {
margin-right: 10px;
}
/*----------bootstrap-navbar-css------------*/
.navbar-logo{
padding: 15px;
color: #fff;
}
.navbar-mainbg{
background-color: #5161ce;
padding: 0px;
}
#navbarSupportedContent{
overflow: hidden;
position: relative;
}
#navbarSupportedContent ul{
padding: 0px;
margin: 0px;
}
#navbarSupportedContent ul li a i{
margin-right: 10px;
}
#navbarSupportedContent li {
list-style-type: none;
float: left;
}
#navbarSupportedContent ul li a{
color: rgba(255,255,255,0.5);
text-decoration: none;
font-size: 15px;
display: block;
padding: 20px 20px;
transition-duration:0.6s;
transition-timing-function: cubic-bezier(0.68, -0.55, 0.265, 1.55);
position: relative;
}
#navbarSupportedContent>ul>li.active>a{
color: #5161ce;
background-color: transparent;
transition: all 0.7s;
}
#navbarSupportedContent a:not(:only-child):after {
content: "f105";
position: absolute;
right: 20px;
top: 10px;
font-size: 14px;
font-family: "Font Awesome 5 Free";
display: inline-block;
padding-right: 3px;
vertical-align: middle;
font-weight: 900;
transition: 0.5s;
}
#navbarSupportedContent .active>a:not(:only-child):after {
transform: rotate(90deg);
}
.hori-selector{
display:inline-block;
position:absolute;
height: 100%;
top: 0px;
left: 0px;
transition-duration:0.6s;
transition-timing-function: cubic-bezier(0.68, -0.55, 0.265, 1.55);
background-color: #fff;
border-top-left-radius: 15px;
border-top-right-radius: 15px;
margin-top: 10px;
}
.hori-selector .right,
.hori-selector .left{
position: absolute;
width: 25px;
height: 25px;
background-color: #fff;
bottom: 10px;
}
.hori-selector .right{
right: -25px;
}
.hori-selector .left{
left: -25px;
}
.hori-selector .right:before,
.hori-selector .left:before{
content: '';
position: absolute;
width: 50px;
height: 50px;
border-radius: 50%;
background-color: #5161ce;
}
.hori-selector .right:before{
bottom: 0;
right: -25px;
}
.hori-selector .left:before{
bottom: 0;
left: -25px;
}
@media(min-width: 992px){
.navbar-expand-custom {
-ms-flex-flow: row nowrap;
flex-flow: row nowrap;
-ms-flex-pack: start;
justify-content: flex-start;
}
.navbar-expand-custom .navbar-nav {
-ms-flex-direction: row;
flex-direction: row;
}
.navbar-expand-custom .navbar-toggler {
display: none;
}
.navbar-expand-custom .navbar-collapse {
display: -ms-flexbox!important;
display: flex!important;
-ms-flex-preferred-size: auto;
flex-basis: auto;
}
}
@media (max-width: 991px){
#navbarSupportedContent ul li a{
padding: 12px 30px;
}
.hori-selector{
margin-top: 0px;
margin-left: 10px;
border-radius: 0;
border-top-left-radius: 25px;
border-bottom-left-radius: 25px;
}
.hori-selector .left,
.hori-selector .right{
right: 10px;
}
.hori-selector .left{
top: -25px;
left: auto;
}
.hori-selector .right{
bottom: -25px;
}
.hori-selector .left:before{
left: -25px;
top: -25px;
}
.hori-selector .right:before{
bottom: -25px;
left: -25px;
}
}
Using the google import link we will set the font family “Roboto” and using the universal selector we will set the padding and margin as “Zero”.
Using the class selector (.navbar-logo)we will add a padding of 15px and the font color is set as “white”.Using the class selectors we will add the styling to our navbar other then the bootstrap styling we will set the background as “blue”.
We will add some basic styling to our bootstap navbar. It is a very basic styling we will just add the some padding and margin according to the user choices. Using the same bootstrap classes we will add the styling to our navbar.
Here is our updated output css code for the bootstrap responsive navbar.
Restaurant Website Using HTML and CSS
Html + Css Code Output Bootstrap Navbar

CDN link of Bootstrap and jQuery
 https://code.jquery.com/jquery-3.4.1.min.js
https://cdn.jsdelivr.net/npm/[email protected]/dist/js/bootstrap.min.js
https://cdn.jsdelivr.net/npm/[email protected]/dist/js/bootstrap.min.js
Add these 3 cdn links in html with script tag for working javascript code.
Ecommerce Website Using HTML, CSS, & JavaScript (Source Code)
Javascript Code For Navbar
// ---------Responsive-navbar-active-animation-----------
function test(){
var tabsNewAnim = $('#navbarSupportedContent');
var selectorNewAnim = $('#navbarSupportedContent').find('li').length;
var activeItemNewAnim = tabsNewAnim.find('.active');
var activeWidthNewAnimHeight = activeItemNewAnim.innerHeight();
var activeWidthNewAnimWidth = activeItemNewAnim.innerWidth();
var itemPosNewAnimTop = activeItemNewAnim.position();
var itemPosNewAnimLeft = activeItemNewAnim.position();
$(".hori-selector").css({
"top":itemPosNewAnimTop.top + "px",
"left":itemPosNewAnimLeft.left + "px",
"height": activeWidthNewAnimHeight + "px",
"width": activeWidthNewAnimWidth + "px"
});
$("#navbarSupportedContent").on("click","li",function(e){
$('#navbarSupportedContent ul li').removeClass("active");
$(this).addClass('active');
var activeWidthNewAnimHeight = $(this).innerHeight();
var activeWidthNewAnimWidth = $(this).innerWidth();
var itemPosNewAnimTop = $(this).position();
var itemPosNewAnimLeft = $(this).position();
$(".hori-selector").css({
"top":itemPosNewAnimTop.top + "px",
"left":itemPosNewAnimLeft.left + "px",
"height": activeWidthNewAnimHeight + "px",
"width": activeWidthNewAnimWidth + "px"
});
});
}
$(document).ready(function(){
setTimeout(function(){ test(); });
});
$(window).on('resize', function(){
setTimeout(function(){ test(); }, 500);
});
$(".navbar-toggler").click(function(){
$(".navbar-collapse").slideToggle(300);
setTimeout(function(){ test(); });
});
// --------------add active class-on another-page move----------
jQuery(document).ready(function($){
// Get current path and find target link
var path = window.location.pathname.split("/").pop();
// Account for home page with empty path
if ( path == '' ) {
path = 'index.html';
}
var target = $('#navbarSupportedContent ul li a[href="'+path+'"]');
// Add active class to target link
target.parent().addClass('active');
});
// Add active class on another page linked
// ==========================================
// $(window).on('load',function () {
// var current = location.pathname;
// console.log(current);
// $('#navbarSupportedContent ul li a').each(function(){
// var $this = $(this);
// // if the current path is like this link, make it active
// if($this.attr('href').indexOf(current) !== -1){
// $this.parent().addClass('active');
// $this.parents('.menu-submenu').addClass('show-dropdown');
// $this.parents('.menu-submenu').parent().addClass('active');
// }else{
// $this.parent().removeClass('active');
// }
// })
// });
Here in our javascript we will be using the jquery function to add the functionality inside our navbar using the jquery function we will add the expand and collapse functionality to our navbar using the we will add the expand functionality .According to the screen width we will be adding the styling to our navbar .We will make a collapsible bootstrap navbar.
100+ JavaScript Projects With Source Code ( Beginners to Advanced)
Final Output Of Bootstrap Responsive Navbar


Video Output:
Now we have completed our javascript Code. Hope you like the Animated Bootstrap Navbar. you can see the output video and project screenshots. See our other blogs and gain knowledge in front-end development. Thank you!
Create Working Search Bar HTML, CSS & JavaScript
Written by – Code With Random/Anki
Codepen by – Piyush
Which code editor do you use for this Bootstrap 4 Navbar Animation coding?
I personally recommend using VS Code Studio, it’s straightforward and easy to use.
What is a Navbar?
A website’s navigation header is represented graphically by a navigation bar, also referred to as a navbar. Typically, it includes links to the homepage, about page, contact page, and other key pages of a website. The navbar is typically a fixed element that is always visible regardless of how far down or up the user scrolls on a webpage
ADVERTISEMENT
What is the use of Navbar?
The main purpose of the navbar is to move across the different sections of the website.
ADVERTISEMENT
Which tag is used for the navigation bar?
The <nav> tag defines a set of navigation links.
ADVERTISEMENT


