Introduction
Welcome to our comprehensive guide on creating a To-Do List application using React. Today We’ll be creating a Simple interactive To-Do List App Using ReactJS. ReactJs is a JavaScript Framework made by Facebook. We will be working with Class Based Components in this application and use the React-Bootstrap module to style the components. You’ll acquire the knowledge of Hooks in ReactJS.
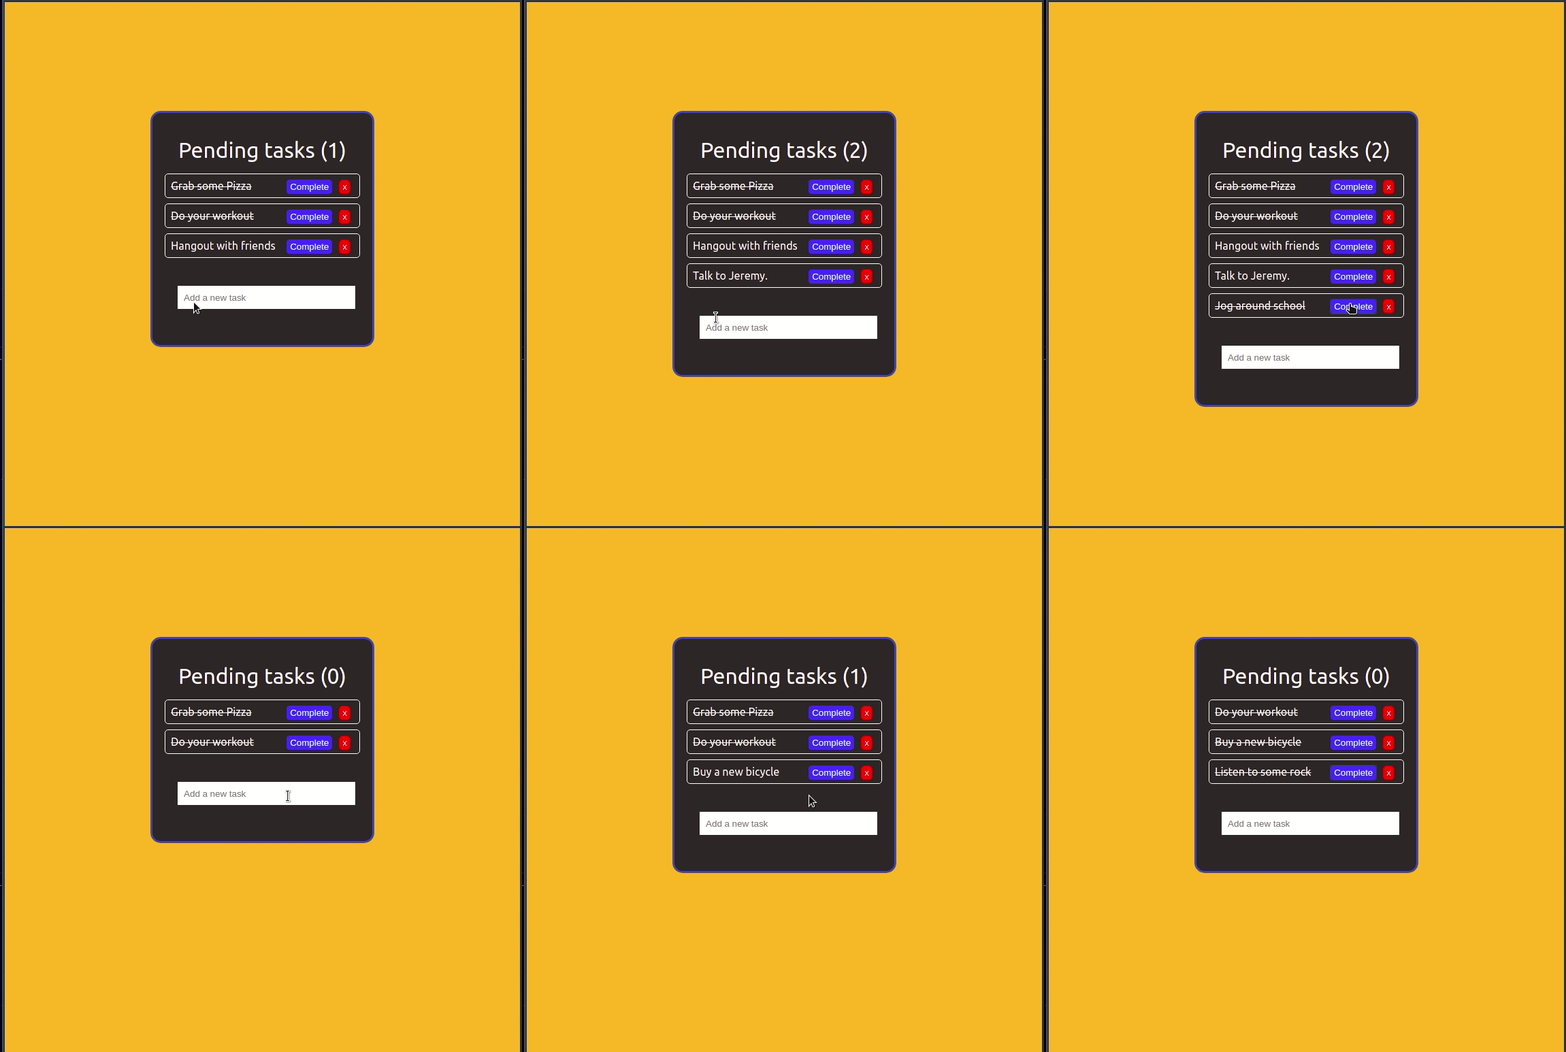
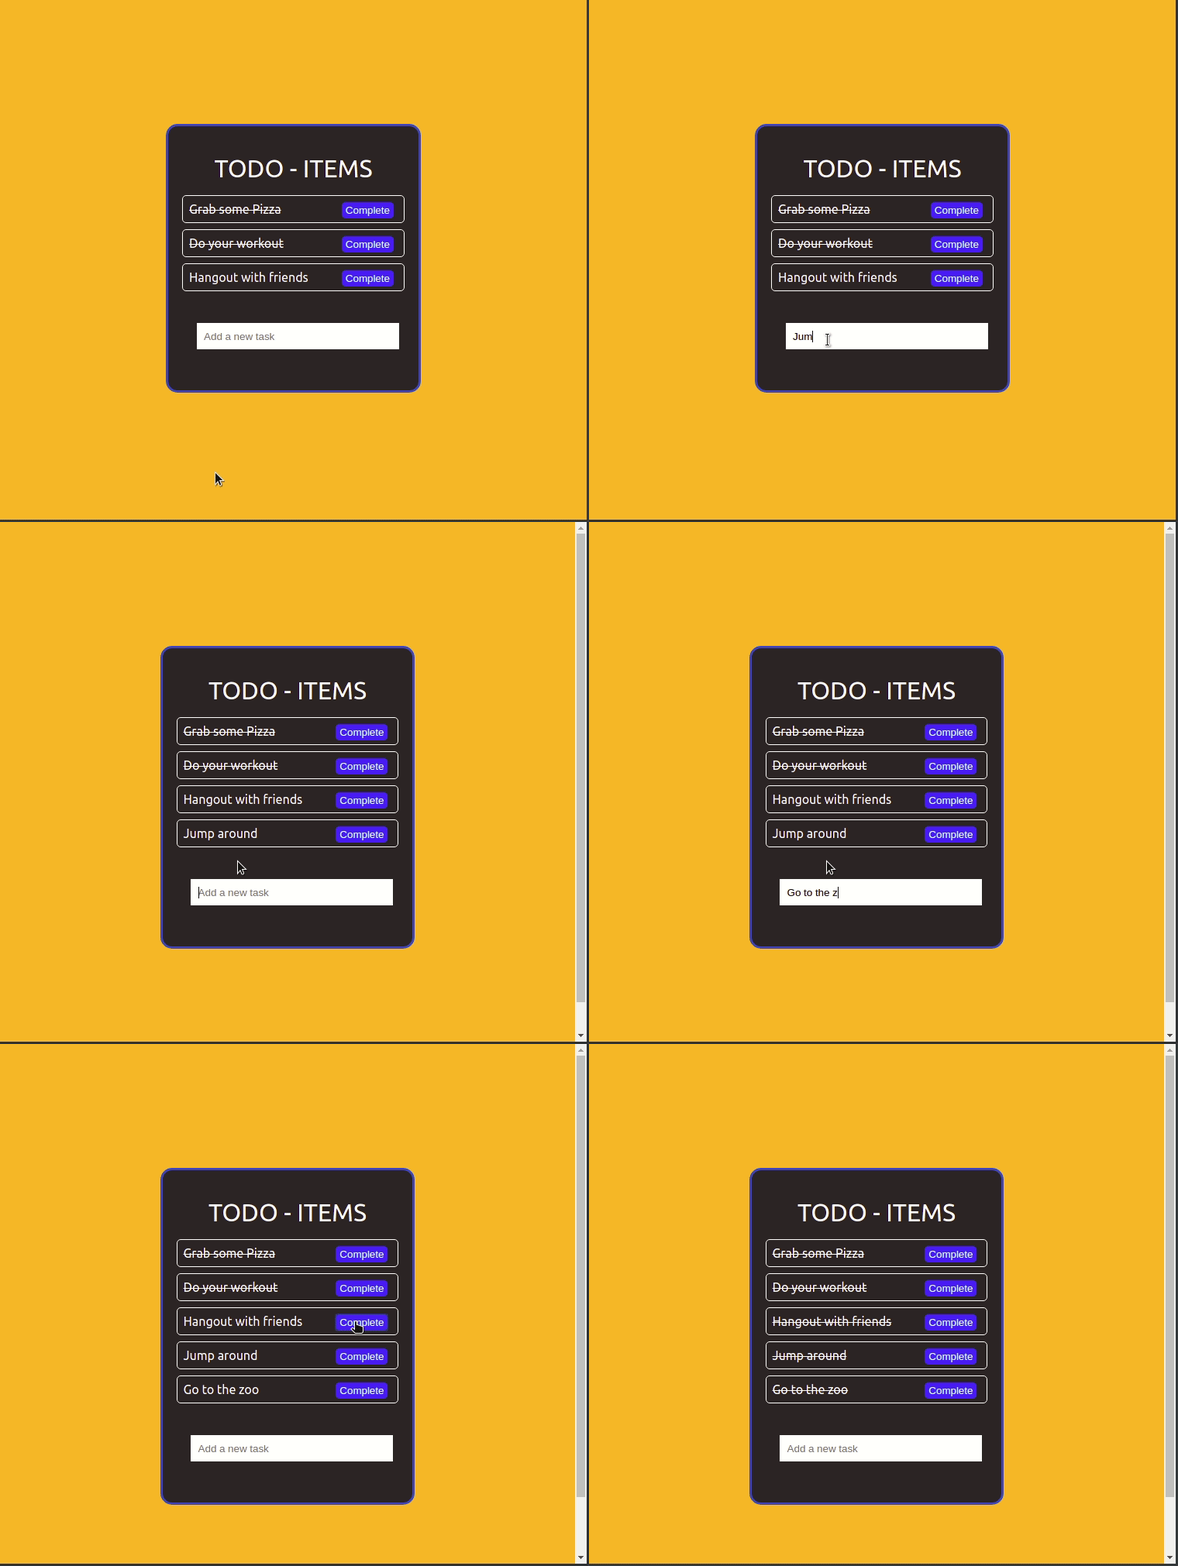
Preview Of To-Do List App using ReactJs
Prerequisites
- Basic Knowledge of HTML
- Basic Knowledge of CSS
- Basic Knowledge of JS including ReactJS Concepts.
Set Up The Environment
Let’s create a new React application using the create-react-app CLI tool:
Copy the following command and run it in your CMD
    $ npx create-react-app react-todo
    $ cd react-todo
    $ npm install --save [email protected] [email protected]
    $ npm start
This will gonna create the react-todo application in your desired file folder and Now open in your Favourite Code editor e.g. Vs Code. You’ll see the output on the browser like below:-

Steps to Create a ToDo Application
Let’s start creating the Files and Add the following Codes in the Desired File. We will create a components folder in the src directory and add two files within it:-
Js file will add the functional logic and CSS will add the styling part. Make sure your Directory looks like this src/Components/ToDo.js
Todo.js
import React, { useState, useEffect } from 'react';
import './Todo.css';


function Task({ task, index, completeTask, removeTask }) {
    return (
        <div
            className="task"
            style={{ textDecoration: task.completed ? "line-through" : "" }}
        >
            {task.title}

            <button style={{ background: "red" }} onClick={() => removeTask(index)}>x</button>
            <button onClick={() => completeTask(index)}>Complete</button>

        </div>
    );
}

function CreateTask({ addTask }) {
    const [value, setValue] = useState("");

    const handleSubmit = e => {
        e.preventDefault();
        if (!value) return;
        addTask(value);
        setValue("");
    }
    return (
        <form onSubmit={handleSubmit}>
            <input
                type="text"
                className="input"
                value={value}
                placeholder="Add a new task"
                onChange={e => setValue(e.target.value)}
            />
        </form>
    );
}

function Todo() {
    const [tasksRemaining, setTasksRemaining] = useState(0);
    const [tasks, setTasks] = useState([
        {
            title: "Grab some Pizza",
            completed: true
        },
        {
            title: "Do your workout",
            completed: true
        },
        {
            title: "Hangout with friends",
            completed: false
        }
    ]);

    useEffect(() => { setTasksRemaining(tasks.filter(task => !task.completed).length) });


    const addTask = title => {
        const newTasks = [...tasks, { title, completed: false }];
        setTasks(newTasks);
    };

    const completeTask = index => {
        const newTasks = [...tasks];
        newTasks[index].completed = true;
        setTasks(newTasks);
    };

    const removeTask = index => {
        const newTasks = [...tasks];
        newTasks.splice(index, 1);
        setTasks(newTasks);
    };

    return (
        <div className="todo-container">
            <div className="header">Pending tasks ({tasksRemaining})</div>
            <div className="tasks">
                {tasks.map((task, index) => (
                    <Task
                    task={task}
                    index={index}
                    completeTask={completeTask}
                    removeTask={removeTask}
                    key={index}
                    />
                ))}
            </div>
            <div className="create-task" >
                <CreateTask addTask={addTask} />
            </div>
        </div>
    );
}

export default Todo;
ToDo.css
The below-mentioned code will add the styling to our Application.
/* src/components/Todo.css */

body{
background: rgb(255, 173, 65);
}

.todo-container{
background: rgb(41, 33, 33);
width: 40vw;
margin: 10em auto;
border-radius: 15px;
padding: 20px 10px;
color: white;
border: 3px solid rgb(36, 110, 194);
}

.task{
border: 1px solid white;
border-radius: 5px;
padding: 0.5em;
margin: 0.5em;
}

.task button{
background: rgb(12, 124, 251);
border-radius: 5px;
margin: 0px 5px;
padding: 3px 5px;
border: none;
cursor: pointer;
color: white;
float: right;
}

.header{
margin: 0.5em;
font-size: 2em;
text-align: center;
}

.create-task input[type=text]{
margin: 2.5em 2em;
width: 80%;
outline: none;
border: none;
padding: 0.7em;
}
Index.js
Make the changes in the index.js file and add the following code:-
// index.js

import React from 'react';
import ReactDOM from 'react-dom';
import './index.css';
import Todo from './components/Todo';
import * as serviceWorker from './serviceWorker';

ReactDOM.render(<Todo />, document.getElementById('root'));

// If you want your app to work offline and load faster, you can change
// unregister() to register() below. Note this comes with some pitfalls.
// Learn more about service workers: http://bit.ly/CRA-PWA
serviceWorker.unregister();
Now Save the file and Start the application:-

For Creating the Task we’ve used the Below Mentioned Code:-
function CreateTask({ addTask }) {
    const [value, setValue] = useState("");

    const handleSubmit = e => {
        e.preventDefault();
        if (!value) return;
        addTask(value);
        setValue("");
    }
    return (
        <form onSubmit={handleSubmit}>
            <input
                type="text"
                className="input"
                value={value}
                placeholder="Add a new task"
                onChange={e => setValue(e.target.value)}
            />
        </form>
    );
}
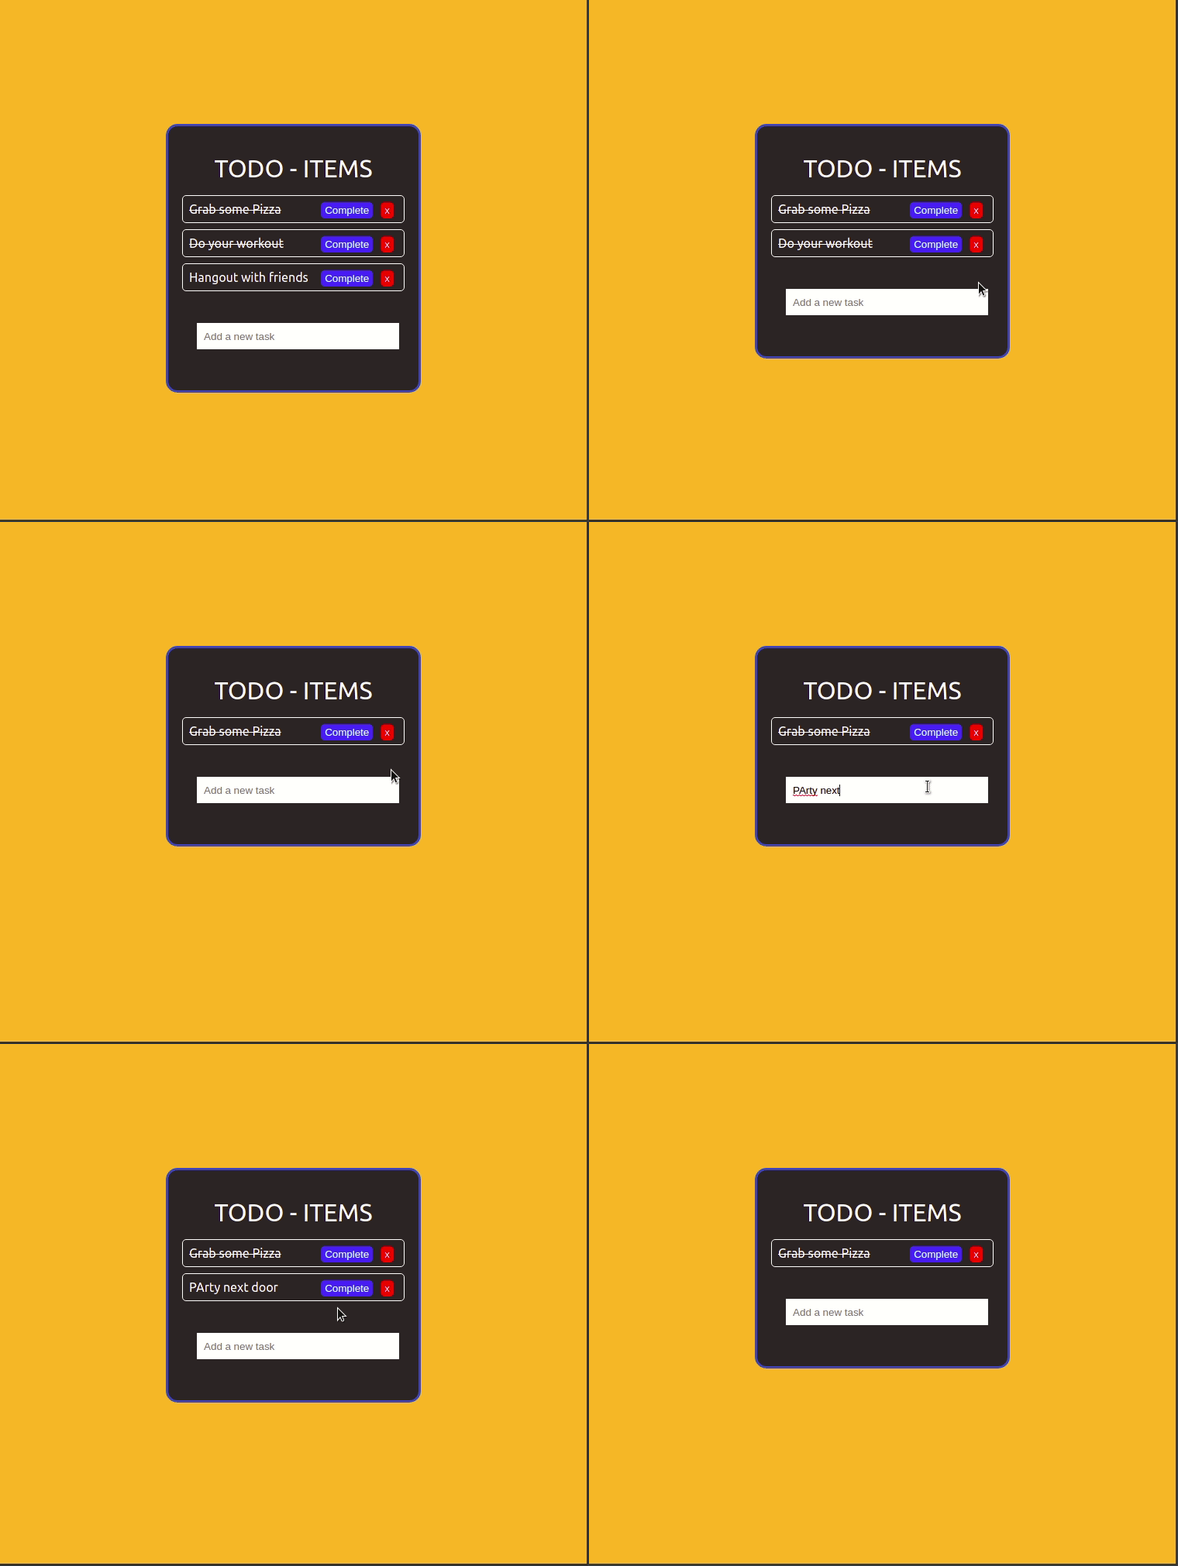
For Deleting the Task Analyze the Below Code:-
splice() is a predefined Method of JavaScript. Is is Used to add and/or remove array elements. The splice() method overwrites the original array.
 const removeTask = index => {
        const newTasks = [...tasks];
        newTasks.splice(index, 1);
        setTasks(newTasks);
    };
For the Complete Task, the Below Code is Written:-
  const completeTask = index => {
        const newTasks = [...tasks];
        newTasks[index].completed = true;
        setTasks(newTasks);
    };
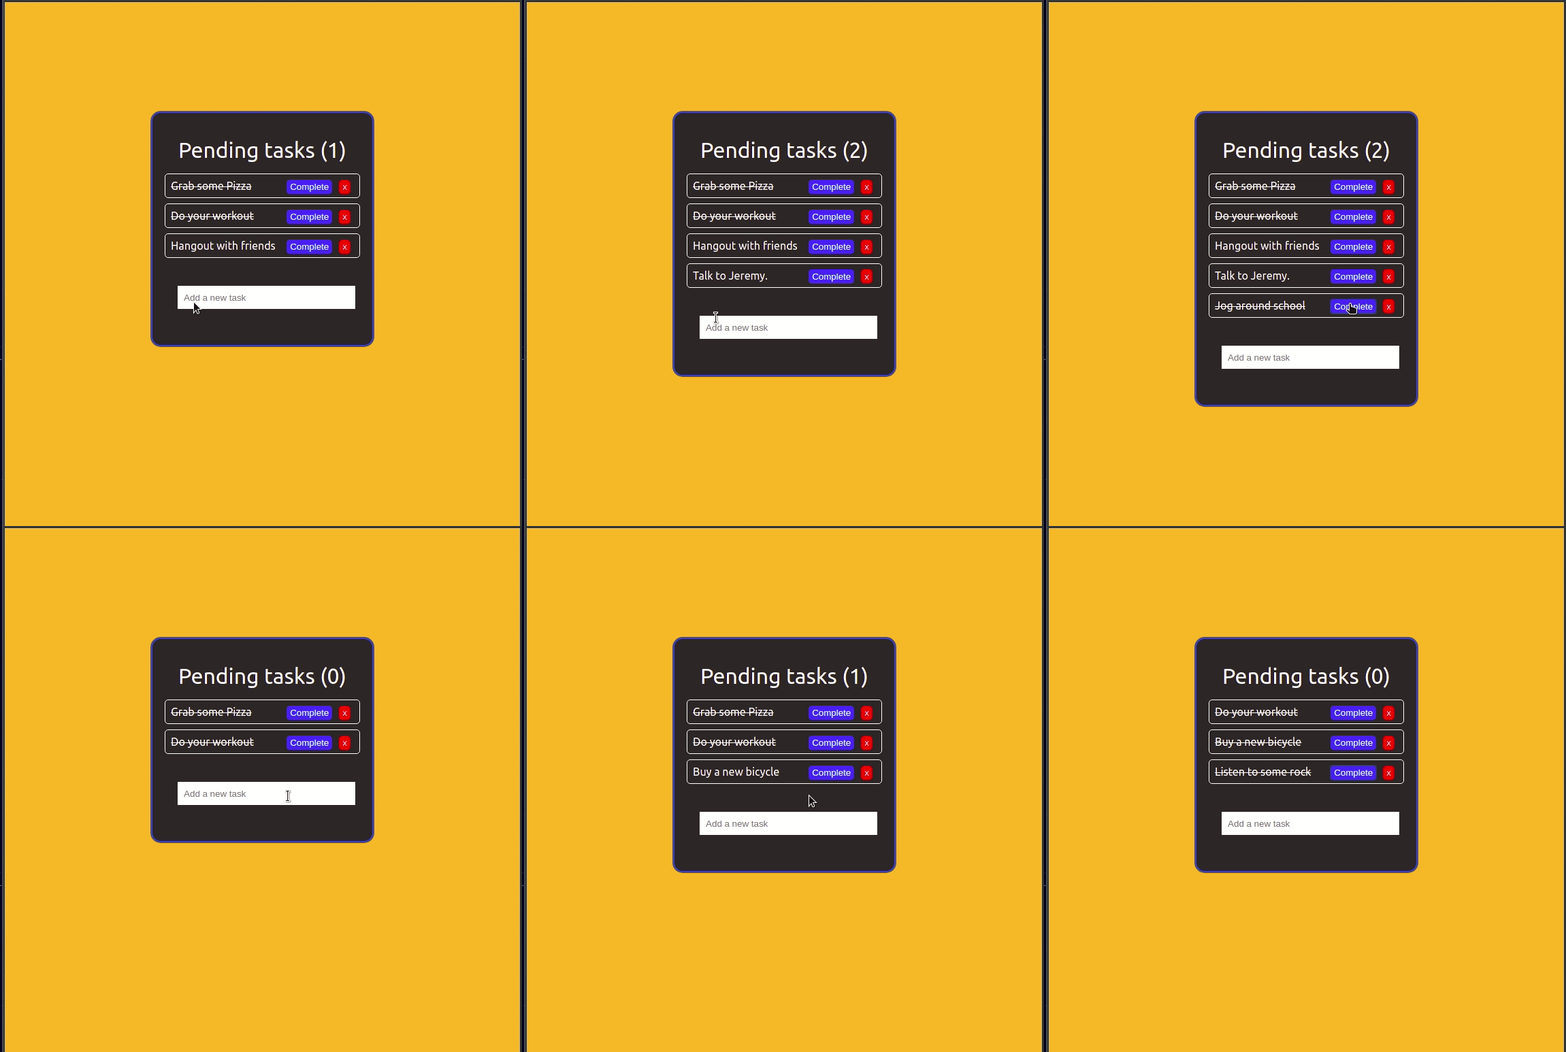
Final Output of Our Application
How to Build a Portfolio Website with React
Conclusion
Congratulations, You have completed your Mini Reactjs Project and further you can enhance this as per your preferences. You can deploy it on the Github, Vercel, or Netfliy platforms and make it live for your friends. Add this to your resume after adding or enhancing more functionality like Date Details on Which date you’re entering in the list, Description about ToDo, profile, saving progress, and many more. You can add further functionalities to your websites.
I hope you liked this Tutorial and must have learned Something new. If you have any questions regarding this feel free to drop your comments below and contact our team on Instagram @Codewithrandom.
Code Credit:- GitHub
HAPPY CODING!!!

