Create a Progress Bar Using CSS
In this article, we will learn to create Progress bars using HTML and CSS. A progress bar is created by using two HTML “div”, the container (parent div), and the skill (child div) as shown in the following examples.
We will divide the article into two coding sections, in the first section we will work on HTML, and in the second section will design that progress bar.

The bar is an important element in the web, the progress bar can be used for downloading, marks obtained, skill measuring units, etc. To create a progress bar we can use HTML and CSS.
50+ HTML, CSS and JavaScript Projects With Source Code
bars usually include a numerical (percentage) and animated representation of the progress. This improves the clarity of the progress bar, adding to the user experience. This is why CSS progress bars are so valuable to UX/UI designers and developers.
Full Code of Progress Bar Using CSS
from here you can use this code in your project for creating a progress bar. below this code, we explain every part of this code.
<!DOCTYPE html>
<html lang="en">
  <head>
    <meta charset="UTF-8" />
    <meta http-equiv="X-UA-Compatible" content="IE=edge" />
    <meta name="viewport" content="width=device-width, initial-scale=1.0" />
    <title>CSS Progress Bar Example</title>

    <style>
      .progress-bar {
        height: 24px;
        width: 360px;
        border-radius: 10px;
        background-color: lightblue;
        margin: 50px;
      }

      .progress-bar > div {
        width: 0%;
        height: 100%;
        border-radius: 10px;
        background-image: linear-gradient(to right, lightskyblue, blue);
        background-size: 360px 100%;
        transition: width 200ms;
      }
    </style>
  </head>
  <body>
    <div class="progress-bar">
      <div></div>
    </div>

    <script>
      setInterval(myTimer, 1000);

      function myTimer() {
        console.log("Interval event");
        const pb = document.querySelector(".progress-bar > div");
        let progress = parseInt(pb.style.width, 10);
        console.log("Widht Before: " + progress);
        if (progress < 100) {
          progress = progress + 10;
        } else {
          progress = 0;
        }
        console.log("Widht After: " + progress);
        pb.style.width = progress + "%";
      }
    </script>
  </body>
</html>
Step 1: Create A New File index.html
Let’s start in the first step to create a new simple index.html file with the following structure inside:
<!DOCTYPE html>
<html lang="en">
<head>
    <meta charset="UTF-8">
    <meta http-equiv="X-UA-Compatible" content="IE=edge">
    <meta name="viewport" content="width=device-width, initial-scale=1.0">
    <title>CSS Progress Bar Example</title>

    <style>

    </style>
</head>
<body>

    <script>

    </script>
</body>
</html>
Step 2: Add The HTML Structure Inside The Body Tag
You Might Like This:
- Dark Mode Toggle Button
- Build your own Tip Calculator
- Portfolio Website Using Html And Css
- Word Guessing Game in HTML CSS & JavaScript
- Popup Box with Html, CSS and JavaScript
Step 3: Add The CSS Code
So with the two div elements available in our HTML code we can start to add the need CSS code within the style element as you can see in the following code listing:
<style>
       .progress-bar {
          height: 24px;
          width:  360px;
          border-radius: 10px;
          background-color: lightblue;
          margin: 50px;
       }

       .progress-bar > div {
           width: 0%;
           height: 100%;
           border-radius: 10px;
           background-image: linear-gradient(to right, lightskyblue, blue);
           background-size: 360px 100%;
           transition: width 200ms;
       }
   </style>
The progress-bar class contains the CSS code which is needed to style the progress bar itself in an unfilled state.
The inner div element is used to fill the bar. The width property is used to define to which extend the bar should be filled, by default we’re setting it to 0%, so that the bar is displayed unfilled. In the following we’ll register an interval function by using a few lines of JavaScript code which is increasing this property by 10% every second.
Restaurant Website Using HTML And CSS With Source Code
The progress bar should be filled with a gradient, so we’re making use of background-image and background-size.
HTML + CSS Output ( Nothing 😂😅 )

Step 4: Add Some JS Code To Animate For Demonstration
Finally let’s a little bit of JavaScript code inside the <script> tag, so that we’re able to demonstrate how the progress bar filling state changes:
<script>
       setInterval(myTimer, 1000);

       function myTimer() {
           console.log("Interval event")
           const pb = document.querySelector('.progress-bar > div');
           let progress = parseInt(pb.style.width,10);
           console.log("Widht Before: " + progress);
           if (progress < 100) {
               progress = progress + 10;
           } else {
               progress = 0;
           }
           console.log("Widht After: " + progress);
           pb.style.width = progress + '%';
       }
   </script>
Here we’re implementing a function myTimer which is registered by using the setInterval function to run every 1000 milliseconds (= every second). The purpose of this function is to increase the bar by 10% by changing the width styling property of the inner div element accordingly.
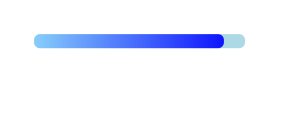
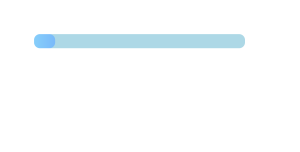
That’s it, now you can open index.html in your browser and you should be able to see the final progress bar result as output.
Final Output Of Progress Bar Using CSS
Source code
Codepen Preview Of Progress Bar:
If you enjoyed reading this post and have found it useful for you, then please give a share with your friends, and follow me to get updates on my upcoming posts. You can connect with me on Instagram.
if you have any confusion Comment below or you can contact us by filling out our contact us form from the home section.
written by – Ninja_webTech
What is a progress Bar?
A dynamic bar used to show the progress of any task is called a progress bar. The amount of work accomplished thus far and the remaining amount are shown on a progress bar.
What is the purpose of a progress bar?
A progress bar is a graphic control element that shows the progression of a lengthy computer activity, like a download, file transfer, or installation.
ADVERTISEMENT
![15+ jQuery Confirm Plugins [ Confirm Box jQuery ] Read more about the article 15+ jQuery Confirm Plugins [ Confirm Box jQuery ]](https://www.codewithrandom.com/wp-content/uploads/2022/11/15-Bootstrap-login-forms121-300x157.png)
