Let us create a vertical image slider using HTML, CSS & JavaScript
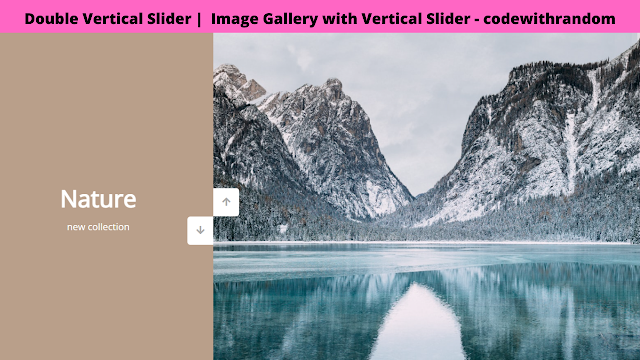
Hey students, Welcome to the Codewithrandom blog. We are back with another informative blog, let’s learn how to create a Vertical Image Slider Using HTML, CSS, and JavaScript.In the Vertical Image Slider, we have 2 arrow buttons that move up and down the image in the slider.
| Code by | N/A |
| Project Download | Link Available Below |
| Language used | HTML, CSS, and JavaScript |
| External link / Dependencies | Yes |
| Responsive | Yes |
I hope you enjoy our blog so let’s start with a basic HTML Structure for a Vertical Image Slider.
Read also – 50+ HTML, CSS & JavaScript Projects With Source Code
Read also – Ecommerce Website Using HTML, CSS, & JavaScript (Source Code)
Read also – Animated Login Form Using HTML and CSS (Source Code)
Read also – 10+ Javascript Projects For Beginners With Source Code

What is a vertical image slider?
A vertical image slider is one in which the images are moved from top to bottom vertically. The majority of you have already noticed that the images slide from left to right. Images will first show to the left, then to the right.
HTML Code:
<!DOCTYPE html>
<html lang="en">
  <head>
    <meta charset="UTF-8" />
    <meta http-equiv="X-UA-Compatible" content="IE=edge" />
    <meta name="viewport" content="width=device-width, initial-scale=1.0" />
    <title>Vertical Slider</title>
    <link rel="stylesheet" href="style.css" />
    <link rel="stylesheet" href="https://cdnjs.cloudflare.com/ajax/libs/font-awesome/5.15.2/css/all.min.css">
  </head>
  <body>
    <div class="slider-container">
        <div class="left-slide">
        <div style="background-color: #b99f8a">
        <h1>Nature</h1>
        <p>new collection</p>
        </div>
        <div style="background-color: #354f32">
        <h1>Cars</h1>
        <p>new collection</p>
        </div>
        <div style="background-color: #657e85">
        <h1>Cars</h1>
        <p>new collection</p>
        </div>
        <div style="background-color: #2b2e32">
        <h1>Nature</h1>
        <p>new collection</p>
        </div>
        </div>
        <div class="right-slide">
        <div
        style="
        background-image: url('https://source.unsplash.com/1600x900/?nature,water');
        "
        ></div>
        <div
        style="
        background-image: url('https://source.unsplash.com/1600x900/?car,cars');
        "
        ></div>
        <div
        style="
        background-image: url('https://source.unsplash.com/1600x900/?car,cars');
        "
        ></div>
        <div
        style="
        background-image: url('https://source.unsplash.com/1600x900/?nature,water'););
        "
        ></div>
        </div>
        <div class="action-buttons">
        <button class="down-button">
        <i class="fas fa-arrow-down"></i>
        </button>
        <button class="up-button">
        <i class="fas fa-arrow-up"></i>
        </button>
        </div>
        </div>
    <!-- JS -->
    <script src="app.js"></script>
  </body>
</html>
Explanation of HTML Code:
- In order to design the structure for our vertical picture slider, we must include a few crucial URLs in our HTML file.
- We also used the font-awesome icons inside our project because we are using separate files for JavaScript and CSS, so we must link those files inside our HTML file.
- The URL for our font-awesome images will be added.
- The structure will now be added inside the body using the <div> element and the class “slider-container.” We will build two containers inside the container: one for the left side and one for the picture. We’ll make a child container for the left side and add the heading and a succinct description of the picture there using the <h1> and <p> selectors.
- In a similar manner, we will make numerous child div containers on the right side, inside which we will add various images using the image tag.
- The top and bottom of our icon will now be added using the button tag selector, and the up arrow and down arrow will be added inside it using the font-awesome classes.
<!--- HEAD SECTION---->
    <link rel="stylesheet" href="style.css" />
    <link rel="stylesheet" href="https://cdnjs.cloudflare.com/ajax/libs/font-awesome/5.15.2/css/all.min.css" />
<!--- BODY SECTION---->
    <script src="script.js"></script>
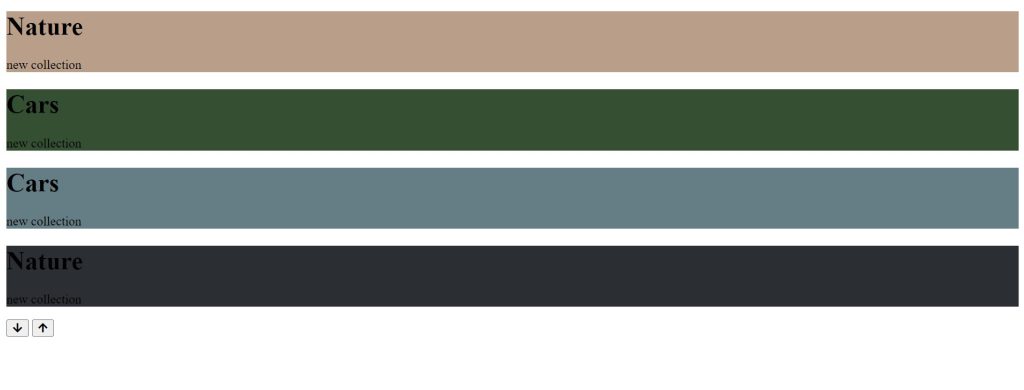
Only HTML code Output:

CSS Code:
@import url("https://fonts.googleapis.com/css?family=Open+Sans&display=swap");
* {
box-sizing: border-box;
margin: 0;
padding: 0;
}
body {
font-family: "Open Sans", sans-serif;
height: 100vh;
}
.slider-container {
position: relative;
overflow: hidden;
width: 100vw;
height: 100vh;
}
.left-slide {
height: 100%;
width: 35%;
position: absolute;
top: 0;
left: 0;
transition: transform 0.5s ease-in-out;
}
.left-slide > div {
height: 100%;
width: 100%;
display: flex;
flex-direction: column;
align-items: center;
justify-content: center;
color: #fff;
}
.left-slide h1 {
font-size: 40px;
margin-bottom: 10px;
margin-top: -30px;
}
.right-slide {
height: 100%;
position: absolute;
top: 0;
left: 35%;
width: 65%;
transition: transform 0.5s ease-in-out;
}
.right-slide > div {
background-repeat: no-repeat;
background-size: cover;
background-position: center center;
height: 100%;
width: 100%;
}
button {
background-color: #fff;
border: none;
color: #aaa;
cursor: pointer;
font-size: 16px;
padding: 15px;
}
button:hover {
color: #222;
}
button:focus {
outline: none;
}
.slider-container .action-buttons button {
position: absolute;
left: 35%;
top: 50%;
z-index: 100;
}
.slider-container .action-buttons .down-button {
transform: translateX(-100%);
border-top-left-radius: 5px;
border-bottom-left-radius: 5px;
}
.slider-container .action-buttons .up-button {
transform: translateY(-100%);
border-top-right-radius: 5px;
border-bottom-right-radius: 5px;
}
Read also: Restaurant Website Using HTML and CSS
Read also: Simple Portfolio Website Using Html And Css With Source Code
Read also: Gym Website Using HTML and CSS With Source Code
Read also: Create 2 Player Dice Game using Javascript (Source Code)
Read also: Create A Travel/Tourism Website Using HTML and CSS
Read also: Div Follows Mouse Cursor using HTML & JavaScript
Explanation of CSS Code:
Step 1:
ADVERTISEMENT
- We’ll begin by updating our vertical picture slider’s Google Font. We will add the Open Sans Google typeface to our vertical image slider by using the import link.
- Now, we will set the margin and padding to “Zero” and the box dimension to “border-box” using the universal tag selector (*).
@import url("https://fonts.googleapis.com/css?family=Open+Sans&display=swap");
* {
    box-sizing: border-box;
    margin: 0;
    padding: 0;
}

body {
    font-family: "Open Sans", sans-serif;
    height: 100vh;
}
Step 2:
ADVERTISEMENT
- We will now set the position to “relative” and the height and width to 100vh and 100vw using the class selector (.slider-container).
- We apply styling to the left side of the slider, setting the height and width to “100%,” the display property to “flex,” the child selector to “h1,” the font size to 40px, and a bottom margin.
.slider-container {
    position: relative;
    overflow: hidden;
    width: 100vw;
    height: 100vh;
}

.left-slide {
    height: 100%;
    width: 35%;
    position: absolute;
    top: 0;
    left: 0;
    transition: transform 0.5s ease-in-out;
}

.left-slide>div {
    height: 100%;
    width: 100%;
    display: flex;
    flex-direction: column;
    align-items: center;
    justify-content: center;
    color: #fff;
}

.left-slide h1 {
    font-size: 40px;
    margin-bottom: 10px;
    margin-top: -30px;
}

ADVERTISEMENT
Step 3:
ADVERTISEMENT
- The right-side styling and the button inside the vertical picture slider will now be added. The height will be set to “100%” using the class selector (.right-slide), and the location will be set to “absolute” using the position property.
- Now, we’ll set the backdrop to “white,” the font color to “charcoal grey,” and the cursor type to “pointer” using the class selector button.
.right-slide {
    height: 100%;
    position: absolute;
    top: 0;
    left: 35%;
    width: 65%;
    transition: transform 0.5s ease-in-out;
}

.right-slide>div {
    background-repeat: no-repeat;
    background-size: cover;
    background-position: center center;
    height: 100%;
    width: 100%;
}

button {
    background-color: #fff;
    border: none;
    color: #aaa;
    cursor: pointer;
    font-size: 16px;
    padding: 15px;
}

button:hover {
    color: #222;
}

button:focus {
    outline: none;
}

.slider-container .action-buttons button {
    position: absolute;
    left: 35%;
    top: 50%;
    z-index: 100;
}

.slider-container .action-buttons .down-button {
    transform: translateX(-100%);
    border-top-left-radius: 5px;
    border-bottom-left-radius: 5px;
}

.slider-container .action-buttons .up-button {
    transform: translateY(-100%);
    border-top-right-radius: 5px;
    border-bottom-right-radius: 5px;
}
Now we have completed our Css Code section. Here is our updated output With HTML + CSS.
ADVERTISEMENT
Output after adding CSS
Now add javascript for click arrow button and image change functionality for slide images.
JavaScript Code :
const sliderContainer = document.querySelector(".slider-container");
const slideRight = document.querySelector(".right-slide");
const slideLeft = document.querySelector(".left-slide");
const upButton = document.querySelector(".up-button");
const downButton = document.querySelector(".down-button");
const slidesLength = slideRight.querySelectorAll("div").length;
let activeSlideIndex = 0;
slideLeft.style.top = `-${(slidesLength - 1) * 100}vh`;
const changeSlide = (direction) => {
const sliderHeight = sliderContainer.clientHeight;
if (direction === "up") {
activeSlideIndex++;
if (activeSlideIndex > slidesLength - 1) activeSlideIndex = 0;
} else if (direction === "down") {
activeSlideIndex--;
if (activeSlideIndex < 0) activeSlideIndex = slidesLength - 1;
}
slideRight.style.transform = `translateY(-${
activeSlideIndex * sliderHeight
}px)`;
slideLeft.style.transform = `translateY(${
activeSlideIndex * sliderHeight
}px)`;
};
upButton.addEventListener("click", () => changeSlide("up"));
downButton.addEventListener("click", () => changeSlide("down"));
Explanation of Javascript code:
- We will first select all the html elements using the document. query selector () and then we will store their values inside the constant variables. Now using the let keyword we will set the values as “zero”.now using the if and else statement
- we will select the html element and then increase the value of activeslideIndex.Using the .addEventListener we will add the click event to the up and down arrow.
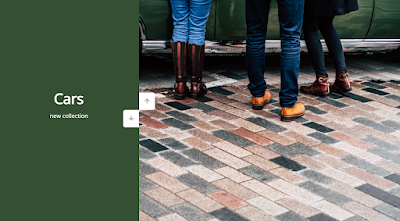
Final Output Of Vertical Slider Using JavaScript

Video Output:
Live Preview Of Vertical Slider Using JavaScript
Now we have completed our blog on Vertical Image Slider. Here is our updated output with HTML, CSS, and JavaScript. Hope you like it
Must See our other blogs and gain knowledge in front-end development.
In this post, we learn how to create a Vertical Image Slider Using HTML, CSS, and JavaScript. If we made any mistake or you have any confusion, please drop a comment to reply or help you learn quickly.
Thank You And Keep Learning!!!
Written by – Code With Random/Anki
Some FAQs about vertical image slider HTML CSS
Which code editor do you use for this Vertical Slider With Image Gallery coding?
I personally recommend using VS Code Studio, it’s straightforward and easy to use.
What is an Image Slider?
A software program called an image slider shows big images one at a time. We will quickly transition from one picture to the next in the image slider.


why my button cannot show