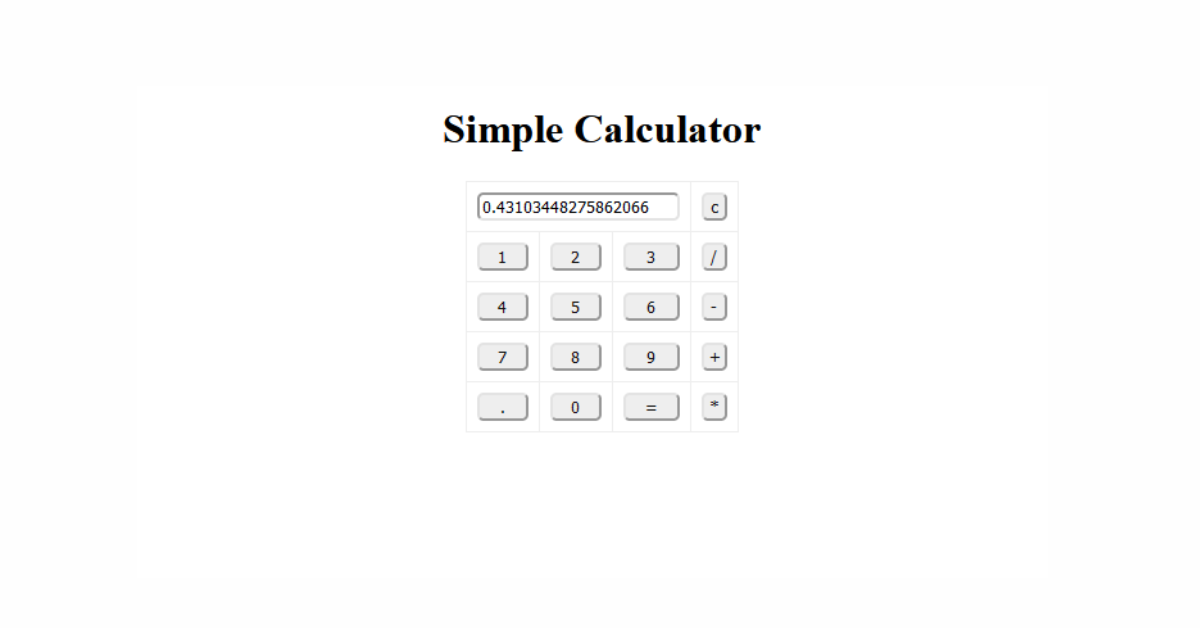
Hello, today we are going to make a Calculator Using HTML, CSS, and JavaScript. This calculator will have a basic user interface with buttons for numbers and operators, an input field to display the input and results, and functionality to perform arithmetic operations.
The calculator is quite stylish, with buttons that beg you to “push me, I dare you!” Every button has a unique sense of comedy of its own. Do you wish to divide? You will have the opportunity to create a division and a slightly awkward vibe in your data. Must I multiply? Prepare yourself for the most enjoyable math you’ve done since you realized that 5×5 = 25!
But there’s still more! We’ve also included a clear button that erases data so well that it could even help you forget about your most recent arithmetic test.
Introduction
HTML, CSS, and JavaScript are fundamental web technologies that can be combined to create interactive and user-friendly web applications. In this article, we will explain how to use these technologies to build a simple calculator. The calculator will allow users to perform basic arithmetic operations, including addition, subtraction, multiplication, and division.
Output
Prerequisites
Before we begin, make sure you have the following:
- A code editor (e.g., Visual Studio Code, Sublime Text, or Notepad++)
- A web browser (e.g., Google Chrome, Mozilla Firefox, or Microsoft Edge)
- Basic knowledge of HTML, CSS, and JavaScript.
HTML Structure
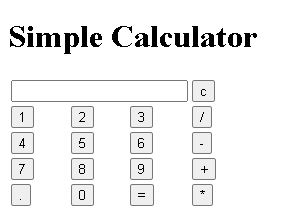
The HTML structure of the calculator is fairly straightforward. It consists of a table that contains the calculator buttons and an input field to display the input and results.
Step – 1: A title “Simple Calculator” is displayed as an <h1> (header 1) element.
<h1>Simple Calculator</h1>
Step – 2: An HTML table is created with the center class to center-align it. This table will contain the calculator buttons and display.
<table class="center">
Step – 3: This section creates a row in the table for displaying the result and clearing the result. A <td> element spans 3 columns to accommodate the input field with the id “result.” Another <td> element contains a button labeled “c” that, when clicked, calls the ‘clearResult()” function to clear the result.
Create Portfolio Website Using HTML and CSS (Source Code)
  <tr>
    <td colspan="3">
      <input type="text" id="result" />
    </td>

    <td>
      <input type="button" value="c" onclick="clearResult()" />
    </td>
  </tr>
Step – 4: In these sections, multiple rows of buttons are created. Each button is labeled with a number or an operator and has an “onclick” attribute that calls the “displayValue()” function with the corresponding value.
  <tr>
    <td><input type="button" value="1" onclick="displayValue('1')" /> </td>
    <td><input type="button" value="2" onclick="displayValue('2')" /> </td>
    <td><input type="button" value="3" onclick="displayValue('3')" /> </td>
    <td><input type="button" value="/" onclick="displayValue('/')" /> </td>
  </tr>
  <tr>
    <td><input type="button" value="4" onclick="displayValue('4')" /> </td>
    <td><input type="button" value="5" onclick="displayValue('5')" /> </td>
    <td><input type="button" value="6" onclick="displayValue('6')" /> </td>
    <td><input type="button" value="-" onclick="displayValue('-')" /> </td>
  </tr>
  <tr>
    <td><input type="button" value="7" onclick="displayValue('7')" /> </td>
    <td><input type="button" value="8" onclick="displayValue('8')" /> </td>
    <td><input type="button" value="9" onclick="displayValue('9')" /> </td>
    <td><input type="button" value="+" onclick="displayValue('+')" /> </td>
  </tr>
Question – What is an “onclick”? – Tap on ME to Learn
Step – 5: The last row of buttons is created, including the decimal point, zero, and the equals sign for calculating the result, and the multiplication operator. The “onclick” attributes are assigned to either call the “displayValue()” function or the solve() function for calculation.
  <tr>
    <td><input type="button" value="." onclick="displayValue('.')" /> </td>
    <td><input type="button" value="0" onclick="displayValue('0')" /> </td>

    <td><input type="button" value="=" onclick="solve()" /> </td>

    <td><input type="button" value="*" onclick="displayValue('*')" /> </td>
  </tr>
Question – What is a Table in HTML? – Tap on ME to Learn
HTML – Output
CSS Style
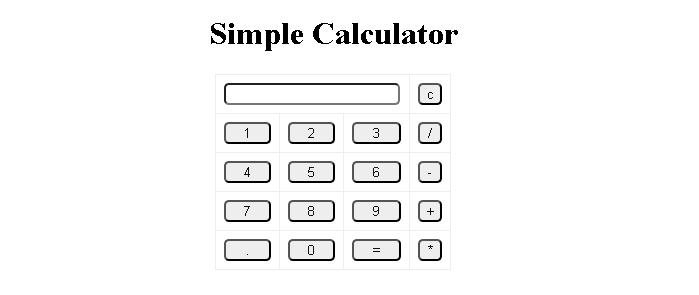
The CSS part is used to give a beautiful design to our calculator; here is the breakdown of steps to make beautiful our calculator.
Step – 1: This rule applies to <h1> elements. It sets the text alignment of <h1> elements to the center. This centers the text within the <h1> element.
h1 { text-align: center;}Step – 2: This rule applies to all <table> elements. It sets the border-collapse property to “collapse,” which makes the borders between table cells collapse into a single border, creating a neater and more compact appearance for the table. It sets the border-radius property to 5px, giving the table rounded corners.
table {
    border-collapse: collapse;
    border-radius: 5px;
  }
Step – 3: This rule applies to tables with the class “center.” It uses the margin-left and margin-right properties to automatically center the table horizontally on the page by setting the left and right margins to “auto.”
100 Day , 100 HTML CSS JavaScript Projects
table.center {
    margin-left: auto;
    margin-right: auto;
  }
Step – 4: This rule applies to both <td> and <th> elements, which are table cells and table headers, respectively. It sets a 1px solid border with a color of #eee (light gray) for all table cells and headers. It aligns the text within these cells to the left. It adds 8px of padding to each cell, providing space between the cell content and its border.
td, th {
    border: 1px solid #eee;
    text-align: left;
    /* Uncomment below and see */
    /* background-color: #eee; */
    padding: 8px;
  }
Step – 5: This rule applies to <input> elements with the attribute type=”button”. These are typically buttons in the form. It sets the background color to #eee (light gray) for these buttons. It sets the text color to #111 (black) for the button labels. It makes the buttons take up 100% of their container’s width, ensuring they span the entire available space. It gives the buttons rounded corners with a “border-radius” of 5px.
input[type="button"] {
    background-color: #eee;
    color: #111;
    width: 100%;
    border-radius: 5px;
  }
Step – 6: This rule applies to <input> elements with the attribute `type=”text.” These are typically text input fields. It sets the background color to white for this text input field. It sets the width to 95% of their container’s width, allowing them to occupy most of the available space but not the entire width. It gives the text input fields rounded corners with a “border-radius” of 5px.
input[type="text"] {
    background-color: white;
    width: 95%;
    border-radius: 5px;
  }
CSS Style – Output
JavaScript Functions
The JavaScript functions are defined within a <script> tag in the HTML. These functions provide the calculator’s functionality. Let’s take a closer look at each function:
Step – 1: This function appends the provided value (number or operator) to the input field.
function displayValue(val) {
  document.getElementById("result").value += val;
}
Output JS – 1
Step – 2: The solve function evaluates the expression entered in the input field using the “eval” function and displays the result in the input field.
ADVERTISEMENT
function solve() {
  let x = document.getElementById("result").value;
  let y = eval(x);
  document.getElementById("result").value = y;
}
Question – What is an “eval” function? Tap on ME to Learn
It retrieves the expression from the input field, evaluates it, and updates the input field with the result.
ADVERTISEMENT
Output JS – 2
Step – 3: The “clearResult” function clears the input field.
ADVERTISEMENT
function clearResult() {
  document.getElementById("result").value = "";
}
This function simply sets the input field’s value to an empty string, effectively clearing the contents.
ADVERTISEMENT
Output JS – 3
Calculator in HTML, CSS, JavaScript – Full Codes
Conclusion
In this article, we’ve explained- how to create a simple calculator using HTML, CSS, and JavaScript. The calculator allows users to perform basic arithmetic operations and provides a basic user interface. This project is an excellent starting point for learning web development and creating interactive web applications. You can further enhance this calculator by adding additional features, such as parentheses for complex expressions or scientific functions.
ADVERTISEMENT
